|
|||||||


| Sponsored Links (Register now to hide all advertisements) |
|
|

|
Thread Tools | Display Modes |


 09-20-2012, 12:55 AM
|
#1 |
|
Senior Member

Join Date: Oct 2010
Location: Orem, Utah
Posts: 5,762
|
The question was asked on the EFV8 site so I messed around with it and figured out this way to backflush the 59A-B engine. Don't know how much would apply to other engines but the method might be adapted.
Start with removing the thermostats. Need them out to flush out of both top and bottom of the block. I already had a Prestone Flush N Fill T plumbed into the heater hose coming out of the right head: 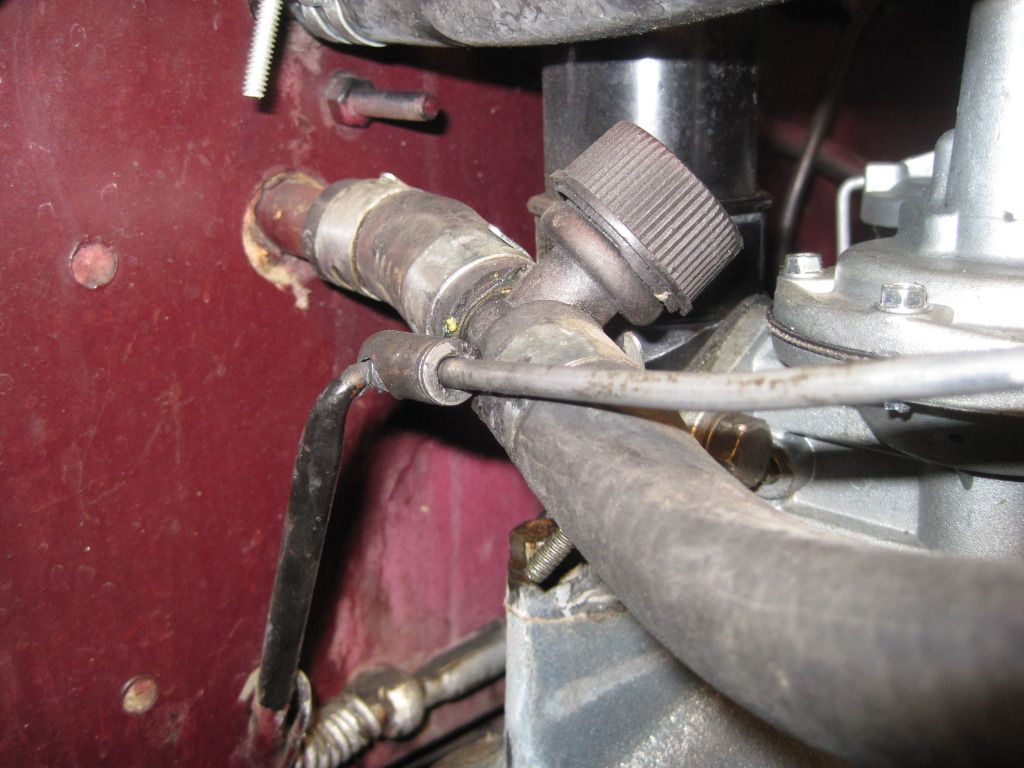 I had already backflushed the engine once using this and was about to do it again when I realized that all this does is the right side since there's no connection between the two sides. So, I had to figure out a way to do both sides at the same time. Here are the parts to make an adapter for the left side: 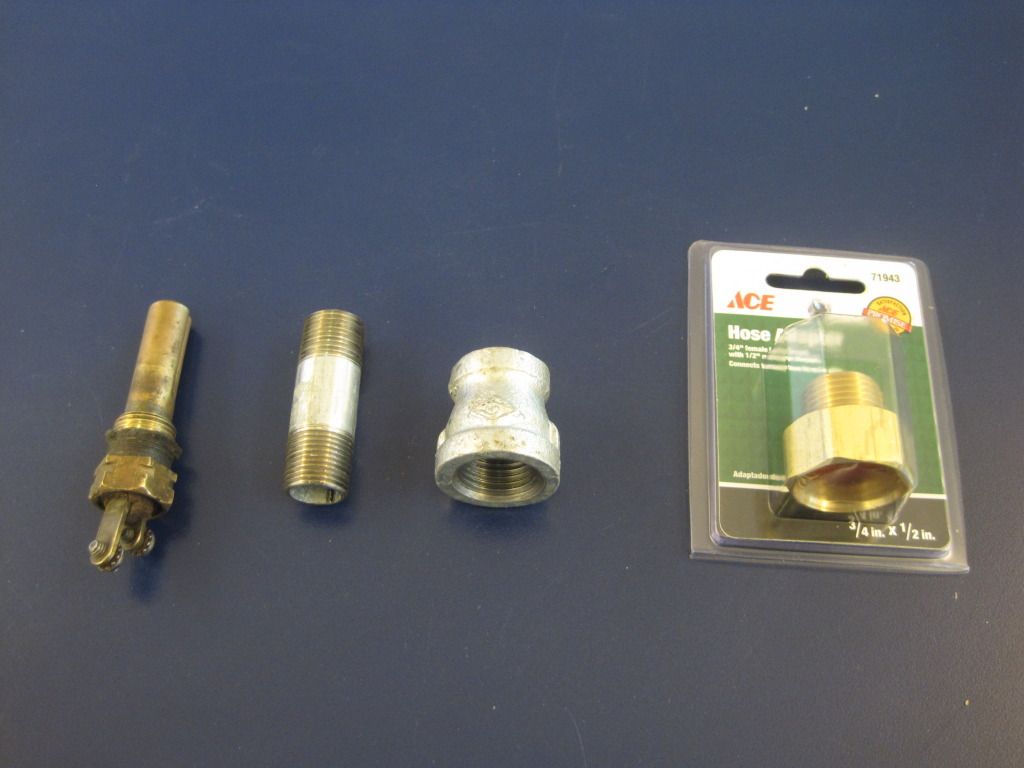 On the left is the left temperature sender that I removed to install the adapter. It is a 3/8" pipe thread. Next is a 3/8" nipple, then the adapter to 1/2" to receive the hose adapter that screws into the 1/2" adapter thus: 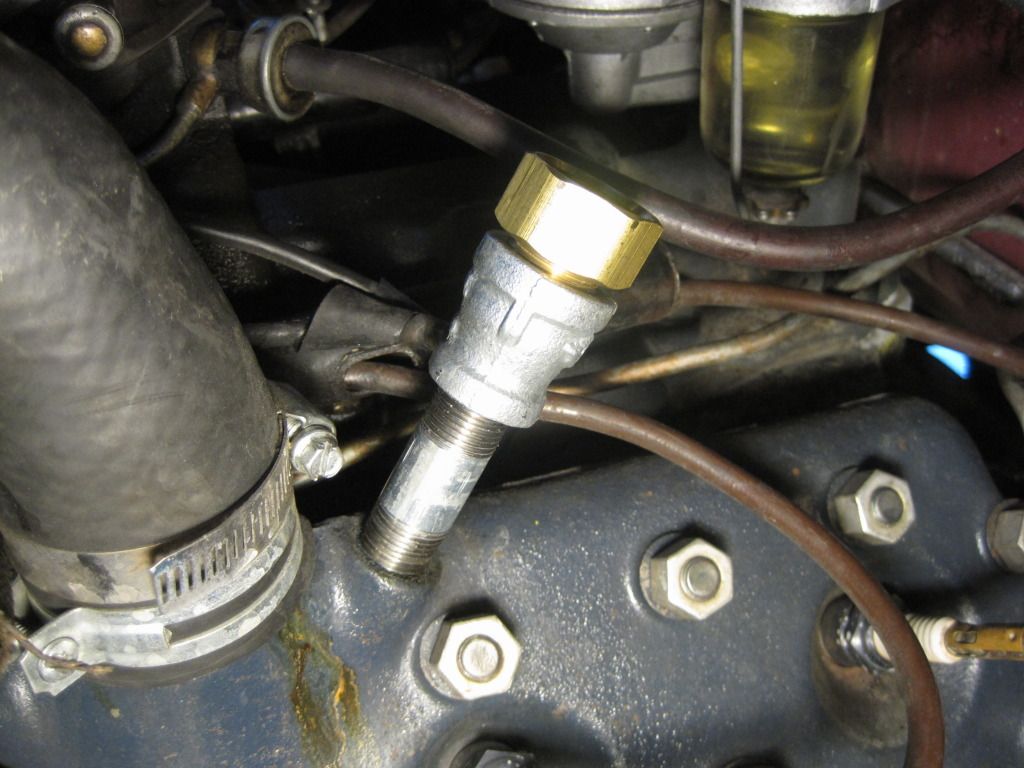 Prestone provides an adapter to hook up the hose to their T but it restricts the flow of water quite a bit so I just bought this one to hook the hose to it: 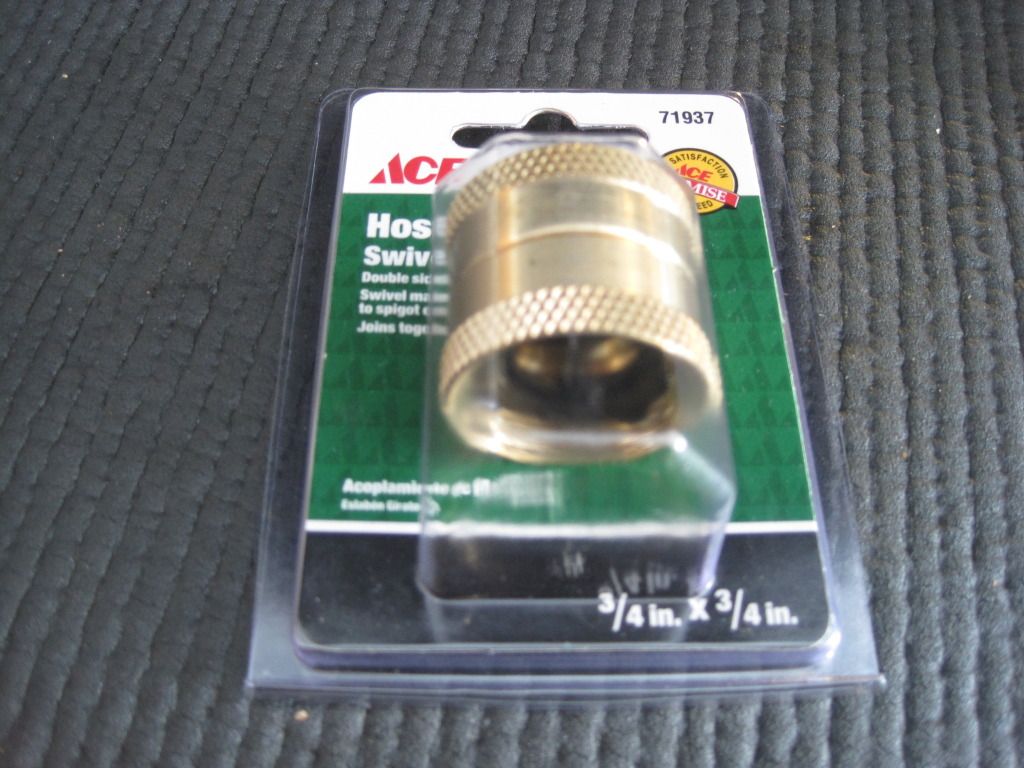 It's just a double female hose adapter that receives the male end of the hose and screws onto the male end of the Prestone T thus: 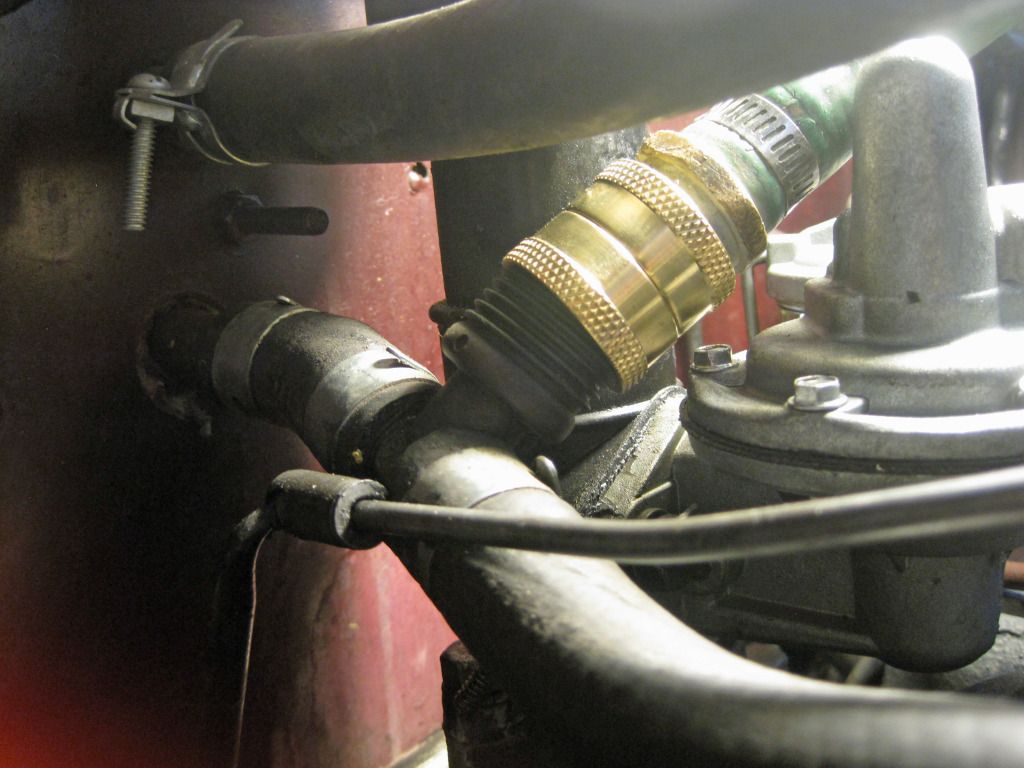 (Doesn't it bug you to see the thing cross threaded like this?  No worries - I got it right after the picture was taken. No worries - I got it right after the picture was taken. ) )Then screwed a second short hose to the left side: 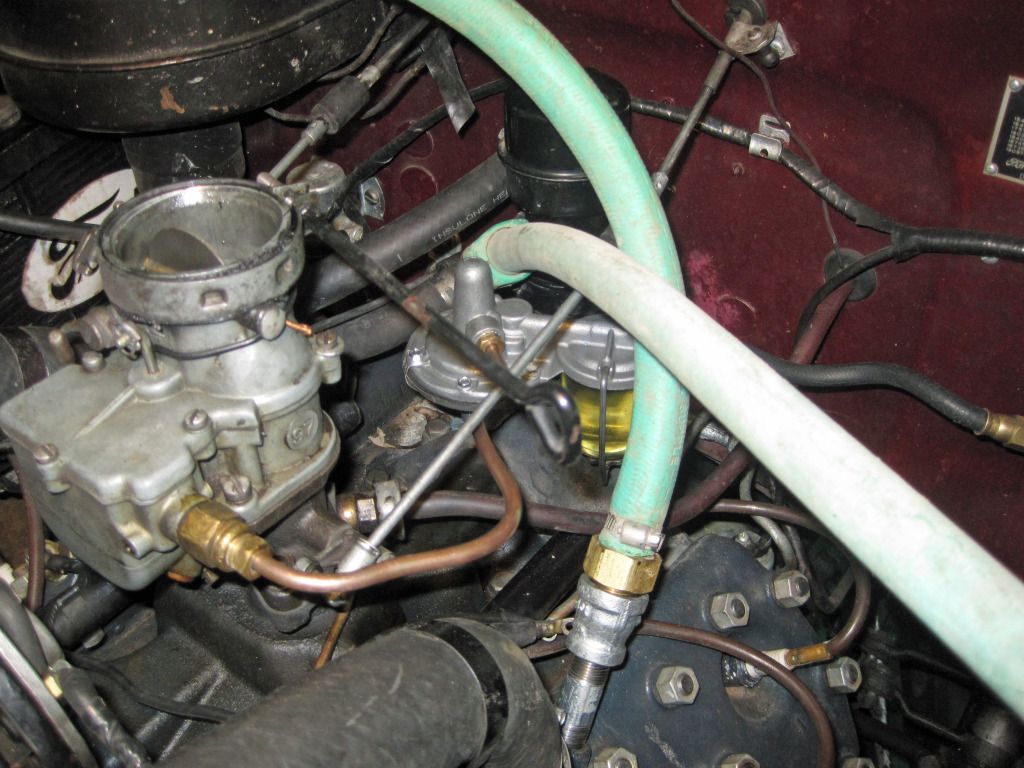 Then screwed the other end of the short hoses to a valved Y to control flow thus (didn't really use the valves - just left them wide open. I'll use a non-valved Y next time): 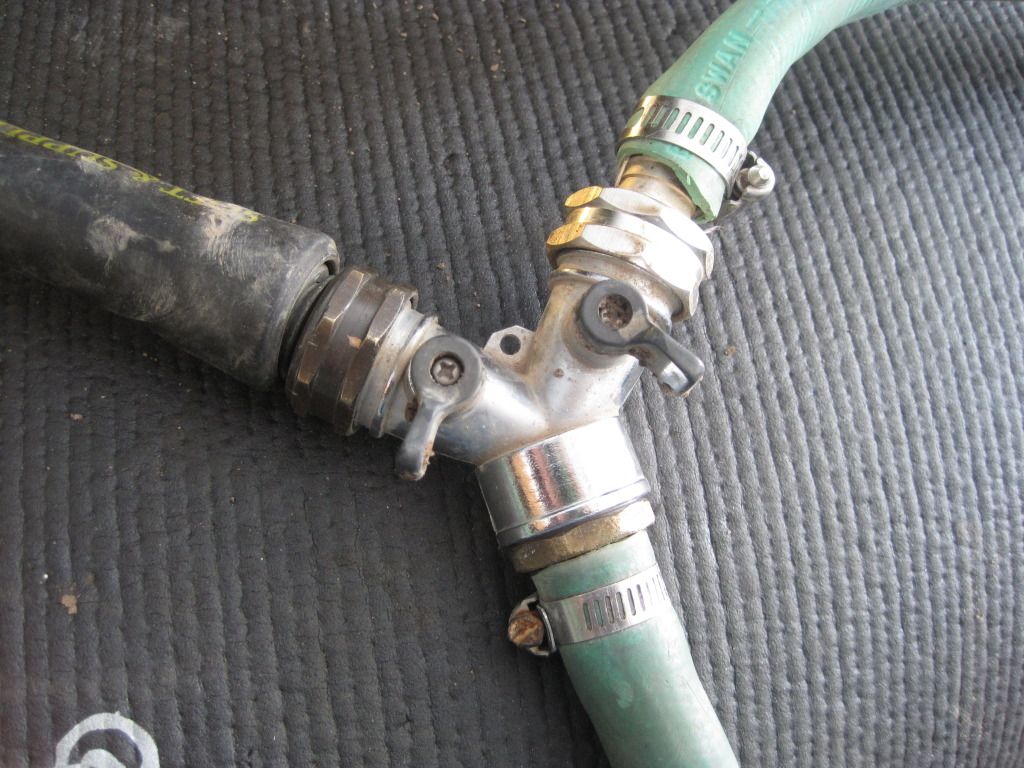 Then I put an 11 gallon plastic rectangular storage bin the width of the radiator under it. This one was short enough I didn't even have to jack up the car. All the better to get the water to flow out the drain when it's time. 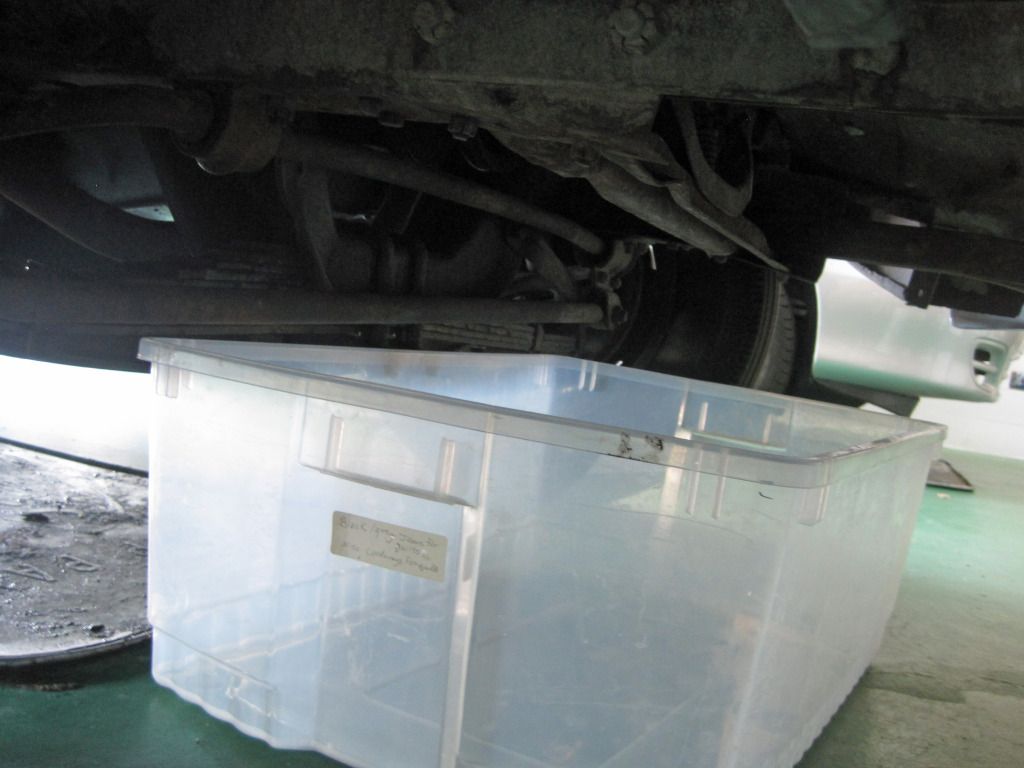 Then I turned on the water full blast and let 'er rip till the water ran clear which was well before the bin filled up. 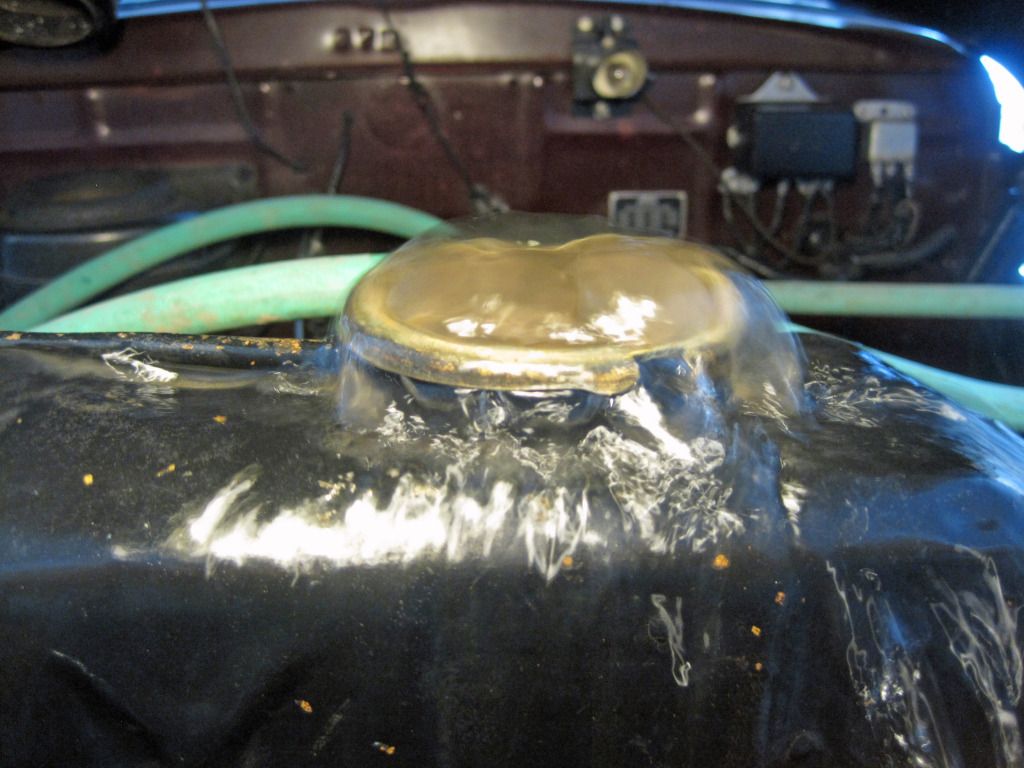 After it was all clear, drained the water down low enough to disconnect the hoses and adapters, replaced the cap on the Prestone T and the temperature sender on the left side, added my coolant, ran till hot enough to pressure up for leak test, and was good to go. Total time 20-30 minutes.
__________________
Prof. Henry (The Roaming Gnome)  "It is good to have an end to journey toward; but it is the journey that matters, in the end. *Ursula K. Le Guin in The Left Hand of Darkness Last edited by Old Henry; 11-16-2013 at 07:14 PM. |

|

|
«
Previous Thread
|
Next Thread
»


 Threaded Mode
|
|

| Sponsored Links (Register now to hide all advertisements) |
|
|
All times are GMT -5. The time now is 06:38 PM.