|
|||||||


| Sponsored Links (Register now to hide all advertisements) |
|
|

|
Thread Tools | Display Modes |


 07-05-2025, 10:35 PM
|
#1 |
|
Senior Member

Join Date: Aug 2023
Location: Southern California
Posts: 177
|
Hey all! Okay, so this might have to be a multi-part post as I'm not sure how long/how many photos I can post in one single post. So, bear with me as I showcase this really fun project I did a few months ago. I thought I'd share what I did here to inspire others to, perhaps, do something similar. This will be a long read with a lot of modern technical jargon, so hopefully you read along! I'm going to put the image captions above the images.
As I slooowly restore my 1940 Ford Deluxe Fordor, I've worked on smaller projects when I can and to take a break from being frustrated on the Fordor! My Fordor came with the original Zenith radio. While it powered on, including the lights, the speaker was blown/dead, and the capacitors/tubes were all fried. Turning it on only made a humming noise, but nothing else. I even tried to attach the antenna, but nothing worked. It's dead. Now, I could have gotten new tubes/capacitors (no guarantee that would fix it) or even just had the radio fixed (expensive). Furthermore, here in SoCal, there are really not many AM stations left I'd want to listen to. Mostly just talk radio and foreign language stations. So, I originally thought I'd just change the system over to a modern Bluetooth system and just send 1940s music to the radio that way. I've done that to 1940s radios that were beyond repair electronically. So, that was my plan at first (but majorly changed)... And thus the idea was formed. So, let's go through the first few steps, figuring out how to do this to the radio itself. Here's a look inside a 1940 Zenith radio. Yikes. Even though I love tinkering with electronics, even I opened this up... paused, and audibly said aloud 'NOPE!' and closed it back up. This is when I made the decision to go the 'modern conversion' route. 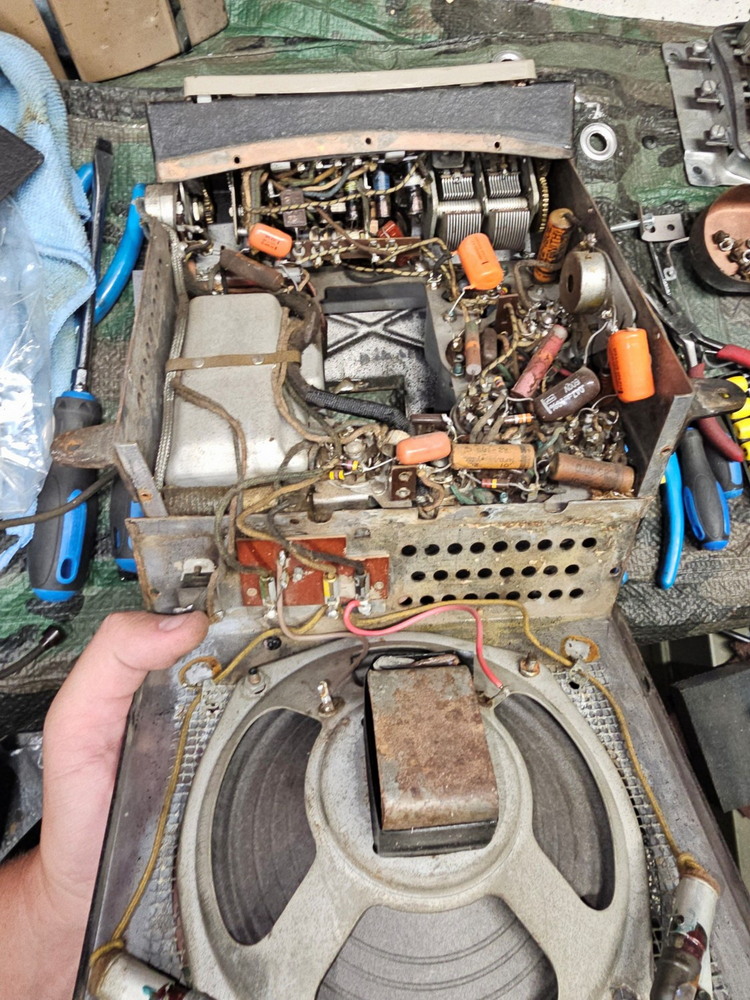 Now, I didn't want to harm my original radio. Doing this process means gutting the inside so you can fit the modern electronics. While many people wouldn't bat an eye, I just couldn't do that to my original radio. So, I went on the hunt for another one. And I scored an incredible deal on one at a Model T swap meet event for $10! This $10 one turned out to have a blown speaker as well, and the inside electronics were in unrecoverable condition. The photo below shows the $10 one (left with Bob Drake rubber pad) and my original on right. 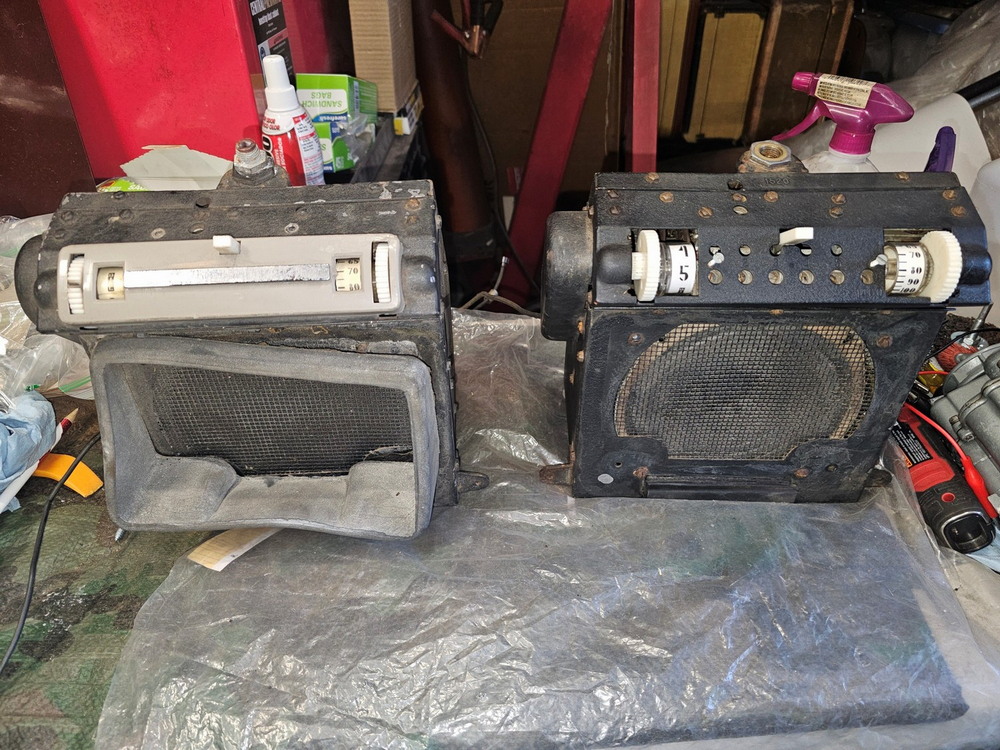 Looking at this spare one, it actually came with some neat markings. Inside the back cover are the original paper patent numbers and tube layout guide. I made sure to keep those on there. The Drake rubber boot, though, isn’t in the best of shape (and stiff), so I'm going to replace it with a new repro. 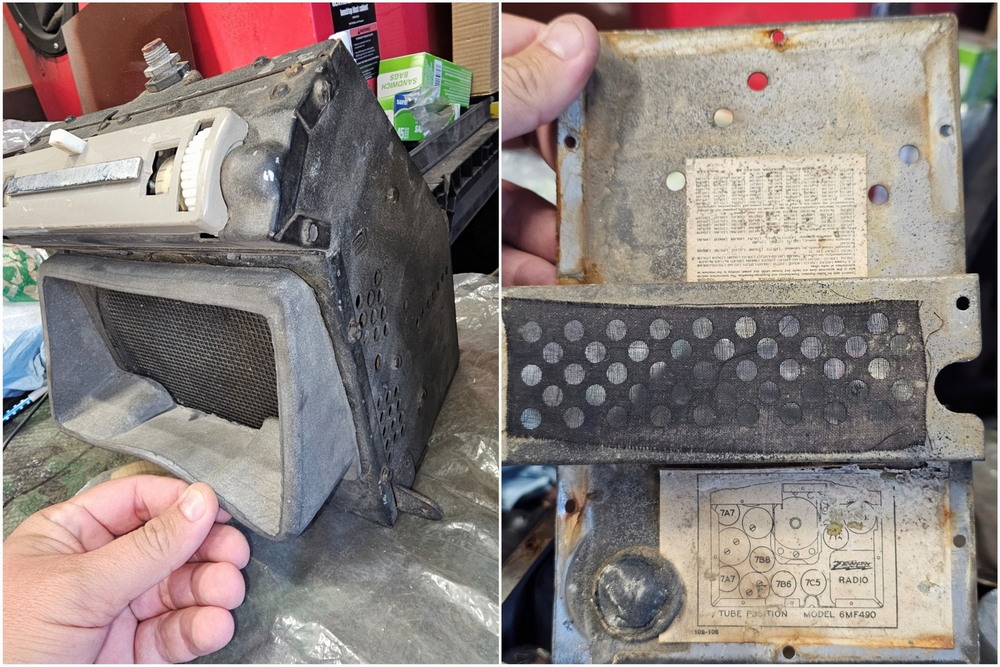 Here’s a look inside at all the tubes in the sapre. There’s so many crammed in there! That wire mess is on the other side. I tested all the tubes, and they were all shot, some even cracked and the terminals on the radio body itself corroded/rusted/cracked. So, I don’t feel as bad about tearing this all out of there. I would need to get rid of EVERYTHING inside the radio you see here to make this idea I had come to life. 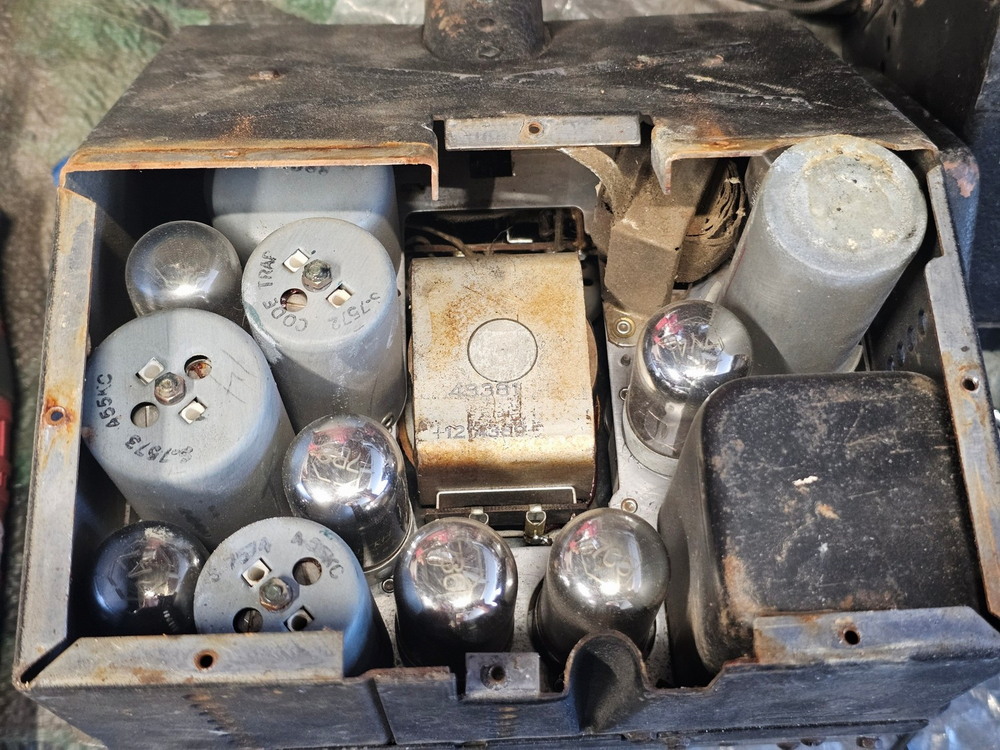 On the speaker side of the spare radio, I tested it and the light bulbs. As you can see, one of the lights still worked. The speaker was blown just like my original, and is not functional. So that would need to be replaced. I knew I could find a replacement speaker the same size on Amazon or eBay. 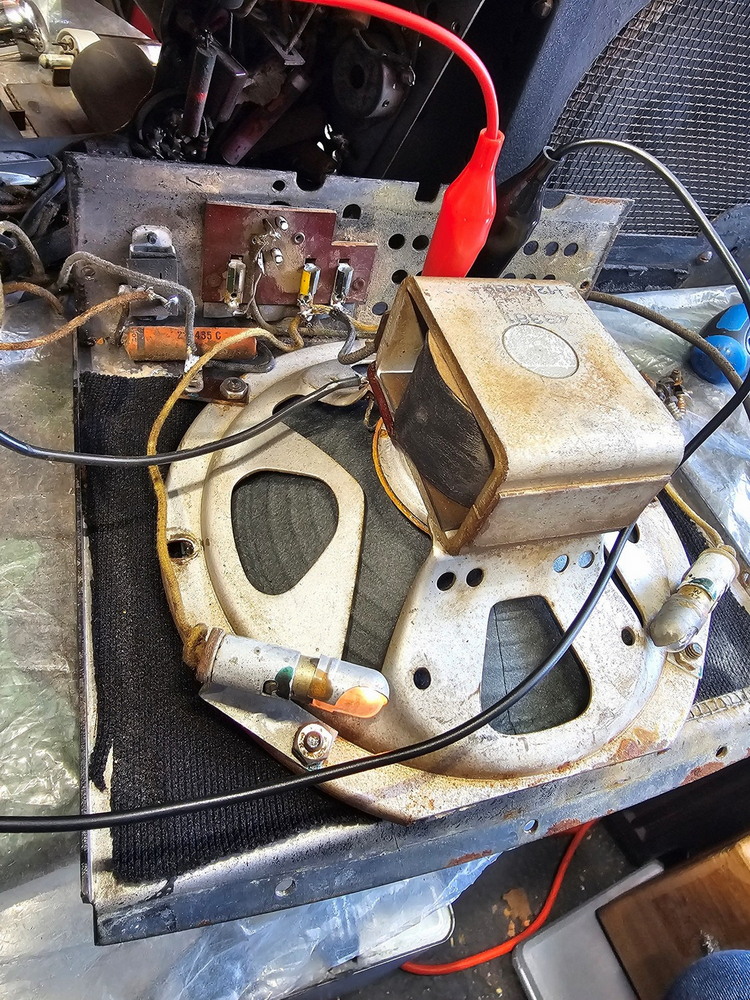 So I got to work. Even though it was a busted spare, it was still difficult for me to rip everything out and destroy the interior. I really don’t like destroying original things, so I had to keep reminding myself that this is bringing new life to this otherwise junked radio. It took HOURS for me to rip out everything; there were so many things. What you can’t see is the massive pile of wires, parts, etc to the right. 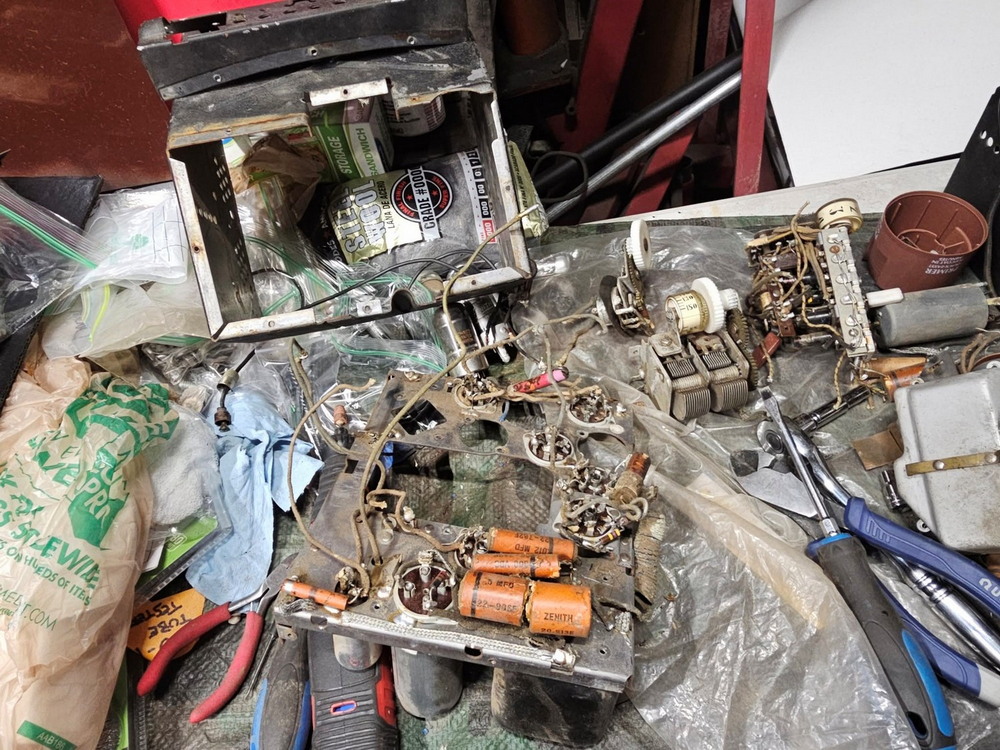 Finally, getting it almost down to the main plate. This sits in the center of the radio and holds the tubes on one side, and all the wires/capacitors/resistors/etc in the other. I realized I could actually use this bracket with the new electronics. 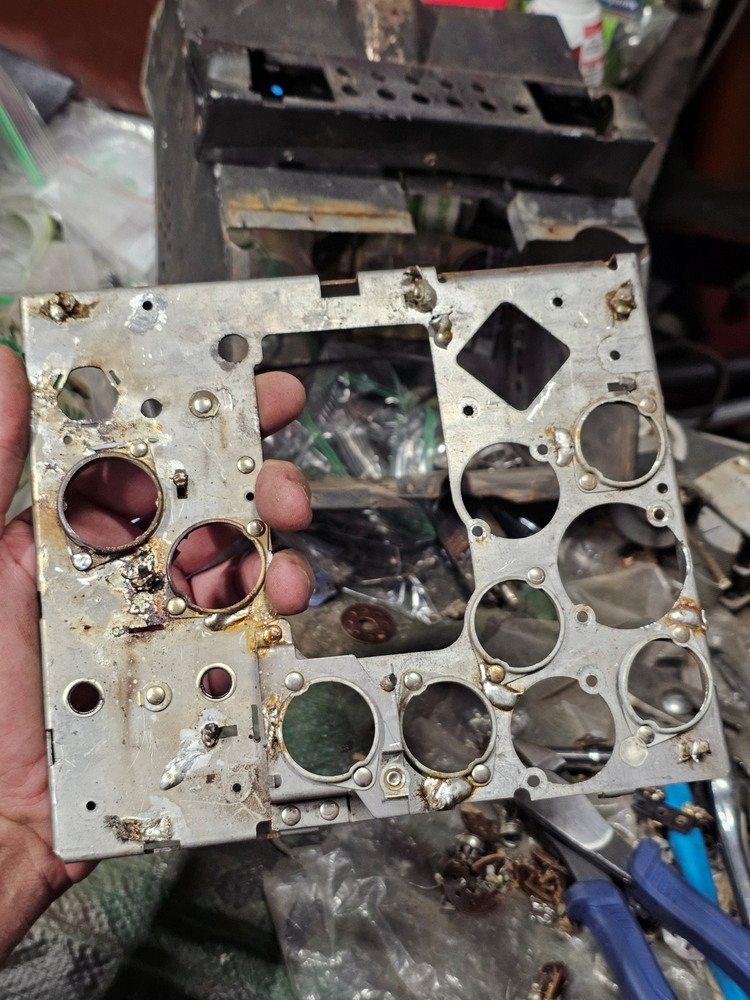 Here’s the original station tuning dial. It’s the same style as a larger tabletop radio, but just smaller. I was already trying to figure out how I could use this dial in some way, and ideas were forming...  Here’s the mechanism for changing the preset stations. It’s impressive engineering. You press the button on the right (just out of frame), and that rotates the shaft one partial turn. That moves those metal tabs in a way that only makes one contact at a time. That contact that’s being made then feeds to a different bracket that has a bunch of screws that tighten/loosen a wire. Each of those screws are turned an exact amount by the Ford dealer to the ‘local AM stations’. Crazy right? So that’s how it can switch between the different preset stations. Again, I’m looking at this wondering… can I somehow utilize this push button to change something? 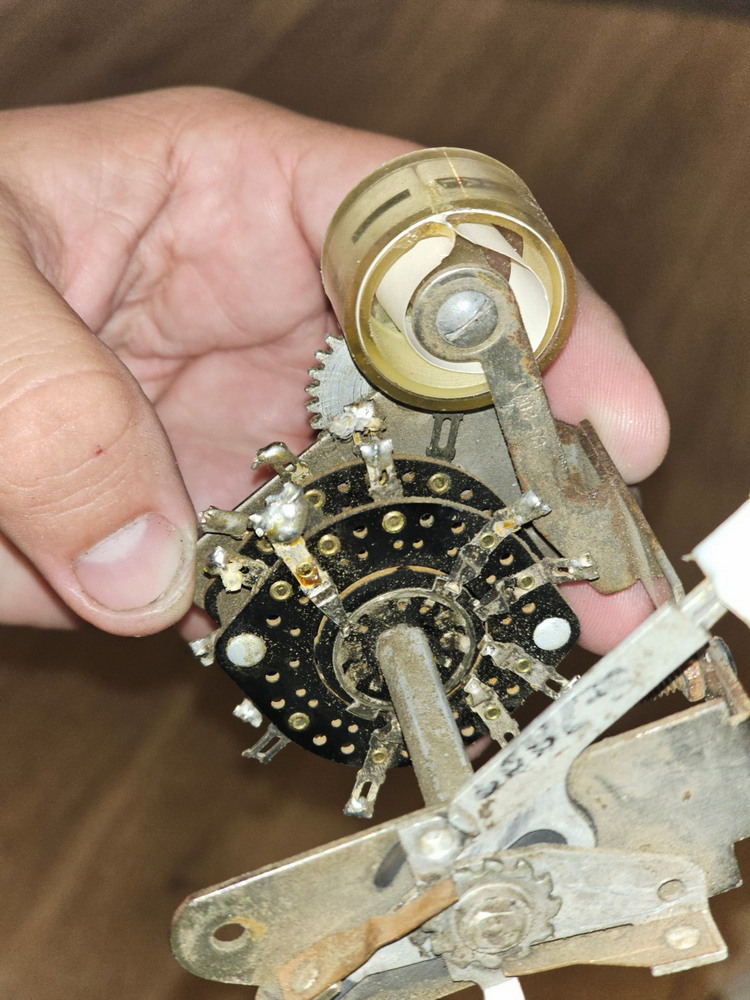 Looking at the other side of this station changer bracket, you can see the three gears that turn the station indicator dial. You can also see the push button in the back. 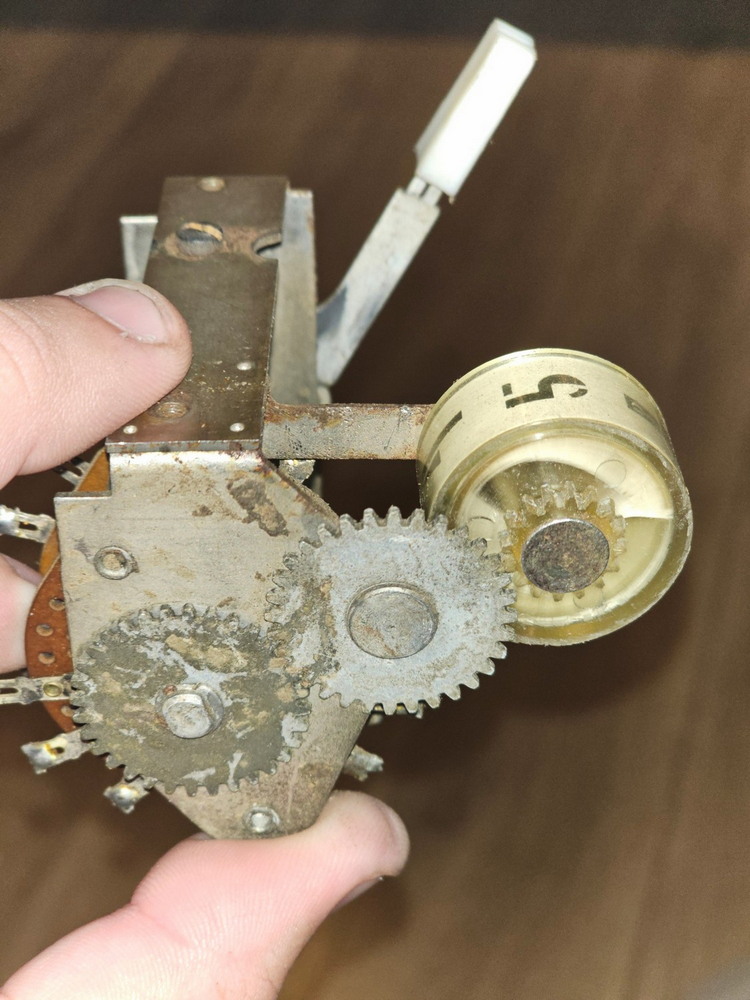 One thing I wanted to note was that I found original inspection markings from the Zenith workers who were putting the radio together. So cool! 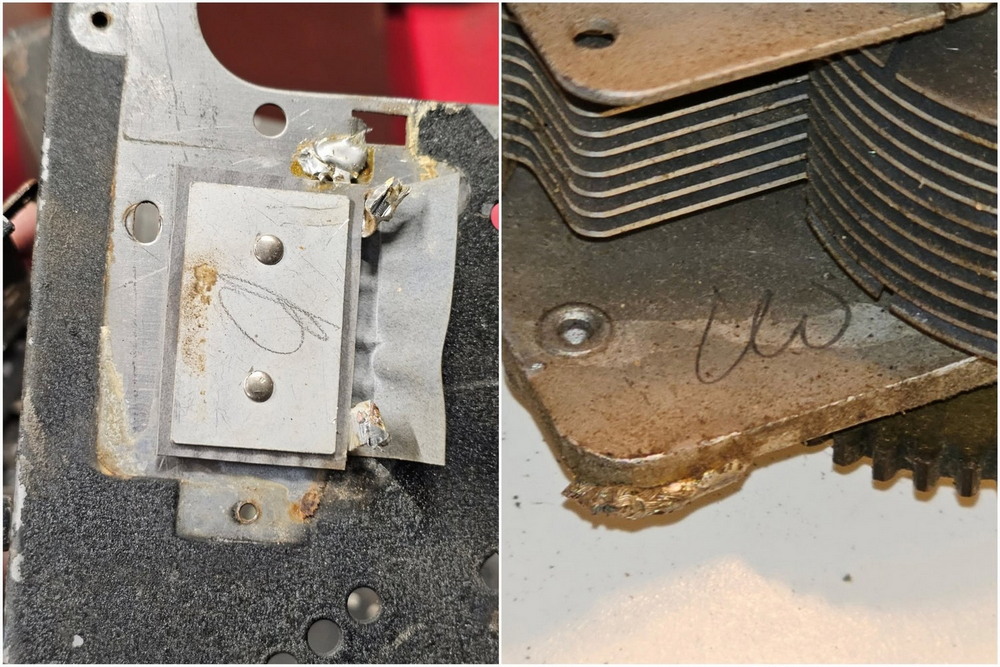 Going back to that middle plate, after cleaning it up, removing all the last bits, including soldering that was done to it… Here’s what I was left with. I figured I could use a lot of the holes to mount things. But that presents an issue since it’s metal. Mounting a bluethooth control board directly to the metal will instantly short it out. So I would need to figure out a way to mount them ‘outwards’ from the metal so they don’t touch. 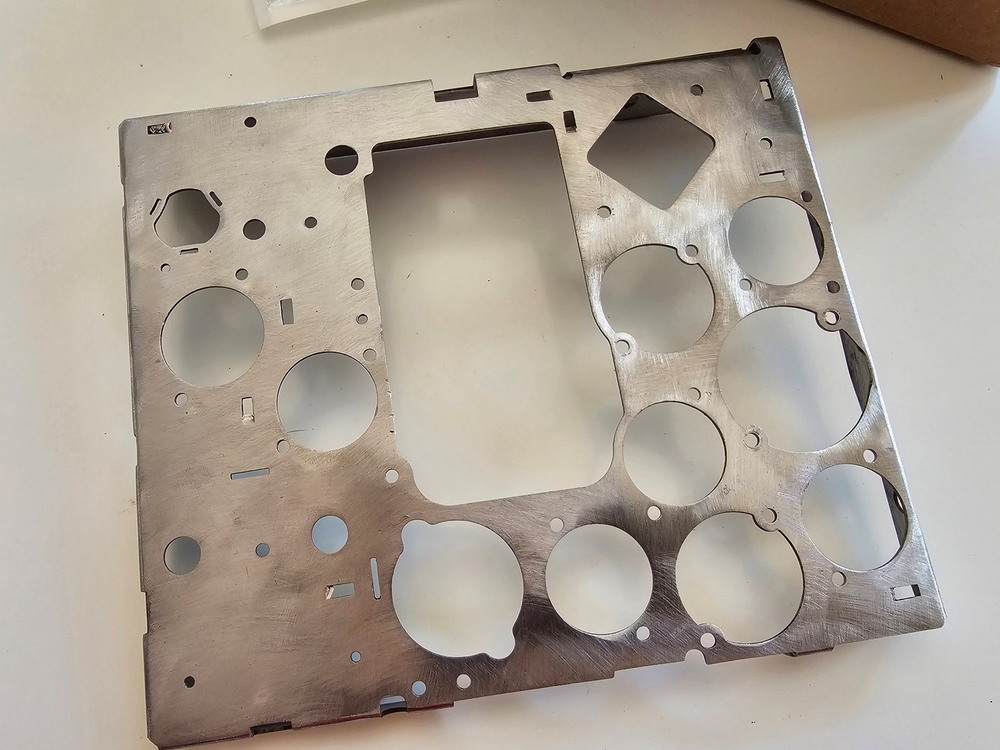 And here are the four basic brackets I wanted to keep. TOP L to R: The volume dial, the pre-set station changer button/indicator, and the manual station dialer. At the bottom is the main bracket with the screws for the preset stations that the dealer would turn. I’m only keeping that bracket as it is visible on the top of the radio, but (at the time), I didn’t have any practical use for it or the push button other than cosmetically making it ‘seem’ like the radio is all there. 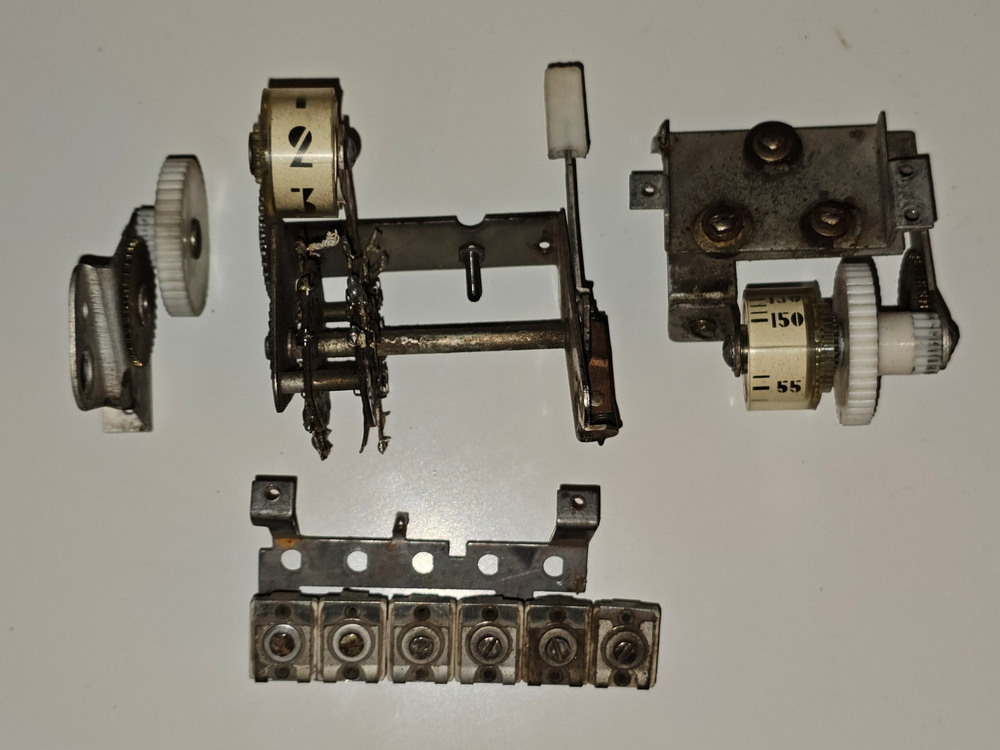 Now, I got to work cleaning the inside of the radio housing. 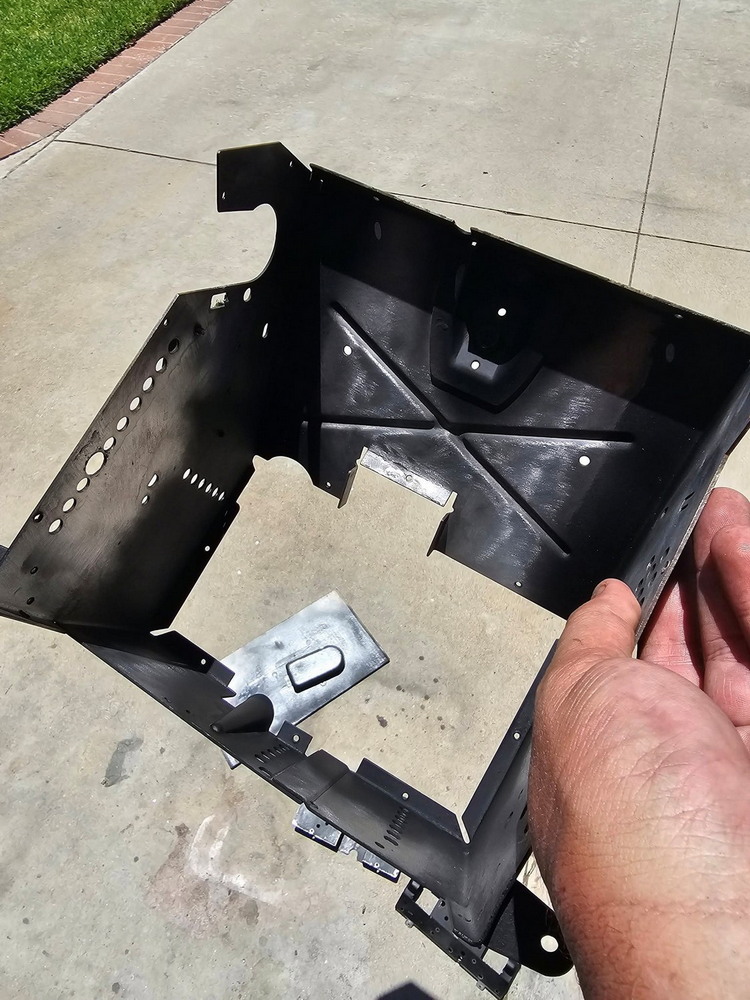 Then came the time to repaint the radio! I had to mask EVERY HOLE that goes inside the radio, as I didn’t want overspray inside to ruin the original paper guides. And I couldn’t mask those guides with tape as they’d rip off. 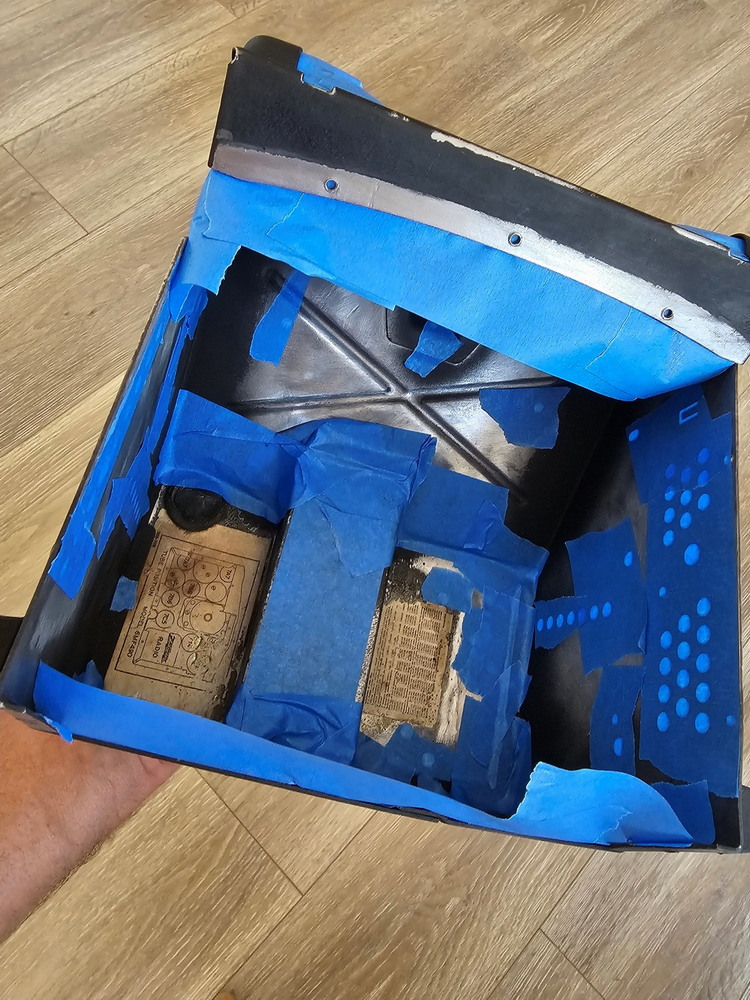 Below shows the radio masked, lightly sanded to fix any nicks or marks, and ready for paint. I decided to use a wrinkle paint on a hot day to simulate the original crackle look. Won’t be exactly the same, but close enough considering it sits behind the dash. 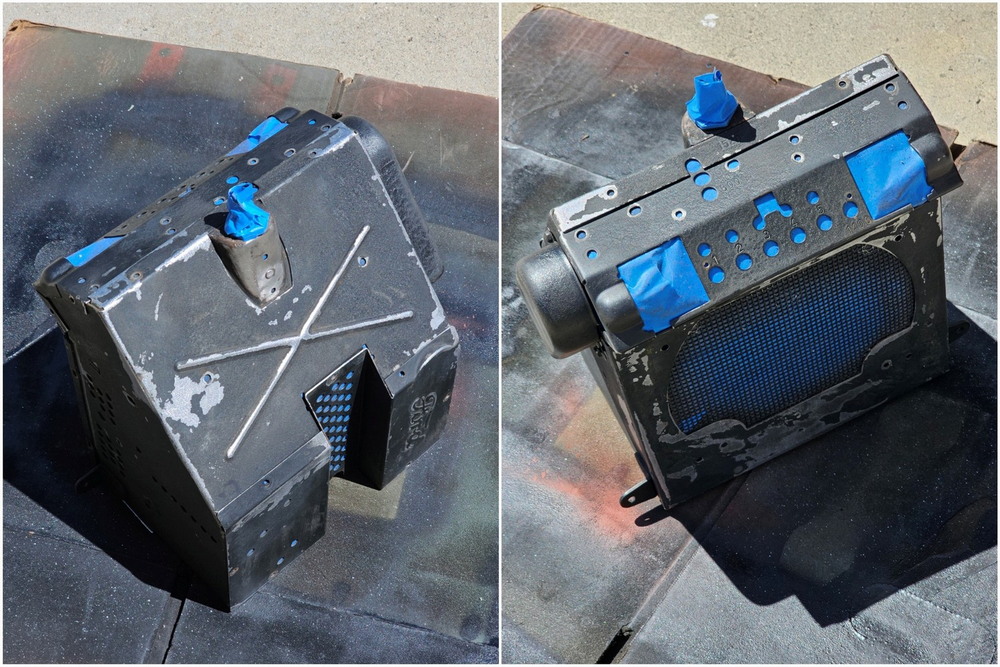 And here it looks after painting and letting it bake in the hot sun. Almost appears brand new! Now that the radio was cosmetically done, it was time to start working on the inside electronics, and about this time, I came up with an idea to take it beyond a modern Bluetooth radio... 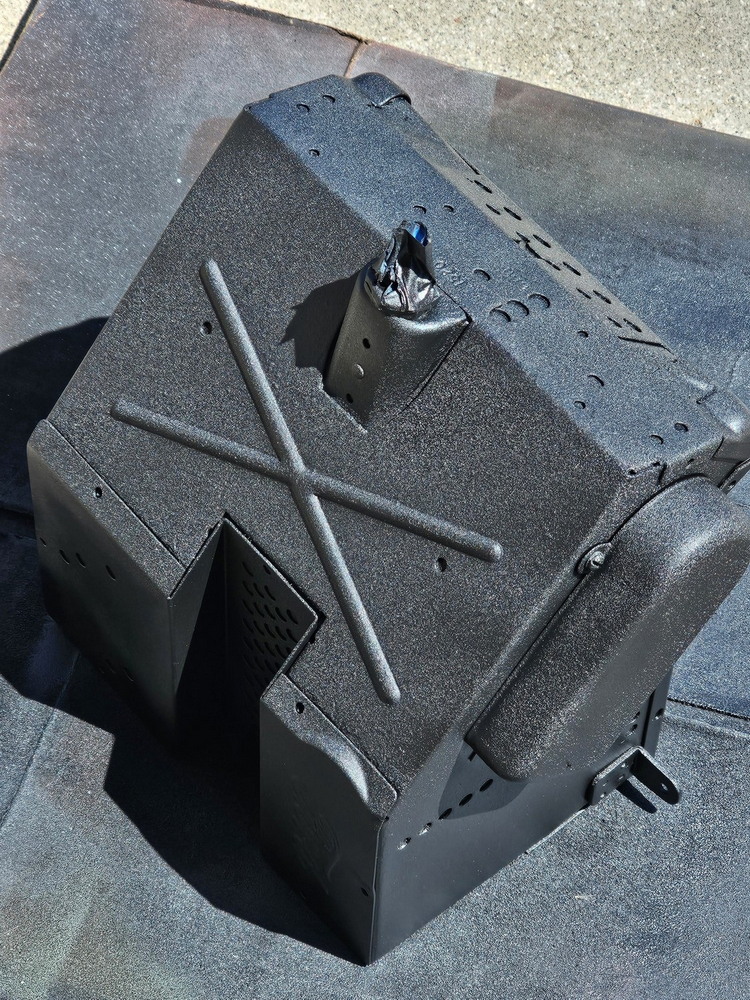 I'm going to take a pause here and submit this post. As soon as I get more time this evening, I'll continue with how this went from a simple Bluetooth radio into a self-contained 1940s radio station.
__________________
1940 Ford DeLuxe Fordor Sedan 1944 GPW Jeep Last edited by WarbirdPhotog; 07-06-2025 at 03:54 AM. |

|

|
«
Previous Thread
|
Next Thread
»


 Threaded Mode
|
|

| Sponsored Links (Register now to hide all advertisements) |
|
|
All times are GMT -5. The time now is 08:33 AM.