|
|||||||


| Sponsored Links (Register now to hide all advertisements) |
|
|
 |

|
Thread Tools | Display Modes |
 10-07-2023, 07:25 PM
|
#1 |
|
Senior Member

Join Date: May 2010
Location: Lynden, Wa
Posts: 3,552
|
OK, so when I get my 57 wagon back from the shop in three weeks, I am going to start cutting out the driver floor pan. I have drilled out the spot welds along the outer rocker panel and the floor is now pried up just a bit. BUT, is the floor pan welded to the inner rocker? I can't see any spot welds. To me the inner rocker is the one that is perpendicular to the out rocker-hoping I have the name correct.
Thanks, ?Mike
__________________
1930 TownSedan (Briggs) 1957 Country Sedan |

|

|
|
10-08-2023, 09:02 AM
|
#2 |
|
Senior Member

Join Date: Jul 2011
Location: Birmingham, AL
Posts: 814
|
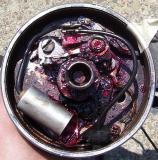
I do not think so. There are two body mounts it is welded (spot) to and the very front where the toe board goes up is welded there as well. The floor pan is under the toe board. I have found the best way to "save" all the under structure parts and pieces is to cut the floor pan out in pieces. There is also a heat shield under the pan that helps keep heat from the muffler off the floor. A couple of shots, before and after the carnage was repaired.
__________________
Bill, certified Ford nut. 2016 F-150 2016 Focus 08 Shelby GT500 57 Ford Ranchero 36 Chevy, 351C/FMX, 8", Mustang II |
|
|
|
| Sponsored Links (Register now to hide all advertisements) |
|
|
|
10-08-2023, 03:51 PM
|
#3 |
|
Senior Member

Join Date: Mar 2012
Location: Ohio
Posts: 1,973
|
Wish I could weld. I have a mig, but it's always a huge mess every time I try.
|
|
|
|
|
10-08-2023, 04:15 PM
|
#4 |
|
Senior Member

Join Date: May 2010
Location: Granite City, Illinois
Posts: 3,008
|
Okay, see that underfloor brace near the front floor riser? You need to drill out the resistance welds that hold the floor panel to it. DO NOT cut thru the brace. Leave it intact. It may be easier to identify the resistance welds from underneath since the top of the panel is so badly corroded. BE CAREFUL when prying up the old panel so as not to corrupt the underfloor brace.
Once the panel is removed, you can clean out the top of the brace with a wire-wheel attachment in a drill and blow it out with compressed air. Get it down to bare metal and coat it with "Rust-fix" or POR or something but leave bare the spots where you anticipate welding to. There's another floor brace closer to the seat you may need to do the same thing to. As far as the inner rocker, I don't recall any spot welds at the top flange to the floor pan itself, but there may be a row of welds holding it to the door threshhold panel. There need to be drilled out for removal of the outer rocker (of which the top is part of). When I did my '55's, those were so bad I had to cut all that out and start over with a new 18 ga metal piece joining the front door opening to the rear and set the new outer rocker on top of it. Pretty much the same as the factory method, but you must make sure there is no movement of the remaining cowl and rear of the car. Make sure car frame is not twisted such that it may distort newly welded pieces once the welding is complete. Keep as many main body-to-frame bolts assembled as possible and equalize frame rails on both sides of the car with jacks if you have unmatched tire sizes on the car, otherwise, distortion of the metal panels may occur once the car is outfitted with matching tires, etc. Cut out floor panels with a jigsaw using a metal cutting blade and stop cutting at the underfloor braces. For the small portions that need to be cut along the braces, use a drill with metal cutting disc and be careful not to cut too deep. |
|
|
|
|
10-08-2023, 04:25 PM
|
#5 |
|
Senior Member
Join Date: May 2010
Location: Granite City, Illinois
Posts: 3,008
|
The inner rocker has a flange that is bent over 90 degrees and meets with the 18 gage flat strip that runs from front of door opening to rear. It should have some spot welds to that structural strip (18 gage), but since it is under the strip, it does not come directly in contact with the floor panel.
The outer rocker top lip lays on top of that 18 gage structural threshhold strip and welds down to that strip. The floor panel originally met the top edge of the outer rocker and is also welded to that strip. There may be a small gap between the outer rocker top lip and the edge of the floor panel, which should be filled in with body sealer after the welding and grinding is done. I would coat all welded surfaces with a minimum of marine primer or other rust preventive coating PRIOR to sealing. |
|
|
|
|
10-08-2023, 05:12 PM
|
#6 |
|
Senior Member
Join Date: Mar 2012
Location: Ohio
Posts: 1,973
|
Sponsored Links (Register now to hide all advertisements)
|
|
|
|
|
10-10-2023, 08:06 AM
|
#7 | |
|
Senior Member

Join Date: May 2010
Location: Palookaville
Posts: 112
|
Quote:
This is outstanding advice.... and exactly how I did my floors on my 57. It took some time for me... but I wanted to ensure a good job. I really enjoyed it and learned a lot. |
|
|
|
|

|
10-10-2023, 09:09 AM
|
#8 | |
|
Senior Member
Join Date: Aug 2012
Location: IN A 'GALAXIE' FAR FAR AWAY
Posts: 6,475
|
Quote:
!!! ABSOLUTELY BEAUTIFUL OUTCOME !!!
__________________
***** - WHY IS IT ...  - -... that everything you buy in the grocery store is either wrapped in or contained in plastic but the government doesn't want you to carry it out in a plastic bag? WONDERING IN W(BY GOD)V ...
 DIAGNOSED CDO - (OCD In Correct Alphabetical Order) |
|
|
|
|
|
10-10-2023, 12:24 PM
|
#9 |
|
Senior Member
Join Date: Aug 2012
Location: IN A 'GALAXIE' FAR FAR AWAY
Posts: 6,475
|
I would also suggest raising the car and leveling the frame on stands (in lieu of a frame machine or plate). Shim the stands on a good level concrete floor as necessary. Tram the frame for squareness. The frame is akin to the foundation on a house. It has to be level and square.
Make sure body mounts are good and repair/replace as needed to square the body before cutting into it. Use reinforcing cross-rails as needed to keep the body from moving while cutting out panels.The body can also be trammed to see if there was any previous crash damage that is not obvious, and of course you want to tram it before hanging sheet metal and doors. A good PORTA-POWER can be your friend in lieu (Fr.) of a frame machine.
__________________
***** - WHY IS IT ... -... that everything you buy in the grocery store is either wrapped in or contained in plastic but the government doesn't want you to carry it out in a plastic bag? WONDERING IN W(BY GOD)V ...
DIAGNOSED CDO - (OCD In Correct Alphabetical Order) |
|
|
|
|
10-10-2023, 04:32 PM
|
#10 |
|
Senior Member
Join Date: May 2010
Location: Lynden, Wa
Posts: 3,552
|
Thank you all for the help. I will put her up on stands when I get her back in two weeks to verify that the frame is level and square-I am hoping but she was used and abused. The body mounts are all new and tight, except for the ones that go to the new pans. I will take pics and post them here when I do.
Mike
__________________
1930 TownSedan (Briggs) 1957 Country Sedan |
|
|
|
|
10-10-2023, 06:02 PM
|
#11 |
|
Senior Member
Join Date: Aug 2012
Location: IN A 'GALAXIE' FAR FAR AWAY
Posts: 6,475
|
There are diagrams and specs for both the frame and body are in the WSM.
The frame needs to be completely level. To do this DIY, use linoleum ties as shims under the stands.
__________________
***** - WHY IS IT ... -... that everything you buy in the grocery store is either wrapped in or contained in plastic but the government doesn't want you to carry it out in a plastic bag? WONDERING IN W(BY GOD)V ...
DIAGNOSED CDO - (OCD In Correct Alphabetical Order) |
|
|
|
|
10-11-2023, 08:37 AM
|
#12 |
|
Senior Member
Join Date: Jul 2011
Location: Birmingham, AL
Posts: 814
|
Level is a must! I also used masking tape on the doors, one piece on the door over the opening to the quarter. Cut and fold the edges. This will tell you if any shift in mounts or supports occurred while cutting and welding.
__________________
Bill, certified Ford nut. 2016 F-150 2016 Focus 08 Shelby GT500 57 Ford Ranchero 36 Chevy, 351C/FMX, 8", Mustang II |
|
|
|
|
10-11-2023, 03:45 PM
|
#13 |
|
Senior Member
Join Date: May 2010
Location: Lynden, Wa
Posts: 3,552
|
Bill and Kultulz, thanks for the ideas. I will put them to use in a few weeks.
__________________
1930 TownSedan (Briggs) 1957 Country Sedan |
|
|
|
|
«
Previous Thread
|
Next Thread
»
 Linear Mode

|
|

| Sponsored Links (Register now to hide all advertisements) |
|
|
All times are GMT -5. The time now is 04:40 AM.