|
|||||||


| Sponsored Links (Register now to hide all advertisements) |
|
|
 |

|
Thread Tools | Display Modes |
 08-26-2023, 02:16 AM
|
#1 |
|
Member

Join Date: Aug 2023
Location: Southern California
Posts: 75
|
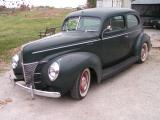
Thanks for all the help to everyone so far. I have some more questions on my 1940 Ford Deluxe Fordor. I did get the amazing "It's Ford for '40" book by Mike Kubarth, and have been going page by page and trying to match up what I have VS what's in the book, so I've learned an insane amount in the last week.
- It seems the hood is not resting as far back as it should. When I open it, I have to pull it forward slightly for it to lock in the upward position. When it goes back down, it does go backwards a bit, but it leaves about a 1-inch gap on the cowl. There currently is no seal on the cowl (working on getting that), but not sure if there's a way to tweak the hood supports to get it to align right. When it's closed, it also seems to be higher on the passenger side, which I assume might be one of the issues?  - I'm having issues with a leak with the fuel line between the fuel pump and carb. I'm not a fan of compression fittings, but went that route getting a brand-new fuel line (from CW Moss). The original fuel pump had failed that came with the vehicle, so I got a new one. The carb is an original late 1940s Holly Model 59. I've got both sides of the fuel line centered and straight, but I cannot screw the fuel line in anymore (it hits the flange on both the carb and fuel pump). Any suggestions?  - I would like to remove the vent window from the front door frames so I can restore the frames, remove the glass from one of the vents, and try to remove the rock-hard rubber seals. But, it seems like while I was able to undo the spring/castle nut from the bottom of the vent window, the top pivots appear to be riveted to the frame? How can I get that vent window out? It seems like I'll have to cut off the rivets... but wanted to make sure there's not something I'm missing here.  - Does anyone have the dimensions of the trunk wood blocks that prop up the spare tire? I have the original heavy cardboard backing, so I can see how wide and long it was with the ghost marking of it, but not how tall it was and the slant it had.  - While I've gotten the vehicle running, I haven't driven it yet. It appears, however, that the oil pressure, engine temp, and battery gauges are either dead or not moving. The dash light works, so I know it has some power. I was told when I purchased the vehicle that all the gauges worked, but it was over a year the car sat in a garage. What would be the best suggestions to test for connectivity with these important gauges? I'm going to do some continuity tests on the wires this weekend and make sure the wires haven't fallen apart.  - Where is the horn relay connected to the horn bracket? The previous owners just zip-tied it to the voltage reg.  - The previous owners decided to attach the throttle rod to the arm of the carb because it's missing the rotational ball arm. Makes me laugh every time I see it. Trying to find just that ball arm and locking 'cap' has been impossible, other than getting an 'as is' carb to steal one from, anyone have any ideas?  - In the 1990s is when the vehicle got a huge make-over restoration. That's when they sprayed the interior body (inside and everywhere underneath) with this black almost resin-looking spray. On one hand, that's prevented any rust and kept the vehicle in great shape. But they also sprayed it over several things that shouldn't be sealed up... like the gas sender access port in the trunk. Does anyone have a good photo or two of that spot and how it should look opened so I can cut away at this spray to get it back? 
__________________
1940 Ford DeLuxe Fordor Sedan 1944 GPW Jeep |

|

|
|
08-26-2023, 09:20 AM
|
#2 |
|
Senior Member

Join Date: May 2010
Location: Wisconsin, USA
Posts: 9,007
|
Lots of questions... I'll do my best here.
First the hood issue. It may seem counter-intuitive, but pivoting a hinge upwards, will lower the hood. You may try that before "we" go further. Keep in mind I tend to go at things like this methodically and as such, I like to eliminate things prior to simply relacing things. Fuel pump: If I understand correctly, the fittings bottom against the surface of both the carb and the fuel pump? Might you remove the line and photograph each end for me? My knee jerk thought was a poorly manufactured repop fuel pump. However, if you are having the same issue on each end, it's most likely in the line or more precisely in how the ferrules were seated. Vent window: Yes, you must remove the rivets. I remove the pivoting rivet at the top. The seal kit should have a replacement rivet included. When installing the new seals, I use #10 machine screws that I have ground the heads flat prior to installing. Use a very small flat washer below the head of the screw and a lock washer and hex nut on the back side of your window frame. Cut off the protruding length of the screw that goes past the nut. Wood block dimensions: Sorry, can't help with dimensions. Gauge activity: First things first I suppose. I hope you have a wiring diagram by now  Check which side of each gauge should be "hot" and check with a probe. If not hot, follow the diagram backward. Not too complicated. Check which side of each gauge should be "hot" and check with a probe. If not hot, follow the diagram backward. Not too complicated. Oh, be certain nuts are tight on your ignition switch. Horn relay: Well, you have a later relay. I have attached a photo of the correct relay which was integral of the harness; soldered to the harness. I have also attached two photos that should show you where the relay was mounted. In the "assembled" photo, you can just make out the cover of the relay. The same bolt that fastens the horn bracket to the frame rail, also fastens the relay. Missing carb pieces: Private message me as I probably have those pieces for you. Fuel tank sending unit access: That's factory installed sealer. Remember these cars were built quickly with little thought of neatness That sealer is rock hard now. I'd suggest a thick blade putty knife and a hammer to chip away at it. Wear goggles please.Two photos attached. One shows the floor with the cover, the other without.
__________________
"I can explain it for you. However, I can't understand it for you". |
|
|
|
| Sponsored Links (Register now to hide all advertisements) |
|
|
|
08-27-2023, 07:51 PM
|
#3 |
|
Senior Member
Join Date: Mar 2011
Location: faucett, mo
Posts: 419
|
I have had a few 40's myself and I have found that if you just push in on the side of the hood when it sets down that the hood settles in perfect.
|
|
|
|
|
08-28-2023, 04:11 AM
|
#4 | |||||||
|
Member
Join Date: Aug 2023
Location: Southern California
Posts: 75
|
Quote:
I checked the hood hinge, I can't seem to figure out how to make it hinge upwards. Here's a look at how the hinges look on both sides:     I do notice that when I close the hood, there's a pretty large gap in the front. Is this normal?  Quote:
 There was an interesting metal-toothed liner on the bottom forward part of the frame that was covered in a welting? and held in with staples. What is this?  Quote:
 Right now it appears that only one of the dual engine temp probes remains, and it's the single-wire one that should be on the passenger side. The dual-wire one is missing. The passenger side port has a bolt on it. But that still should work even with just the one?  Quote:
 Quote:
__________________
1940 Ford DeLuxe Fordor Sedan 1944 GPW Jeep |
|||||||
|
|
|

|
08-28-2023, 04:16 AM
|
#5 |
|
Member
Join Date: Aug 2023
Location: Southern California
Posts: 75
|
New questions:
- I can't quite figure out how the battery cable and the ground cables are supposed to route with a modern 6v battery. I bought a repro battery cable and ground bond strap looking cable for the battery. I know the battery cable (neg terminal) goes to the solenoid. Then the ground cable (pos terminal) goes onto the battery only stud on the firewall. But, with the factory heater installed, the battery cable can't reach all the way to the opposite side. So if I put the negative closer to the solenoid so it can connect, then the ground can't reach the positive from the firewall. Is this just a limitation of the repro cables?  - I'm having issues with the generator, which seems to be one of the biggest issues at the moment. Measuring the voltage on the battery terminal to terminal, I'm only getting 6.29V when the engine is running. Seems like it should be 7-8 volts. I've tried polarizing the generator (Field to Battery), but that made no difference. Anything I can try to see if the Generator has gone bad? Or the Voltage Regulator (which looks newer)  - I've searched a lot on this forum to figure out what people are doing for the difficult-to-find monaida maroon. But it seems everyone suggestions something different. What is the current most popular way to get that color to paint the dash/window frames/steering wheel? I actually found some of the original monaida maroon color on the inside of the window frame:  -This is the ashtray that's on the back of my front seat. It does not appear to match the one shown in "It's Ford for '40", but I will say the color/style of the handle does seem to match. What is this to?  Thank you again to everyone who's helped me out with all the questions!
__________________
1940 Ford DeLuxe Fordor Sedan 1944 GPW Jeep |
|
|
|
|
08-28-2023, 10:20 AM
|
#6 |
|
Senior Member

Join Date: May 2010
Location: Coral Springs FL
Posts: 10,950
|
Sponsored Links (Register now to hide all advertisements)
Remember: The OEM 1940 was originally 6V POSITIVE GROUND. Instrument Cluster INFO: Rather than pushing your instrument cluster inward from the outside, gently pull it out from the inside so you don't drop it. Take photos before you disconnect the wiring and label each terminal connector so you know where it goes on the cluster. Can you reposition your battery so that the + and - terminals align like the OEM when connected to the solenoid and starter? Notice the attachment of the braided 6V cables connected on the firewall. Find them here: https://www.bing.com/search?q=1940+f...ANAB01&PC=HCTS Hood INFO: Read everything you see posted here: https://www.fordbarn.com/forum/searc...rchid=33156532 1940 Ford Deluxe interior window frames were finished with wood grain appearance. They were not painted Monaida Maroon. Last edited by 19Fordy; 08-28-2023 at 12:00 PM. |
|
|
|
|
08-28-2023, 11:13 AM
|
#7 | |
|
Senior Member

Join Date: May 2015
Posts: 8,151
|
Quote:
 
__________________
The only thing nice about being imperfect is the joy it brings to others.... "Silver rings, your butt! Them's washers!" "We shot our way out of that town for a dollar's worth of steel holes!" - from 'The Wild Bunch' - 1969 https://www.youtube.com/watch?v=7NReUd2_0u0 Last edited by petehoovie; 08-28-2023 at 11:29 AM. |
|
|
|
|
|
08-28-2023, 01:00 PM
|
#8 |
|
Senior Member

Join Date: Jun 2014
Location: Williamsburg, VA
Posts: 1,627
|
The single connector temperature on the passenger side will work fine by itself to control the temperature gauge. The two-connector unit is a simple cutout switch that opens when the temp goes over about 200 degrees. That open circuit will send the temp gauge to full hot.
Regarding the generator; do you still only get 6.3 volts if you run the engine rpm up well above idle? If that gets you over 7.5 volts, you are probably okay. Be sure to use an analog voltmeter. |
|
|
|
|
08-28-2023, 01:41 PM
|
#9 | |||
|
Member
Join Date: Aug 2023
Location: Southern California
Posts: 75
|
Quote:
Quote:
Quote:
__________________
1940 Ford DeLuxe Fordor Sedan 1944 GPW Jeep |
|||
|
|
|
|
08-28-2023, 02:16 PM
|
#10 | |
|
Senior Member

Join Date: May 2010
Location: Alabama
Posts: 3,261
|
Quote:
|
|
|
|
|
|
08-28-2023, 04:07 PM
|
#11 |
|
Senior Member
Join Date: May 2010
Location: Coral Springs FL
Posts: 10,950
|
Warbird: Browse thru these 6V Ford car batteries. Open and scroll down.
https://www.bing.com/images/search?v...jaxserp=0&vt=0 |
|
|
|
|
08-28-2023, 07:32 PM
|
#12 |
|
Senior Member
Join Date: May 2010
Location: Wisconsin, USA
Posts: 9,007
|
[QUOTE=drolston;2251346]The single connector temperature on the passenger side will work fine by itself to control the temperature gauge. The two-connector unit is a simple cutout switch that opens when the temp goes over about 200 degrees. That open circuit will send the temp gauge to full hot.
Also, in 1940, there was only one sending unit.
__________________
"I can explain it for you. However, I can't understand it for you". |
|
|
|
|
08-28-2023, 10:27 PM
|
#13 | |
|
Member
Join Date: Aug 2023
Location: Southern California
Posts: 75
|
Quote:
__________________
1940 Ford DeLuxe Fordor Sedan 1944 GPW Jeep |
|
|
|
|
|
08-28-2023, 11:23 PM
|
#14 |
|
Senior Member

Join Date: May 2010
Posts: 2,488
|
Those FLEX rad hose drive me nuts! hate em. Newc
|
|
|
|
|
08-29-2023, 02:08 AM
|
#15 | |
|
Member
Join Date: Aug 2023
Location: Southern California
Posts: 75
|
Quote:
__________________
1940 Ford DeLuxe Fordor Sedan 1944 GPW Jeep |
|
|
|
|
|
«
Previous Thread
|
Next Thread
»
 Linear Mode

|
|

| Sponsored Links (Register now to hide all advertisements) |
|
|
All times are GMT -5. The time now is 09:48 AM.