|
|
#121 |
|
Senior Member
Join Date: May 2010
Location: Lancaster, CA
Posts: 917
|
Now comes the part a lot of you have been waiting for... "How in the Devil is he going to get that engine and transmission back into that car?"
Welp, fighting the Devil just happens to be my area of expertise! Take note... and let the Y block follies resume: It was late last night, er... early this morning about midnight to be exact when I wrapped up the other work and decided to get prepped to install the engine and transmission in the car together. We all know the drill - it tends to be the question that pops up frequently on the forums. "Do you pull the whole engine and transmission out together?" "How do you take it out with an automatic?" "Do I put them both back in at the same time?" Well, let's get rolling. The car has had an original Fordomatic ever since I can remember, and I have only ever pulled/installed a Y block in the car with an automatic. Since that original Fordo is CAST IRON and weighs about as much as the car , I have always split the two (engine and transmission). However on the umpteen parts cars I have fooled with I have always pulled the Y block out with the transmission and to be frank it has always been quite messy, a lot of bumping, groaning, metal grinding, etc to get them out. The angle has to be pretty steep. So what to do? Well at midnight "I ain't thinkin' about that." Let's just get this clutch (remember I lost it ... had to order a set but it was only $100 shipped) "only", bellhousing, and transmission all back together and we'll just throw it back onto the frame tomorrow. No trouble. Yeh right. Dufus me at midnight ... I was really not thinking straight. So with the nice Y block on the stand and all of my other parts painted up and what have you, I mounted up the clutch and pressure plate with my pilot tool. No problem. I had installed a new pilot bearing, had nice, clean bolts, and even got the torque wrench out to check my specs. We're good. 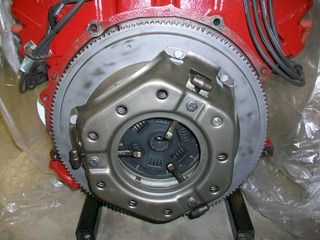 The fun ensues when I make the bonehead mistake of trying to install JUST THE BELLHOUSING first and then try to mate the transmission to the bellhousing and the clutch and the crank, etc. NO GO! A real Devil of a time I tell ya! 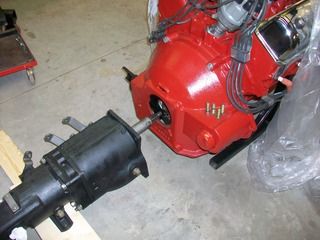 So after I wake up a little bit and tell myself, "You ain't turnin' in until you get this thing all together son," I snap my fingers and remind myself to mate the bellhousing to the transmission and THEN MATE THE BELLHOUSING TO THE BLOCK. 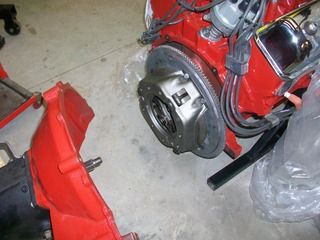 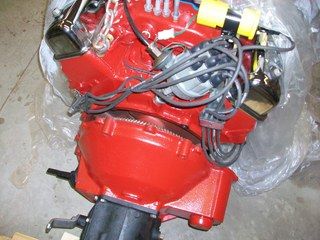 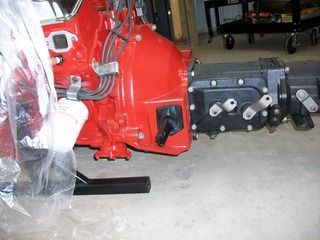 Literally 5 minutes later and the Devil was gone. Nice - turn out the lights and call it a day. ---------------------------- Next morning.... ---------------------------- First things first, WRAP THAT TRANSMISSION'S TAIL! I acquired some bubble wrap and went around the tail shaft a few times as you can see. I tell you - this idea saved my bacon and my firewall paint a few times during the install. 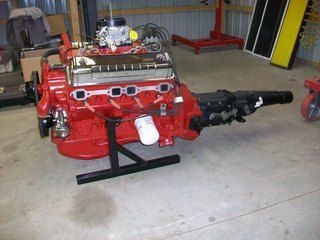 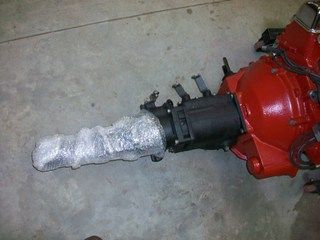 A couple of caveats... 1. I have not installed an engine and trans combo before and 2. Sometimes a blind hog finds an ear of corn Now back to the blog. I contemplated going out and doing the tool loaner thing to get a leveler to attach to the engine hoist. Seeing as how the nearest auto parts is literally 20 miles away from me, "I don't think so!" We will get this done if we can get the right angle. Don't ask me how I did it, but the angle created by my attachment points on the block (front and rear) and the weight of the transmission were absolutely perfect. That, coupled with the fact that there was not front end sheet metal on the car made this doable. I am sure this would not work with front end sheet metal on the car... just not possible. Anyhow, after clearing all concrete of debris (you don't want your shop wheels stubbing over gravels or other tiny substances that will make your engine sway when you stop suddenly!) I got out the shop jack and placed it strategically so that I could make sure the tail shaft cleared the welded crossmember (see photos). 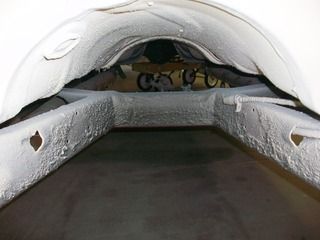 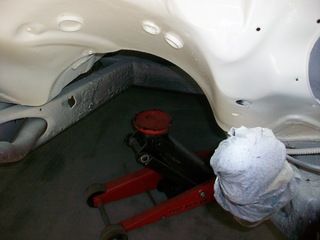 The idea was to keep the attack angle the same until the tail shaft got to the jack and then go back and forth between jack and engine hoist so that the trans cleared and the engine mounts got lined up at the same time. For the record, I did wrap the threads of the engine mount studs with duct tape for a little protection. How I did this by myself I don't know... I guess it took 30 minutes from start to finish. Constant checks on the tight tolerances ARE a must. I had to get a bungee cord and wrap the exhaust pipe on the drivers side to the sheet metal so that it would be out of the way. I had to remove the levers on the transmission because they were about to hit the firewall tunnel, etc, etc. Follow the photos below and rejoice with me! 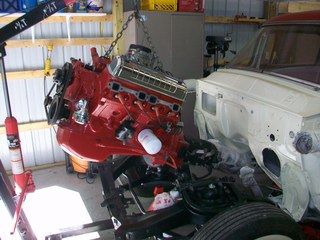 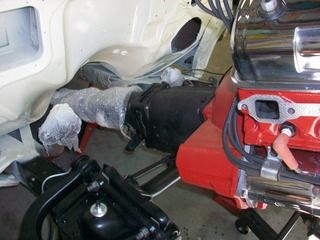 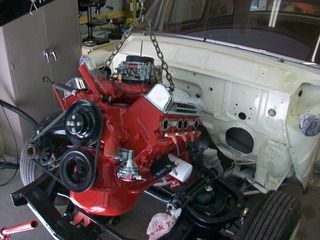 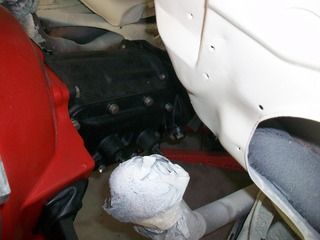 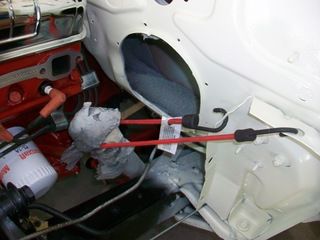 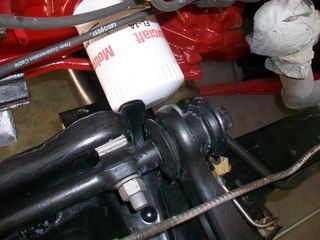 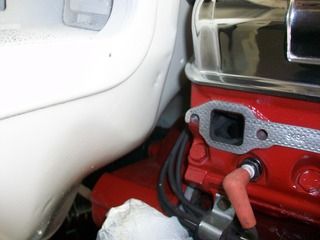 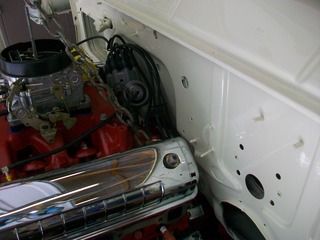 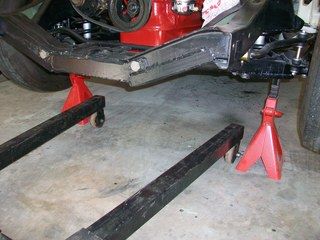 Yep, everything was tight. Sometimes it seemed that clearances were so tight when you were moving the whole works that you couldn't even swipe a credit card! It all went very well and here she is all fastened down... 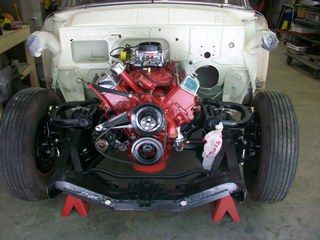 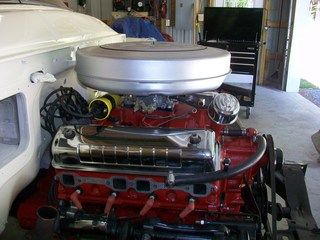 for the record I got excited when I thought, "Man, I made it here and no dings on the firewall and not even a scratch!" Well I have to be honest to you fellas. I have no idea how when it happened but there is a small 1/16" inch of scratch on there. It is hard to see and I think the driver's side head makes it to where no one will ever see it so we are ok. Gotta get the dash and then the steering column/pedal bracket in next. Any pointers?
__________________
Lancaster, California Visit hotrodreverend.com to view hundreds of pictures and videos of the build of the 1955 Ford Club Sedan! |
|
|

|
|
|
#122 |
|
Senior Member
Join Date: May 2010
Location: Granite City, Illinois
Posts: 3,008
|
I know exactly what you mean. I did a body-off-frame resto (twice) and I cannot remember how I lifted or sat the body back down on the frame. And since no other living being was here to witness the occurrence, I can't ask anybody how I did it. All I can remember is There is a photo of the car body sitting on two oversize sawhorses and another photo of the finished rolling frame out in the driveway.
|
|
|

|
| Sponsored Links (Register now to hide all advertisements) |
|
|
|
|
#123 |
|
Senior Member
Join Date: May 2010
Location: Lancaster, CA
Posts: 917
|
Big hangup... check this out:
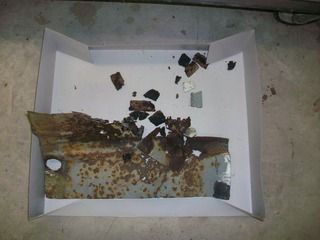
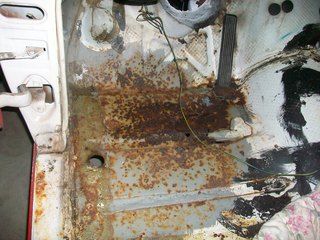 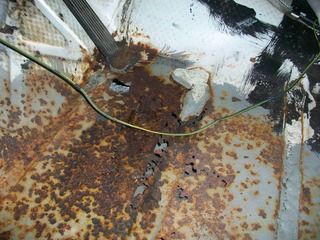 The driver's side floor pan is rotted completely through. A little bit of a setback on the timing here. I thought for sure the floor was pretty solid but that was only by looking from underneath and not really "banging around" with anything. However, when I pulled back the old carpet to throw it out about 2 lbs of rusted metal STUCK TO THE JUTE UNDERLAYMENT and just came right out. I have already had a replacement floor pan shipped in: 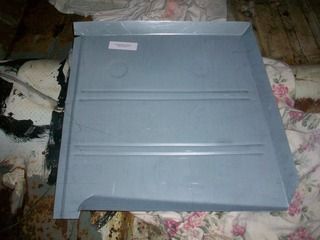 I did get the dash installed but only have this photo of some of the assembly on the bench 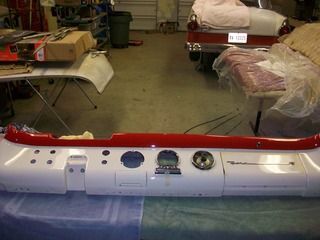 And, this wiring harness came in today so I have some work ahead of me! 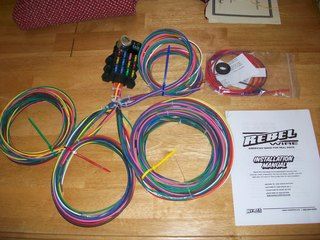
__________________
Lancaster, California Visit hotrodreverend.com to view hundreds of pictures and videos of the build of the 1955 Ford Club Sedan! |
|
|

|
|
|
#124 |
|
Senior Member
Join Date: Nov 2013
Location: Portugal
Posts: 374
|
Reverend Daniel, mine is probably just like that.
Could you please post a tutorial on the floor replacement, if you can?. I'd like to see how and were you un-stitch the old one and fit the new. Could that be? Thanks |
|
|

|
|
|
#125 |
|
Senior Member
Join Date: May 2010
Location: westbury ny
Posts: 854
|
HRR the floors aren't to bad to do I did front and rear in my wagon just be sure to check the supports mine were gone at the inner rocker I made them from 3 pieces seam welding the edge using a cardboard template. as for the scratch in the fire wall if you didn't go through to the primer you may be able to sand lightly with 2000 grit and polish out. good luck with your sale and move keep up the good work your ride is looking great. For the fellow asking for a video lay your replacement panel in mark it to make a rough cut smaller then panel drilling spot welds {not all the way through}as you were counter sinking a screw cutting can be done with a sawzall cut off wheel air chisel sabersaw or plasma cutter you do not have to use the full panel if you have solid material good luck
|
|
|

|
|
|
#126 |
|
Senior Member
Join Date: Nov 2013
Location: Portugal
Posts: 374
|
Sponsored Links (Register now to hide all advertisements)
Regards. |
|
|

|
|
|
#127 |
|
Senior Member
Join Date: May 2010
Location: Lancaster, CA
Posts: 917
|
Been real busy lately. Found a place to live in Milford earlier this week, and we go to closing on our house here in about 2 weeks or so. I did get the chance to get back with it last night though. I built a "cocoon" around the area that I worked on for the floorpan because I already had the new dash installed and I did not want to ruin the headliner, the door panels, etc. Basically I wrapped the dash in plastic and then put cardboard up all the way around - even to protect the headliner. When I weld and stuff starts spattering hopefully it will protect things.
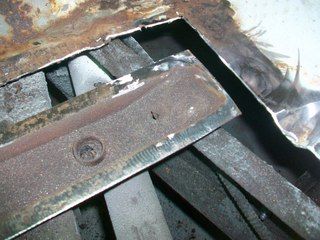
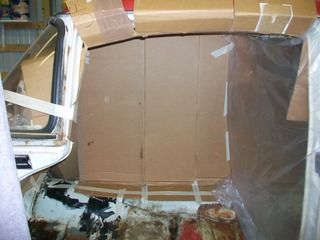 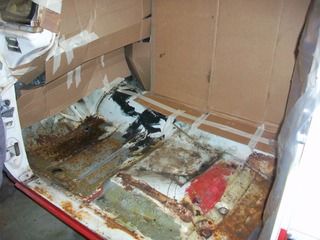 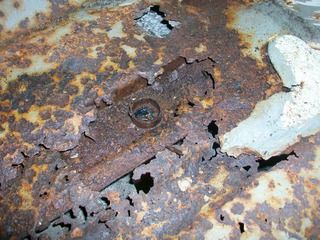 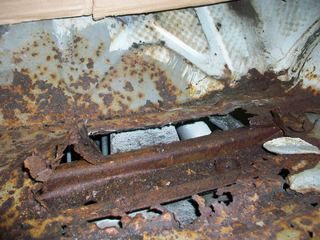 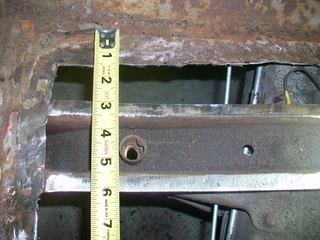 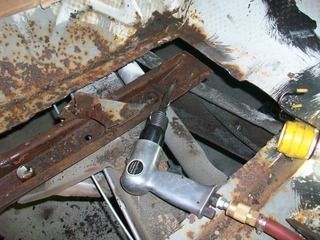 The old rotten floor came up like butter. However, I was surprised to find how little of the floor was rotten. There was better metal in places than I thought so the section I had to cut out was not too big. I use the holes in the strut as a reference point so that I could trim the new floorboard to size. 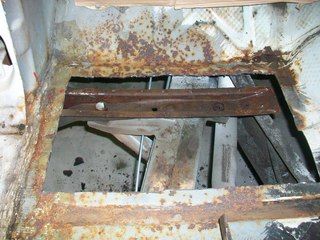 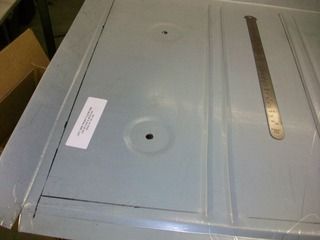 The floor brace/strut is very strong so I just took a Roloc to it to clean it up for a sold arc for the mig welder. I did transfer the measurements of the strut to the new floorboard so that I could drill 3/16" holes so that the floorboard can be spot welded to the strut. The rest of perimeter of the new metal was also drilled out for spot welds, but I am going to see what I can get with lap welds in some areas. I primed the new floor with Weld-Thru Primer as well. I have sealer and I also have chassis black paint all ready to be applied once the repair is made. The only thing I will have to do after all of that is redrill the holes for the accelerator pedal. Hopefully I can get to all of this over the weekend.
__________________
Lancaster, California Visit hotrodreverend.com to view hundreds of pictures and videos of the build of the 1955 Ford Club Sedan! |
|
|

|
|
|
#128 |
|
Senior Member
Join Date: May 2010
Location: westbury ny
Posts: 854
|
Hrr lap welds will be fine as they will act as though the panel is a solid peice weld through primer is the way to go just seam seal the bottom when your done and it will last how were the body bushings ? Just a word of caution watch the sparks and the cardboard
|
|
|

|
|
|
#129 |
|
Senior Member
Join Date: May 2010
Location: Lancaster, CA
Posts: 917
|
The strut and the body bushings... the condition of all that underneath is what floors me here. The car is super solid.
__________________
Lancaster, California Visit hotrodreverend.com to view hundreds of pictures and videos of the build of the 1955 Ford Club Sedan! |
|
|

|
|
|
#130 |
|
Senior Member
Join Date: May 2010
Location: MN
Posts: 7,053
|
Don't know how I missed this thread!
 Just went through all the pages. The 55' ford fairlane is such a great looking car. Just went through all the pages. The 55' ford fairlane is such a great looking car.Very nice work HRR! |
|
|

|
|
|
#131 |
|
Senior Member
Join Date: May 2010
Location: westbury ny
Posts: 854
|
When i did mine the supports were gone bushings were good bolts were bad i welded the floors in seam sealed and just primed with rustoleum then put down sound deadener look on line or i saw a show where they used a/c duct insulation good luck on your move
|
|
|

|
|
|
#132 |
|
Senior Member
Join Date: May 2010
Location: Lancaster, CA
Posts: 917
|
You can follow along in the photos below to see the floor pan work. I did cut out all of the rot, checked on the condition of the remaining, and then cut the panel to fit. The panel was then drilled with 3/16" holes for spot welding and then fitted to the floor, shaped, fitted again, shaped, cut, filed, and then fitted one last time. I used the orientation of the body bolts to help with measurements and orienting the new metal correctly.
    I did use a "weld through" primer on the top and bottom and it worked pretty well. The conductivity must have been good because I had to dial back my welder because of early blow throughs and all. I also used self tapping sheet metal screws to keep the panel tight to the overlapped floor so the seam would hold pretty good. 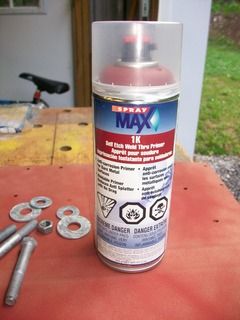 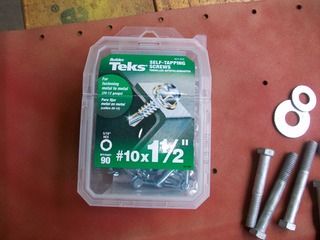 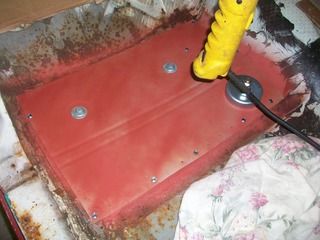 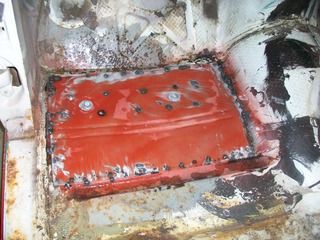 The panel is not perfect, but she looks good from underneath. I still need to hit it with sealer and then I will paint both top and bottom with chassis saver paint. On to other things... I was glad I had restored the pedal assembly sometime ago. It felt good to just pick it up and bolt it in. I did try to duplicate Ford's original "anti-rattle" fixes by using a spongey type of neoprene for the bracket to rest on the dash (I believe the factory used cloth?). I did that same thing when I mounted the dash too. 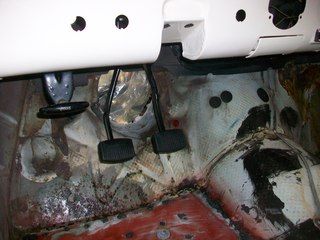 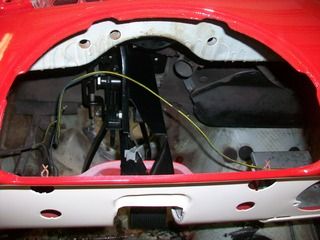 Next came the mounting of the aftermarket MP&B Power Booster and Master Cylinder. The instructions given on paper were good, but not very thorough. There was something they missed on their sheet - namely the adapter plate that bolted to the firewall. It held the rubber grommet for the brake pedal rod/lever. 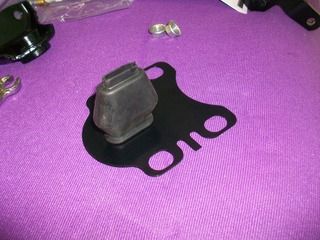 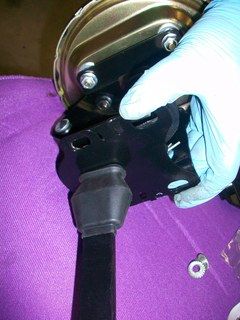 I got everything mocked up and wondered how the lever was going to be sealed to the firewall because the instructions never mentioned. I just figured it was because it fit so many years, blah, blah, and I would have to make one. I actually took measurements and started wondering where I could find some generic grommets so large. I went back to the shipping box to put the MC box back inside and what do you know? The adapter plate was lying there in a plastic bag. I picked it up and knew immediately what it was for. Then I sighed and said, "Yep, you've got to take it all apart Dufus!" here is a photo of the booster assembly with the special bracket for the firewall 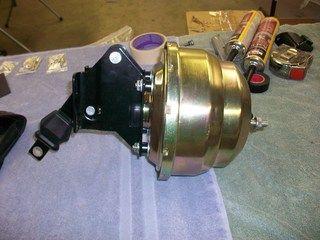 All went well until I mounted the MC just to check on my bends and mockup for the brake lines. All went well up front - no issues - just the right amount of distance. However, you can see what happened at the rear. 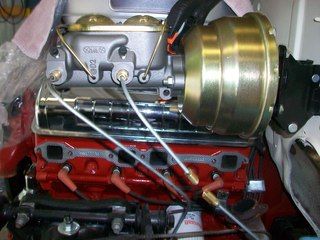 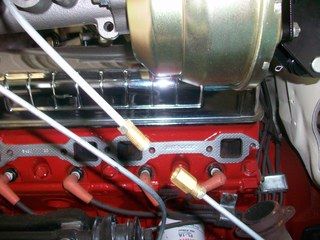 Aaaaaaaaaaaaaaaaaaaaaaarrrrrrrrrrrrrggggggggggghhh hhhhhhh! I am missing just a couple of inches. So... back to the store to get a longer brake line. I will say that the brake lines I had were a complete set from Jackson's Auto Parts but they were a set for original brakes - not for this FrankenFord I am putting together. However, the booster and MC do fit well and although it is kicked it into the engine compartment more than I would like, it does not interfere with anything. 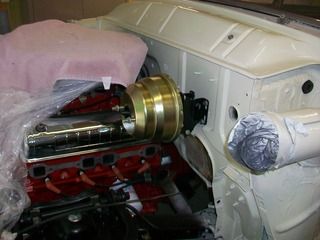 I did check the fit of the exhaust manifold and what have you just to be sure. When I get more photos loaded I will tell you about all the fun we are having with the clutch linkage! Here is the little booger that is so much fun:::: 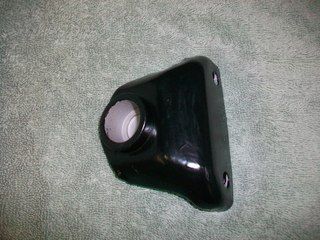 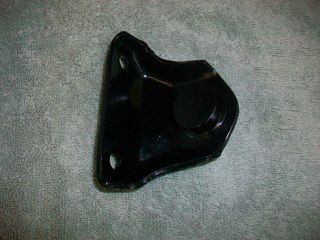
__________________
Lancaster, California Visit hotrodreverend.com to view hundreds of pictures and videos of the build of the 1955 Ford Club Sedan! |
|
|

|
|
|
#133 |
|
Senior Member
Join Date: Jun 2010
Location: Detroit suburb, MI
Posts: 3,706
|
When I was 17, I converted my '55 Mercury Montclair from a Mercomatic to a 4 speed stick. I have not so fond memories of installing that clutch Z-bar bracket on the engine. Also had a riot taking it off the donor car in the junk yard.
Sal |
|
|

|
|
|
#134 |
|
Senior Member
Join Date: Jun 2010
Location: tolland CT
Posts: 773
|
Hey Rev....did you have any problems sealing your spin on oil adapter plate ?Could you please tell me "EXACTLY' what you did ?
From what I have read, the procedure goes as follows: #1...install gasket on to block..#2..place adapter plate over gasket...#3..place bolt into adapter plate and tighten to 25 ft lbs...#4...screw on the oil filter. Did you cement the gasket to the recess in the block, if so, what did you use for cement ? Have I forgotten anything ?......thanks, J in CT |
|
|

|
|
|
#135 | |
|
Senior Member
Join Date: May 2010
Location: Lancaster, CA
Posts: 917
|
Quote:
http://www.y-blocksforever.com/tech/...il_filter.html The adapter plate needs to be "reformed" first before installing it back onto the block. Since the adapter plate is a metal plate that is very close to sheet metal, it has probably either succumbed to being overtightened during its life or has given in to the pressure with the heat and what have you. Here is what I did... 1. Examine the clean adapter plate on a 100% flat surface to see if the middle hole and surrounding sheet metal is off of the surface (remember this is where the nut will go to secure the OUTER CIRCUMFERENCE of the plate itself. If the interior circle is flush with your flat surface, YOU WILL NOT GET A GOOD SEAL NO MATTER WHAT YOU DO! Follow the link above to "reform" the interior circle. I actually went past 1/16". 2. Clean the block surface very well. I also used acetone as a follow up. 3. Install the thin gasket that mates the plate to the block. No sealer. 4. Install the plate and check for fitment. 5. Install the nut/stud that secures the plate to the block. While 25 ft/lbs is a good start. Remember that your adapter plate has been reformed. You will probably need to go past that, but not too much. Remember that for proper torque you need clean threads both male and female and that you should lubricate with a little bit of lighter weight oil. Is your setup and adapter OVER an original, early style canister type oil filter plate or is it the later block style that just has the block, the plate, and then of course your filter?
__________________
Lancaster, California Visit hotrodreverend.com to view hundreds of pictures and videos of the build of the 1955 Ford Club Sedan! |
|
|
|

|
|
|
#136 |
|
Senior Member
Join Date: May 2010
Location: Lancaster, CA
Posts: 917
|
The floorpan and quite a bit of the surrounding floor has been cleaned and now painted with Chassis Saver Antique Satin Paint. I had a whole mess of it so I figured why not. I am probably going to use Dyanamat (or something similar) anyway.
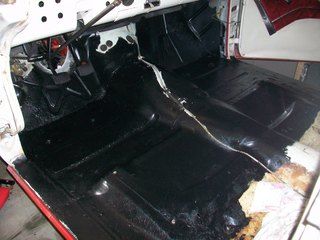 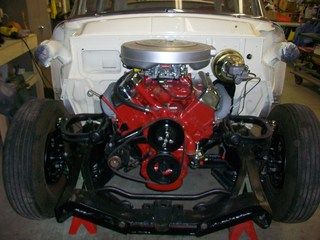 The engine compartment is looking better too. 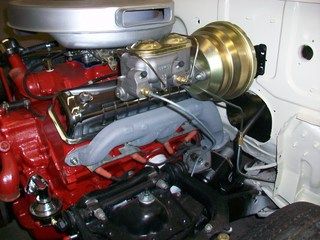 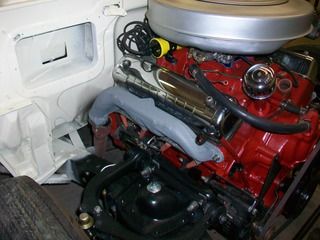 I made up my own bracket for the return spring. You can see it below. 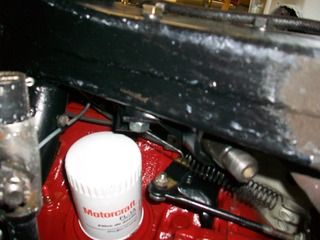 It sure is getting tight around the clutch pivot/steering gear area! 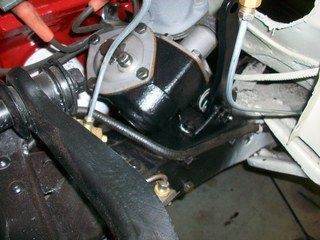
__________________
Lancaster, California Visit hotrodreverend.com to view hundreds of pictures and videos of the build of the 1955 Ford Club Sedan! |
|
|

|
|
|
#137 |
|
Senior Member
Join Date: May 2010
Location: westbury ny
Posts: 854
|
looking good !
|
|
|

|
|
|
#138 |
|
Senior Member
Join Date: May 2010
Location: Lancaster, CA
Posts: 917
|
Been over a week since my last post, but man have I been busy. We celebrated my wife's 40th birthday, I have been packing up boxes in the house and the garage like a Tazmanian Devil because we close on the house on Wednesday the 24th, and oh yeh - I am trying to get this ol' 55 moving on her own before we haul freight here.
Of course Father's day is also coming up and I shipped off a nice little load of antique truck toys and some cards to my father down in NC, I am sure he will like them. My family gave me my gift early - a new creeper. My son was so excited he talked the rest of them into it. So, Ethan came out to the shop and decided to assemble it for me. Nothing like working with "Lug Nut Junior"! He helped me quite a bit this week - bleeding the brakes, putting on the finishing touches, etc. He even dropped a wrench on his head while under the Y block. 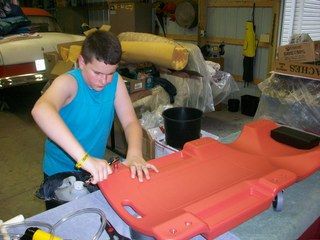 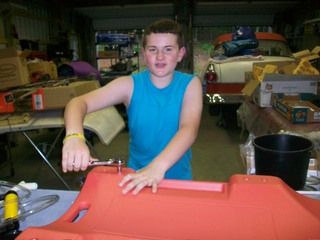 Long story short, the son and I pulled her out of the garage under her own Y block power yesterday with loads of success... no leaks, no trouble, and we had a lot of fun together in the midst of the moving melee. I will have to record video when we pull her out again on Monday to load it up for the trip to Loveland, Ohio. Earlier this week we bled the brakes and tightened down some of the fittings that were dripping... I thought I had them all cinched down but there were a couple of leaks where they needed a quarter turn or so. I did wire it up just for a "hotwire" with the original switch and keys, a "batt" line/"start" line/"ign" line so that we can just hook up a battery to a relay and off we go. You can see my zip ties in the photos here. I would have liked to have had the Rebel Wire harness in and ready but I ran out of time (along with other things I wanted to do). 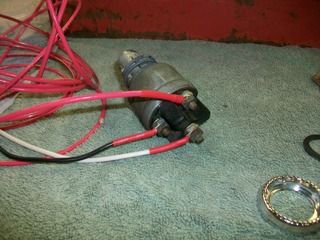 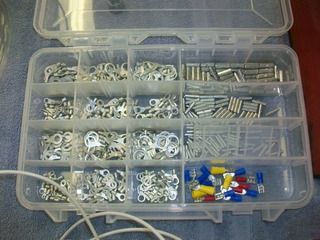 I don't know about you, but I like using the uninsulated wire terminals, crimping, and then using the heat shrink tubing to seal it off. The box above is a custom kit that I put together and then organized the ends in a lure box from a big box store. 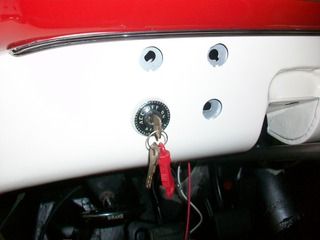 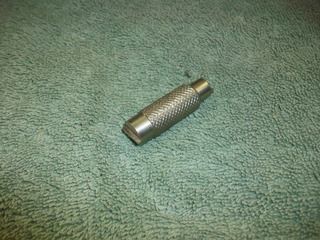 Don't start working on dash parts unless you have that little tool above. It is a must when taking off the collars and chrome fittings for your dash switches! 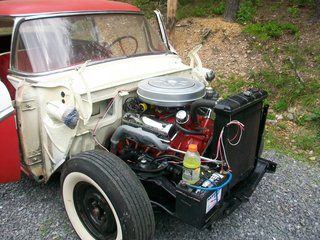 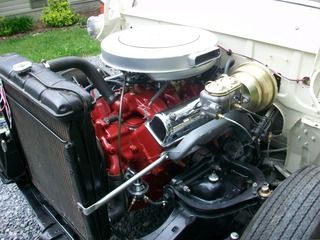 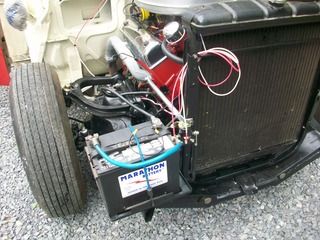 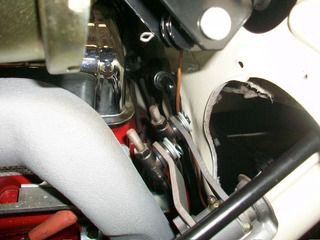 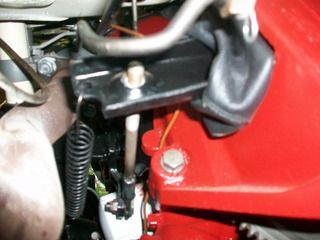 I did get the "3 on the tree" all figured out and at a stand still the shifter will put the transmission in all gears. I did use some nylon washers to tighten things up a bit but you can tell by looking at the push rod that when the clutch pedal is depressed the clutch fork gets too close for comfort with the narrow rod that is actuating the lever on the transmission. I lengthened the push rod by cutting the rod in two pieces, welding a sleeve to one side, inserting a 3/8" stud in the center, and then welding the other side to the sleeve. A very solid piece indeed. As you can see though I did not need too much room, only about 1/2" to get the actuation I needed. After hooking up some conduit to the radiator frame and the first exhaust bolt on either side I placed a starter relay on the radiator frame and got the battery secured to the car frame. The plumbing for the fuel was pretty straightforward but my son and I had a hoot trying to the fill the transmission case. I guess I need to get one of those drill operated pumps or something. We ended up running a hose from above the firewall to the main case and emptying a few quarts in there. Then we went to the tailshaft where the overdrive is located and I ended up using a small squirt bottle. It held more than I thought it would back there. Most of the linkage work was temporary. especially the steering column tube. That collar that attaches the tube to the dash was pretty tight. I think next time I am going to cut it in half, that should work better. 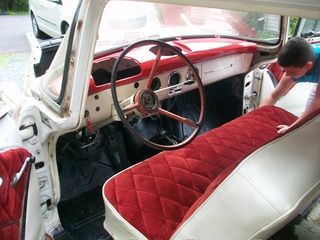 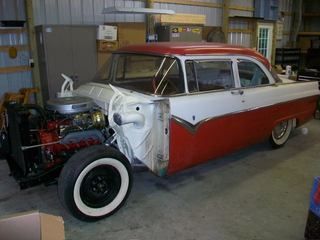
__________________
Lancaster, California Visit hotrodreverend.com to view hundreds of pictures and videos of the build of the 1955 Ford Club Sedan! Last edited by Hot Rod Reverend; 06-19-2015 at 08:34 PM. |
|
|

|
|
|
#139 |
|
Senior Member
Join Date: May 2010
Location: Lancaster, CA
Posts: 917
|
Will the Hurst Mystery Shifter (293-3097) work with the 3 speed with OD transmission? The box says it is for the 9 bolt, straight bottom side cover, which my FIL has on the car but nothing about the OD. I have heard somewhere that if we were to put a floor shifter in the 55 we would need the Hurst Mystery Shifter. Will anything else out there work?
here is an ebay link to the 293-3097 http://www.ebay.com/itm/FORD-MERCURY...449ea8&vxp=mtr
__________________
Lancaster, California Visit hotrodreverend.com to view hundreds of pictures and videos of the build of the 1955 Ford Club Sedan! |
|
|

|
|
|
#140 |
|
Senior Member
Join Date: May 2010
Location: Lancaster, CA
Posts: 917
|
It has been quite some time since I have uploaded any photos to this blog about the 55 Ford Club Sedan front end refresh but we have been swamped with this move. It took 3 U-Haul Trucks. First trip was a 17 footer, the next trip was a 26 footer, a 20 footer, a two dolly, and of course a trailer. (I now own stock in U-Haul
 ) What a mess. ) What a mess. Here are a few photos of loading up and the actual trip out to Loveland, Ohio from Winchester, Virginia. 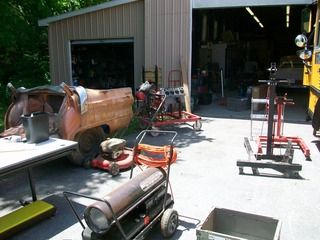 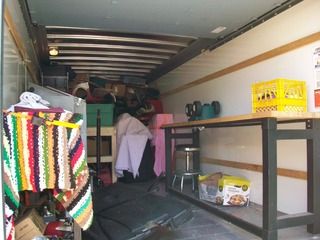 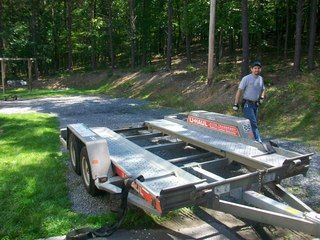 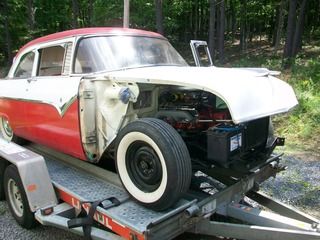 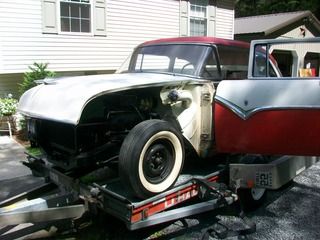 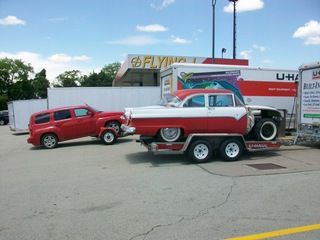 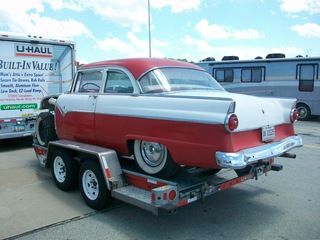 We made good time and everything traveled well... pretty much uneventful. The big event was actually the week before we left when I loaded up the truck that had all the parts and tools. I had decided to load up my son's basketball goal. That sucker was filled with sand at the base and very heavy. So, I decided to take it apart to load it in sections. After beating on it for 30 minutes I finally got it apart and got it loaded. It just so happens however that I forgot to restrap my tool box that I had to get into. I only the drove the truck in the driveway for about 60 feet, but that was all it took - you guessed it. The thing went careening out the back end and onto the pavement. DESTRUCTO box now.  No, there are no pictures, I was not in the mood. I guess the heat had gotten to me that day. No, there are no pictures, I was not in the mood. I guess the heat had gotten to me that day. When we showed up in Loveland at the house, (Loveland is right next to Milford) I could not find both of the wheels to the basketball goal. I felt like backing over it with the truck since that crazy thing had been the cause of so much grief. Oh well, the trip was good and everyone is safe and sound. Tool carts I can replace - people I can't.
__________________
Lancaster, California Visit hotrodreverend.com to view hundreds of pictures and videos of the build of the 1955 Ford Club Sedan! |
|
|

|
 |
«
Previous Thread
|
Next Thread
»
|
|
| Sponsored Links (Register now to hide all advertisements) |
|
|
All times are GMT -5. The time now is 04:08 AM.


 Linear Mode

