|
|||||||


| Sponsored Links (Register now to hide all advertisements) |
|
|
 |

|
Thread Tools | Display Modes |
 09-20-2023, 12:18 AM
|
#121 |
|
Member

Join Date: Nov 2022
Location: Esparto, CA
Posts: 74
|
I'm not trying to be argumentative, but I ask genuine question on the matter and a "here's what I do" answer won't do. I've googled this question and that's pretty much all I am hearing. Some people use a copper-based anti-seize, others say you should not use anything. In the latter case, if a reason is given, it is that the friction between the two parts is necessary. In all of these cases they were talking about situations that did not involve a keyway, or at least none was mentioned.
My Opel engines have a keyway on the nose of the crank. It turns a gear which operates the oil pump, fuel pump, and distributor. It also sets the timing, to an extent, for everything it turns. This is not on a tapered shaft so the keyway is necessary, and I've never heard anyone express a concern about the load on the keyway fracturing the crank. Granted, the loads are lower, but still. The issue has never even been broached. In our case we have a keyway that is nearly 4" long, possibly longer. (I have not measured it.) If loading it could lead to axle failure, why is it even there? I don't think there is any issue concerning timing. And given it's length, I'd say it was meant to carry a load and that is is capable of carrying a considerable load. My reason for wanting to use anti-seize is to prevent the axle and drum from essentially welding themselves together. If you take two clean pieces of metal and rub them together hard enough, the oxide keeping them from bonding when simply touching each other, is rubbed away and you have actual bare metal in contact with actual bare metal, and when that happens they will bond, aka, weld. I think this is why it is so difficult to get these parts apart, not because they are wedged tightly together, or that they have rusted, but because they have welded themselves together, partially. In industry they do this for certain metals. As things are now, I am going to clean everything up and apply a thin layer of anti-seize, unless someone can give me a good reason not to. And I welcome hearing a good reason not to. In other news, I cleaned up the drums today and they are in great shape. There are hardly any signs of wear in them. Tomorrow I'll paint them and set them aside while I clean up the backing plates. Today's photo:  The bearing and race look great. All I am going to need to finish this is the seal, shoes, and some axle grease. Mike |

|

|
|
09-20-2023, 02:39 AM
|
#122 |
|
Senior Member

Join Date: May 2010
Location: Masterton, New Zealand
Posts: 3,835
|
The advice you have been given is correct; you assemble tapers dry. This is a standard engineering principle. And is why you had so much trouble removing the drums. That's how it's supposed to be. And yes, that is the way I do it!! I have been following your rebuild, good work. Good that you are enjoying the process and learning about this era of automobile. Keep up the good work, which includes assembling the hubs onto the axles dry and torquing, subsequently retorquing and retorquing after a few miles. These things MUST be tight [and dry]
__________________
Unfortunately, two half wits don't make a whole wit! |
|
|
|
| Sponsored Links (Register now to hide all advertisements) |
|
|
|
09-20-2023, 03:31 AM
|
#123 | |
|
Senior Member

Join Date: May 2010
Location: East Shore of LAKE HOUSTON
Posts: 11,115
|
Quote:
Mike ..... Rest assured that nobody is going to accuse you of being "argumentative". Everyone here in America has the God-given right to IGNORE any answer that comes from an internet-based advice forum, and a bunch of dummies trying to save your butt. I am not a credentialed or degreed mechanical engineer, so I really don't have a means of putting the science involved here into lay terms so that you can understand how two precisely-tapered surfaces are designed to 'lock-up' ..... precisely the situation that you will be attempting to prevent with your application of anti-seize. You don't seriously think that that little piece of 1/4" key stock is what allows you to spin your tires as you 'peel-out' (if you're so inclined)? Have ya ever heard of a "MORSE TAPER"? An entire industry has been based on this theory for at least the past hundred plus years. Look into it! If you'll give any of this TAPERED AXLE crapola a few moments of reasonable consideration, you would eventually realize why every Ford dealer in America had more than one tool in their SERVICE Department made specifically to separate the tapered drums from the tapered axles. ALL of us serious old Ford geezers of any worth own one of these not-inexpensive tools designed exactly for that purpose. And this is exactly the reason for that single axle nut being required to be torqued to 205 foot pounds (PLUS). It's the guys that DON'T torque those nuts nearly that tight ('cuz they know better and that will make the drum easier to remove the next time) that cause most of the cracked axles and axle failures that we occasionally hear about. Those tapered surfaces NEED to be tightened to the extreme for the surfaces to take advantage of the surface friction produced. It's that drum moving around on that axle KEY that causes the inner end of that key stock to cause a crack to form. Every time that wheel/axle goes around, the crack propagates through the axle until it meets its yield point and fails. That's when the owner finally realizes (hopefully) what a dumb idea it was not to follow this ages-old advice .... dry, clean and tight! AND, it really ain't no fun replacing an axle after it breaks, not to mention the damage that tire and wheel is going to cause on your rear fender and possibly more parts as the wheel/tire departs the rear end. And heaven forbid that wheel/tire causes an accident with another/more vehicle(s)! Coopman |
|
|
|
|

|
09-20-2023, 07:15 AM
|
#124 |
|
Senior Member

Join Date: Jan 2011
Location: Central Ohio
Posts: 5,072
|
Another thing to consider is "lapping" the rear hubs onto the axle stubs. You can use a fine lapping compound as well as blue die-chem to see how well the tapers fit together.
This can help ensure that the morse taper is doing the best job that it can (due to a consistent contact surface between the axle the hub). As others have noted, you want them to go together DRY upon final assembly! |
|
|
|
|
09-20-2023, 10:49 PM
|
#125 |
|
Member
Join Date: Nov 2022
Location: Esparto, CA
Posts: 74
|
I do plan to clean everything thoroughly before it goes back together, lightly sanded and wire-brushed to remove any rust and rough spots.
I totally get it that you want the drum on tight, but the question remains, why is there a keyway in this setup? It is not needed to set the position (rotational) of the drum and wheel, so I figure it is there to keep the drum from rotating. Or maybe it is there just in case the drum gets loose on the axle. I do have degrees and credentials in a related area, metallurgy, not that that means much here other than how it warps my thinking.  I figure a 1/8" deep 4" long keyway can carry a lot of load. Figure 1/8 x times 4 and you have 1/2 square inches of steel working for you. Mild steel is good for around 40,000 psi, hardened steels more than double that, so at minimum that means we're looking at 20,000 lbs of force it can handle. These are rough numbers. I would need to look at shear strength instead of tensile strength, plus the loads the keyway can expect to see given wheel diameter, axle diameter, etc. I'm not up to that at the moment. But again, why is the keyway even there? I have an old copy of Machinery's Handbook. I'll see what I can find in it. Mike |
|
|
|
|
09-21-2023, 03:00 AM
|
#126 |
|
Senior Member

Join Date: May 2010
Location: Solihull, England.
Posts: 8,756
|
Sponsored Links (Register now to hide all advertisements)
But they did use the keyway and people familiar with early Fords just accept it and carry on using it. Collectively the contributors to this forum probably have many hundreds of years of early Ford experience. So why dismiss "here's what I do" replies? The accepted good practice is to have everything clean as a whistle and have the nut very tight and regularly checked. If you have been here for a while you will know which contributors advice can be relied upon. Mart. Edit: Re the keyway: It isn't a pure shear strength consideration but a fatigue failure situation when people do not have the nuts tight enough. |
|
|
|
|
09-24-2023, 02:20 PM
|
#127 |
|
Member
Join Date: Nov 2022
Location: Esparto, CA
Posts: 74
|
Seems odd that Ford would spend time and money on something not needed.
I'm not totally dismissing the "here's what I do" reasons, as it seems to be working, but that doesn't mean it's the best way, and I'm not one to just stick with tradition if I think there might be a better way. Does anyone remove the keyway when they work on this part of the car? Eliminating it would seem to remove the fatigue problem. Moving on, our local parts place, Sacramento Vintage Ford, has the oil seals we need, but not the brake shoes. Does anyone know of a source for these? Or, do people buy the kits and reline them themselves? Next up, while waiting for brake parts to show up, are three windows that have been de-laminating for a while. I think there might be a local (to Sacramento) source for replacement glass. I should also look into replacing the seals or gaskets while I am at it. Mike |
|
|
|
|
09-24-2023, 02:50 PM
|
#128 |
|
Senior Member

Join Date: May 2010
Location: South Texas
Posts: 1,631
|
You can probably clean the shoes up. The lining material looked thick. Use brake cleaner or starting fluid without upper cylinder lubricant and spray away. You will be surprised and how much gunge comes out of the woven lining before it cleans up, but it will. Make sure the lining is on tight with no looseness or loose rivets.
|
|
|
|
|
09-24-2023, 09:27 PM
|
#129 |
|
Senior Member
Join Date: Aug 2010
Location: East Boothbay, Maine
Posts: 279
|
Ok, I'm going to jump into the fray on this taper thing. It's interesting to note that Morse taper drills have a parallel sided tang at the end of the shank. Some would argue that its purpose is for removal with a drift key. Others would say the tang is to prevent the drill from slipping. I tend to agree with the latter opinion. Otherwise, why would the tang be parallel sided and fit into a milled slot? That slot could have easily been a far less expensive drilled hole to accommodate a round tapered drift pin. But that's not the case.
As for Ford and the key and machined keyway, it was not just Ford. General Motor did it as well. My 37 LaSalle has the same setup and most likely do similar years Cadillac. Frankly all it would take is one slight slip between the axle and the hub to create a galling situation and now you have a real mess. |
|
|
|
|
09-24-2023, 09:38 PM
|
#130 | |
|
Member
Join Date: Nov 2022
Location: Esparto, CA
Posts: 74
|
Quote:
|
|
|
|
|
|
09-26-2023, 08:00 PM
|
#131 | |
|
Member
Join Date: Nov 2022
Location: Esparto, CA
Posts: 74
|
I found something in Wikipedia that shed some light on the tapered joint question.
Link: https://en.wikipedia.org/wiki/Machine_taper The interesting part, to me is this: Quote:
|
|
|
|
|
|
09-26-2023, 08:15 PM
|
#132 |
|
Member
Join Date: Nov 2022
Location: Esparto, CA
Posts: 74
|
Today I started removing windows that had de-laminated. The driver-side rear came out okay, and the rear window too, although that one too more effort. I didn't want to break it. Once out, it was interesting. It came out as two pieces of glass and between them a thin sheet of plastic. I'm sure that at one point these were bonded together, like the rear quarter is. I can see the plastic layer from the edge.
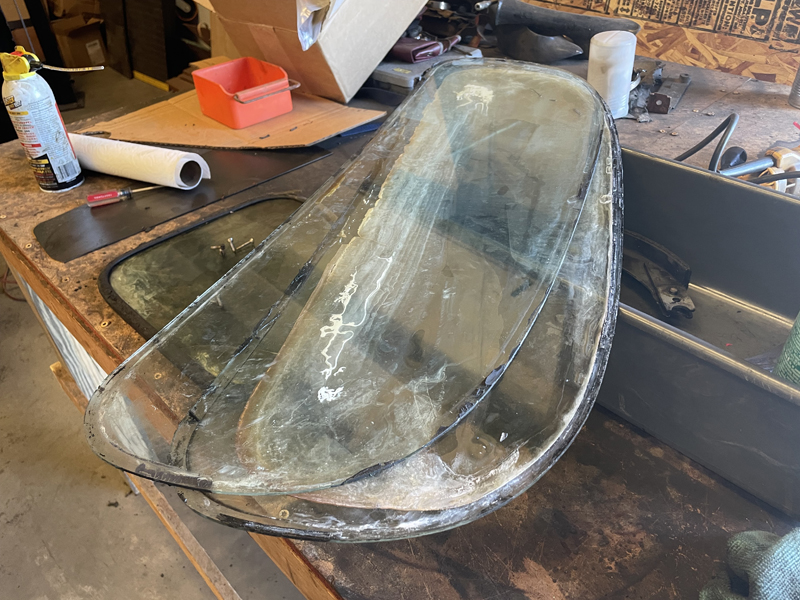 I'm having trouble getting the driver-side door window out. It looked like it may have been installed in the channel along with some heated tar to hold it in place. With some PB Blaster and a screw drive I can easily dig some of it out, but that won't get me far. I can't see an easy way to disconnect the channel it is mounted in, so it is looking like I have to deal with that tar somehow. Any suggestions? Mike |
|
|
|
|
02-19-2024, 09:12 PM
|
#133 |
|
Member
Join Date: Nov 2022
Location: Esparto, CA
Posts: 74
|
I'm still here, and the project has not been abandoned.
Richard, the owner, has been out of the country for a bit and I was sidelined by a medical, but I'm back now. I have a short list of things to do before Richard gets back in April.
Today it was brakes. Three are done, only the driver-side front remained. I opened it up and other than being really greasy it looked okay. I'm wondering if the drums hadn't been resurfaced and shoes replaced before the car got parked, back in 1957. Here's what I saw after getting the drum off.  Now in primer.  All cleaned up. It will get some paint. 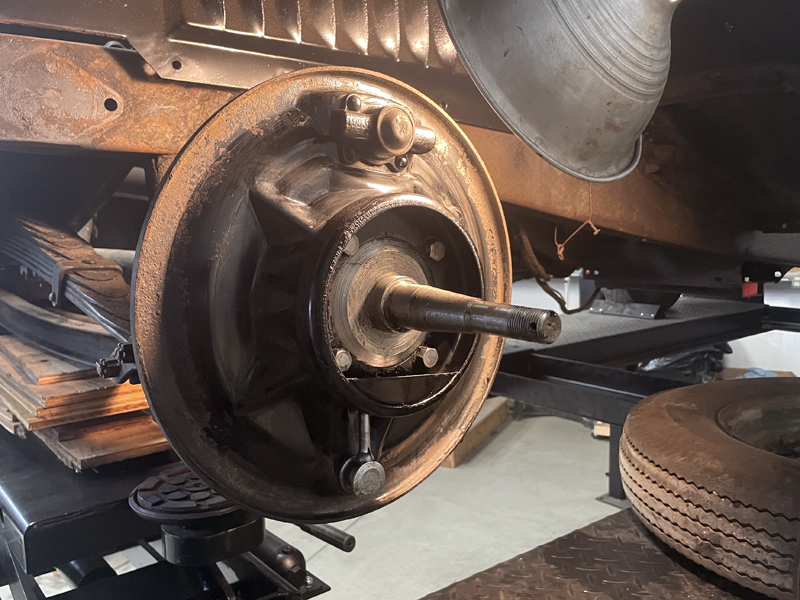 The small parts. 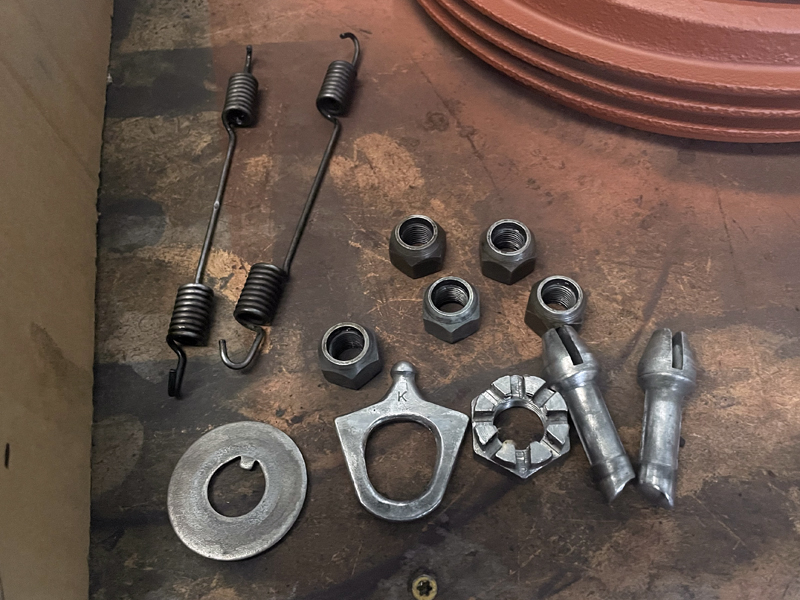 Fresh paint, still shiny because it is wet.  Oh, and I am determined to get this fan working again.  Mike |
|
|
|
|
02-19-2024, 09:14 PM
|
#134 |
|
Member
Join Date: Nov 2022
Location: Esparto, CA
Posts: 74
|
After everything I listed above is done we will take the motor to a shop that will do the run-in, attach the clutch and transmission (overhauled years ago), and repair the fenders. While they are at it they might as well install the motor, too.
It's looking like this car will be on the road come summer. Mike |
|
|
|
|
02-20-2024, 11:10 PM
|
#135 |
|
Member
Join Date: Nov 2022
Location: Esparto, CA
Posts: 74
|
Modest progress today. I took care of a little painting, mostly for rust protection, but it looks better, too. I had to cut a few bolts to get the passenger side fender off. Now that I've figured out how that goes I'll get the other one tomorrow.
I spent most of the day on the road to see the nice folks at Vintage Ford in Rancho Cordova, CA. I picked up a few small parts, talked about getting window glass, and my friend talked about his coming '32 Ford project where the power plant will be from a Tesla. No photos worth posting today. Quick question, regarding shocks, are the really for the left and right, or can they go on either side as long as the arms are on correctly? Mike |
|
|
|
|
02-21-2024, 06:10 AM
|
#136 |
|
Senior Member
Join Date: May 2010
Location: Saratoga Springs, NY
Posts: 1,111
|
Welcome aboard, best of luck with the 36
|
|
|
|
|
02-21-2024, 08:48 AM
|
#137 |
|
Senior Member

Join Date: Jul 2010
Location: 36 miles north of Albany NY
Posts: 2,954
|
I think the shocks are the same without the arms. If you need them rebuilt or have any question here is the go to guy for lever shocks. I had him rebuild all 4 of mine.
|
|
|
|
|
02-21-2024, 12:12 PM
|
#138 | |
|
Senior Member

Join Date: May 2015
Posts: 8,166
|
Quote:
__________________
The only thing nice about being imperfect is the joy it brings to others.... "Silver rings, your butt! Them's washers!" "We shot our way out of that town for a dollar's worth of steel holes!" - from 'The Wild Bunch' - 1969 https://www.youtube.com/watch?v=7NReUd2_0u0 |
|
|
|
|
|
02-21-2024, 10:43 PM
|
#139 |
|
Member
Join Date: Nov 2022
Location: Esparto, CA
Posts: 74
|
Thanks, all.
After looking at the shocks carefully I noticed a single left/right difference, the location of a filler hole/plug. I installed the shocks with this feature pointing up, in case future topping off is needed, which I sort of doubt. But no matter because this port is not accessible with the shock on the car, but they are easy to remove. I finished up the last brake today. When I took it apart it was loaded with grease. When I installed everything I used much less. It should be fine. Same with the wheel hub. It was packed with grease, over a cup in total. I went with much less, but still plenty. Both front fenders are now off. They will be repaired and reinstalled with the nicer set of running boards. With the fenders off I was able to clear away a lot more of that tar that I figures was undercoating. Was also able to remove a rat's nest. Rat's nest removed. 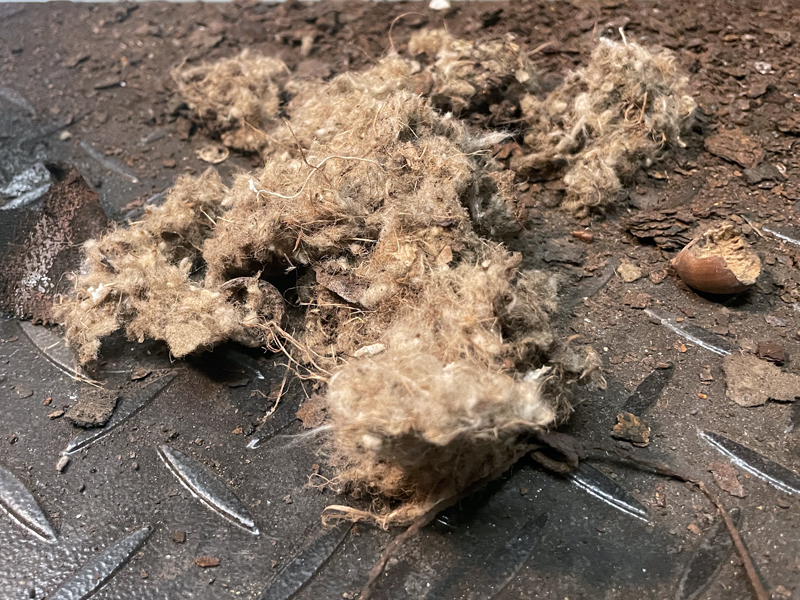 Front brake going back together.  Front brake done.  Fenders off.  Mother Nature's approval of my work.  Mike |
|
|
|
|
02-22-2024, 10:58 PM
|
#140 |
|
Member
Join Date: Nov 2022
Location: Esparto, CA
Posts: 74
|
I didn't expect today to go pretty much the whole day, roughly 11 AM - 5 PM. It was just small stuff, but you know how small stuff goes.
I finished up on installing the shocks, by installing the links and the last shock. (I had to wait for yesterday's paint to dry.) After the shocks (Aftershocks?) came the brake rod hardware that reduces vibration. The fronts were a bit of a chore but they got done. In the rear there was more rust but I managed to get things apart without breaking anything. I would have finished them up except the parts we have are wrong. The label says they are for the rear, and they look very different from the fronts, but the ones on the rear of the car look like the fronts. I'll see about getting replacements. Question, the car has springs pulling each rod towards the frame. Were those stock/original? I installed the brake and clutch pedals and hooked the brakes up. I still need to install the parking brake lever but I can't figure out where it goes. Maybe someone here can help, or maybe all I need is a good night's sleep and a fresh look in the morning. With a little help I got the last of the front fender sheet metal off. Looking around at other parts we had one hand, I found the battery cables and installed them. I hooked up the ground (+) but not the power side (-). I'll get a plastic boot to cover the hot (-) terminal so that it would be very difficult to short the battery. I installed the foot-press starter switch and connected the battery cable, but did not connect the other end to the battery. It's too early for that and we don't want to have a live circuit while we are working on the car. The fact that the outer insulation for the wiring is fabric still bothers me. There are a few places where chaffing can lead to problems. In those areas I'll cover them with a harder plastic wire covering. I'll also paint the exposed terminals for the brake light switch with liquid electrical tape, to keep things there clean and dry. As for the windows, the rear and rear-quarter are clearly bad, as is the driver-side window. We'll be replacing them. It looks like tomorrow will be a short day for me on the car, and after that, there's next to nothing to do until the owner returns from Asia. No photos today. Mike |
|
|
|
|
«
Previous Thread
|
Next Thread
»
 Linear Mode

|
|

| Sponsored Links (Register now to hide all advertisements) |
|
|
All times are GMT -5. The time now is 12:17 PM.