|
|||||||


| Sponsored Links (Register now to hide all advertisements) |
|
|
 |

|
Thread Tools | Display Modes |
 11-13-2011, 05:59 AM
|
#81 |
|
Senior Member

Join Date: May 2010
Location: Mpls, MN
Posts: 27,582
|
If you can't find Kroil, then use diesel, kerosene, or any penetrating fluid. Can you tell if the distributor has ONE long shaft to the drive gear, or does it have the correct TWO PIECE shaft? Either way you should be able to lift the head a bit and use a punch and hammer the drive gear down to try to free it from the shaft for the distributor.
|

|

|
|
11-13-2011, 09:29 AM
|
#82 |
|
Senior Member

Join Date: May 2010
Location: Iowa
Posts: 346
|
Kroil isn't available in retail stores. You can find it a www.kanolabs.com As far as the grinder goes, you could. You probably won't reuse the shafts anyway.
|
|
|
|
| Sponsored Links (Register now to hide all advertisements) |
|
|
|
11-13-2011, 10:16 AM
|
#83 |
|
Senior Member

Join Date: May 2010
Location: new britain,ct 06052
Posts: 9,390
|
Earlier this year when I had to remove my dist, it was "stuck". I tried acetone and ATF, no dice. I tried prying carefully with 2 screwdrivers, no dice. I was trying to save it as a core, but went and got 3 foot crowbar and inserted it underneath the pin area and "pow" out it came, no damage.
If you're not concerned with saving it get yourself a "bar" and try that method. Paul in CT |
|
|
|
|
11-13-2011, 05:48 PM
|
#84 |
|
Senior Member

Join Date: May 2010
Location: Stayton, Oregon
Posts: 3,806
|
I think there is a product like Kroil called "PC Blaster" that seems to work OK and I think you can buy it from a local parts store.
__________________
Fred Kroon 1929 Std Coupe 1929 Huckster |
|
|
|
|
11-14-2011, 05:32 AM
|
#85 |
|
Senior Member

Join Date: May 2010
Location: Bellingham, Washington
Posts: 362
|
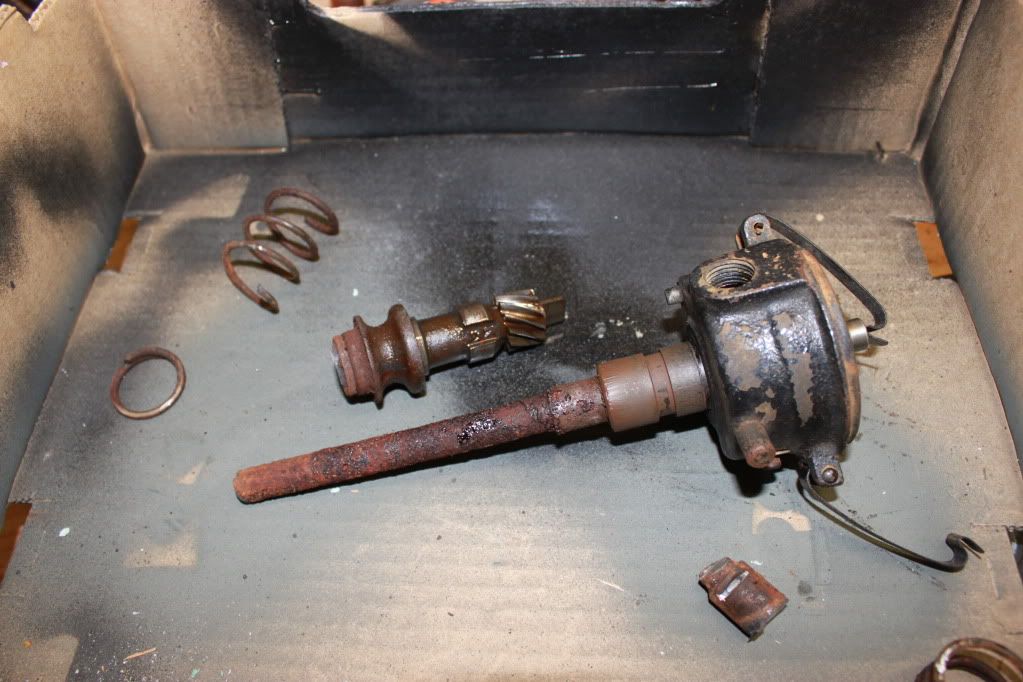
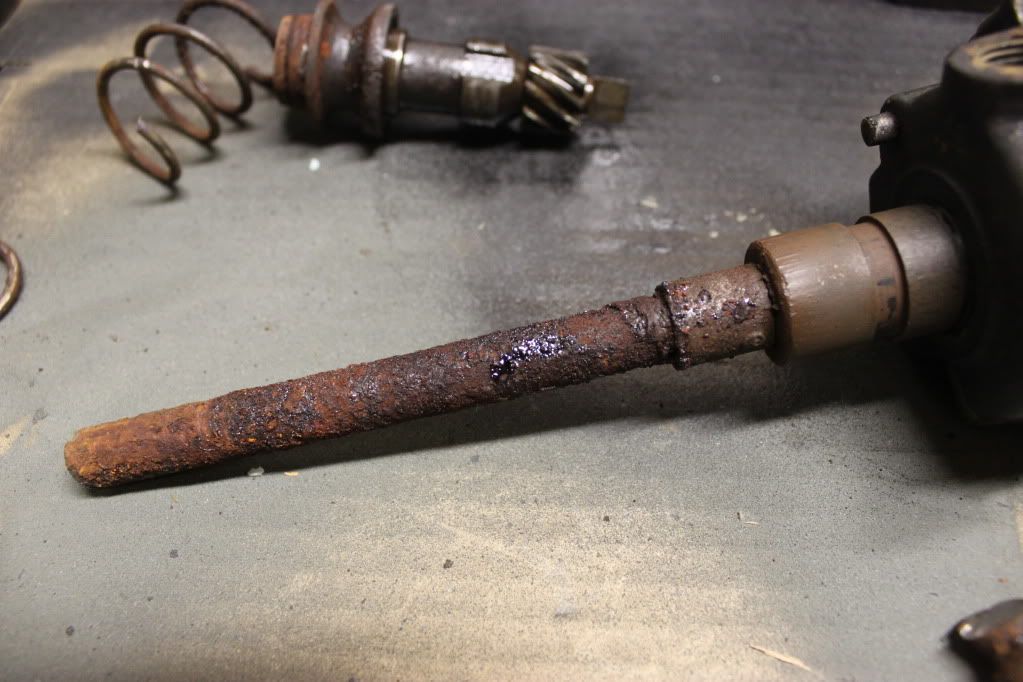
Soooooo....I got the head off! What I ended up doing was cutting the shaft into three pieces (the first cut didn't let me pull the bottom piece out). So, the distributor is now out and the head is off!
The pistons, intake and exhaust valves look OK and I will post pictures hopefully in the morning. I think I will have to add to my previous shopping list...haha! I keep finding more and more pieces to add the further along I go. Anyway, I will probably rebuild my oil pump and buy a rebuilt distributor, so that I know it is done properly. |
|
|
|
|
11-14-2011, 06:01 AM
|
#86 |
|
Senior Member
Join Date: May 2010
Location: Mpls, MN
Posts: 27,582
|
Sponsored Links (Register now to hide all advertisements)
|
|
|
|
|
11-14-2011, 02:17 PM
|
#87 |
|
Senior Member
Join Date: May 2010
Location: Bellingham, Washington
Posts: 362
|
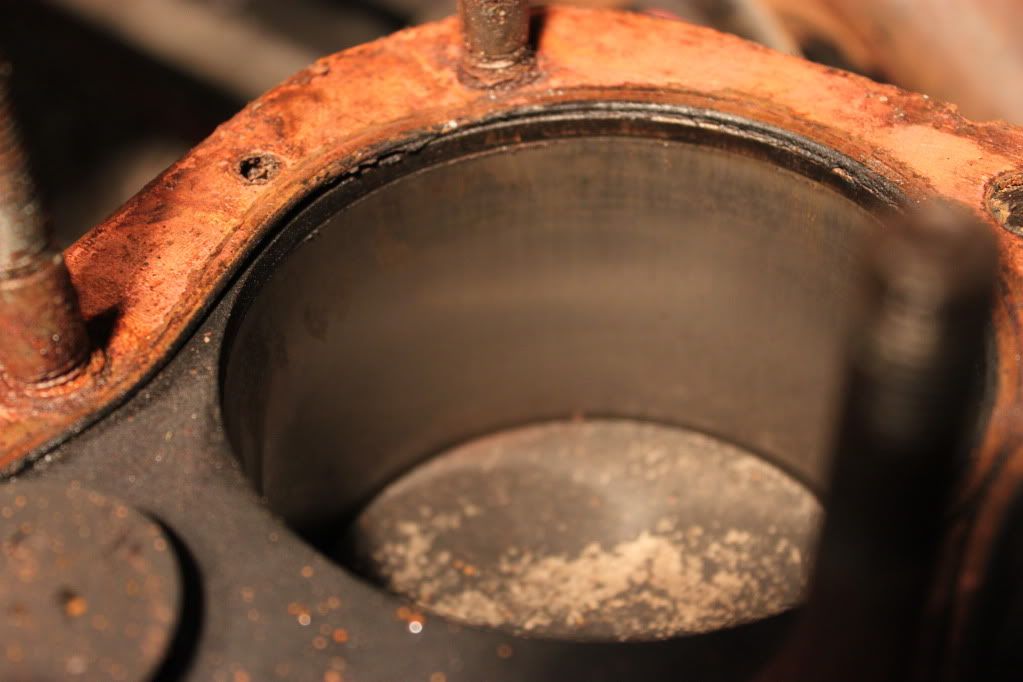
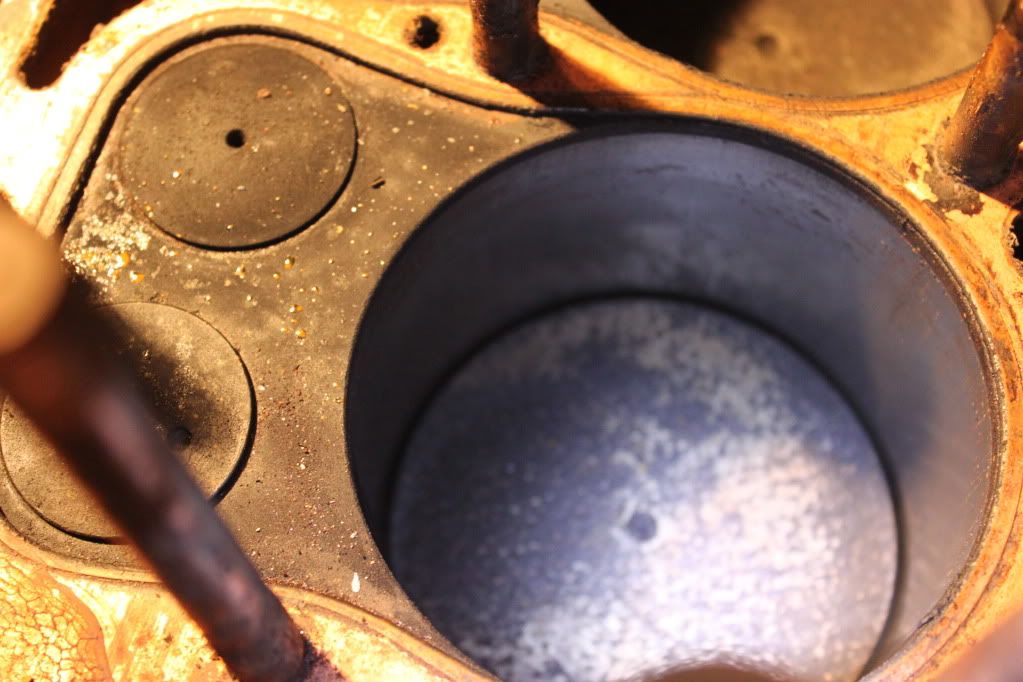
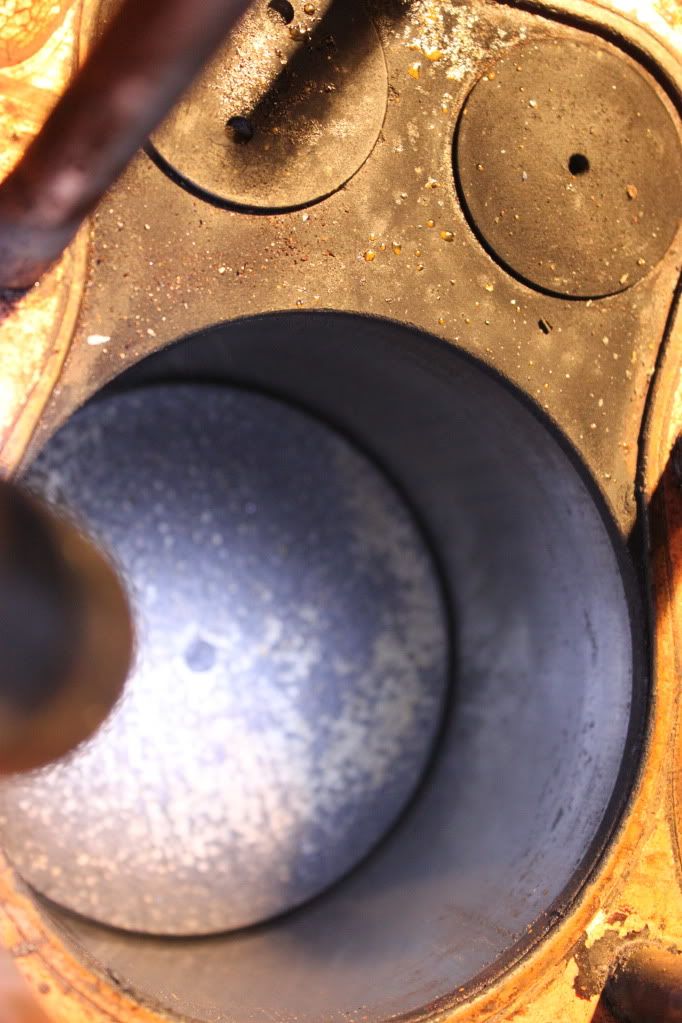
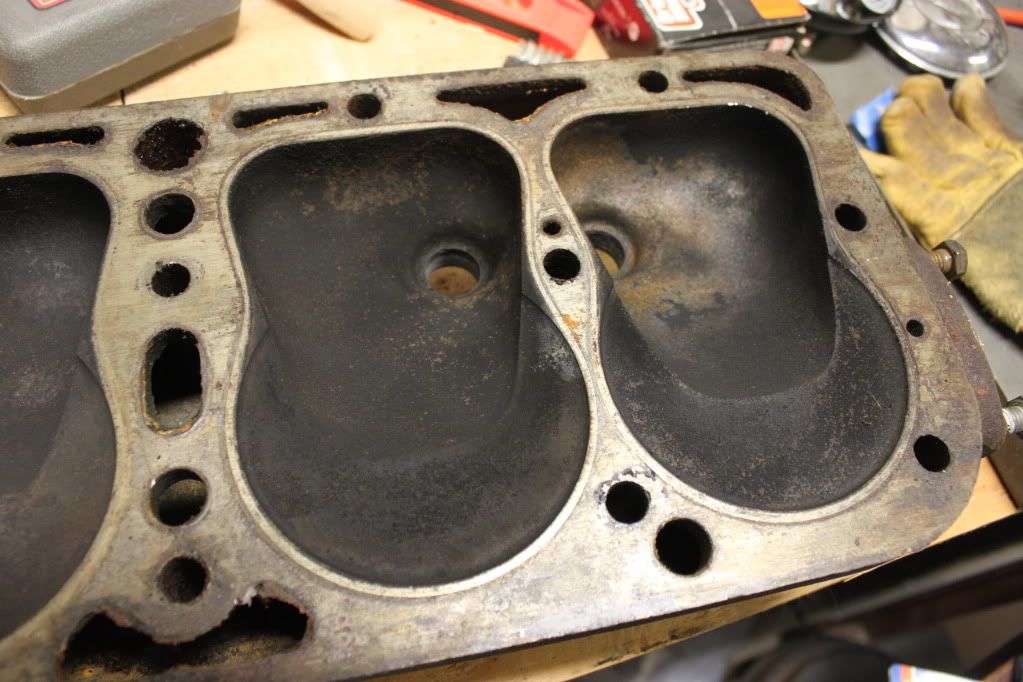
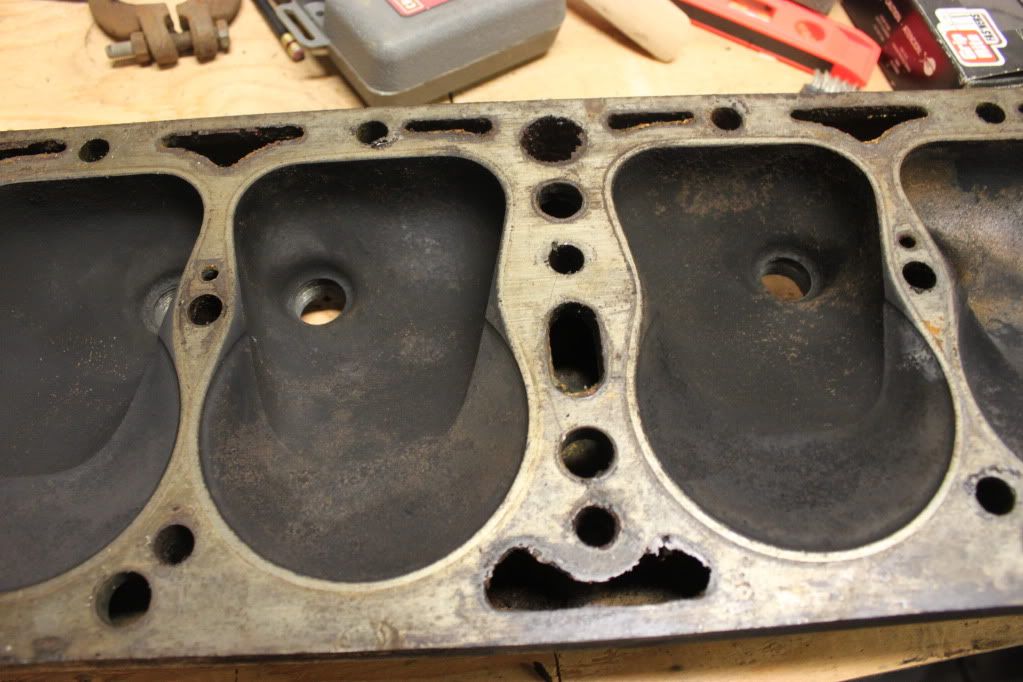
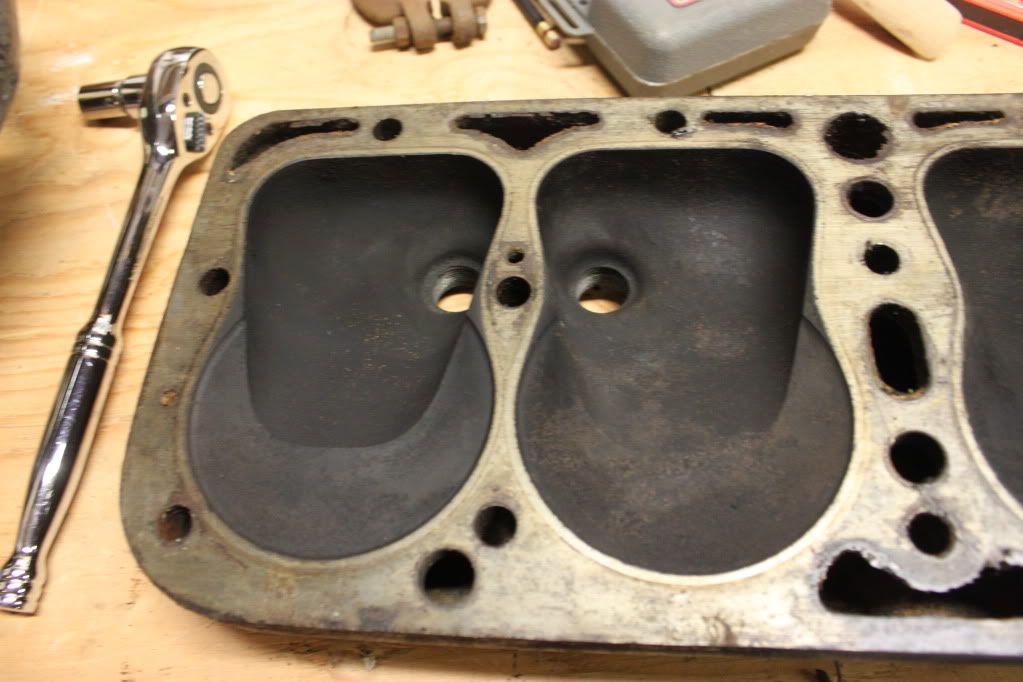
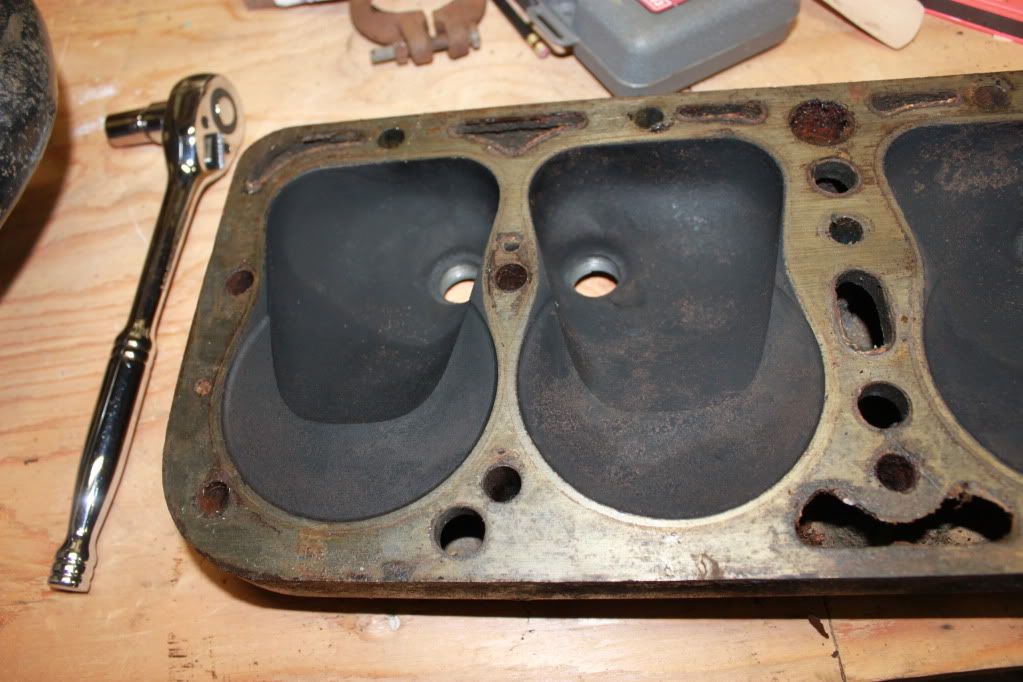
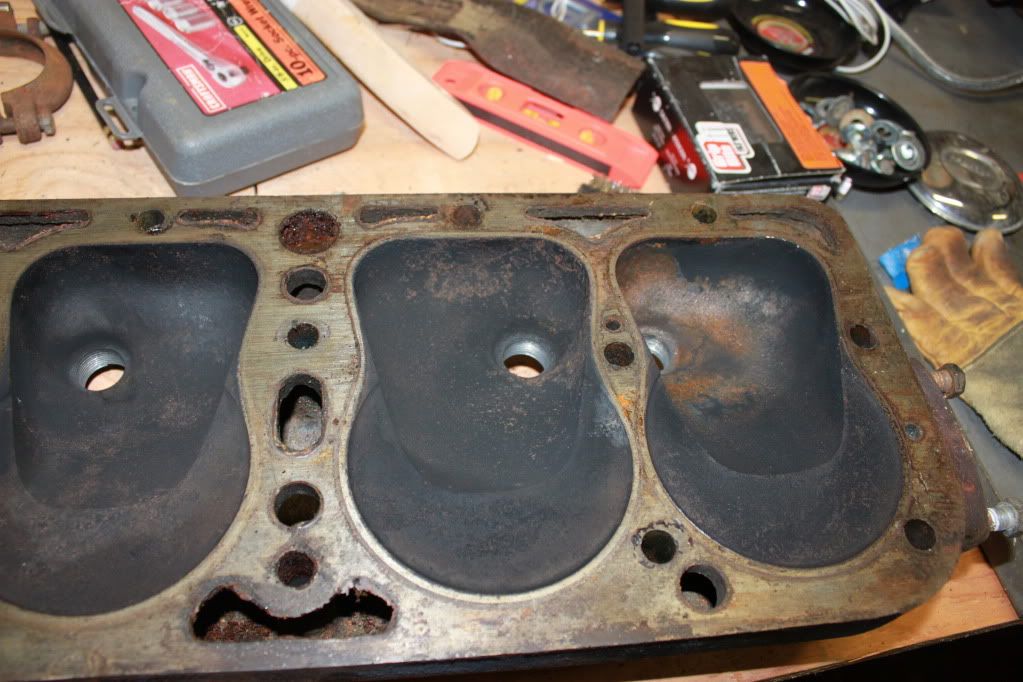
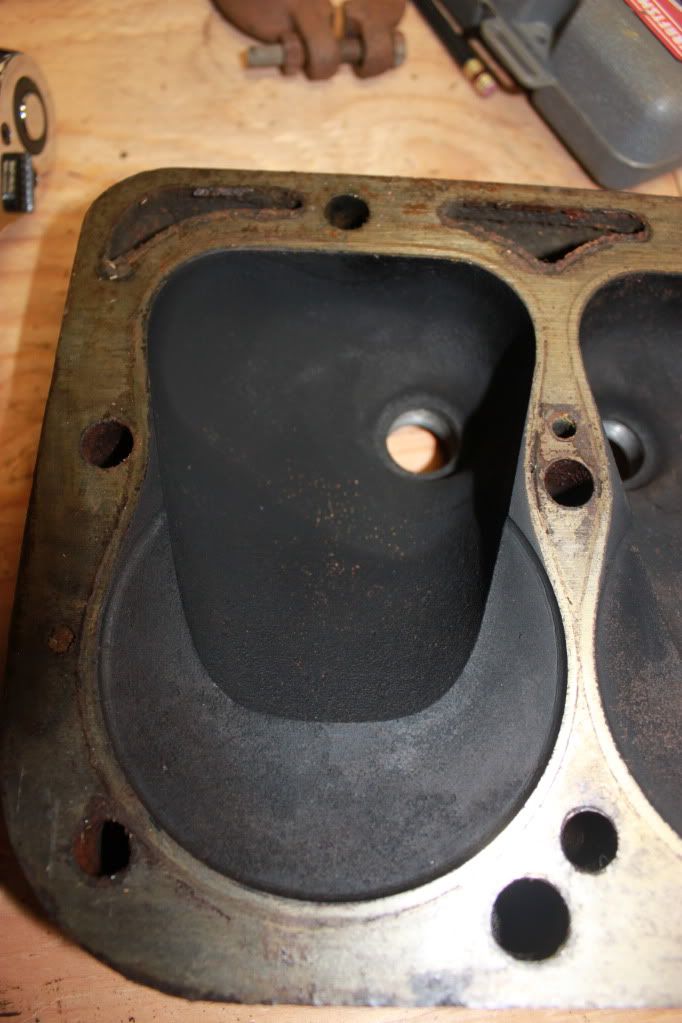
I am planning on washing out the valve chamber. I just planned on washing it down with a solvent of some sort and draining it through the hole where the distributor shaft was. I see the syphon sprayer is like what they use at a dentist's office, only heavier duty and for solvents?
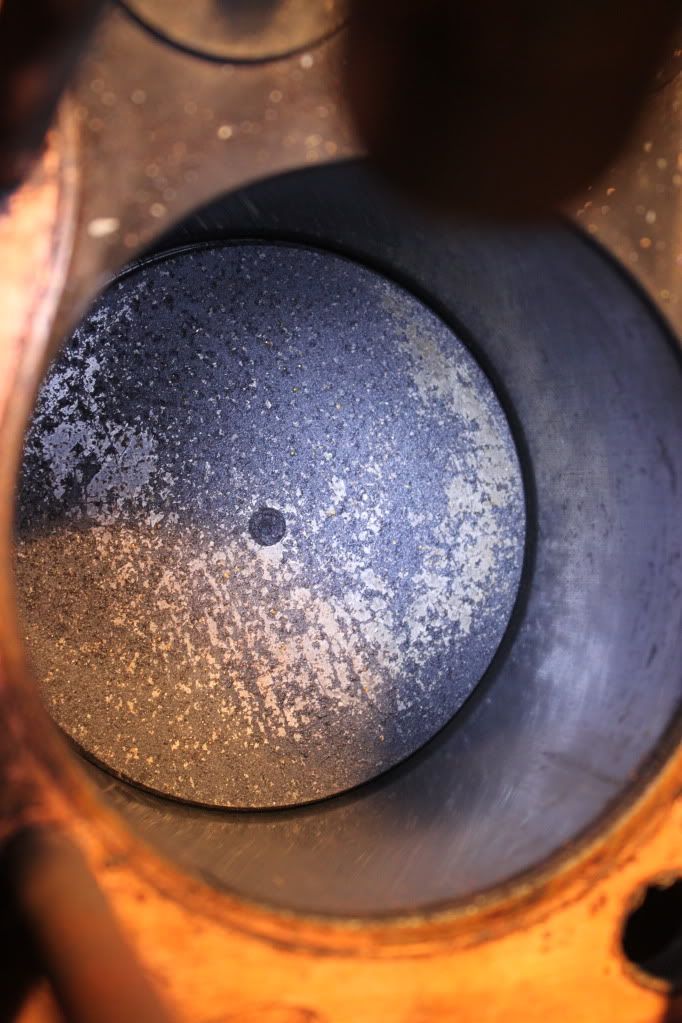
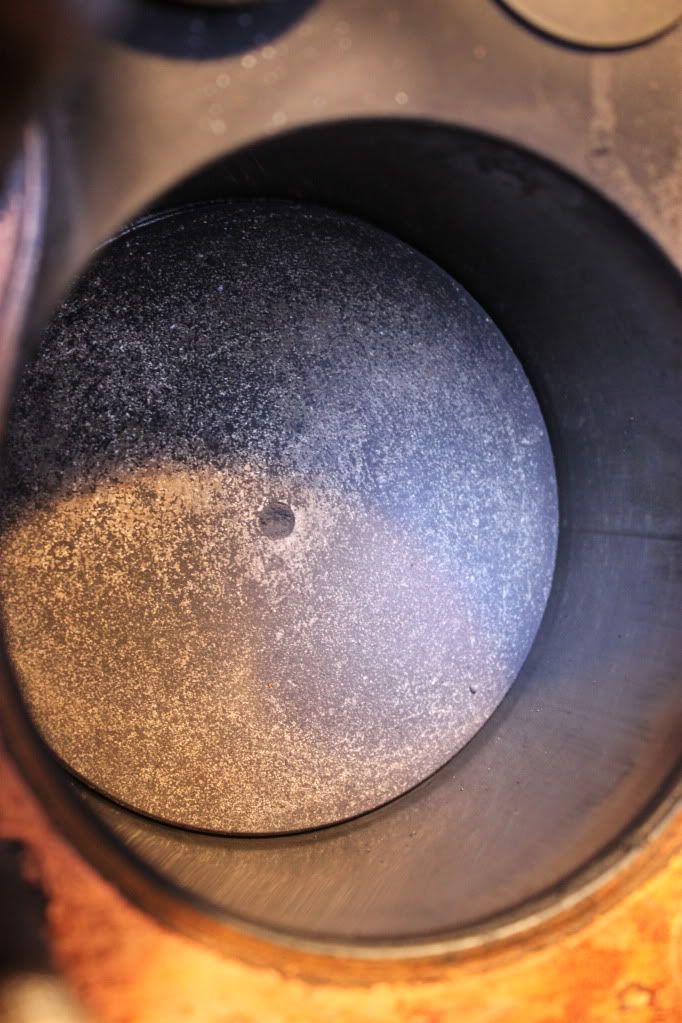
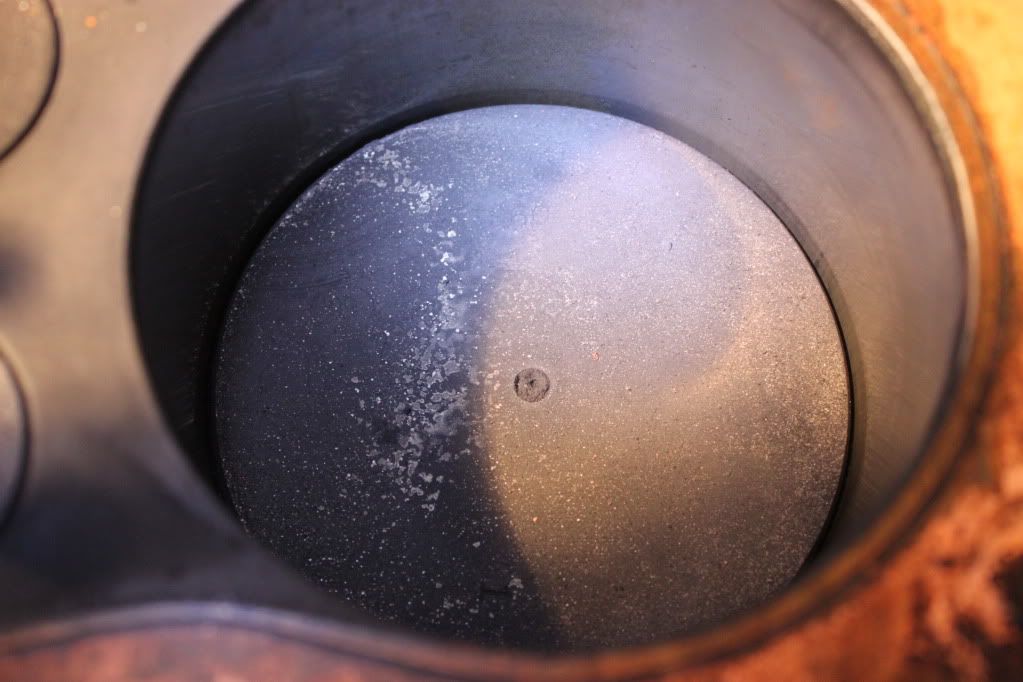
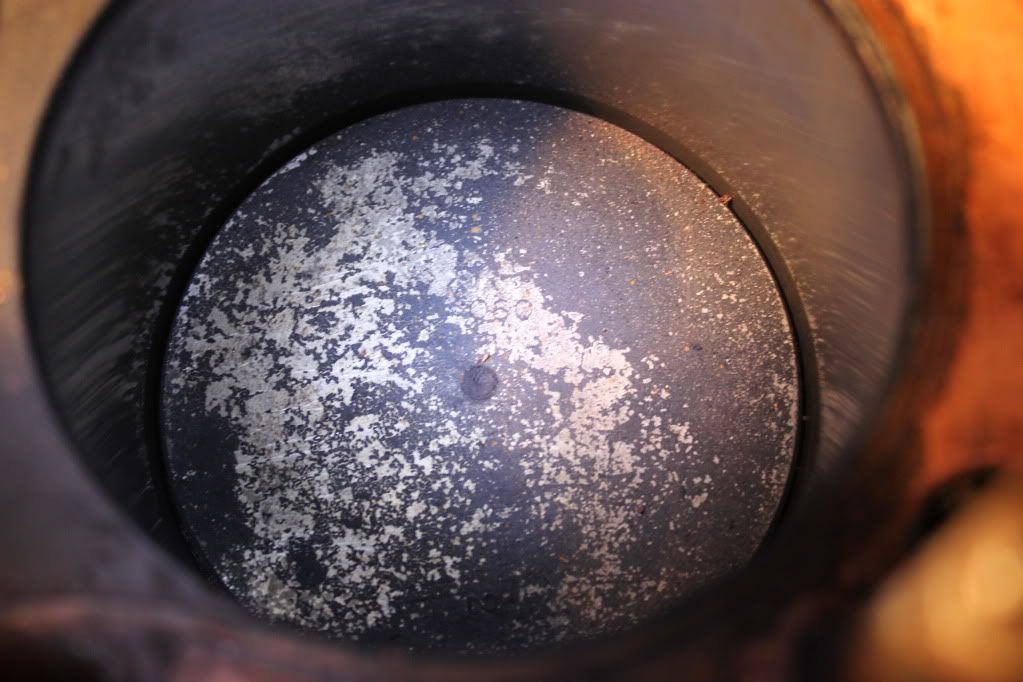
Before I go and try to rip the oil pan apart, does the part that has the dimples for oil "pop" out or is there some other way I need to remove it? I would like to clean the inside and get it empty of the sludge. Here are some photos... 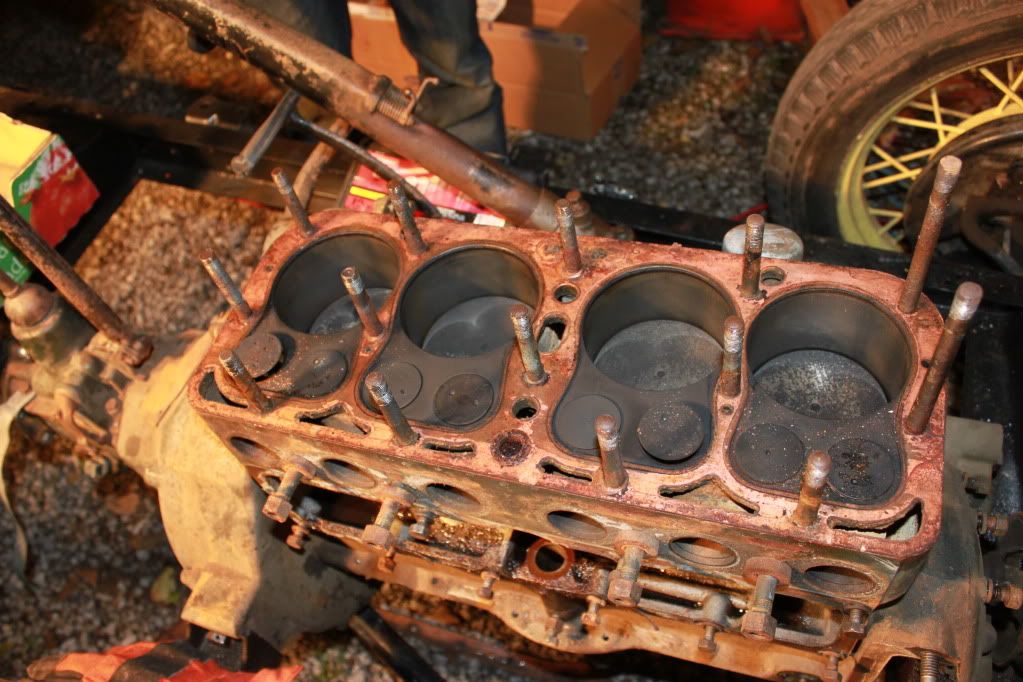 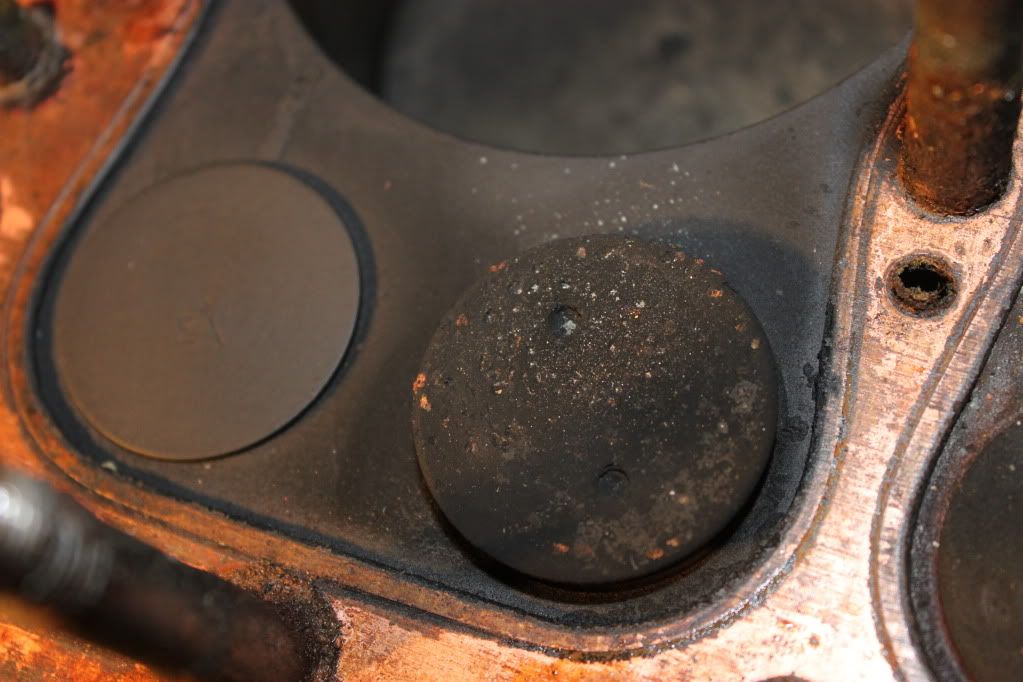 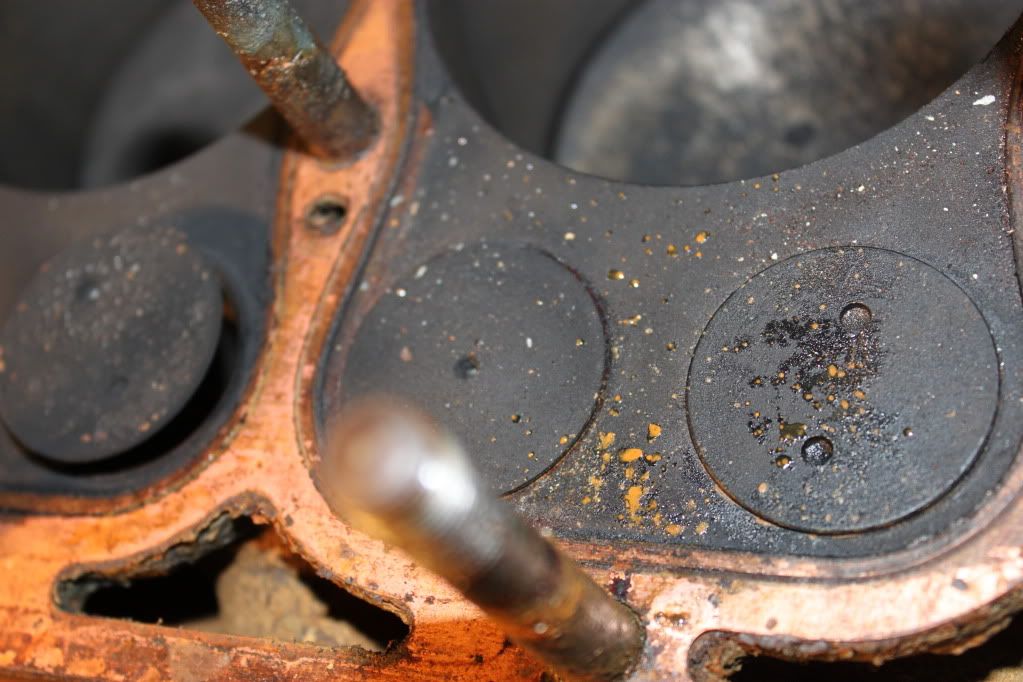 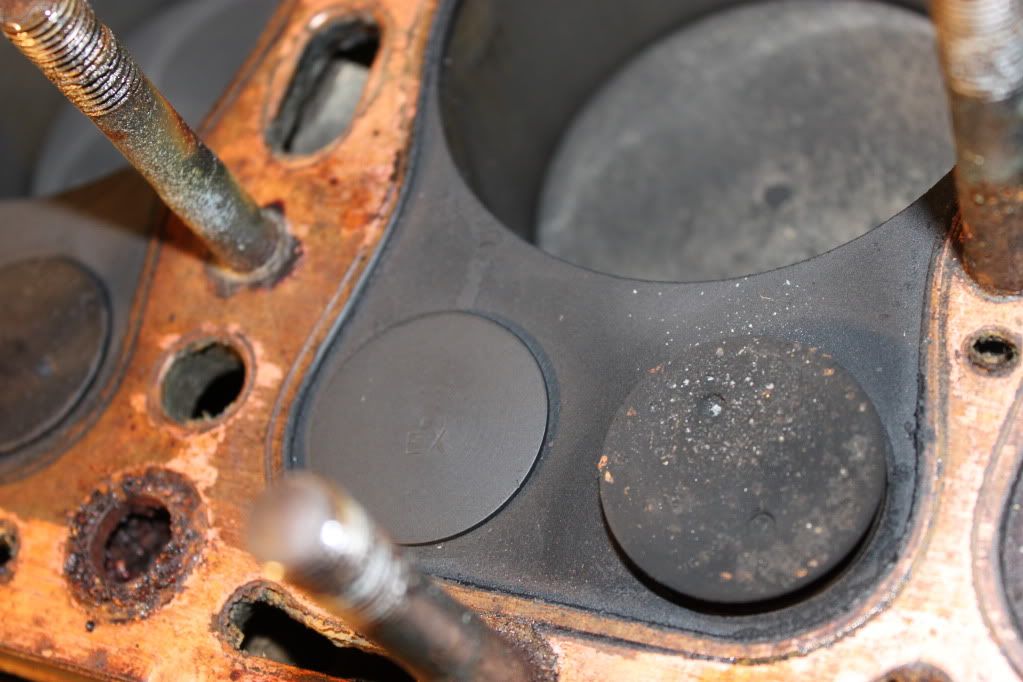 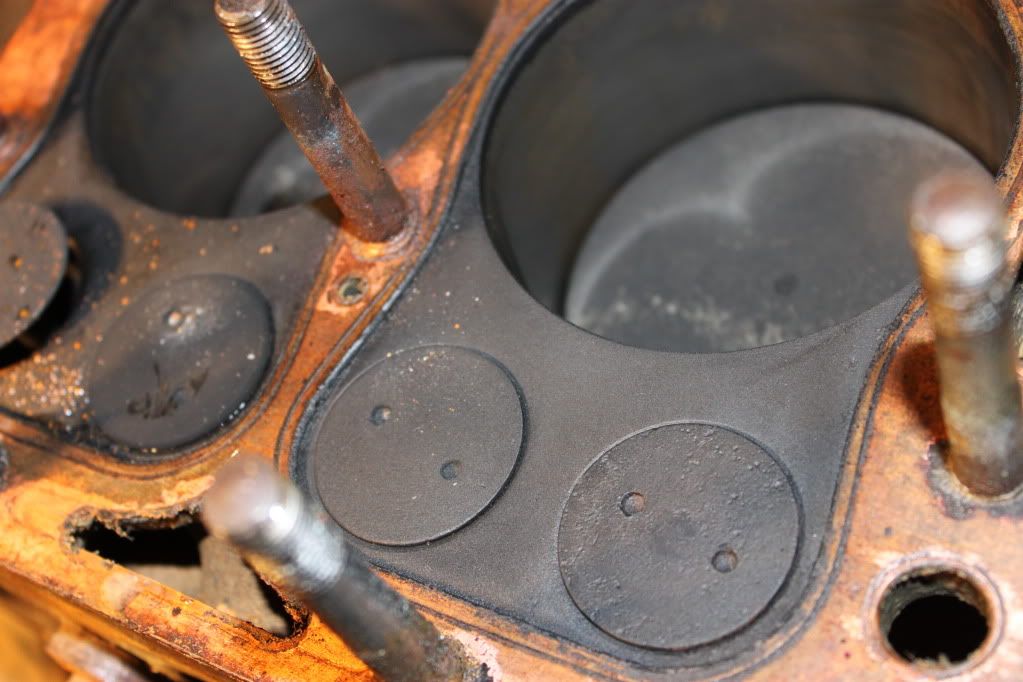 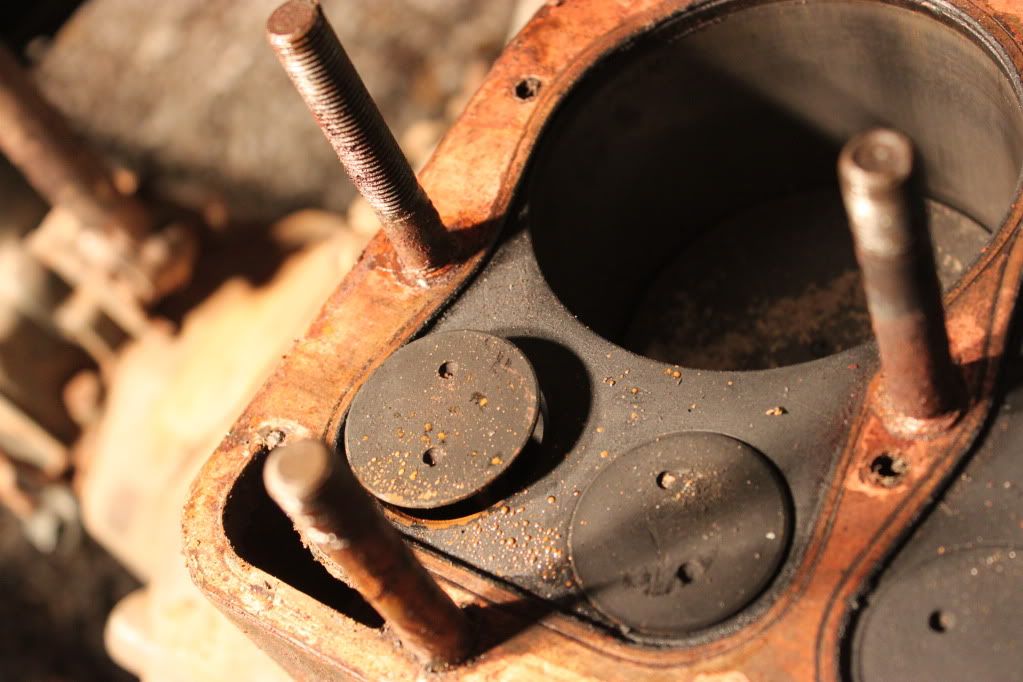 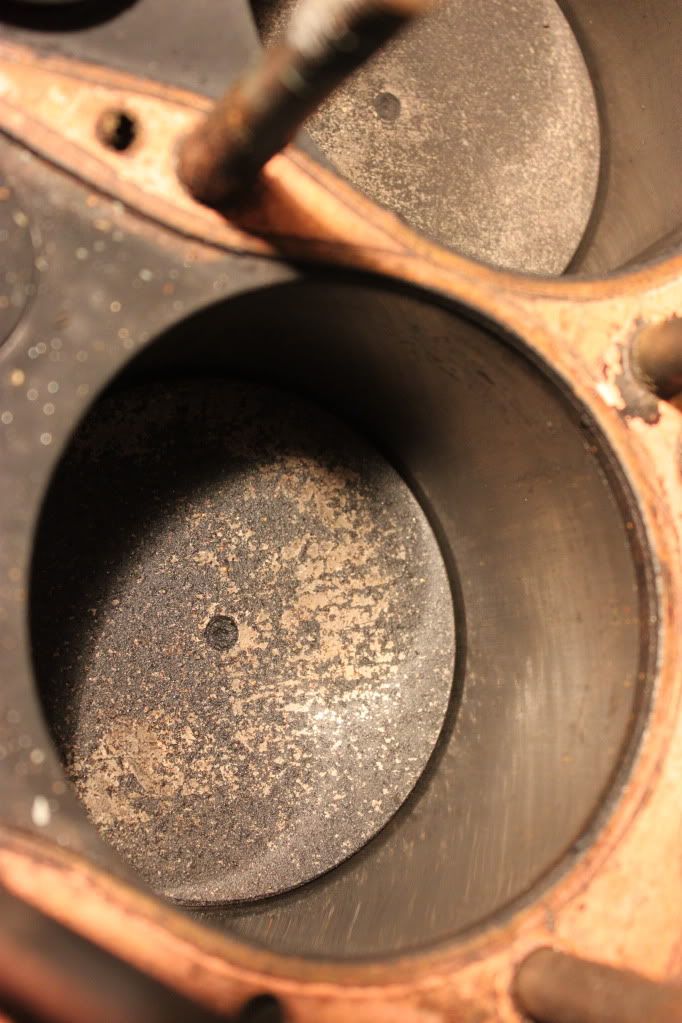 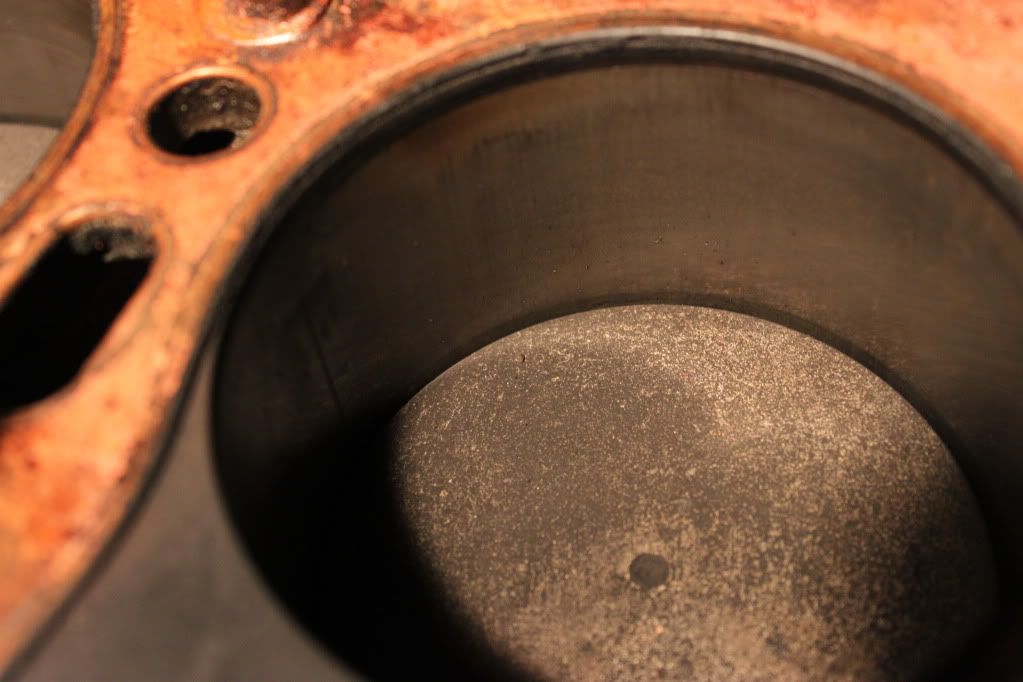 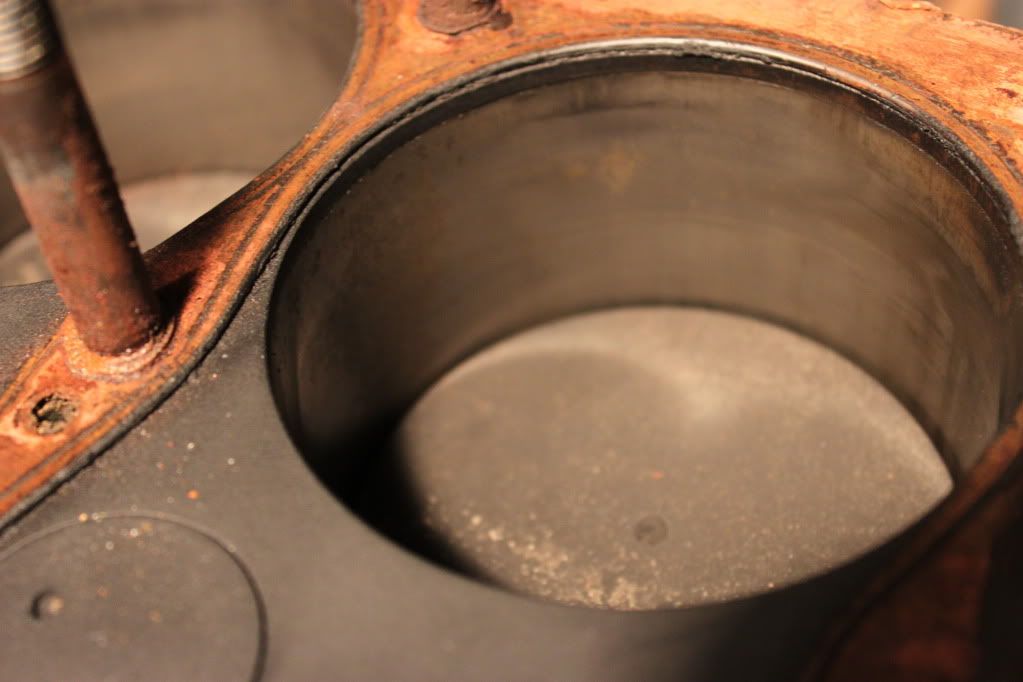
Last edited by Model A Fan; 11-14-2011 at 02:24 PM. |
|
|
|
|
11-14-2011, 02:18 PM
|
#88 |
|
Senior Member
Join Date: May 2010
Location: Bellingham, Washington
Posts: 362
|
|
|
|
|
|
11-14-2011, 02:21 PM
|
#89 |
|
Senior Member
Join Date: May 2010
Location: Bellingham, Washington
Posts: 362
|
|
|
|
|
|
11-14-2011, 02:23 PM
|
#90 |
|
Senior Member
Join Date: May 2010
Location: Bellingham, Washington
Posts: 362
|
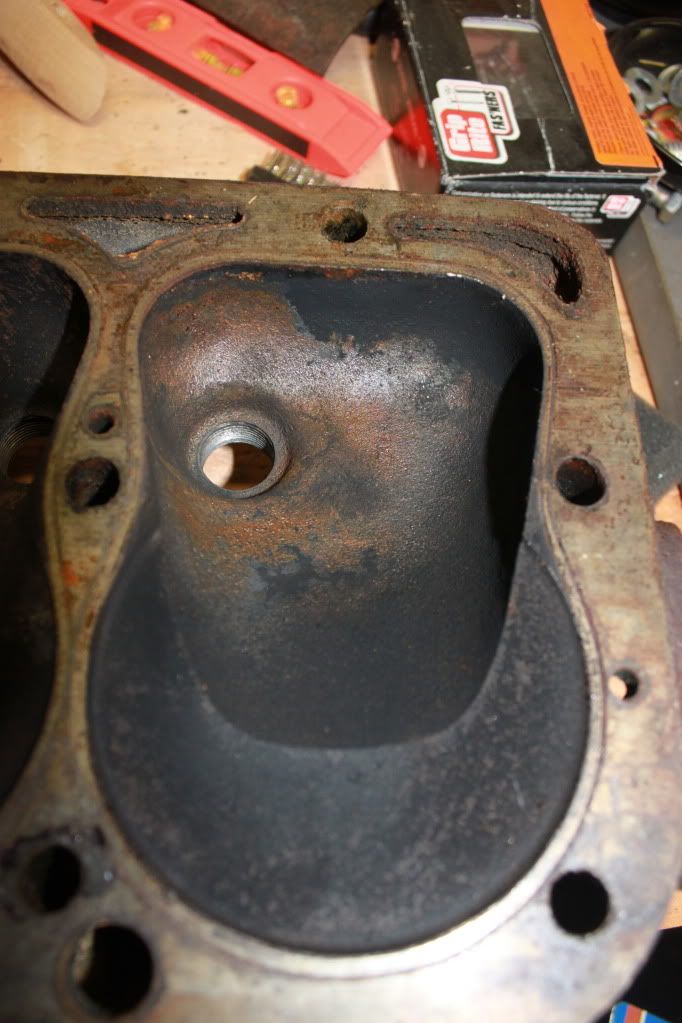
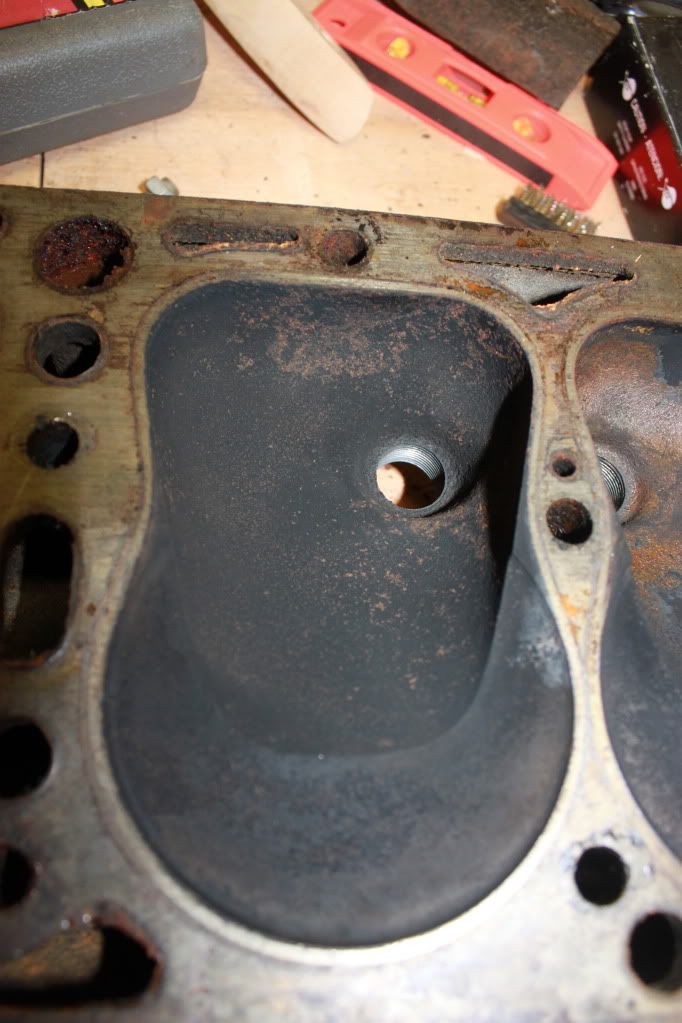
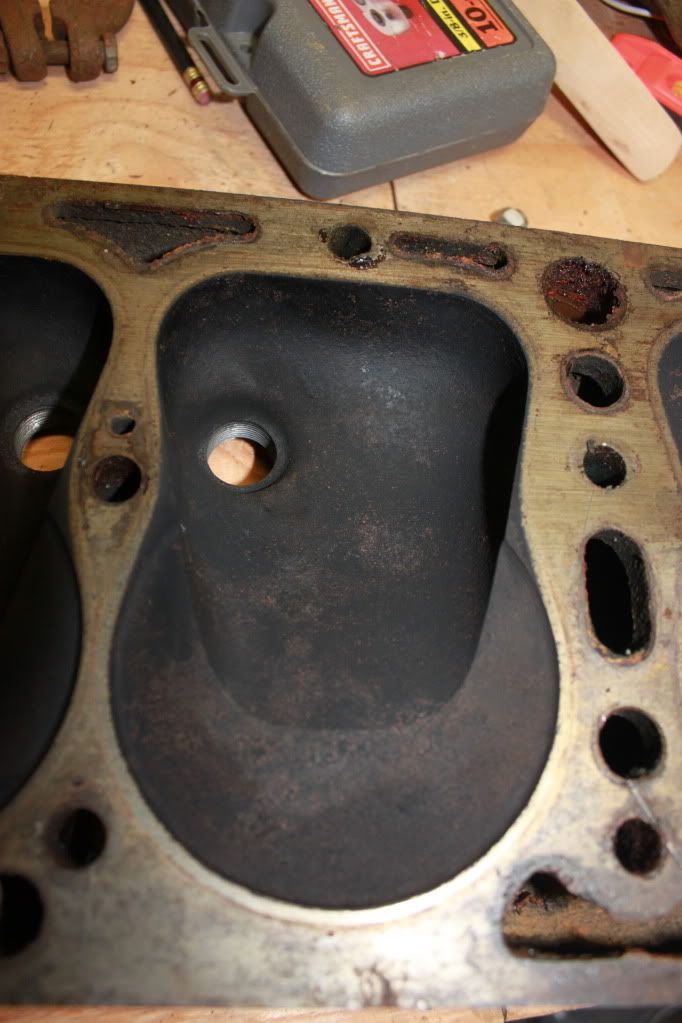
Cylinder 4
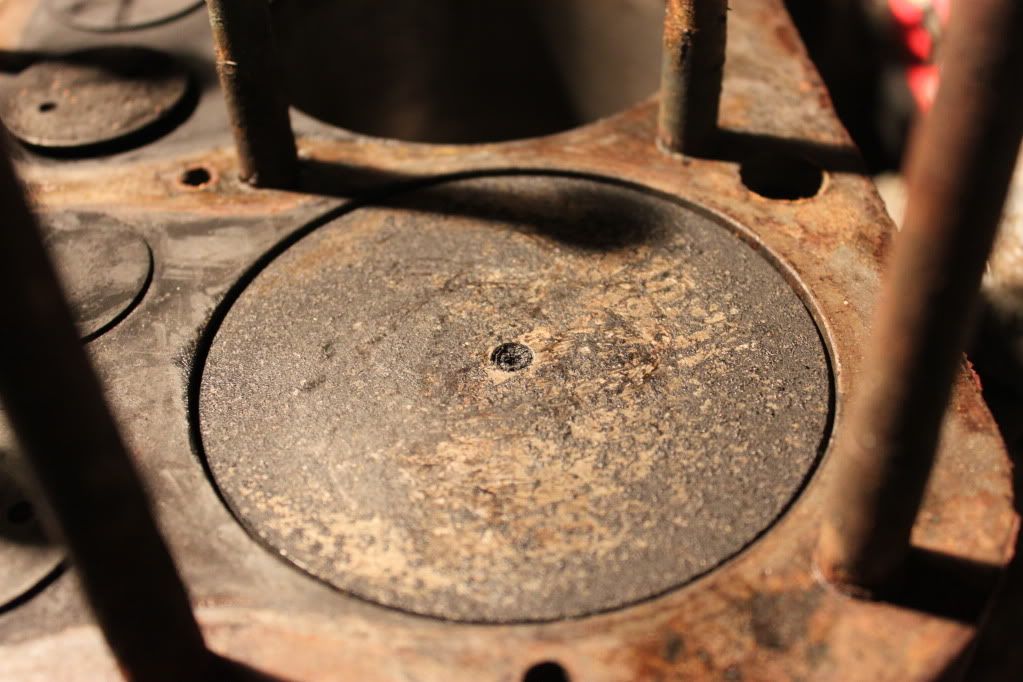 Cylinder 3 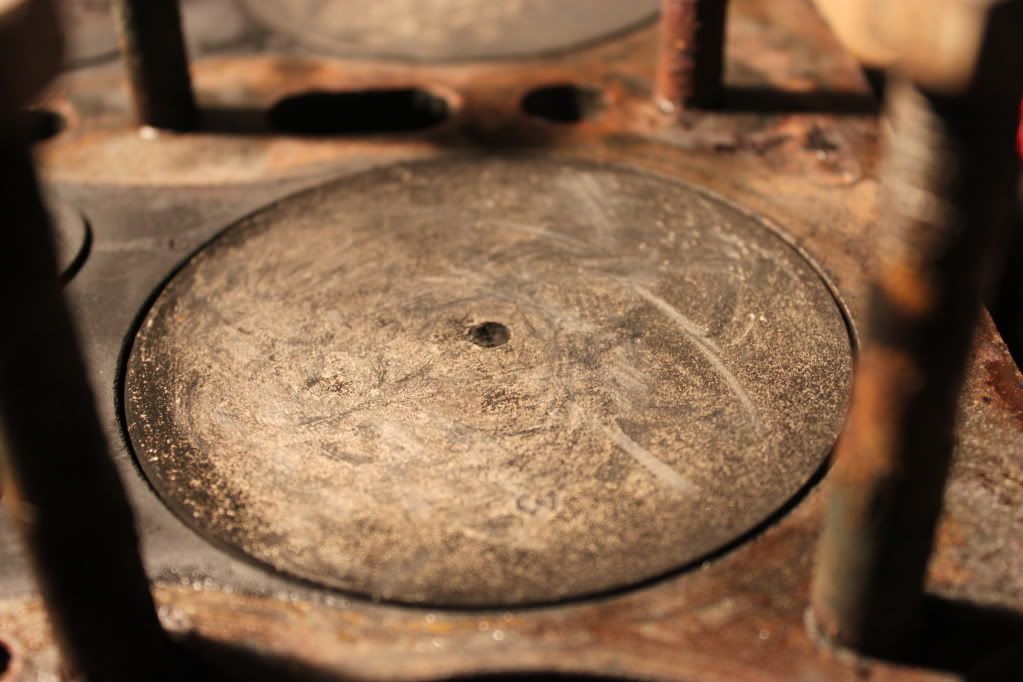 Cylinder 2 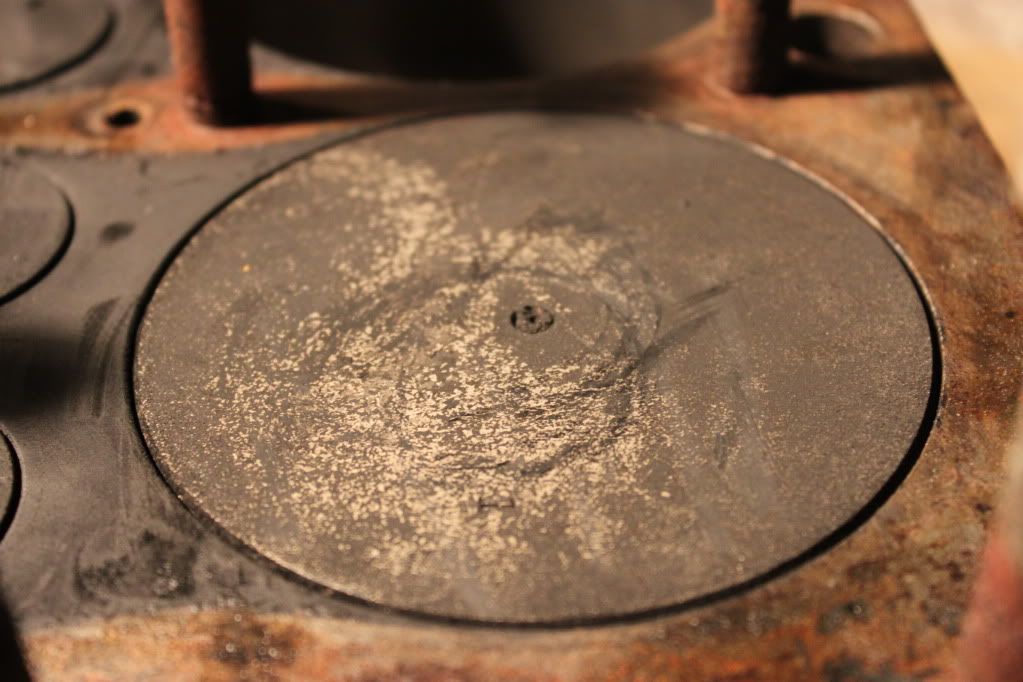 Cylinder 1 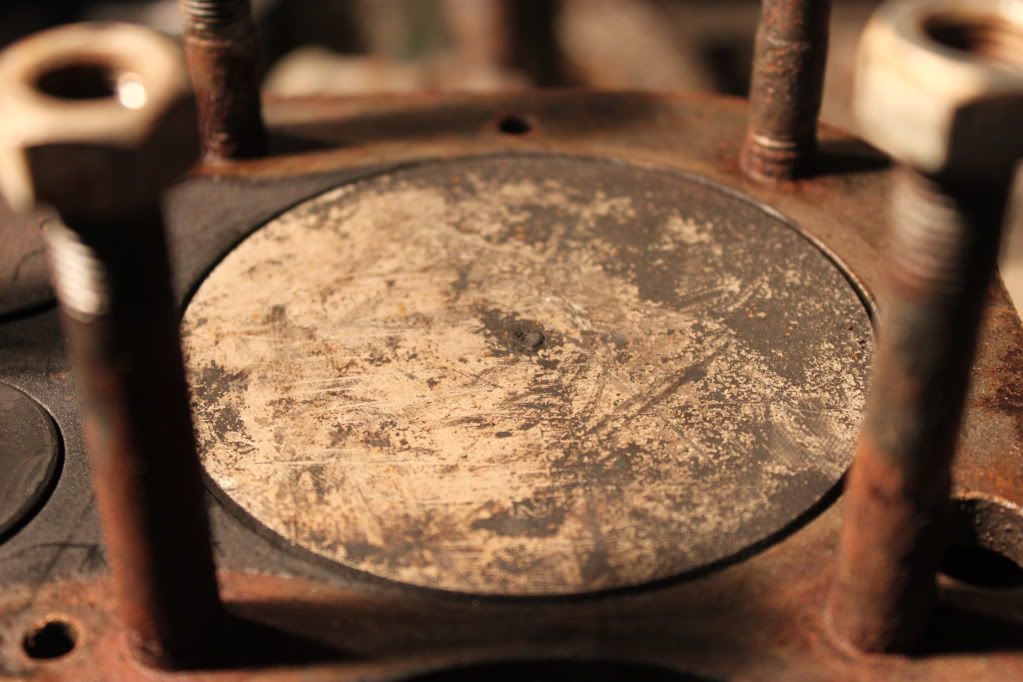 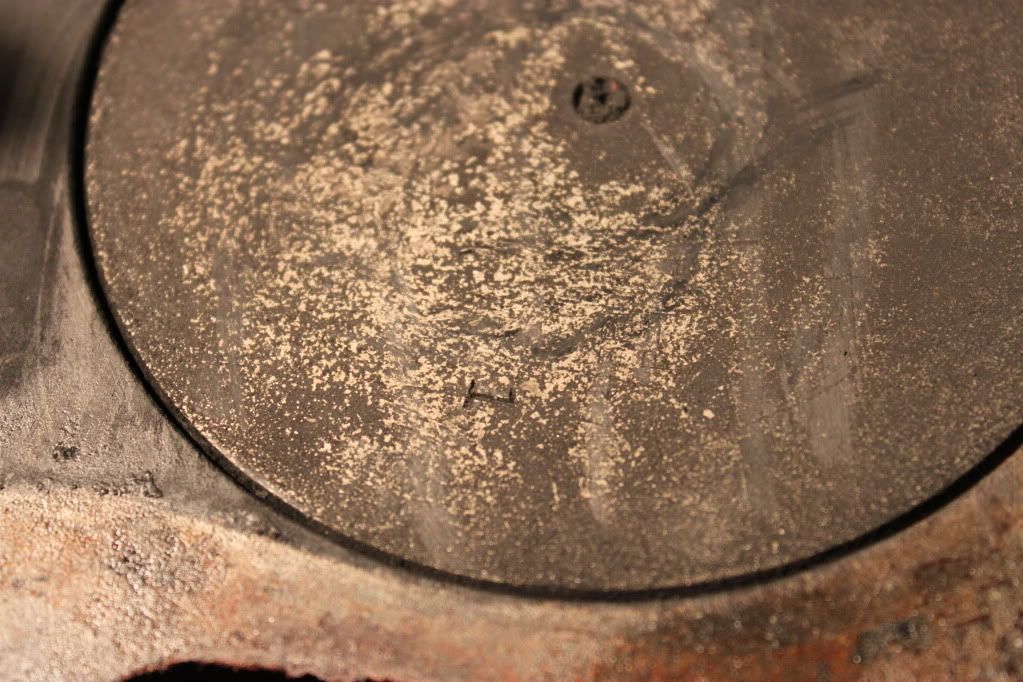 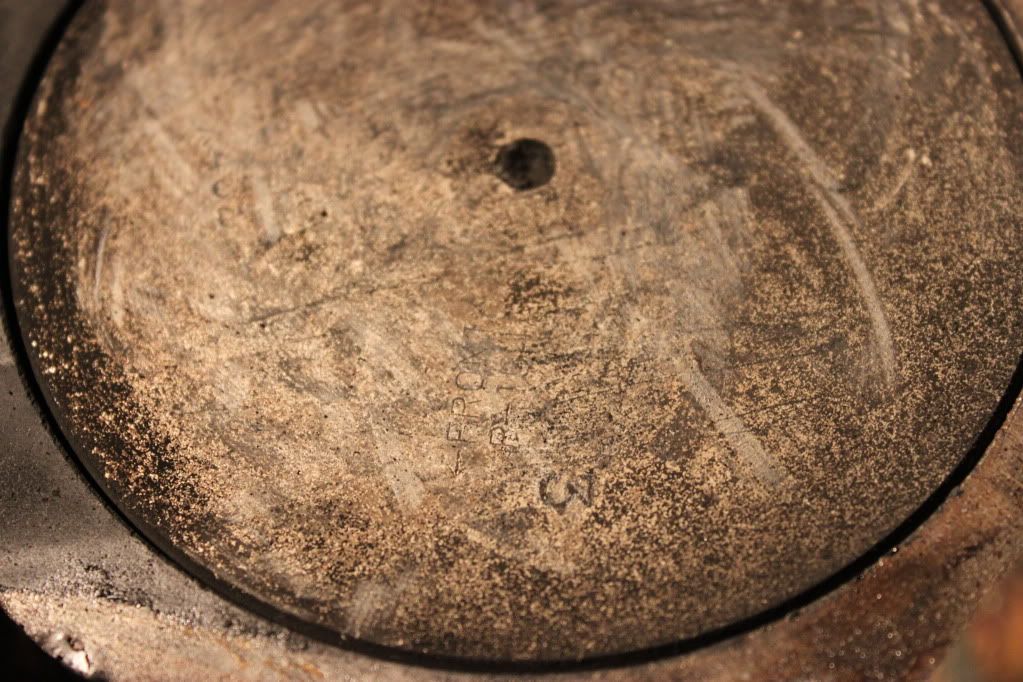 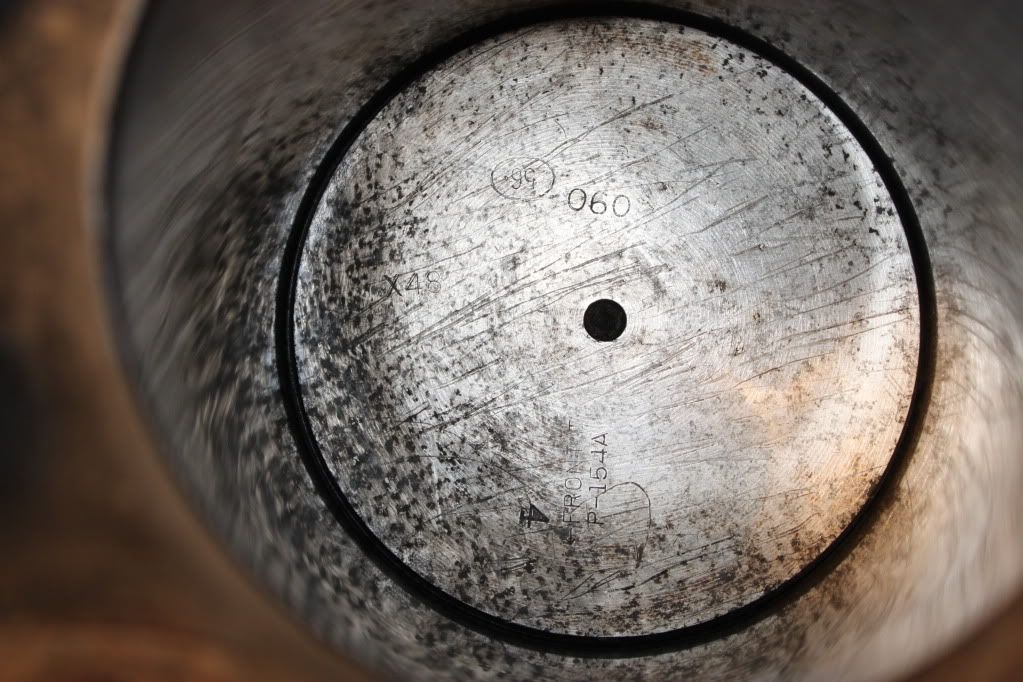 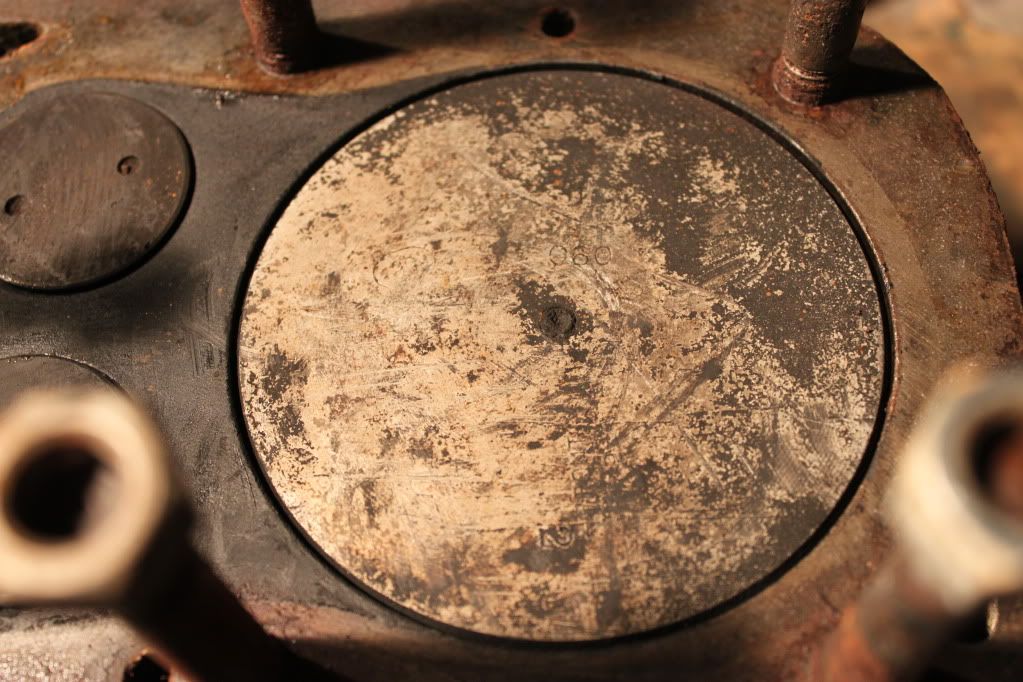 Grime in the oil pan: 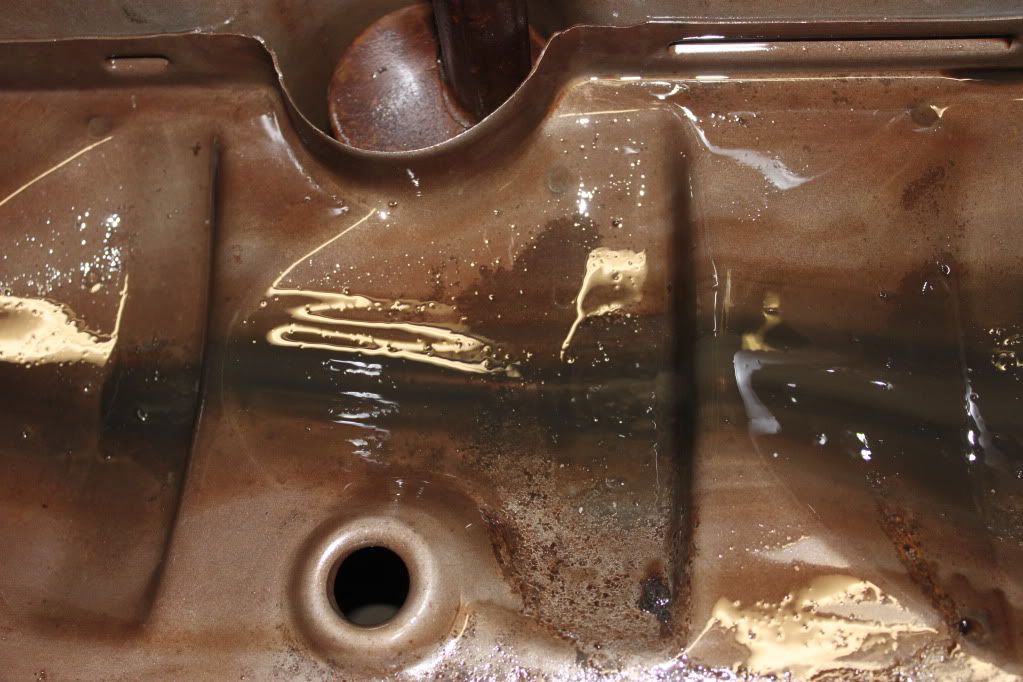 
|
|
|
|
|
11-14-2011, 03:28 PM
|
#91 |
|
Senior Member
Join Date: May 2010
Location: Iowa
Posts: 346
|
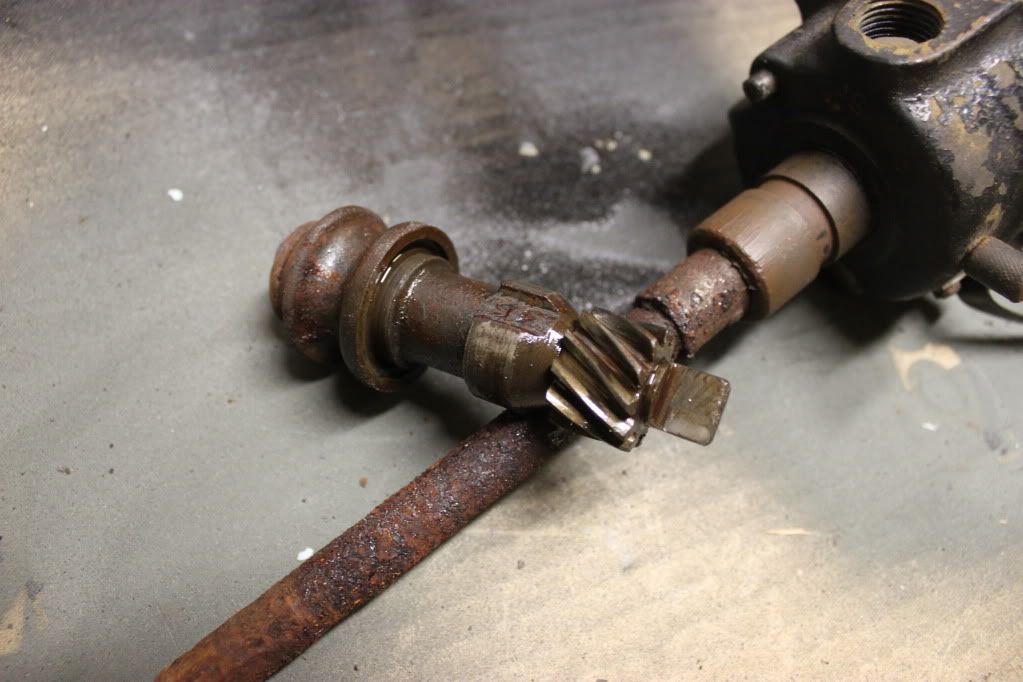
Your motor has been bored to .060 over. The distributor shaft looks like a one piece shaft and probably didn't help you get it out.
Take the oil pan and hold it upside down about waist high and drop it on the ground. The tray should pop out. |
|
|
|
|
11-14-2011, 04:29 PM
|
#92 | |
|
Senior Member
Join Date: May 2010
Location: Bellingham, Washington
Posts: 362
|
Quote:
I have heard that if I just pour solvent into the oil tray, I can just swirl it around and just dump it out after I've gotten it clean too. I don't want to damage it. Drop it onto...cement? Gravel? Grass? Cardboard? |
|
|
|
|

|
11-14-2011, 06:12 PM
|
#93 |
|
Senior Member
Join Date: May 2010
Location: new britain,ct 06052
Posts: 9,390
|
Grass.....
Paul in CT |
|
|
|
|
11-15-2011, 01:20 PM
|
#94 |
|
Senior Member
Join Date: May 2010
Location: Mpls, MN
Posts: 27,582
|
Drop or lightly throw the pan upside down onto grass as mentioned and the tray should pop out. Unless you have the engine upside down (head down in the engine stand) some grit can and will go down the main bearing oil feed tubes (not good). At this point I'd remove the pistons and crankshaft and give the block a thorough cleaning and check the pistons for wear and replace the rings. Check the babbit to see it it's OK. With the pistons in the block you can look down the top edge and see the ring gap on the top compression ring.
I don't know how much you plan to spend, or what your goals are for the engine, but at this point a honing, new rings, and thorough cleaning are in order, at the very least. |
|
|
|
|
11-15-2011, 05:00 PM
|
#95 | |
|
Senior Member
Join Date: May 2010
Location: Bellingham, Washington
Posts: 362
|
Quote:
I did not anticipate having to break my entire engine down to a block when I started as I did not want to get in over my head. Removing the crank and pistons isn't too big of a job, but one I would assume has to be done carefully. I'm just a little nervous about the complete disassembly of the engine. That's all...I assume it is relatively easy to put back together as long as I retain the pieces and put it back together in the order it came out. As far as the removal of the pistons and rings and crank-is there anything I need to be EXTRA careful of or is it just unbolt and go? Thanks. I don't want to mess this part up... 
|
|
|
|
|
|
11-15-2011, 05:11 PM
|
#96 |
|
Senior Member
Join Date: May 2010
Location: Stayton, Oregon
Posts: 3,806
|
I think if I remember correctly, Andrews has some stuff in his book about how to do this. Guess this is all the advise I can give in that I have never done this type of thing.
It would seem like you might want to decide how far you want to go with your engine. Cleaning it is well worth the effort to get all the junk out of it. But then it would seem like you would have to decide how much further you want to go. If you have no problem about taking the engine in and out of your car, then you maybe could put it back together and go for it and see how it runs. I assume the problem here might be that if you had tore it completely down, you could have solved some little things now that might be bigger ones later on. Tom's advise is very good above but guess you need to decide which way you may want to go from here. Good luck and keep up the good work.
__________________
Fred Kroon 1929 Std Coupe 1929 Huckster |
|
|
|
|
11-15-2011, 07:07 PM
|
#97 |
|
Senior Member
Join Date: May 2010
Location: Mpls, MN
Posts: 27,582
|
Mark each rod and cap so you keep them together and in the same hole they came out of. It's common to mark the rods and caps on the side that faces the cam by using a center punch and making dots, one dot for number one rod, etc.
Pay attention to clearances and cleanliness. |
|
|
|
|
11-15-2011, 09:10 PM
|
#98 |
|
Senior Member

Join Date: Jun 2011
Location: Dallas, Texas
Posts: 109
 |
Make sure not to knick the journals of the crank shaft in any way. If you want to be safe you can put tape around the rod bolts. Get some plastigauge to check the clearance of the rods and mains. When you put it all back together make sure all of the pistons are facing the direction they were when they came out and all the caps (rods and mains) are facing the same directions they were when they came out. I personally wouldn't of done this alone my first time. I think someone talked about getting in a local club and asking for some help. Especially if this is your first engine tear down.
|
|
|
|
|
11-15-2011, 10:24 PM
|
#99 |
|
Senior Member
Join Date: May 2010
Location: Stayton, Oregon
Posts: 3,806
|
Here is a distributor being sold on EBay. Don't know the condition but if price is right it may do.
http://www.ebay.com/itm/MODEL-FORD-D...sories&vxp=mtr
__________________
Fred Kroon 1929 Std Coupe 1929 Huckster |
|
|
|
|
11-15-2011, 11:03 PM
|
#100 |
|
Senior Member

Join Date: Nov 2010
Location: Argentina
Posts: 710
|
First would have take apart all the parts involved in the engine and clean to remove the rust from all parts in general...
The cylinder walls seem to have little wear, and the cylinder head surface is well, it seems, but take a look in the cooling ducts for some rust... Make a cleaning by a qualified professional with molasses to clean the block cooling ducts... Honing the cylinder walls to accept new rings, grinding the valves, set the crankshaft and connecting rods... Engine rebuild Items from Bentley's Complete disassembly and documentation Removal of all studs, rethreading of bolt holes Cooling passages sandblasted Engine parts professionally cleaned Magna fluxed and checked for cracks Head and block resurfaced Crankshaft ground and polished Cylinders bored and honed Cylinders Sleeved if needed New pistons and rings Rebuilt Connecting Rods Piston pins fitted. Hardened Valve seats installed New Valve Guides installed New Stainless Steel Valves Adjustable Tappets New valve springs and retainers Reground Cam New timing gear Flywheel resurfaced New flywheel ring gear installed Rebuilt pressure plate installed. New Clutch plate New pilot bearing Complete rotating assembly balanced New 4X Nickel Babbitt poured in block Crankshaft fitted to .0015” Rebuilt Oil pump Premium Gaskets used throughout New External Nuts and Bolts New Crankshaft pulley and ratchet nut Complete assembly and testing |
|
|
|
|
«
Previous Thread
|
Next Thread
»
 Linear Mode

|
|

| Sponsored Links (Register now to hide all advertisements) |
|
|
All times are GMT -5. The time now is 07:44 AM.