|
|||||||


| Sponsored Links (Register now to hide all advertisements) |
|
|
 |

|
Thread Tools | Display Modes |
 08-02-2011, 12:36 PM
|
#1 |
|
Senior Member

Join Date: Jul 2010
Location: Queen Creek AZ
Posts: 519
|
Now that I have my 1932 Hot Rod Lincoln done it is time for my next project. Here are a few pictures of this project. I will be installing a 1953 Ford Flathead with a pair of Mercury heads a 1952 Mercury transmission 3 speed with 16 x 4 smoothies wheels in front and rear. Also pictures of the engine.
Frenchy Last edited by frenchy dehoux; 04-24-2013 at 10:13 AM. |

|

|
|
08-02-2011, 01:59 PM
|
#2 |
|
Senior Member

Join Date: Jul 2010
Location: Palm City FL>
Posts: 556
|
Nice project, is that a driver side 28 29 roadster door? I wonder if it is surplus to your project. I need one real bad for my flatty powered 29 roadster project. PM me if it is for sale. thanks Rich.
|
|
|
|
| Sponsored Links (Register now to hide all advertisements) |
|
|
|
08-02-2011, 02:45 PM
|
#3 |
|
Senior Member
Join Date: Jul 2010
Location: Queen Creek AZ
Posts: 519
|
Rich
Let me look and see if I have other ones in my container storage. Frenchy |
|
|
|
|
08-02-2011, 03:14 PM
|
#4 |
|
Senior Member

Join Date: May 2010
Location: Odessa, FL
Posts: 7,611
|
Frenchy, lookin good but, no V-12...?
 Vic Vic
__________________
Imagination is more important than knowledge. |
|
|
|
|
08-02-2011, 05:21 PM
|
#5 |
|
Senior Member
Join Date: Jul 2010
Location: Queen Creek AZ
Posts: 519
|
Actually I do have another V12 and was thinking of putting one in but I figured a Flathead V 8 would be cool. I will post pictures as I get into this project.
Frenchy |
|
|
|
|
08-02-2011, 07:36 PM
|
#6 | |
|
Senior Member
Join Date: May 2010
Location: Odessa, FL
Posts: 7,611
|
Sponsored Links (Register now to hide all advertisements)
Quote:
__________________
Imagination is more important than knowledge. |
|
|
|
|

|
08-02-2011, 08:17 PM
|
#7 |
|
Member

Join Date: Jun 2011
Location: Bountiful, UT
Posts: 66
|
Very cool project. I'm working on a 28/29 Roadster Pickup with a 39 toploader and a 53 EAC Merc flathead. I wish you luck.
JMKnight, Bountiful, UT Last edited by JMKnight; 08-02-2011 at 10:31 PM. |
|
|
|
|
08-03-2011, 12:28 AM
|
#8 |
|
Senior Member

Join Date: Oct 2010
Location: North Pole, Alaska
Posts: 1,470
|
The grille shell looks like a 28/9, but the cowl is definitely not 28., maybe narrowed 30-31?
|
|
|
|
|
08-03-2011, 04:48 AM
|
#9 | |
|
Member
Join Date: Feb 2011
Location: Invercargill, New Zealand
Posts: 93
|
Quote:
|
|
|
|
|
|
08-03-2011, 05:56 AM
|
#10 |
|
Senior Member

Join Date: Jul 2011
Location: Montgomery,Texas
Posts: 115
|
Looks like a good project and a V-12 would be outstanding.
|
|
|
|
|
08-03-2011, 08:08 AM
|
#11 |
|
Senior Member

Join Date: May 2010
Location: Chester Vt
Posts: 8,862
|
I can just imagine a V12 with an L-100 cam. Warms the cockles of my heart.
|
|
|
|
|
08-03-2011, 09:31 AM
|
#12 |
|
Senior Member
Join Date: Jul 2010
Location: Palm City FL>
Posts: 556
|
How about a custom fabricated intake with six strombergs, maybe just two or three that really work. Rich
|
|
|
|
|
08-03-2011, 01:58 PM
|
#13 |
|
Senior Member
Join Date: Jul 2010
Location: Queen Creek AZ
Posts: 519
|
This is the engine in my 32. I think a V8 in this one will be easier and much cheaper to build.
Frenchy |
|
|
|
|
08-03-2011, 10:02 PM
|
#14 |
|
Senior Member
Join Date: Oct 2010
Location: North Pole, Alaska
Posts: 1,470
|
That's sweet!
|
|
|
|
|
08-03-2011, 10:30 PM
|
#15 |
|
Senior Member

Join Date: May 2010
Location: Napier, New Zealand
Posts: 2,001
|
So cool!
|
|
|
|
|
08-11-2011, 12:04 PM
|
#16 |
|
Senior Member
Join Date: Jul 2010
Location: Queen Creek AZ
Posts: 519
|
Here are pictures of the transmission I will be using. It is from a 1952 Ford and I recently found an early Hurst shifter to adapt for this project.
Frenchy Last edited by frenchy dehoux; 09-21-2012 at 12:54 AM. |
|
|
|
|
08-11-2011, 01:23 PM
|
#17 |
|
Senior Member

Join Date: May 2010
Location: Williamsburg, Virginia
Posts: 2,654
|
Looking like a really cool project!
|
|
|
|
|
08-11-2011, 01:31 PM
|
#18 |
|
Senior Member
Join Date: Jul 2010
Location: Queen Creek AZ
Posts: 519
|
Here are a few pictures of my recent find a Hurst shifter a friend had this on his shelves and was kind to sell it to me.
Thanks Frenchy Last edited by frenchy dehoux; 08-11-2011 at 05:17 PM. |
|
|
|
|
06-10-2012, 08:26 PM
|
#19 |
|
Senior Member
Join Date: Jul 2010
Location: Queen Creek AZ
Posts: 519
|
It has been a while since I posted on this side of the forum. I have made some progress on this project slowly but shurely. Pictures are showing where I had to shorten the floor board due to the fact that this body was narrowed and shortened as well. Also this past weekend I was able to do more work I had located a pillar post from a 1929 Briggs which I had to slice in half so that one piece would be use for the left side and the other for the right side and would be welded to the rear quarter panel. Both rear quarter panels were made out of the two rear doors and both were shortened down to 12 inches in width. As you can see from these pictures.
Thanks Frenchy |
|
|
|
|
06-10-2012, 08:29 PM
|
#20 |
|
Senior Member
Join Date: Jul 2010
Location: Queen Creek AZ
Posts: 519
|
Here a few more showing progress.
Frenchy |
|
|
|
|
06-10-2012, 08:33 PM
|
#21 |
|
Senior Member
Join Date: Jul 2010
Location: Queen Creek AZ
Posts: 519
|
And a few more pictures now showing making the rear quarter panels out of the two rear doors and were shortened down to 12 inches in width and the pillar post cut to be use on both sides.
Frenchy |
|
|
|
|
06-10-2012, 10:11 PM
|
#22 |
|
Senior Member

Join Date: May 2010
Location: Sf bay area
Posts: 1,464
|
very nice project was the windshield frame custom made or bought that way? thanks gump
|
|
|
|
| Sponsored Links (Register now to hide all advertisements) |
|
|
|
06-10-2012, 11:26 PM
|
#23 |
|
Senior Member
Join Date: Jul 2010
Location: Queen Creek AZ
Posts: 519
|
I bought this project with this windshield I have always like the look of them.
Frenchy |
|
|
|
|
06-10-2012, 11:35 PM
|
#24 | |
|
Senior Member
Join Date: May 2010
Location: Napier, New Zealand
Posts: 2,001
|
Quote:
|
|
|
|
|
|
07-05-2012, 03:32 PM
|
#25 |
|
Senior Member
Join Date: Jul 2010
Location: Queen Creek AZ
Posts: 519
|
Here are a few pictures of the progress on my project.
Thanks Frenchy |
|
|
|
|
07-05-2012, 03:37 PM
|
#26 |
|
Senior Member
Join Date: Jul 2010
Location: Queen Creek AZ
Posts: 519
|
Sponsored Links (Register now to hide all advertisements)
Thanks Frenchy |
|
|
|
|
07-06-2012, 01:12 PM
|
#27 |
|
Senior Member
Join Date: Jul 2010
Location: Queen Creek AZ
Posts: 519
|
A few more pictures of the passenger door. I will have some type of bead roll done.
Frenchy |
|
|
|
|
07-06-2012, 01:49 PM
|
#28 |
|
Senior Member
Join Date: May 2010
Location: Chester Vt
Posts: 8,862
|
Two things to add here one: it's quite simple to adapt a Toyota 5 speed to a Ford steel bell housing, I just finished one. Second I just heard of a fellow thats putting two V8 60's to gether to form a V16. nOT SURE WHAT IT'S GOING IN.
|
|
|
|
|
07-06-2012, 03:51 PM
|
#29 |
|
Senior Member
Join Date: Jul 2010
Location: Queen Creek AZ
Posts: 519
|
Ron thanks for the heads up. Do you know which Toyota model had the 5 speed you mentioned. Do you have pictures of the modification you made you could post.
Thanks Frenchy |
|
|
|
|
07-06-2012, 06:08 PM
|
#30 |
|
Senior Member

Join Date: May 2010
Location: Kokomo, Indiana
Posts: 1,731
|
Frenchy - Your body work skills are pretty impressive! Neat project.
|
|
|
|
|
07-06-2012, 07:35 PM
|
#31 | |
|
Senior Member
Join Date: Jul 2010
Location: Queen Creek AZ
Posts: 519
|
Quote:
Frenchy |
|
|
|
|
|
07-06-2012, 07:52 PM
|
#32 |
|
Senior Member
Join Date: May 2010
Location: Chester Vt
Posts: 8,862
|
I think it's a W-55 or W-56, I'm doing the machine work for someone else so I'm not firmiliar with Toyota transmissions. Yes I have some pics of the mods and will post them. Waiting for the bell housing to come back from the sand blasters.
|
|
|
|
|
07-06-2012, 09:01 PM
|
#33 | |
|
Senior Member
Join Date: Jul 2010
Location: Queen Creek AZ
Posts: 519
|
Quote:
I appreciate you helping me with this just curious to see how it is set up. Frenchy |
|
|
|
|
|
07-06-2012, 09:32 PM
|
#34 | |
|
Senior Member

Join Date: May 2010
Location: Gardiner Me.
Posts: 4,200
|
Quote:
|
|
|
|
|
|
07-06-2012, 10:08 PM
|
#35 |
|
Senior Member
Join Date: May 2010
Location: Chester Vt
Posts: 8,862
|
This happened to my friend George back a few years ago.
|
|
|
|
|
07-07-2012, 03:05 AM
|
#36 | |
|
Senior Member
Join Date: Jul 2010
Location: Queen Creek AZ
Posts: 519
|
Quote:
Walt Thanks I found a pair of Mercury heads and I am having them magnuflux to make sure they are OK to use the ones in the pictures are Ford I am not going to use them unless the other heads have an issue. Frenchy |
|
|
|
|
|
07-07-2012, 07:14 AM
|
#37 | |
|
Senior Member
Join Date: May 2010
Location: Gardiner Me.
Posts: 4,200
|
Quote:
|
|
|
|
|
|
07-07-2012, 11:30 AM
|
#38 | |
|
Senior Member
Join Date: Jul 2010
Location: Queen Creek AZ
Posts: 519
|
Quote:
It is a 1953 Mercury motor after I did some research on it. Thanks Last edited by frenchy dehoux; 09-04-2012 at 08:11 PM. |
|
|
|
|
|
07-07-2012, 06:47 PM
|
#39 |
|
Senior Member
Join Date: May 2010
Location: Chester Vt
Posts: 8,862
|
The Merc heads are low compression similar to the 8RT. Not a good choice for a street engine
|
|
|
|
|
07-07-2012, 08:42 PM
|
#40 |
|
Senior Member
Join Date: Jul 2010
Location: Queen Creek AZ
Posts: 519
|
Ron
How about if I machine the heads to give it the same compression the EAB heads have what do you think. Thanks Frenchy |
|
|
|
|
07-08-2012, 09:52 AM
|
#41 |
|
Senior Member
Join Date: May 2010
Location: Chester Vt
Posts: 8,862
|
This might be possable if you want to redome the heads the transfer area determines the CR and this area is deaper in the Merc. and 8RT heads. You might try angle milling, However you'll start running into the thermostat housing after .050-060" Seems like allot of work. Just to reolace the EAB head. I also mill them to give .040-050" piston clearance. After you do all this you'll have to clearance for the valves especially if your running a high lift cam. Building an engine takes some thought.
|
|
|
|
|
07-08-2012, 11:43 AM
|
#42 | |
|
Senior Member
Join Date: Jul 2010
Location: Queen Creek AZ
Posts: 519
|
Quote:
I am installing a stock cam in this one. I will cc the chamber in the EAB heads and see how many cc I have and duplicate them in the Mercury heads. Thanks Frenchy Last edited by frenchy dehoux; 09-21-2012 at 01:00 AM. |
|
|
|
|
| Sponsored Links (Register now to hide all advertisements) |
|
|
|
07-08-2012, 11:55 AM
|
#43 |
|
Senior Member
Join Date: May 2010
Location: Kokomo, Indiana
Posts: 1,731
|
Frenchy - When you look at the Merc heads and compare them to the EAB's it'll become very obvious where the differences lie. The EAB combustion chambers are much smaller and therefore yields a higher Compression Ratio. Just a thought here . . . . .you might use your die grinder or an angle grinder to smooth up the exterior surface of the heads. Taking out the casting roughness and the cast on markings isn't difficult and you get two benefits. 1) the paint job looks better-i.e.smoother and shinier and 2) only you know for sure what type heads you have. Paint'em Merc. green and go for it. (I've just been through a debacle with milled EAB heads, Ross pistons and a decked block. Keep it as simple as you can). FWIW - Regards, Henry.
|
|
|
|
|
07-08-2012, 06:21 PM
|
#44 | |
|
Senior Member
Join Date: Jul 2010
Location: Queen Creek AZ
Posts: 519
|
Quote:
Frenchy |
|
|
|
|
|
07-30-2012, 12:44 PM
|
#45 | |
|
Senior Member
Join Date: Jul 2010
Location: Queen Creek AZ
Posts: 519
|
Quote:
I had the machine shop check the CC in these Mercury heads and we matched them to the Ford heads. Frenchy |
|
|
|
|
|
07-30-2012, 12:53 PM
|
#46 |
|
Senior Member
Join Date: Jul 2010
Location: Queen Creek AZ
Posts: 519
|
Sponsored Links (Register now to hide all advertisements)
Thanks Frenchy |
|
|
|
|
09-04-2012, 02:53 PM
|
#47 |
|
Senior Member
Join Date: Jul 2010
Location: Queen Creek AZ
Posts: 519
|
Here are a few pictures of what I did this past weekend. Also had the front axle drilled and now waiting for the front finned drums to get done to install. I am not the best welder in town but so far I am doing OK more practice will help. You are not looking at a dent on the passenger door panel just where the panel curves to meet the door frame brace. I had to cut the lower corner of the rear section on both side to be able to fit the side panels. After I have these panels installed and welded in place I will do another pie cut to reinstall these corner pieces.
Thanks Frenchy Last edited by frenchy dehoux; 09-04-2012 at 08:18 PM. |
|
|
|
|
09-04-2012, 03:26 PM
|
#48 |
|
Senior Member

Join Date: May 2010
Location: Elk Grove, CA
Posts: 663
|
Frency, attaboy keep it up, it's looking real good. Even your tools are restored, lol...
|
|
|
|
|
09-04-2012, 08:19 PM
|
#49 |
|
Senior Member
Join Date: Jul 2010
Location: Queen Creek AZ
Posts: 519
|
I would like to thank everyone who is following my post on this project. When it is done should be a great ride.
Frenchy Last edited by frenchy dehoux; 09-21-2012 at 01:03 AM. |
|
|
|
|
09-05-2012, 09:44 AM
|
#50 | |
|
Senior Member

Join Date: May 2010
Location: Windham, CT
Posts: 702
|
Quote:
What did you mean by 'Happened to George''? Is that Flathead George from Connecticut?
__________________
[FONT=Comic Sans MS] |
|
|
|
|
|
09-20-2012, 12:07 PM
|
#51 |
|
Senior Member
Join Date: Jul 2010
Location: Queen Creek AZ
Posts: 519
|
Here I have a few more pictures to show where I am as of today. I am working on this project every day when I get home no time for breaks. Next we are going and fabricate under the dash the main support for the steering column,transmission mounts etc...
Frenchy |
|
|
|
|
09-20-2012, 06:14 PM
|
#52 |
|
Senior Member
Join Date: May 2010
Location: Kokomo, Indiana
Posts: 1,731
|
Very nice! You're making good progress. Hang in there.
|
|
|
|
|
09-21-2012, 01:05 AM
|
#53 | |
|
Senior Member
Join Date: Jul 2010
Location: Queen Creek AZ
Posts: 519
|
Quote:
Frenchy |
|
|
|
|
|
10-10-2012, 10:53 AM
|
#54 |
|
Senior Member
Join Date: Jul 2010
Location: Queen Creek AZ
Posts: 519
|
Here are a few pictures of the radiator shell and grill on the car to see how it will look. Also my tires from Coker and had them mounted this past weekend.
Thanks Frenchy |
|
|
|
|
10-15-2012, 10:56 AM
|
#55 |
|
Senior Member
Join Date: Jul 2010
Location: Queen Creek AZ
Posts: 519
|
A few more pictures from this past weekend. Welded on the bungs of the wish bones and bolted the front axle back on the frame and installed the front wheels. Also cut the bottom of the radiator shell.
Frenchy |
|
|
|
|
10-15-2012, 10:57 AM
|
#56 | |
|
Senior Member
Join Date: May 2010
Location: NJ
Posts: 6,185
|
Quote:
I think you are right. Look at the seem in the center. Looks really good that way. |
|
|
|
|
|
10-15-2012, 11:37 AM
|
#57 | |
|
Senior Member
Join Date: Jul 2010
Location: Queen Creek AZ
Posts: 519
|
Quote:
The cowl was narrowed about 3 inches I was told to fit the Duval windshield. Thanks Frenchy |
|
|
|
|
|
11-23-2012, 08:39 PM
|
#58 |
|
Senior Member
Join Date: Jul 2010
Location: Queen Creek AZ
Posts: 519
|
Here is my latest update on my project. I bought a pair of headlight mounting brackets from So Cal and I am also making my front shock mount. This weekend my son and I are planning to make the braces for under the cowl.
Thanks Frenchy |
|
|
|
|
11-23-2012, 10:20 PM
|
#59 |
|
Senior Member
Join Date: May 2010
Location: Kokomo, Indiana
Posts: 1,731
|
Lookin' good! Love the lights.
|
|
|
|
|
02-11-2013, 01:09 PM
|
#60 |
|
Senior Member
Join Date: Jul 2010
Location: Queen Creek AZ
Posts: 519
|
A bit of progress this past weekend added on the right and left side front inner quarter panels braces and this week I will add upper braces between each one of them.
Frenchy |
|
|
|
|
02-12-2013, 10:50 AM
|
#61 |
|
Senior Member
Join Date: Jul 2010
Location: Queen Creek AZ
Posts: 519
|
Here a few more from last night these braces will be welded in over the weekend.
Frenchy |
|
|
|
|
03-01-2013, 12:53 PM
|
#62 |
|
Senior Member
Join Date: Jul 2010
Location: Queen Creek AZ
Posts: 519
|
My son and I did some welding last night and added a few more braces to support the rear cab section to the sub floor. The doors gaps are pretty good but will make some adjustment as we add braces to the sil area and front cowl. So far so good.
Frenchy |
|
|
|
| Sponsored Links (Register now to hide all advertisements) |
|
|
|
03-01-2013, 04:59 PM
|
#63 |
|
Senior Member
Join Date: Jul 2010
Location: Queen Creek AZ
Posts: 519
|
How wide is the bead roll at the bottom of the front cowl I am measuring 1 1/8 wide. Or is it wider.
Thanks Frenchy |
|
|
|
|
03-06-2013, 10:59 AM
|
#64 |
|
Senior Member
Join Date: Jul 2010
Location: Queen Creek AZ
Posts: 519
|
Can someone give me the dimension on a 1929 / 1930 Briggs Murray from the front driver door to the other side passenger door I need the width of the body across or from door hinge pin to door hinge pin left to right I am on my car at 42 1/2 inches I wanted to see how narrow the cowl on my car is in comparison to the original.
Thanks Frenchy |
|
|
|
|
03-06-2013, 08:12 PM
|
#65 |
|
Senior Member
Join Date: May 2010
Location: NW Arkansas
Posts: 361
|
WOW and I have trouble fixing a dent!
|
|
|
|
|
03-11-2013, 01:07 PM
|
#66 |
|
Senior Member
Join Date: Jul 2010
Location: Queen Creek AZ
Posts: 519
|
Sponsored Links (Register now to hide all advertisements)
Thanks. Frenchy |
|
|
|
|
03-26-2013, 01:23 PM
|
#67 |
|
Senior Member
Join Date: Jul 2010
Location: Queen Creek AZ
Posts: 519
|
Here I have a few more pictures of this past weekend. Did a pie cut on the rear floor panel and under the seat as well.
Frenchy |
|
|
|
|
04-23-2013, 11:23 AM
|
#68 |
|
Senior Member
Join Date: Jul 2010
Location: Queen Creek AZ
Posts: 519
|
Here a bit of progress from this past weekend. I installed the engine and trans to see where I will heve to weld the engine mounts and transmission mount. I cut out the main center frame brace to modify it and trim a portion and re install it back. Also I will have to make sure the intake manifold I will be using a dual set up has to be leveled at the base meaning I need to tilt the engine to make it right. See pictures.
Thanks Frenchy |
|
|
|
|
04-23-2013, 11:25 AM
|
#69 |
|
Senior Member
Join Date: Jul 2010
Location: Queen Creek AZ
Posts: 519
|
And a few more.
Frenchy |
|
|
|
|
04-23-2013, 11:48 AM
|
#70 |
|
Senior Member

Join Date: May 2010
Location: Union Pier MI
Posts: 392
 |
Nice work Frenchy, really like the build.
__________________
Still smokin tires and cigars |
|
|
|
|
04-23-2013, 07:19 PM
|
#71 | |
|
Senior Member
Join Date: May 2010
Location: Gardiner Me.
Posts: 4,200
|
Quote:
|
|
|
|
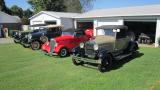
|
|
04-24-2013, 10:18 AM
|
#72 | |
|
Senior Member
Join Date: Jul 2010
Location: Queen Creek AZ
Posts: 519
|
Quote:
Thanks I had to change my original post history. The friend I bought the engine from we had to remove this engine from his car because it needed to be rebuild. He told me he bought the car originally from this guy Chicago who had bought it from a guy in Canada and it was a Mercury engine. Looking at the heads I told myself they should have the Mercury heads on it. Sorry for the confusion. It does not have the 4 inch crank so it has to be a Ford motor. I had the machine shop check the heads for me and we also had the Mercury heads checked at the same time and the CC in the heads are the same as the Ford heads. Frenchy |
|
|
|
|
|
05-06-2013, 04:28 PM
|
#73 |
|
Senior Member
Join Date: Jul 2010
Location: Queen Creek AZ
Posts: 519
|
A little more progress from this past weekend. Figured out the location for my engine mounts and the center brace for the transmission mount as well. Next weekend we will be adding various brace across the frame for better support and " Z " the chassis at the rear to set up the rear end and suspension. Here a few pictures to show.
Thanks Frenchy |
|
|
|
|
05-28-2013, 11:29 AM
|
#74 |
|
Senior Member
Join Date: Jul 2010
Location: Queen Creek AZ
Posts: 519
|
Did some work over the weekend. Made the box plate for the frame as well as making a small plate to cover the original hole on the cross member. Next I will cut the rear section to Z the chassis to fit the rear end with the rear spring. Next week my son is helping me to the welding leave it to the pro.
Thanks Frenchy |
|
|
|
|
06-18-2013, 11:16 AM
|
#75 |
|
Senior Member
Join Date: Jul 2010
Location: Queen Creek AZ
Posts: 519
|
Here are a few update pictures from this past weekend.
My son helping me out with some of the welding and boxing the chassis with plates I had ground down to fit the chassis. Than we made some angle brackets to add in the center brace to make the chassis a bit stronger. I also cut part of the front brace cut a portion of the lip off which we did not need. I also received my pedal assembly that we will need to see how much room we will have to make them fit by the frame. We have the box plates spot welded in place for now until we have all of the braces in place than we will be welding the plates all along the edge of the frame than grind down the weld to leave a nice rolled edge. Next in the plan is to weld in the bracket for the vega steering box and "Z" the rear of the frame for my 48 Ford F 100 rear end. Thanks Frenchy |
|
|
|
|
07-31-2013, 12:11 PM
|
#76 |
|
Senior Member
Join Date: Jul 2010
Location: Queen Creek AZ
Posts: 519
|
Here are some updates on my project. This weekend my son and I will be welding the rear section that was "Z " and also welding the rear wish bones to the rear end than the steering box plate.
Frenchy |
|
|
|
|
08-05-2013, 02:10 PM
|
#77 |
|
Senior Member
Join Date: Jul 2010
Location: Queen Creek AZ
Posts: 519
|
Here are my updates from this past weekend. Now we have a rolling chassis next we are going and weld the front shock mounts and the rear as well which will be on the inside. We also welded in the bracket for the Vega steering box. The rear wish bones with the brackets I bought from Industrial Chassis in Phoenix.
Frenchy |
|
|
|
|
08-15-2013, 11:07 AM
|
#78 |
|
Senior Member
Join Date: Jul 2010
Location: Queen Creek AZ
Posts: 519
|
Here a few updates on the project. This past weekend we had to do some trimming in the cross member brace to fit my Hurst shifter and the linkage to the transmission also the template is showing the additional plate to go around the shifter area. We also had to extend the shifter plate to the right so it would be positioned in the center of the transmission.
Frenchy |
|
|
|
|
08-15-2013, 08:42 PM
|
#79 |
|
Senior Member

Join Date: May 2010
Location: Waxahachie, Texas
Posts: 241
|
Roadster-Pickup? My favorite!
|
|
|
|
|
08-15-2013, 10:32 PM
|
#80 |
|
Senior Member
Join Date: May 2010
Location: Chester Vt
Posts: 8,862
|
I don't think the machine shop did an accurate measure of the heads. From past experience, I know the 8cm heads are substantially larger than the EAB heads, I just measured a set that were clearance d for the L-100 cam and milled .030" and they came out to 60cc. I believe the 8CM is closer to 80Cc.
Might want to recheck them. I think your workmanship is great, love the project, Good luck. |
|
|
|
|
08-16-2013, 07:21 AM
|
#81 |
|
Senior Member
Join Date: May 2010
Location: Gardiner Me.
Posts: 4,200
|
I want to now how you keep such a clean neat garage to work in. How do you find any tools. Walt
|
|
|
|
|
08-16-2013, 10:24 AM
|
#82 | |
|
Senior Member
Join Date: Jul 2010
Location: Queen Creek AZ
Posts: 519
|
Quote:
Thanks Walt people that know me know that I am very anal about cleanliness and all tools in their place if not needed. I clean and sweep the garage and the shop after we are done for the day. Thanks Frenchy |
|
|
|
|
| Sponsored Links (Register now to hide all advertisements) |
|
|
|
08-16-2013, 10:25 AM
|
#83 | |
|
Senior Member
Join Date: Jul 2010
Location: Queen Creek AZ
Posts: 519
|
Quote:
Thanks Ron for the heads up I will check the CC in the chambers once more and see where we are. Frenchy |
|
|
|
|
|
08-17-2013, 07:21 AM
|
#84 |
|
Senior Member
Join Date: Jan 2012
Location: Ashby, Mass
Posts: 452
|
I like your project and was wondering if you made your floor for your roadster or if you purchased it. I am starting a 28-29 roadster and will need one.
__________________
I know I can, I know I can http://www.flickr.com/photos/waltsprojects/ |
|
|
|
|
08-17-2013, 07:31 PM
|
#85 |
|
Senior Member
Join Date: Jul 2010
Location: Queen Creek AZ
Posts: 519
|
We will be building our own floor once I see where the shifter and pedal assembly will be. I will be posting more pictures as we go along.
Thanks Frenchy |
|
|
|
|
08-17-2013, 08:32 PM
|
#86 |
|
Senior Member
Join Date: Jan 2012
Location: Ashby, Mass
Posts: 452
|
Sponsored Links (Register now to hide all advertisements)
__________________
I know I can, I know I can http://www.flickr.com/photos/waltsprojects/ |
|
|
|
|
08-22-2013, 01:21 PM
|
#87 |
|
Senior Member
Join Date: Jul 2010
Location: Queen Creek AZ
Posts: 519
|
After doing some modifications on the center brace to make the shifter area looking presentable my son did not like the way it look so we decided to cut the original center brace and make our own with a solid piece and making it fit better than the original one. Here are pictures showing cutting it off and grinding all the rivets holding the center brace. Next I will be posting the new brace.
Thanks Frenchy |
|
|
|
|
08-27-2013, 11:59 AM
|
#88 |
|
Senior Member
Join Date: Jul 2010
Location: Queen Creek AZ
Posts: 519
|
I had a friend help me and make my rear upper shock mount. The one on the right is the original one I had and was too short.
Frenchy |
|
|
|
|
09-03-2013, 12:17 PM
|
#89 |
|
Senior Member
Join Date: Jul 2010
Location: Queen Creek AZ
Posts: 519
|
A few changes from the weekend my son did not like the cross brace and we decided to cut it off and build a new one that would fit better and been able to install the hurst shifter see pictures. Next we will be making the trans mount going on the underside of the cross brace I will be posting pictures of that when done with the Hurst linkage as well.
Frenchy Last edited by frenchy dehoux; 09-03-2013 at 02:53 PM. |
|
|
|
|
09-03-2013, 02:19 PM
|
#90 |
|
Senior Member

Join Date: Jun 2011
Location: new jersey
Posts: 228
|
wow!! wish i was as good as you with medal work...look great thus far.
__________________
if rust were money i would be a billionaire!! |
|
|
|
|
09-03-2013, 05:29 PM
|
#91 |
|
Senior Member
Join Date: May 2010
Location: Chester Vt
Posts: 8,862
|
It's built for narrow people. On my 27 I widened the body 4" pn front and 6" in back.
|
|
|
|
|
09-04-2013, 02:35 PM
|
#92 |
|
Senior Member
Join Date: Jul 2010
Location: Queen Creek AZ
Posts: 519
|
The reason we narrowed the body is because I wanted to have the windshield to fit the countor of the body. So we had no choice to narrow it and looks a lot better.
Thanks Frenchy |
|
|
|
|
09-05-2013, 12:56 PM
|
#93 |
|
Senior Member
Join Date: Jul 2010
Location: Queen Creek AZ
Posts: 519
|
We worked on the project last night and this is what we did. Made the trans mount to fit near the linkage area. The last two pictures showing the two bolts where the plate will be welded in to the brace.
Frenchy |
|
|
|
|
10-03-2013, 11:15 AM
|
#94 |
|
Senior Member
Join Date: Jul 2010
Location: Queen Creek AZ
Posts: 519
|
Moving right along with this project here are a few pictures showing where we are as of today. My son is doing a great job on my project he made the pedal assembly to fit level with the floor and made the transmission mount to fit under the cross brace we will be making our own trans mount with a solid piece of rubber. Also the rear shocks and mount to be installed inboard looks better.
Frenchy |
|
|
|
|
11-08-2013, 11:06 AM
|
#95 |
|
Senior Member
Join Date: Jul 2010
Location: Queen Creek AZ
Posts: 519
|
I brought the car home this past weekend from my son's shop to start installing the brake lines,fuel lines, installing the steering column and figure out the pedal assembly etc ...Here are a few pictures. I also have the oval fuel tank on order from the Hot Rod shop.
Thanks Frenchy |
|
|
|
|
11-17-2013, 03:08 PM
|
#96 |
|
Senior Member
Join Date: Jul 2010
Location: Queen Creek AZ
Posts: 519
|
I got a pair of front shocks and I did not like the dust cover so I decided to cut them off which gives a better look especially in front also if you polish the stainless shaft looks better they will be painted gloss black.
Frenchy Last edited by frenchy dehoux; 11-18-2013 at 01:21 AM. |
|
|
|
|
11-27-2013, 11:25 AM
|
#97 |
|
Senior Member
Join Date: Jul 2010
Location: Queen Creek AZ
Posts: 519
|
I need a 16 splines yoke for my 1952 Mercury transmission. Do I need to measure the inside of the transmission to the outside edge and how easy for me to locate one of them.
Thanks Frenchy |
|
|
|
|
11-27-2013, 12:05 PM
|
#98 |
|
Senior Member

Join Date: Dec 2010
Location: North of sandy ago, CA.
Posts: 2,064
|
Frenchy
Check with your local bearing supply house for spicer or borg warner catalogs. Should find what you need. Bruce Works good Lasts long time |
|
|
|
|
12-02-2013, 11:36 AM
|
#99 |
|
Senior Member
Join Date: Jul 2010
Location: Queen Creek AZ
Posts: 519
|
Had the chance to work on my project for the last 3 days or so. Ran the brake lines through the frame from the front to the rear. The rear brake line took a while to figure out the best way for routing. Also the clutch cylinder and the brake pedals modifications for the proper angle of the pads. Also made the hoop for the driveshaft for clearance of the body. Fuel line was routed as well and will be going along the frame to the rear where the fuel tank will be installed on top of the buggy spring frame. The brake and fuel lines will be painted black the only detail will be the fittings they will be polished.We modified the pedals so that the steering column would fit better between them and not rubbing against it.The hoop will be trimmed at the bottom to fit evenly with the bar.I still need a yoke for the trans which has 16 splines so I can have a driveshaft made to fit
Thanks Frenchy Last edited by frenchy dehoux; 12-02-2013 at 03:35 PM. |
|
|
|
|
12-12-2013, 10:50 AM
|
#100 |
|
Senior Member
Join Date: Jul 2010
Location: Queen Creek AZ
Posts: 519
|
A bit more progress this past week did the fuel lines and finish the rear brake line to the frame with a flexible rubber line. All of the fuel lines will have a compressed ring to join the rubber hose. All of the brake and fuel lines will be painted gloss black and the brakets will be polished. I also started to work on the firewall. The brass fitting also will be polished.
Thanks Frenchy |
|
|
|
|
12-29-2013, 01:06 PM
|
#101 |
|
Senior Member
Join Date: Jul 2010
Location: Queen Creek AZ
Posts: 519
|
Made some progress on the 31 project yesterday. We made our firewall from various other firewall to fit because originally the body was narrowed 6 inches so the Duval windshield would look appropriate to the body lines. Next I will make the rest of the firewall once I have the template made. Inside the body I had to cut part of the floor board for the driveshaft hoop to fit.
Frenchy |
|
|
|
|
01-02-2014, 11:08 AM
|
#102 |
|
Senior Member
Join Date: Jul 2010
Location: Queen Creek AZ
Posts: 519
|
I did accomplish a lot these past few days the firewall was the main area I wanted to get done and was able to fit the steering column as well. I have my parts from Speedway arriving this afternoon and wanted the firewall completed.
Thanks Frenchy |
|
|
|
| Sponsored Links (Register now to hide all advertisements) |
|
|
|
01-28-2014, 10:50 AM
|
#103 |
|
Senior Member
Join Date: Jul 2010
Location: Queen Creek AZ
Posts: 519
|
A few updates the firewall is done also installed the Beehive oil filter I will have to modify the bracket so the filter is level because of the firewall is at an angle. Also made the wood floor for the inside of the car with 3/4 plywood that will be painted black with a rubber mat sitting on top. The seats I bought at Bass Pro shop and they will be redone in black with gold stiching with the V8 logo in the center also in gold. The body will be done in flat black with the Duval windshield polish brass the engine will be painted in gold close match to the windshield frame. The headlight buckets are going and be gloss black and the headlight rings in brass the fuel tank is the oval style and will be painted gloss black with the brass straps. Dash panel gloss black with the gold style gauges. I will be posting more pictures as I move along.
Thanks Frenchy |
|
|
|
|
07-12-2015, 01:18 AM
|
#104 |
|
Senior Member
Join Date: Jul 2010
Location: Queen Creek AZ
Posts: 519
|
Hopefully I will be posting some pictures of where I stand today. We just moved this past year to Queen Creek AZ where we have a bigger home and I have a 1,000 square feet garage.I will be posting soon.
Thanks Frenchy |
|
|
|
|
07-12-2015, 03:04 PM
|
#105 |
|
Senior Member

Join Date: Jun 2010
Location: Marana, AZ
Posts: 1,194
|
Frenchy,
I've wondering how you and your son were coming along on your build. I liked what you did for the windshield frame and I think your welding/fabrication is first rate. Looking forward to more pictures. Congratulations on the new "shop". Dick. |
|
|
|
|
07-15-2015, 12:23 AM
|
#106 |
|
Senior Member
Join Date: Jul 2010
Location: Queen Creek AZ
Posts: 519
|
Sponsored Links (Register now to hide all advertisements)
Thanks Frenchy |
|
|
|
|
12-19-2015, 11:17 AM
|
#107 |
|
Senior Member
Join Date: Jul 2010
Location: Queen Creek AZ
Posts: 519
|
Here is the 31 as of today in the new garage. I have been working on my Belly Tanker and switching back and forth on the 31 just keeping me busy now that I am retired.
Frenchy |
|
|
|
|
03-03-2019, 10:05 AM
|
#108 |
|
Senior Member
Join Date: Jul 2010
Location: Queen Creek AZ
Posts: 519
|
It has been a few years since i have worked on the 28 so this week did some work getting the exhaust all lined up and marking before welding them up . Once the exhaust is done I will be removing the body to start on the body work and build the engine !!
Thanks Frenchy |
|
|
|
|
03-03-2019, 10:07 AM
|
#109 |
|
Senior Member
Join Date: Jul 2010
Location: Queen Creek AZ
Posts: 519
|
A few more pictures of the progress !!
Frenchy |
|
|
|
|
03-03-2019, 03:25 PM
|
#110 |
|
Senior Member
Join Date: Jun 2010
Location: Marana, AZ
Posts: 1,194
|
Frenchy, what with your belly tank project and your other things....life would be sweet if work didn't get in the way!!!
 Your '28 is going to be "sweet"!! Your '28 is going to be "sweet"!!Dick |
|
|
|
|
03-03-2019, 06:27 PM
|
#111 |
|
Member
Join Date: May 2010
Location: Bend, OR
Posts: 82
|
Frenchy, Exactly how much did you cut your radiator shell. Looks like you are doing a great Job, keep up the good work!!
Cobbie |
|
|
|
|
03-04-2019, 08:04 AM
|
#112 |
|
Senior Member

Join Date: May 2010
Location: east glenville NY
Posts: 158
|
as i understand it, the merc heads have a bigger combustion chamber than the ford heads. if you use the ford 3 3/4" ford crank and merc heads you are losing compression. i believe the merc 4" crank with ford EAB heads, gives you a nice boost over the ford crank, merc heads. i'm sure others can respond with more knowledge than me.
__________________
1949 F-1 Flatrod II (flat paint, flat motor) Keeping one more flathead alive It smoked, but gave it up 7/26/2013 East Glenville NY |
|
|
|
|
03-04-2019, 10:16 AM
|
#113 |
|
Senior Member
Join Date: Jul 2010
Location: Queen Creek AZ
Posts: 519
|
I was hoping to maybe mill the Mercury heads to match the cc in the chambers of the Ford?
Thanks Frenchy |
|
|
|
|
01-12-2020, 10:45 AM
|
#114 |
|
Senior Member
Join Date: Jul 2010
Location: Queen Creek AZ
Posts: 519
|
Working on the exhaust system now so I can remove the body and start building the engine. But I am also building a Belly Tanker for the street .
Frenchy |
|
|
|
|
04-18-2020, 12:00 AM
|
#115 |
|
Senior Member
Join Date: Jul 2010
Location: Queen Creek AZ
Posts: 519
|
I have my son weld the exhaust system today as soon as i have it back i will be posting pictures of it.
Frenchy |
|
|
|
|
«
Previous Thread
|
Next Thread
»
 Linear Mode

|
|

| Sponsored Links (Register now to hide all advertisements) |
|
|
All times are GMT -5. The time now is 09:34 AM.