|
|
#101 |
|
Senior Member
Join Date: May 2010
Location: Lancaster, CA
Posts: 916
|
Wow, it has been a long time since my last post... I have been busy getting my house ready to sell, making a transition to Ohio, and all that comes with a move. Half of my shop has already been cleared out and many things put into storage or sold. By the way, the most recent contract did fall through. The buyer wanted me to change a window's location, complained about code, went after documentation/permits on my shop, etc, etc, etc. I think he just had a simple case of buyer's remorse.
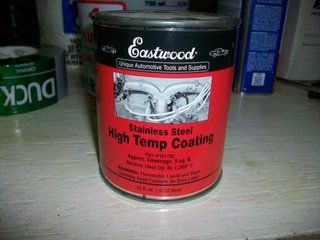
At any rate, this has left me some time in the shop and the last few nights I have been a little busy. I reinstalled the tie rods, idler arm, and drag link after a serious cleaning and installation of new seals and grease. 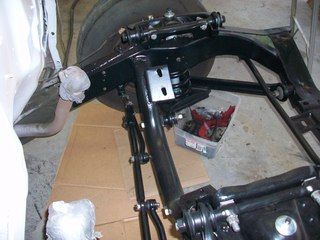 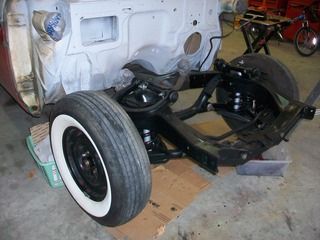 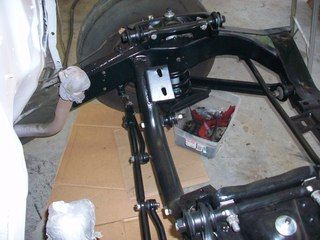 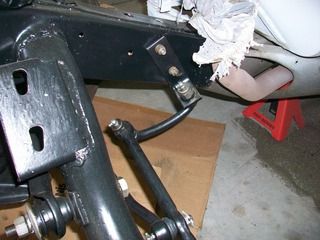 The front brake drums and hubs were cleaned up and painted, and the bearings and seals cleaned, greased up well, and reinstalled. Nothing too exciting to show concerning installation, I guess this is all pretty boring material. I did not put in the steering gear just yet because I want to finish up that firewall. Hopefully the rain will stop coming, but it is April after all. I did get in a brand new fuel line (tank to fuel pump) from Tee Bird Products. The shipping was outrageous - I will leave it at that. I also got a set of bushings in that shipment so that I can rebuild the shifter arms on the column. While I was at it, I ordered a set of brake lines (specific lengths all ready to go) from Jacksons' Auto Parts - the box showed up today, CRUSHED, and all of the lines in the box were bent at a 35 degree angle. They were all supposed to arrive straight. Now what? I guess I will contact them tomorrow and see what we can do. I guess I can bend them back but you know once a line is bent, it's bent. While the front end has continued to receive treatment, I have also been attacking the 292. I degreased it, removed quite a few bolt on's down to make the engine a "long block" so I could clean it up easier. The timing cover and water pump I just left on the block. I did put on another oil pan that was in much better shape, and I added a NEW gerotor oil pump. There are not many miles on the engine (just several hundred) so cleanup was not too bad and the parts are all in great shape. 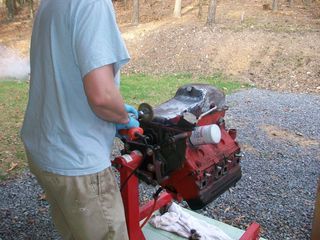 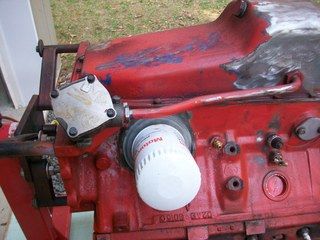 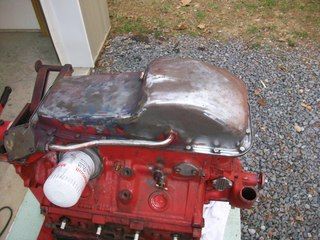 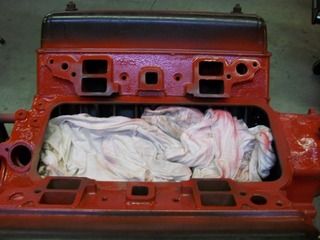 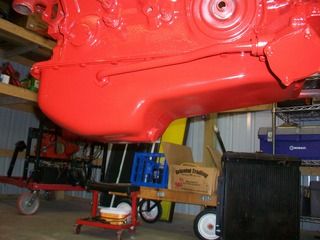 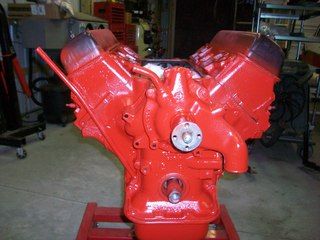 The whole "wire wheel" episode was long, messy, and just downright tedious, but that metal was clean by jove! I am not going to reuse the pitted valve covers, so I Ieft them on. I have rubber valve cover gaskets and chrome valve covers to install anyway. When I paint an engine like this, I like to put clean rags in the lifter valley just to keep out the crap. The engine paint is a simple Duplicolor Engine Red. I don't think it is 55/56 Ford correct but it looks good and it was available. The car is not a show car so what's the difference. My father-in-law came over tonight and likes the look of it so on we go. I have some of the bracketry and other parts on my paint rack so hopefully I can get to install those soon. I also have two good sets of exhaust manifolds that I just brought out of the blast cabinet, cleaned up, and then coated with the Eastwood Hi-temp coating. I have two sets because one is original to the 55 and the other is a 57 set. I will most probably use the 57 set depending on what I do with the power brakes situation. I have not decided what to do about that yet, but will most probably get an aftermarket set up instead of the original master cylinder and Ford's way of doing it in 1955. We want to put a dual master cylinder on it anyway. Once I get the engine running again I will have to post a video. Hopefully I can figure out how to do that.
__________________
Lancaster, California Visit hotrodreverend.com to view hundreds of pictures and videos of the build of the 1955 Ford Club Sedan! |
|
|

|
|
|
#102 |
|
Senior Member
Join Date: May 2010
Location: Lancaster, CA
Posts: 916
|
Ok fellas... back at it again for the last two nights, cleaning things up, installing new gaskets and even had the chance to put the 292 on the run stand tonight before I got ready to turn in.
First of all, I thought it good to cover something that gets asked quite a bit by newbies... "How do you prime the oil pump?" I don't know if my answer is the best but I will show you what I do when I get a Y block ready to go and then after that I will take you through what I do to get the distributor ready for initial start up. Here we go: I put an NOS oil pump (gerotor type, not the "spur gear" pump) on this Y block when I put a new gasket on the oil pan also.  Look to the left in the photo above to see what I am talking about here. The gerotor has a smooth cover, the spur gear has a sizeable "bump out" for the gear. When you put one in, the best advice is to submerge the entire pump and prime the pump itself before installation. Well... I'm pretty lazy and did not want to have to clean it up to paint it, etc. So I did put a little oil in the pump inlet just to make sure it was not dry at all. I then installed a new gasket after I cleaned the block surface really well. It is not recommended that you put any silicone or sealer on the gasket for the oil pump. However, I must say that I always use high tack gasket compound (the red stuff) on the gasket at the oil pump to get it to seal nicely. Careful - a little goes a long way here! After the pump was installed, I cleaned it up with acetone before painting. Another word on the oil pump and the oil pan tube that feeds the pump. There is a very delicate tube seal that goes on your inlet tube as it mates to the pump inlet. Be careful to get this situated correctly and do not overtighten or crush the seal. If you have a leak here after priming or after initial startup it will be a PAIN because you will either have to remove the oil pump or oil pan and then reaffix the seal. You really don't want to have to do either, trust me. Back to priming the pump. Make sure that you installed the oil pump drive rod (get a new one when you put in a new pump - cheap insurance!) correctly in the bore. The catch washer is used to keep the shaft from coming out of the pump when you pull the distributor, so the washer needs to go on the shaft BEFORE you place it up inside the bore of the block. Please don't leave it out - you will just be swearing like a sailor the next time you pull your distributor out and find that the shaft came right on out too... OUCH. That shaft is pretty thin but it is a hex. You can use a 1/4" socket to turn the shaft so that you can prime the pump. Get yourself a long 1/4" drive extension or two, and then a THIN-WALLED socket like the one shown. TAPE THEM TOGETHER so that you don't lose anything while you are messing around in there. 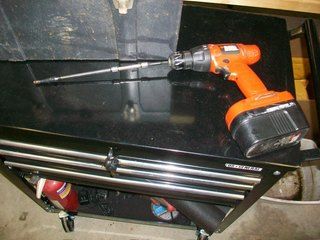 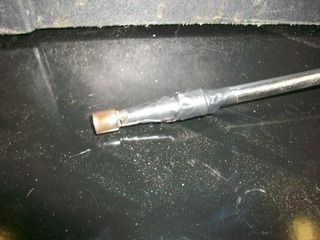 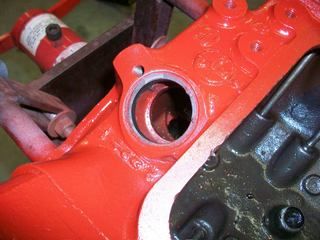 You can see the distributor boss pictured above. That is what we are shooting for here. If you look down in that hole you can see the top of the oil pump drive rod. Take your drill, set it to REVERSE (remember that counterclockwise is the way the distributor and that hex shaft will rotate when the engine is running). Now take your 1/4" extension setup and place it on the shaft... HOLD IT! Did you fill the block with 4 or 5 quarts of oil?  Thought so. You did - but I almost forgot. By the way, another thing you should do... ahem, is uh, to walk around your block and make sure you are BUTTONED UP! (see Y block follies post for explanation here lol) You don't need to go at super fast rate of speed, just touch it off and let it rotate a little bit. You can actually do this with a speed handle for a socket but this certainly takes the sweat out of it. While you are spinning the drill it will be about 10-15 seconds or so and you will feel a load... yep, we struck oil. "Drill baby drill" Keep going and watching your rocker arms to make sure you are getting oil up there. If you have a new build, it is going to take some time. The rockers are the furthest point away from the pump that the oil has to travel, so every other orifice and what have you will fill up first. If you have an early cam that is "cross-drilled" then rotate your cam so that you can mate up the feed holes. Thought so. You did - but I almost forgot. By the way, another thing you should do... ahem, is uh, to walk around your block and make sure you are BUTTONED UP! (see Y block follies post for explanation here lol) You don't need to go at super fast rate of speed, just touch it off and let it rotate a little bit. You can actually do this with a speed handle for a socket but this certainly takes the sweat out of it. While you are spinning the drill it will be about 10-15 seconds or so and you will feel a load... yep, we struck oil. "Drill baby drill" Keep going and watching your rocker arms to make sure you are getting oil up there. If you have a new build, it is going to take some time. The rockers are the furthest point away from the pump that the oil has to travel, so every other orifice and what have you will fill up first. If you have an early cam that is "cross-drilled" then rotate your cam so that you can mate up the feed holes.Now on setting that distributor. With your valve cover off the passenger side head, take a look at the # 1 cylinder and the corresponding valves. You want to get TDC at the compression stroke so that you can give that ignition initial time. Go back to your crank dampener/timing pointer and bring up the TDC mark just as the intake valve has closed (exhaust will be closed as well... double check this by checking valve lash on both rocker arms for #1). Most guys like to set their initial time to exact TDC on the timing pointer. I guess this is good practice, but since Y blocks like a lot of advance I usually bring the timing pointer to 4 degrees or so and then get ready to install the distributor. You will note my timing mark on the crank dampener. I have removed the black paint where the timing marks are located and I have sprayed it with Clear Engine Paint to highlight the difference from the rest of the dampener. 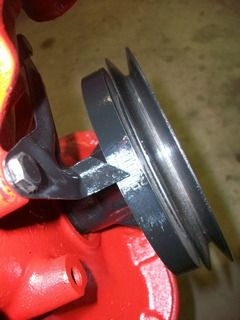 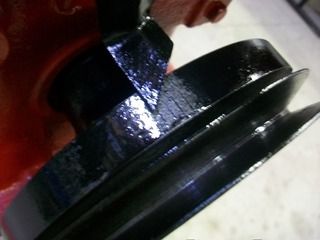 Next, I take the distributor and mark the location of #1 Cylinder/Plug Wire by fitting the cap to the distributor and making a sharpie line right underneath the center of where #1 is located. 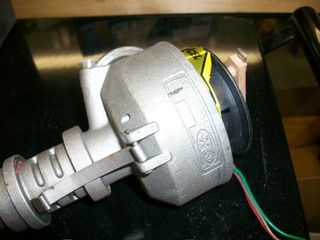 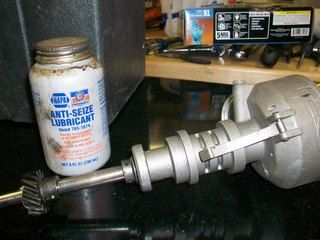 Something else I like to do is get some anti-seize on both lips of the distributor boss on the block and a little on the distributor itself where it will mate to the block. How many times have you tried to pull a seized Y block distributor? I don't know why particularly, but the Y block is NOTORIOUS for seized distributors. In my lifetime of probably dealing with 15 different Y blocks I have never owned, seen, or worked on one that had the top end oiling problems. But about half of the ones I have dealt with had a seized distributor. You may also note the ACCEL pointless ignition. While everyone and their grandmother go the Pertronix route I have used the ACCEL kit with 100% success and no ignition failures over the past 10 years or so. (lol I say that now, wait until I crank this thing up or take the father-in-law out for the initial ride after all the work is done! :w00t: Seriously though, I do like the kit and with an ACCEL super coil there is no resistor needed. You can leave the key on with no problems, etc. That's all for tonight - I'm beat. I did get more done in the shop but until next time, here is the engine finally back on the run stand... 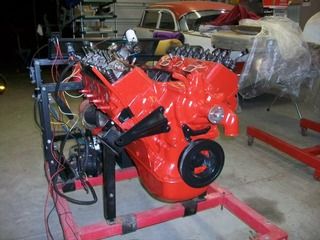 You guys out here late at night can take over for me...
__________________
Lancaster, California Visit hotrodreverend.com to view hundreds of pictures and videos of the build of the 1955 Ford Club Sedan! |
|
|

|
| Sponsored Links (Register now to hide all advertisements) |
|
|
|
|
#103 |
|
Senior Member
Join Date: May 2010
Location: Lancaster, CA
Posts: 916
|
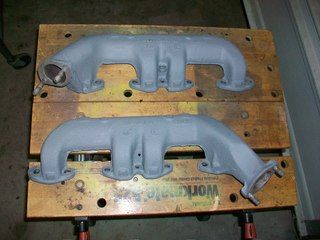
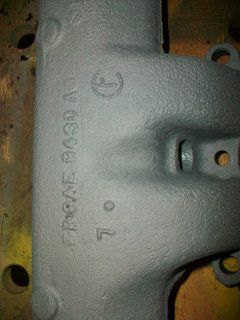
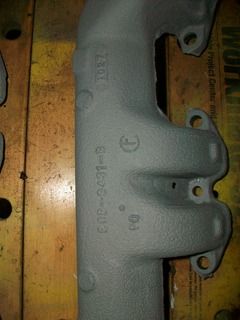
Just to follow up from what I posted last night, here are some photos of the Exhaust Manifolds. Now that I look at the casting numbers, I know that the EDB is not a 1955 number. I believe they are to be ECH if they are original to the car right? anyone know? I am not quite sure why the different numbers in the earlier years - maybe you guys can chime in here. I bought a set of the B9's, blasted them too, and have now coated both sets twice and are letting them dry out. This stuff works pretty good in my opinion.
    I also cleaned up a couple of nice chrome valve covers and used some contact cement to set RUBBER valve cover gaskets to them. The gaskets work very well when you need to remove your valve covers a few times over their "life" when you are setting valve lash, etc. I know some guys will use cork and seal the cork to the valve cover, then grease the end of the gasket that mates to the head - that works too. I have done that with intake manifold gaskets before. 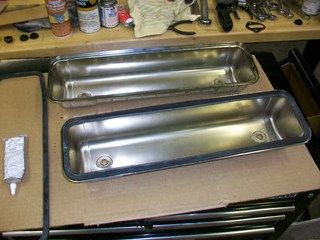 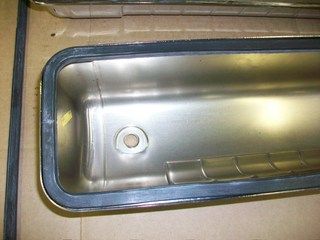 I need to find some chrome or stainless acorn nuts for the valve covers - they would look better with those. I do have new decals to put on the valve covers - I like the 1957 "Ford Interceptor" decals - kind of my favorite FoMoCo look. I did get the Valley Pan cleaned up last night, and I have a rubber gasket for that too. As you are aware sometimes these valley pans you find can be bent up into a banana shape by the last gorilla who wrenched it down. Since there are only two bolts that hold it down to the block, they are prone to leak also so make sure there is a good seal all the way around. If you use silicone or some kind of a gasket maker, go sparingly with it. 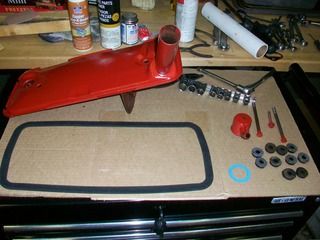 Hopefully soon I can start installing the other bolt-on parts and get this thing fired up again, check for leaks, make sure the plumbing is good, time the engine and get it ready to reinstall in the car.
__________________
Lancaster, California Visit hotrodreverend.com to view hundreds of pictures and videos of the build of the 1955 Ford Club Sedan! |
|
|

|
|
|
#104 |
|
Senior Member
Join Date: May 2014
Location: Tulsa, Oklahoma
Posts: 151
|
Rev, I had forgotten that you have your engine-run stand. Hopefully you will share the startup with us on video? Looks good! I know your eager to hear it run too.
|
|
|

|
|
|
#105 | |
|
Senior Member
Join Date: Aug 2012
Location: Abq, NM
Posts: 3,607
|
Quote:
that outlines them. Truck and Mercury exh. manifolds are on that same page, just scroll down. The main reason for different casting numbers starting in '57 .... the exhaust castings got larger in '57 and have an increased cross section/flow capacity for the larger displacement engines. (I tried to paste the chart here but the formatting gets all jumbled up and impossible to read.) Last edited by dmsfrr; 04-22-2015 at 11:06 AM. |
|
|
|

|
|
|
#106 |
|
Senior Member
Join Date: May 2010
Location: Lancaster, CA
Posts: 916
|
Sponsored Links (Register now to hide all advertisements)
EDIT: funny, no info on any "B9" prefixes
__________________
Lancaster, California Visit hotrodreverend.com to view hundreds of pictures and videos of the build of the 1955 Ford Club Sedan! |
|
|

|
|
|
#107 | |
|
Member
Join Date: Nov 2013
Location: Norfolk, VA
Posts: 39
|
Quote:
Decade alpha B = 50's C = 60's D = 70's E = 80's 9 = 9th year of the decade Model design alphanumeric A = Full size ford (see table 2.1 for more) More here: http://mustangtek.com/FordDecode.html PS I enjoy reading all your progress - Keep it up, please |
|
|
|

|
|
|
#108 | |
|
Senior Member
Join Date: May 2010
Location: Lancaster, CA
Posts: 916
|
Quote:
__________________
Lancaster, California Visit hotrodreverend.com to view hundreds of pictures and videos of the build of the 1955 Ford Club Sedan! |
|
|
|

|
|
|
#109 |
|
Senior Member
Join Date: May 2010
Location: Lancaster, CA
Posts: 916
|
Last night I got back into the shop and installed the valley pan, exhaust manifolds, and the fuel pump.
First the Valley Pan: I used some acetone to remove the paint around the rim of the block where the gasket goes. After that I used a very small thin bead of black hi-temp silicone gasket maker, aligned the rubber gasket on the block and then prepped my pan to make sure we would mate up well to the block. As you know, sometimes these things can be interesting because of warpage over the years caused from overtightening. Put a thin bead of gasket maker on the pan as well so that both the top and bottom of the gasket have a thin coating of silicone so that you will get an excellent seal. 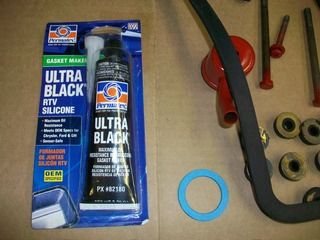 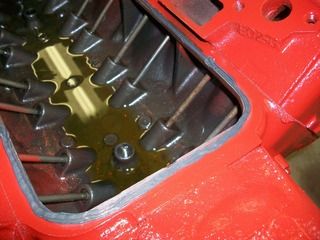 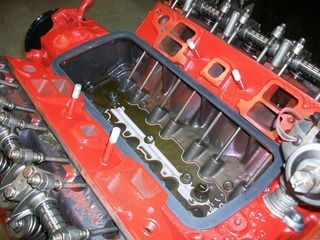 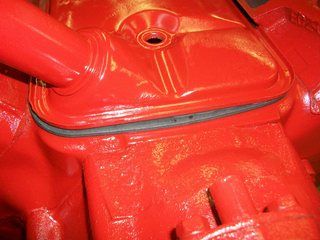 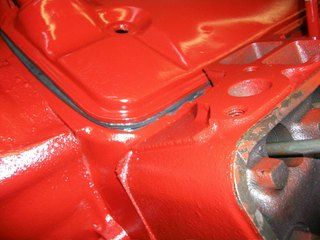 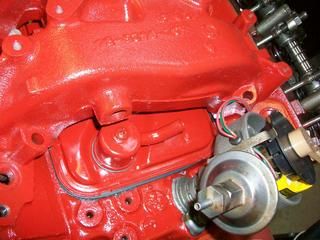 The trick with the valley pan is to get your gasket to cooperate as you slide the pan over the block, between the edges of the intake ports on your heads (if you know Y blocks this can be a pain - especially if you have shaved your heads). I use a very small flatblade screwdriver to position the edges of the rubber gasket before I install the two grommets and bolts. Once the pan and gasket are positioned properly all the way around, I tighten down the bolts alternatively until the goo just begins to squeeze out of the gasket/pan mating area. Stop and let it rest for a while and go on to tackle something else while the silicone sets up. I like to install the teapot PCV mount at this time... 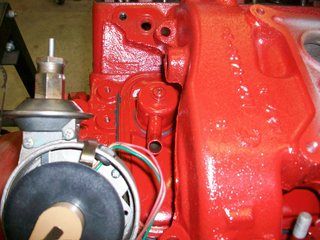  As you can see I have the intake manifold on the heads in the above photos. That was simply to see the placement/orientation of the spout so that I did not come too close to the intake. Obviously these photos show the location being too close, so I loosened up the screw and turned the spout clockwise so that is was between the distributor and the intake. I removed the intake and got back to the valley pan. If you will look at the above photos you can see more photos of the intake resting above the valley pan. This was to check for clearance and to check BOLT LENGTH! For instance, in the photos below certain holes on the head go right into the passage way of the push rods. I suggest you double check the length of your bolts so as not to be in harm's way. Obviously, you will need the valve covers off to verify this. 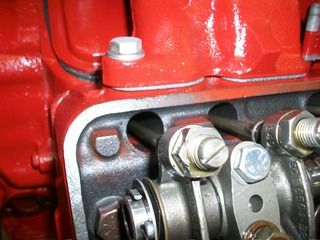 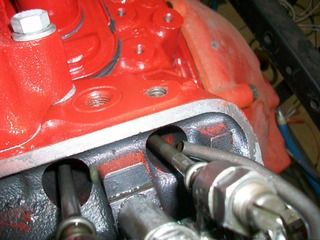 Be sure to check the front and the rear of the manifold. I like to do this check without the gaskets even, knowing that I will have a bit more clearance when the gaskets are placed between the heads and intake. By the time you get done fooling around with all of this, you can probably go ahead and give a final torque on your valley pan. To be honest here, I really don't follow any specification, but I probe around the pan with my small screwdriver to see if the gasket is tight against the block/pan area. That really is the best way to check because you need to make sure your pan is sealed around the perimeter. More later...
__________________
Lancaster, California Visit hotrodreverend.com to view hundreds of pictures and videos of the build of the 1955 Ford Club Sedan! |
|
|

|
|
|
#110 |
|
Senior Member
Join Date: May 2010
Location: Jackson N.J
Posts: 206
|
Love your blog ,Reverend but I cant see none of the pics I just see a black x.when I click on it nothing happens.Mike
|
|
|

|
|
|
#111 |
|
Senior Member
Join Date: May 2010
Location: Lancaster, CA
Posts: 916
|
I am flying to Florida tomorrow morning and had to get quite a few things ready tonight so I did not have much time.
Here is a video link if anyone is interested:<A href="http://s249.photobucket.com/user/danaxjessup/media/Initial%20Cold%20Start%20-%20Retarded%20Timing_zpsii8vh96c.mp4.html">http://s249.photobucket.com/user/dan...vh96c.mp4.html I will try to put up more tomorrow. I have quite a few good photos and loads of video. I do not have a youtube or vimeo account so I reckon I need that to embed video here. Long story short ... I am very happy. Virtually no oil leaks during the 20 minute or more run, and the only water leak I had was water out the overflow tube when the tstat was taking its time opening up (195 degree). The only drip I had was from the new oil pump cover plate which I did not rebuild/install, I just installed that out of the box. Once I tightened up the offending bolt, she was all sealed up good. In the video, the timing is RETARDED a tick, but I got that sorted out quickly. She came to life quickly on a dead cold start so I was glad for that. Here are some quick photo shots of the action tonight. Only water was used. I will be gone an entire week so I drained the block and the radiator before I came out of the shop... 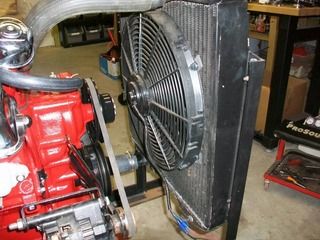 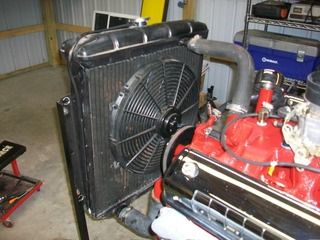 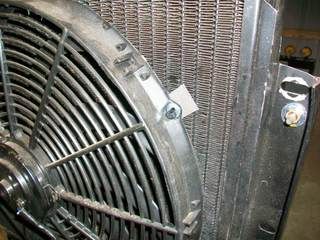 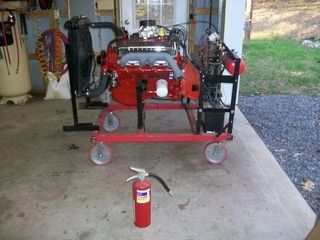 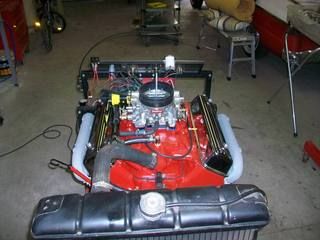 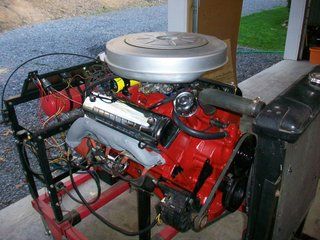 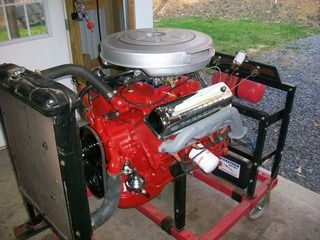 More later UPDATE: It is Saturday morning.. I am working on a YouTube channel here in the airport at Dulles. I will put in more videos later.
__________________
Lancaster, California Visit hotrodreverend.com to view hundreds of pictures and videos of the build of the 1955 Ford Club Sedan! |
|
|

|
|
|
#112 |
|
Senior Member
Join Date: Jun 2010
Location: Detroit suburb, MI
Posts: 3,706
|
You Da'man reverend. Very sweet.
Sal |
|
|

|
|
|
#113 |
|
Senior Member
Join Date: May 2010
Location: Lancaster, CA
Posts: 916
|
Thanks fellas. I did get more videos loaded up on the Youtube channel if anyone is interested.
__________________
Lancaster, California Visit hotrodreverend.com to view hundreds of pictures and videos of the build of the 1955 Ford Club Sedan! |
|
|

|
|
|
#114 |
|
Senior Member
Join Date: May 2010
Location: Lancaster, CA
Posts: 916
|
Here is the latest link to my videos...
https://www.youtube.com/watch?v=Ecyn583wPEI I have several on there. If you want to see the rest of them just click on my channel name and it will show you the rest.
__________________
Lancaster, California Visit hotrodreverend.com to view hundreds of pictures and videos of the build of the 1955 Ford Club Sedan! |
|
|

|
|
|
#115 |
|
Senior Member
Join Date: Nov 2013
Location: Portugal
Posts: 374
|
Thats sweet HRR, and really good to see so much work payed off. Congrats.
Could you elaborate a bit on the sending unit to oil pressure gauge? I've got and old maritime SW oil pressure gauge I'd like to use, but I only have a wire from the pressure valve to the oil pressure gauge at the dash. Did you t'it? Regards. |
|
|

|
|
|
#116 | |
|
Senior Member
Join Date: May 2010
Location: Lancaster, CA
Posts: 916
|
Quote:
__________________
Lancaster, California Visit hotrodreverend.com to view hundreds of pictures and videos of the build of the 1955 Ford Club Sedan! |
|
|
|

|
|
|
#117 |
|
Senior Member
Join Date: May 2010
Location: Lancaster, CA
Posts: 916
|
Tonight I had a really comedic episode with painting the firewall and other interior parts. Last Saturday I had shot a little more TAMCO direct to metal primer surface and wet-sanded (yep, wet sanded) the firewall down to prep for the topcoat. I don't know about you guys but my sinuses sure like the wet sanding route. I know it's messy and you could put what I know about body work in thimble and still need a microscope, but it beats the dust and all. I have dust masks, the 3M charcoal filters, etc, but if I can get away with not having to wear them I am all for it. By the way, the TAMCO primer is the real ticket - it sprays nicely out of the gun and it is easy (soft) to sand.
Welp, after getting everything prepped for paint I decided to shoot some tonight. You guys know the drill, you get home (about 5:30 pm), eat some supper with the wife and kiddos, then remember you have to mow the lawn because there is a house showing tomorrow, do some general yard work outside, etc. Ok, now what? is there enough time to shoot some paint before it gets dark? Well, everything is masked so let's roll the car out and get the parts out on the paint rack, mix some paint and give her a go! I'm using the Eastwood brand (I think it is made by Kirker) single stage Urethane paint. I chose to go with the original tutone so we mixed the 60s Mustang Wimbledon White and away we go. As I pour the paint and make sure I get the right ratio I hear this rumble outside. "No way," I say to myself. "Ain't no rain in the forecast and I just came in from mowing and we are clear and we are good." Yeh right... anyway, as I pour the paint in the cup and start sealing the lid I kid you not... THUNDERSTORM! Aaarrrgghhhhh  You have got to be kidding! I looked like Scamper the Squirrel running around grabbing parts, the 55, tripping over the air hose, and what have you. Now what? You have got to be kidding! I looked like Scamper the Squirrel running around grabbing parts, the 55, tripping over the air hose, and what have you. Now what?I have all the paint mixed so what to do? Throw away the paint and wait another day? Nah, too much Scotch-Irish in me for that! I got things set up quickly and shot in the garage after covering a few things. It really was not too bad but suffice to say it is next to impossible to get every speck of dust off the firewall before you shoot the paint! I need a paint booth for sure. Here are some photos. I was surprised by the high gloss look of the paint - we will see what she has when it all cures. The paint shot well, NO RUNS... imagine that! My wife even came out to give her A+ on the thing! I sent a photo to my FIL and we will see what he says when he takes a look at it. 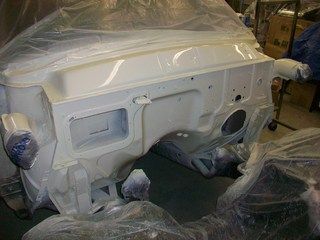 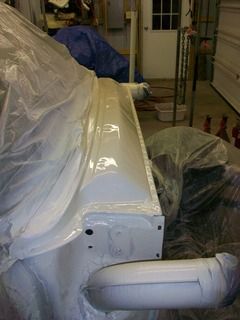 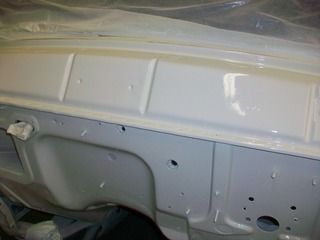 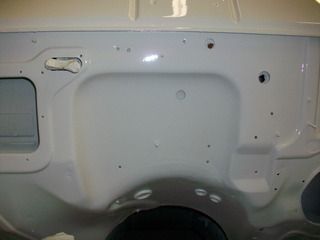 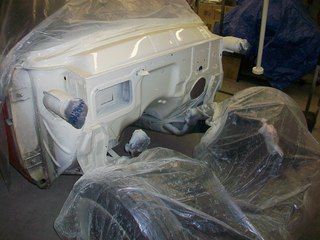 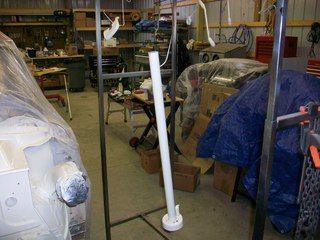
__________________
Lancaster, California Visit hotrodreverend.com to view hundreds of pictures and videos of the build of the 1955 Ford Club Sedan! |
|
|

|
|
|
#118 |
|
Senior Member
Join Date: May 2010
Location: Lancaster, CA
Posts: 916
|
For all the drama around here when I set out to get something done on this old Ford, I know I could talk to one of these cable/satellite stations and get my own reality TV show dagblastit!
For starters, two days ago I was prepping to remove the Y block from the engine run stand so that I could put it on free standing legs, mount the flywheel, clutch, bellhousing, and transmission with every intention of dropping the works in on Saturday (yeh - is that tomorrow?). When I get to pokin' around I look things over and see a shiny thin line at the front of the valley pan where it meets the block... "Is that just silicone?" I say to myself. It was so thin I had to get a screwdriver to touch it and see what it was made of. "Dagblastit!" I said as I smeared the oil off the tip of the flat blade screwdriver. "That valley pan is leaking!"  You may recall during the initial run all things were good, just something small at the oil pump that needed one bolt tightened. I even checked all the way around after that episode... nothing. Until the other day! So... long story short I removed the intake and parts, removed the valley pan, cleaned all surfaces and REMOUNTED the sucker. If it leaks now I am going to take a CAULKING GUN to it after it is in the car. As a side bar, I did notice that the very front corner was a tick higher than the rest of the pan so it was NOT perfectly flat when installed originally. Ok, so on to bigger and better things. I looked over in the corner of the shop and my eyes met the hard fuel line from Kingdom come - yep, it was time to take a look at this thing and get on it. After all, I paid MORE FOR SHIPPING than the line cost itself lol. That sucker is HUGE. I jacked up the driver's side and took a look-see. "You have got to be kiddin' me," I said right out loud (by myself no less, just me and the tools, parts, and God). Seems the factory put the fuel line between the body and the frame in the rear of the car so there ain't no way in the place where Satan sets up shop am I ever going to get it on in one piece unless I RAISE THE BODY OFF THE FRAME.  So much for a front end r&r! This is getting ridiculous. After a few helpful fellas on the internet chimed in to confirm, I said I give and it will have to be "snipped". I guess now I am going to install an electric pump just because I can and maybe I just like the greater opportunity for another ISSUE! So much for a front end r&r! This is getting ridiculous. After a few helpful fellas on the internet chimed in to confirm, I said I give and it will have to be "snipped". I guess now I am going to install an electric pump just because I can and maybe I just like the greater opportunity for another ISSUE!  Alright, so no big deal, let's keep going. "What else?" I say to myself... "There is plenty to do here." And so there is, I have brake lines waiting to be installed, new wheel cylinders, got to get the 3 speed on the tree all cleaned up and connected. (By the way when I shot the firewall the other day I also primed and painted the steering column... vavavoom baby! She looks real good.) 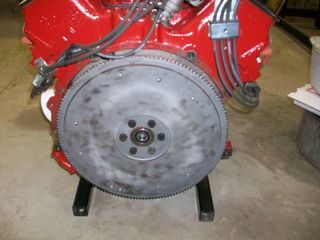 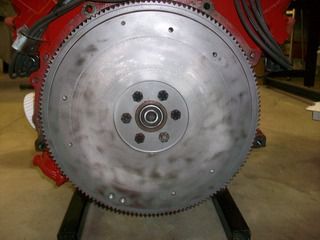 I sauntered over to the engine I had finally got all buttoned up and off the run stand. It was sitting on its free standing frame unassumingly by the workbench just minding it's own business waiting for its tail end. I cleaned up a very good flywheel that had already been turned, installed a new pilot bearing, torqued the flywheel to specs, and the looked for the clutch and pressure plate... "Uh, where is the clutch and pressure plate?" I looked around for a LOOOOONG time. "Jessup, how do you lose something that large? I mean the small spring clip for the clutch fork, I get it... but a clutch disc and the pressure plate? Really?"  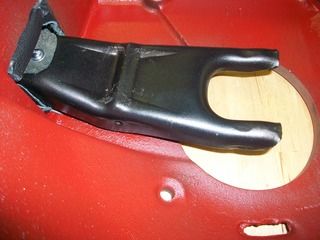 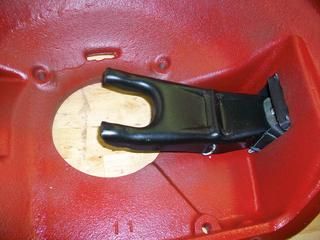 Still can't find them. I don't what I did with the box or the parts. I do have the throw out bearing. With the move going on and all the packing, slinging, tossing, kicking, beating, and what have you I have no idea where it got off to. Ridiculous. So now where are we... oh yeh - at a stand still on the engine and transmission. I could have sworn that the old 292 just sat there and winked at me when I wasn't watching!  At least I manufactured a decent clip for the clutch fork... just a couple snips and turns with an old coat hanger and there you go - that's good for 15 more horses right? Well, whatever the case the Y block follies continue... However I did want to leave you with a photo of an invisible part I NEVER had but do need... It is the clutch equalizer bracket that bolts to the block at this location (I took two photos - one in darkness and one in the light, trying to get one of those ghost shots but it didn't work!) 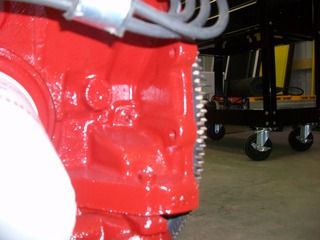 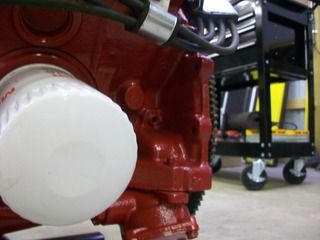 Let me know if you have this apparition.
__________________
Lancaster, California Visit hotrodreverend.com to view hundreds of pictures and videos of the build of the 1955 Ford Club Sedan! Last edited by Hot Rod Reverend; 05-16-2015 at 07:06 AM. |
|
|

|
|
|
#119 |
|
Senior Member
Join Date: May 2010
Location: Lancaster, CA
Posts: 916
|
I think I have located the "ghost of a part" from two different sources and it looks to be the booger. You can view the part photo over at y-blocksforever.com. Hopefully we will have that soon. Since I could not find that stinkin clutch disc and pressure plate I had to order a new set. They are on their way. It is a 10" version to match the flywheel... hopefully.
Since the hard fuel line kicked my butt on installing it without any splices, I decided to kick its butt back and place an inline electric fuel pump on the frame rail. I am glad I decided to replace the fuel line - it was nasty inside and out and was very brittle in several places, but let's be honest - it is 60 years old! (sorry to all of you "mature" folks out there - no insult intended for you!) 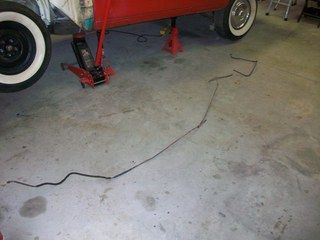 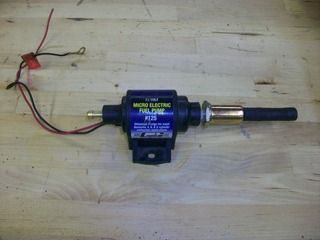 The old fuel line had to be cut in two different places to be removed, but all of the clips were in good shape. Also, I had the gas tank boiled out and coated several years and it is great shape. However, when I got to the fitting at the gas tank, it was a tight little booger. With little space afforded me, it even rounded off with a flare wrench. So, I broke out the set of Crafts man brand easy outs for NUTS (the drill easy outs NEVER work for me lol - I've got a load of stories on these pieces of junk). 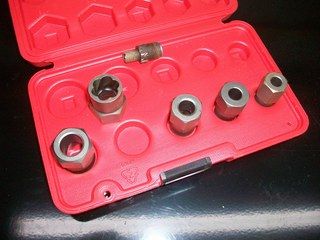 Suffice to say, the idea is that you take one of these "doohickey's" and place it on your nut or fitting (that is right I used a plumbers pipe cutter to cut the line just at the fitting) and then use a wrench to turn the doohickey counter clockwise. It grabs the fitting and presto - you've got it out. Miracle of miracles - this tool lived up to its promise this instance. I ended up cutting the new line (boy that was fun - hacking up a line that costs about $150 when the shipping was included) in two different places. One for the frame rail where the electric pump would be installed, and then one for going over the hump and between body right there above the rear axle housing. Tight I tell ya! The cuts I made on the NEW line were exactly in the same locations as the OLD line so I had point of references and I knew how the bends and curves went in and over the frame neatly. SAVE YOUR OLD LINE before you cut your new one! Also, remember that you will need to take out extra hard line to make room for your pump or even for your rubber hose at your splice. When we got down to mounting the pump on the frame, another "little used tool" came into play. Check this out... 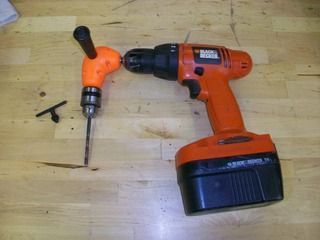 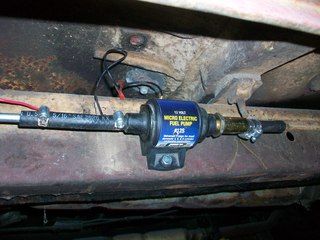 I have owned this tool 15 years and have used it..... twice? But let me tell you, it worked flawlessly. If you look at the fuel pump mount above you can tell the mount uses two holes, top and bottom. The drill would go in straight on the bottom hole, no issues. But the for the top hole the rocker panel was in the way big time. Break out this little tool and away we go! After the holes were drilled I tapped each hole with 1/4" 20 tap so that I could bolt the fuel pump to the frame. By the way, I also used dielectric grease on the top bolt because it is holding the ground. The plan is to eventually wire this to a relay and then have a switch under the dash. On to other things... One thing we were missing in the steering column change out when I bought the 56 version - the bracket that holds the column to the dash! So I dug out the old 55 column and disassembled the column. You can see from the photos that the assembly was pretty nasty. It is interesting to note that the 55 column has a two piece cup at the steering wheel mount. 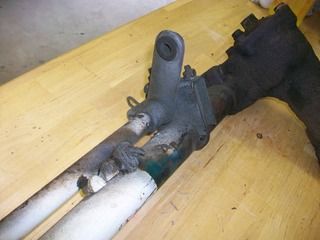 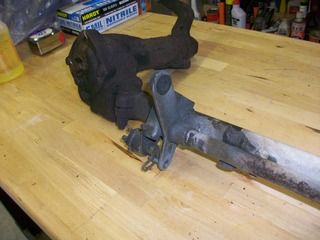 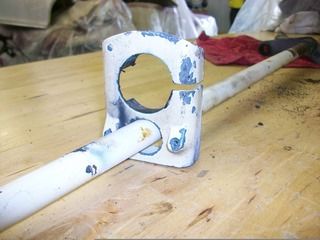 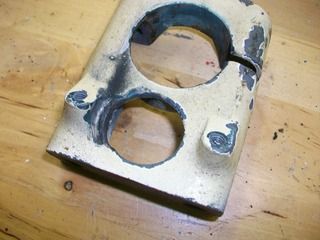 I got the bracket removed with very little fanfare but as you can see the hole for the shift column is oblong. Something rubbed it out. I "think" it was the shift indicator for the Fordomatic? The part has been blasted and I did prime and topcoat a few pieces as well to end the day. Next up - Brake Lines! I already have the front lines off, removed the side line when I took out the old fuel line, and have yet to remove the rear line on the axle housing. I do have all new lines to install though. Again, most of those lines that I removed are original to the car. Scary.
__________________
Lancaster, California Visit hotrodreverend.com to view hundreds of pictures and videos of the build of the 1955 Ford Club Sedan! |
|
|

|
|
|
#120 |
|
Senior Member
Join Date: May 2010
Location: Lancaster, CA
Posts: 916
|
I have got so much done in the past two days I am going to need to make two posts...
 Last night I did the same routine on all of the brake lines that I did on the fuel line earlier. Would you believe half of the hard lines were still original? I had replaced the brake hoses about 5 or 6 years ago and they are in great shape so I reused those. Most of the parts were all doing pretty good. I had used silicone brake fluid the last time I added a Master Cylinder and replaced all wheel cylinders, so this is a great time to "purge" out the old fluid and put in DOT 3 since I am going with a power brake setup. While I was on the rear axle replacing hard lines, I took the time to drain the fuel tank. The fuel had been in there about 3 or 4 years, and although I had added the ethanol treatment and Stabil, I decided to drain it all out. It looked like pee so I took a photo of the Fairlane taking a leak. 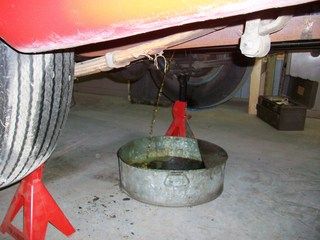 Maybe this would be a good time to talk brakes on a 55/56 Ford. Most guys my age and younger have no idea how to "adjust" their brakes. They are so used to either calipers/pads and self-adjusting drum brakes that all of the other stuff here seems foreign. Most people that wrench on cars can "do a set of brakes" but there are some things peculiar to 55/56 Fords that I did take a few photos of... 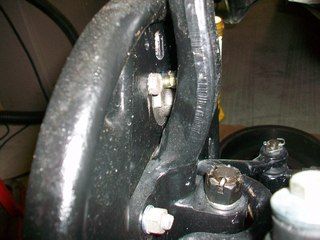 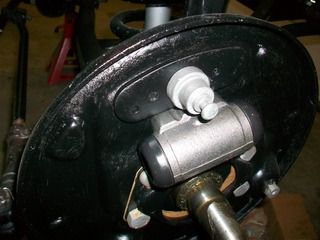 Installing the new wheel cylinders is pretty straight forward, just make sure you know what side you are dealing with and all of that. I will say that up front that small mounting bolt behind the spindle upright is a PAIN to install if you have big fingers. That thing is right in the way. The first thing some folks need to know is that the anchor pin shown above and then here, 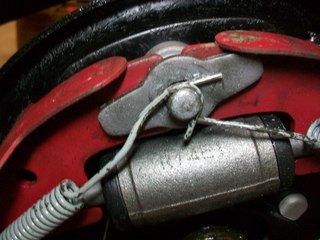 is an adjustment feature. If you noticed how the hardware looks when you reinstalled it, it is made in such a way as to slide up and down in the backing plate boss. The reason it has that oblong washer is so that it can slide. You will need a 15/16" wrench to loosen/tighten the nut behind it. Although the shop manual is not very clear the idea is that when installing new brakes you lower the pin as much as possible in its bore. I use a small amount of white lithium grease to help this out. Once you need to adjust your brakes later on and move the pin up you will be glad that it can slide. There is also an eccentric on the primary shoe. Speaking of the primary shoe, it ALWAYS goes towards the front of the vehicle. 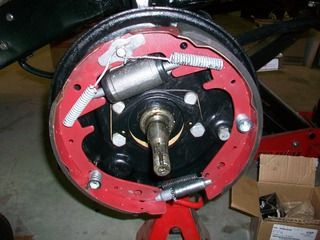 The eccentric is turned by the head of the bolt ON THE BACK SIDE of the backing plate. If you spin it one time you can see where this would tighten the other side of the shoe as the brake linings wear. Of course you have your star adjuster at the bottom also. 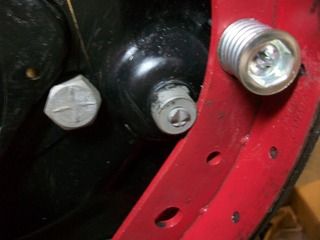 One thing I dislike... the bleed screws are 10 mm and not 3/8" on the last several wheel cylinders I have purchased. What gives? The threads for the mounting and for the brake line are all SAE??? any ideas? One frustrating thing that happened. I got a new front and rear hardware kit for the car from Jackson's Old Time Auto Parts out in the Midwest. The kits came in two bags. I opened the one marked "FRONT" and proceeded to reinstall the shoes. You can tell from this photo that I am glad I saved my parts. When I was fiddling with those spring hold downs that fly out all over the shop I was wondering why I could not get those boogers to lock down. 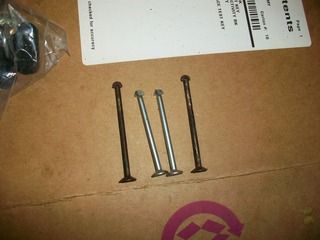 Well..... DUH! They were different sizes (after I started throwing things I decided to check my old parts.) On a whim I got out the other bag that was for the REAR. What do you know? They had the front/rear mixed up. I just sighed and kept on lol. 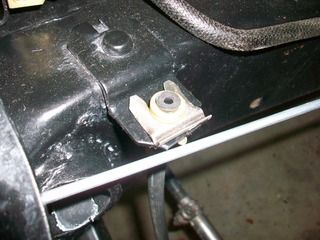 If you look at the photo above, you will see a good reason to save those rubber stoppers that come on your new wheel cylinders. While you are waiting to install other parts or to come back to your project you can pop them in the hole and keep junk out! One last photo for this post... 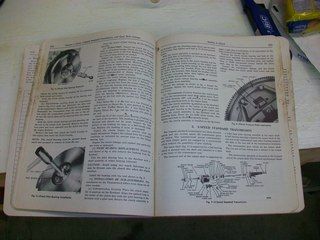 The shop manual is an invaluable tool! I hope you have one.
__________________
Lancaster, California Visit hotrodreverend.com to view hundreds of pictures and videos of the build of the 1955 Ford Club Sedan! Last edited by Hot Rod Reverend; 05-23-2015 at 06:48 PM. |
|
|

|
 |
«
Previous Thread
|
Next Thread
»
|
|
| Sponsored Links (Register now to hide all advertisements) |
|
|
All times are GMT -5. The time now is 09:06 PM.




 Linear Mode

