|
|
#241 |
|
Senior Member
Join Date: May 2010
Location: Lancaster, CA
Posts: 916
|
Yep, 12 volt system. If you look back through this monster blog here you will see a picture of a 14 circuit wiring harness from Rebel, so I really think it would be wise to use a relay.
__________________
Lancaster, California Visit hotrodreverend.com to view hundreds of pictures and videos of the build of the 1955 Ford Club Sedan! |
|
|

|
|
|
#242 | |
|
Senior Member
Join Date: Aug 2012
Location: Abq, NM
Posts: 3,607
|
Quote:
I didn't look back thru all the posts but did assume you were using 12v and a complete new harness. Depending on how much re-wiring the car from scratch you're doing where you place the relay(s) in the headlight circuit will determine the amount of new higher capacity headlight wiring you'll need. It's 'the weakest link' thing that can sneak up on you. Excellent work so far, I'm jealous and wish I had the ability and patience you do. . |
|
|
|

|
| Sponsored Links (Register now to hide all advertisements) |
|
|
|
|
#243 |
|
Senior Member
Join Date: May 2010
Location: westbury ny
Posts: 854
|
if you want to go hi tech use led. low voltage use and a lot brighter only draw back is they look light blue at night like modern cars you can get bulbs for all applications
|
|
|

|
|
|
#244 | |
|
Senior Member
Join Date: May 2010
Location: Lancaster, CA
Posts: 916
|
Quote:
 And then there is the breakdown of equipment that pops up from time to time. An air compressor part, something for the sandblaster, missing this piece here, that tool there, etc. And then there is the breakdown of equipment that pops up from time to time. An air compressor part, something for the sandblaster, missing this piece here, that tool there, etc.  It is what it is. It is what it is.Speaking of patience, I decided last night to rub down the SS headlight trim rings with Acetone and buff them a little bit. The PO had this car painted a long time ago, and you can see from the one headlight ring how shoddy the masking work was. Red paint was all over these things. The rings are in good shape though, and do not show any dents or other problems. I decided to put some elbow grease into it and reuse them. 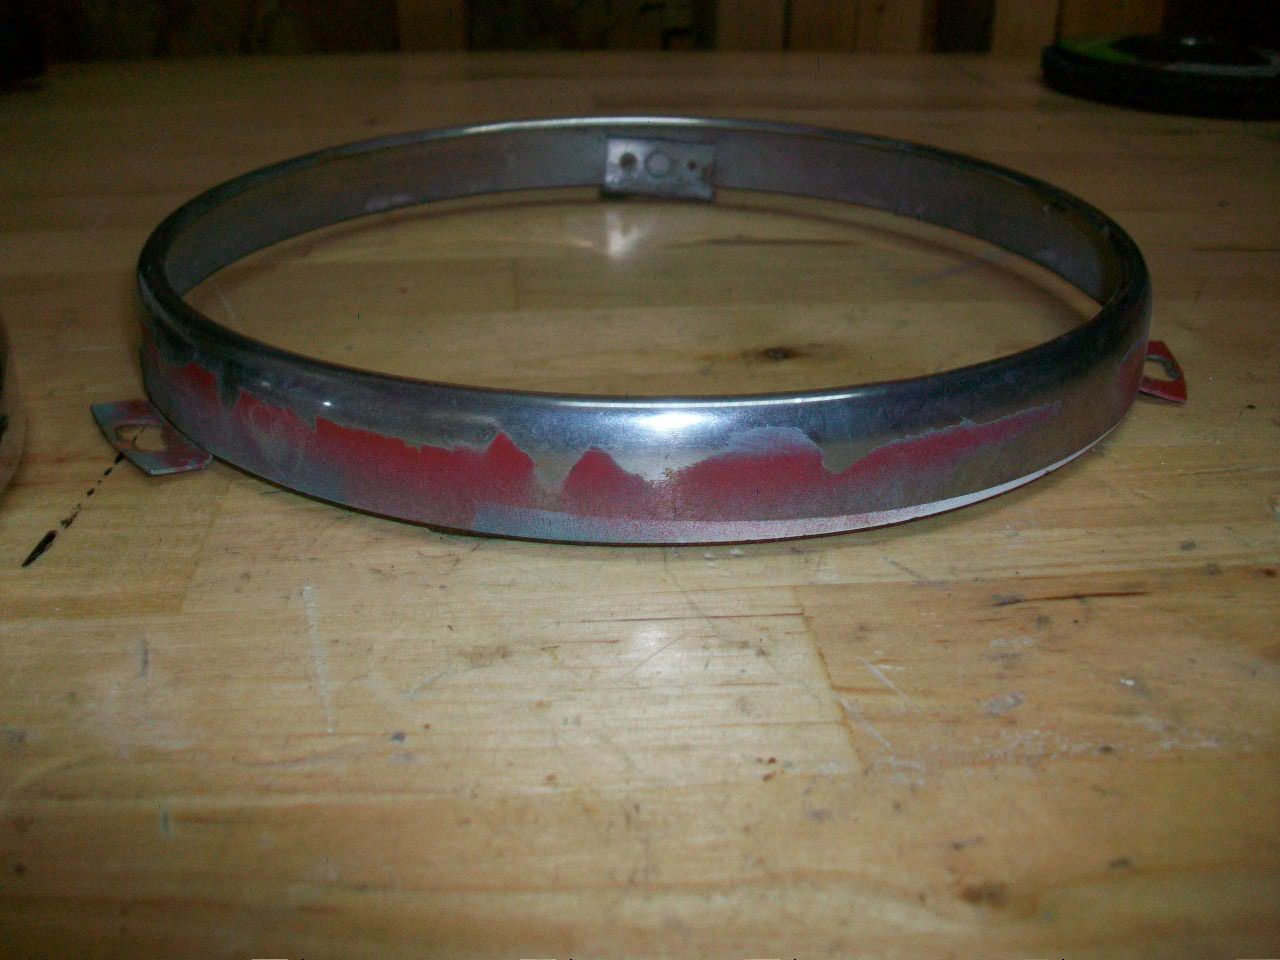 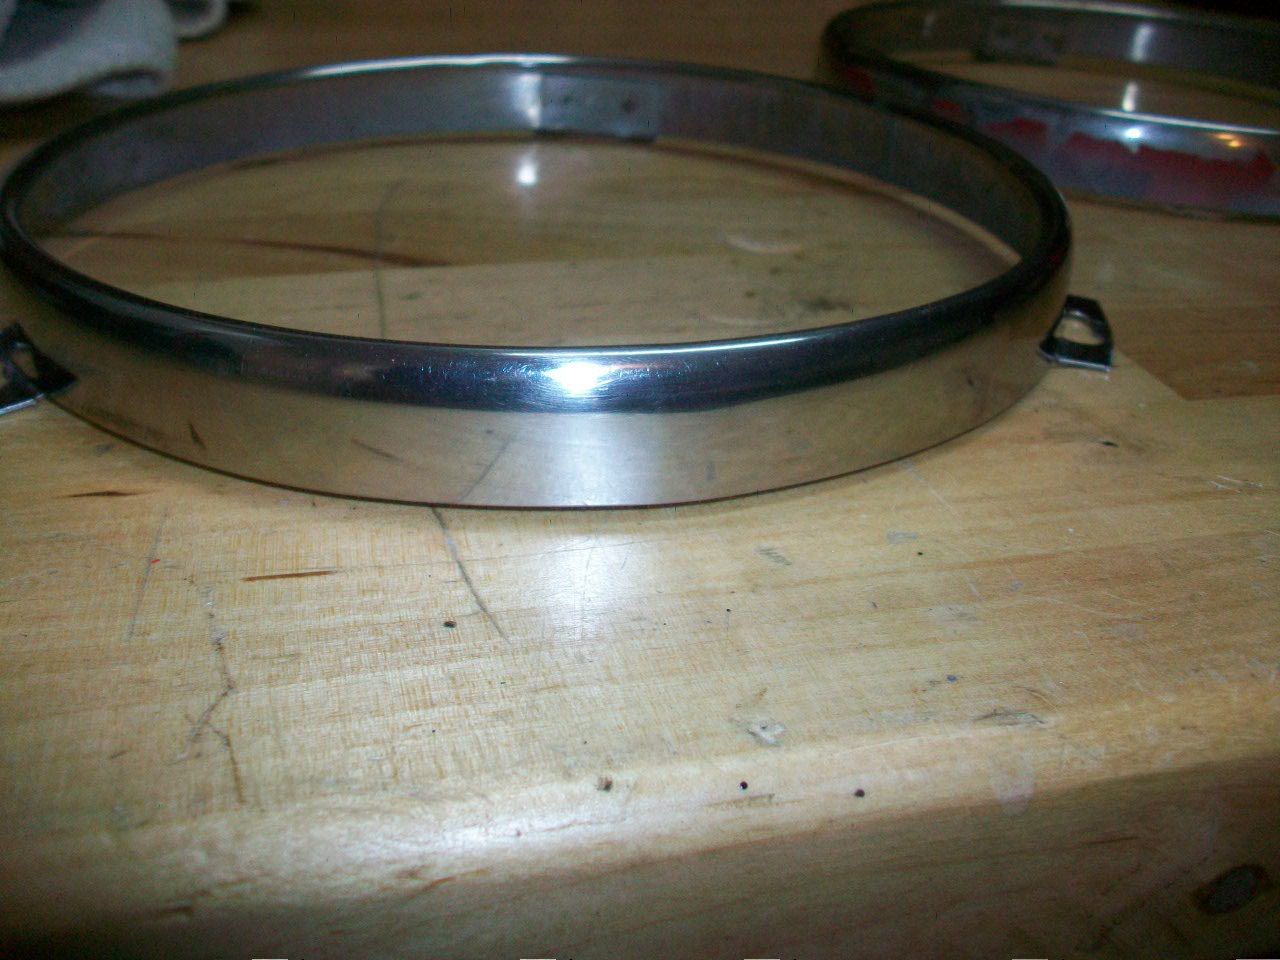 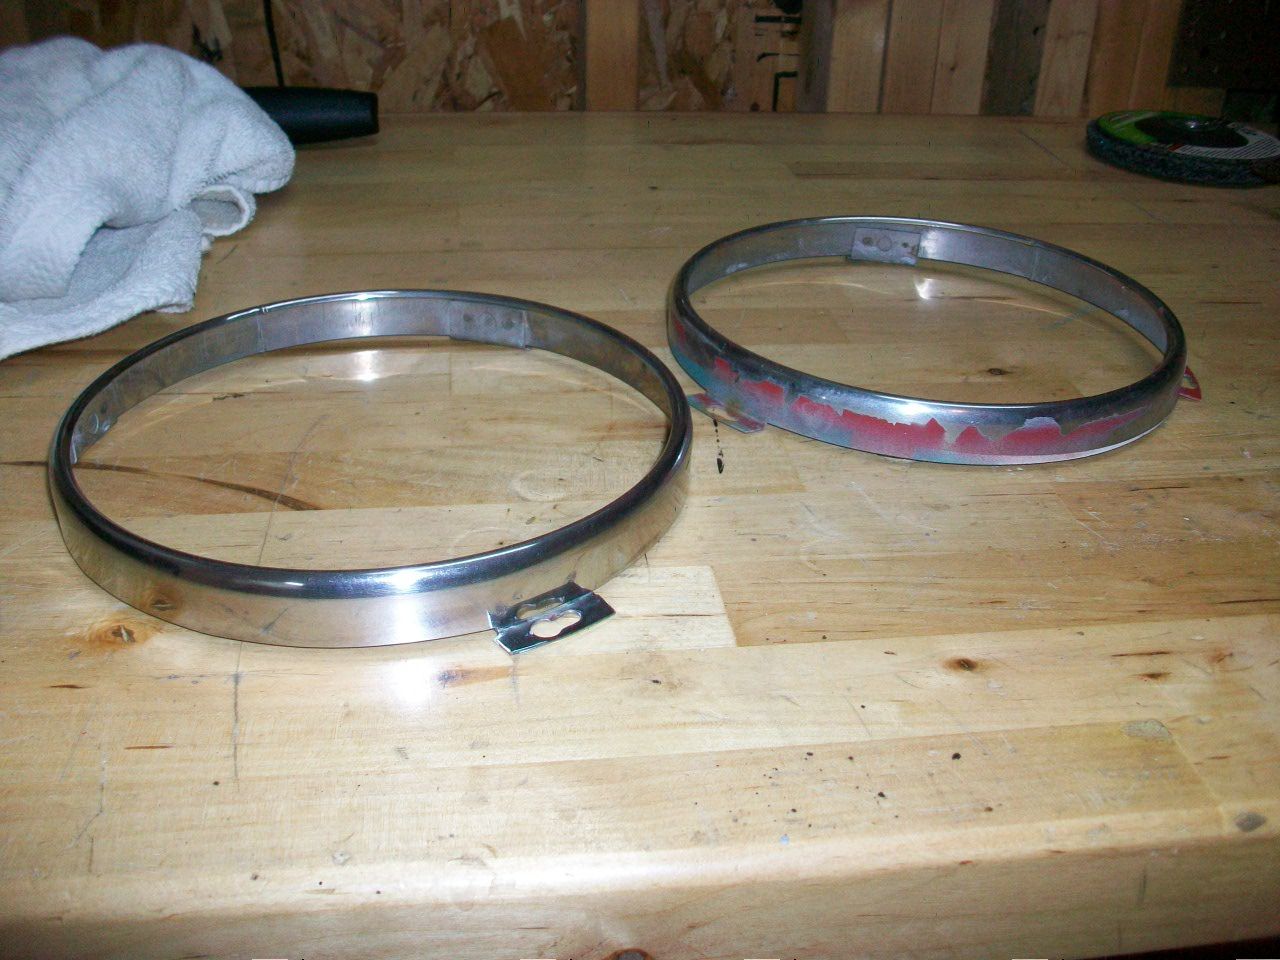 Before it got dark I decided to drag out that passenger fender and the sandblaster(s) to the yard and get some of that white paint removed. This was an excercise in futility. I had replaced the pressure blaster nozzle with the largest nozzle that TSC had (that is where I got the sandblaster from a few years back) and did not recognize the fact that the black diamond I had in the pot from before was 2040 - way too coarse. It kept clogging up obviously. So, I whipped out the siphon blaster that has regular sand in it since it is only a spot blaster kind of thing and that was pretty slow, although there was no worry about heating up a panel lol!  I am going to have to buy the finer grain Black Diamond to get things going on the sandblaster, but whoever had the idea that the white part of the body needed to be taken down to bare metal was right on the money. It looks like there is a thin layer of surface rust underneath the paint layer in places. The sandblaster cleans that up nicely. 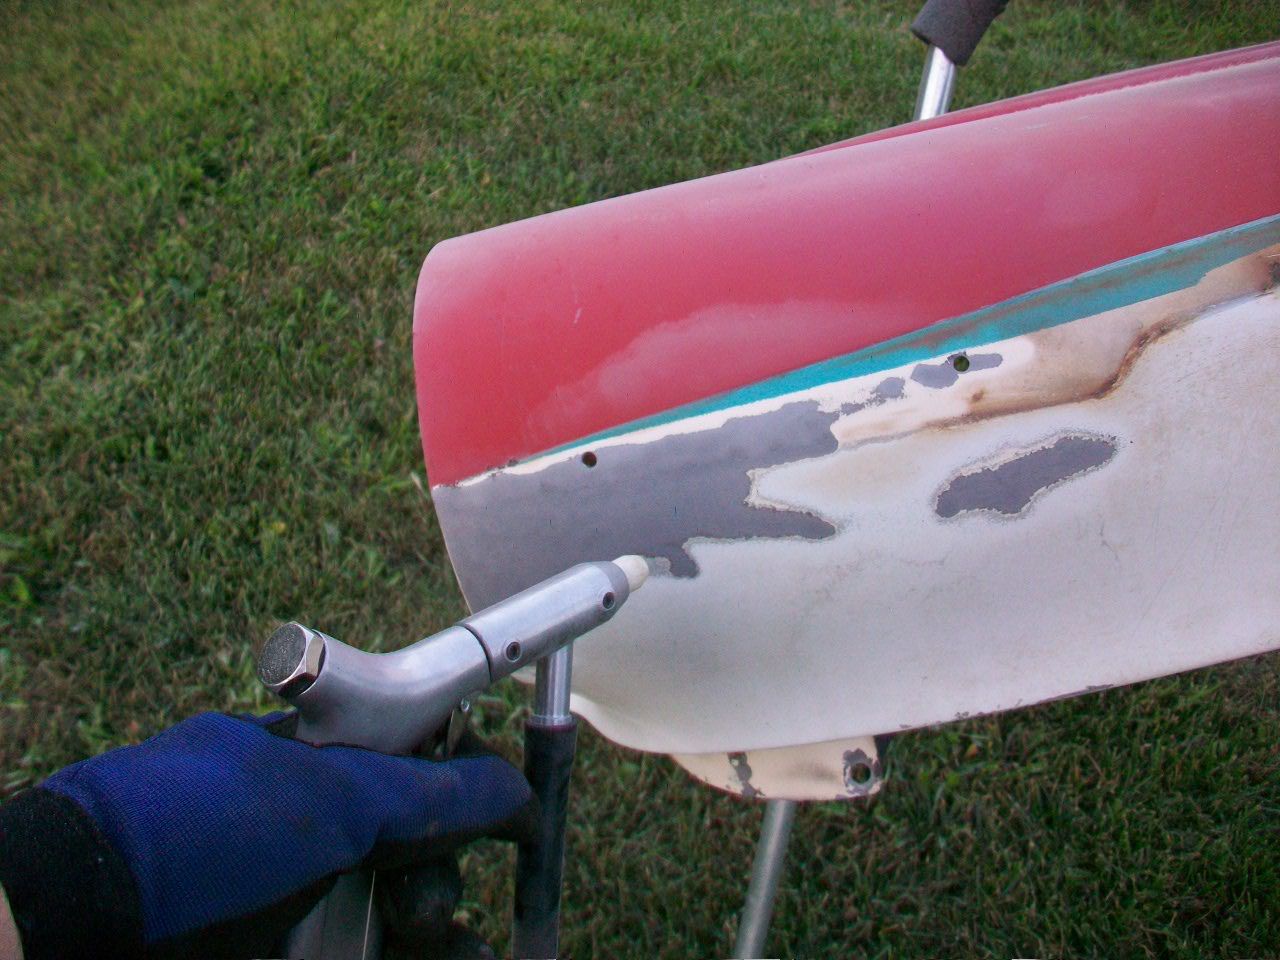 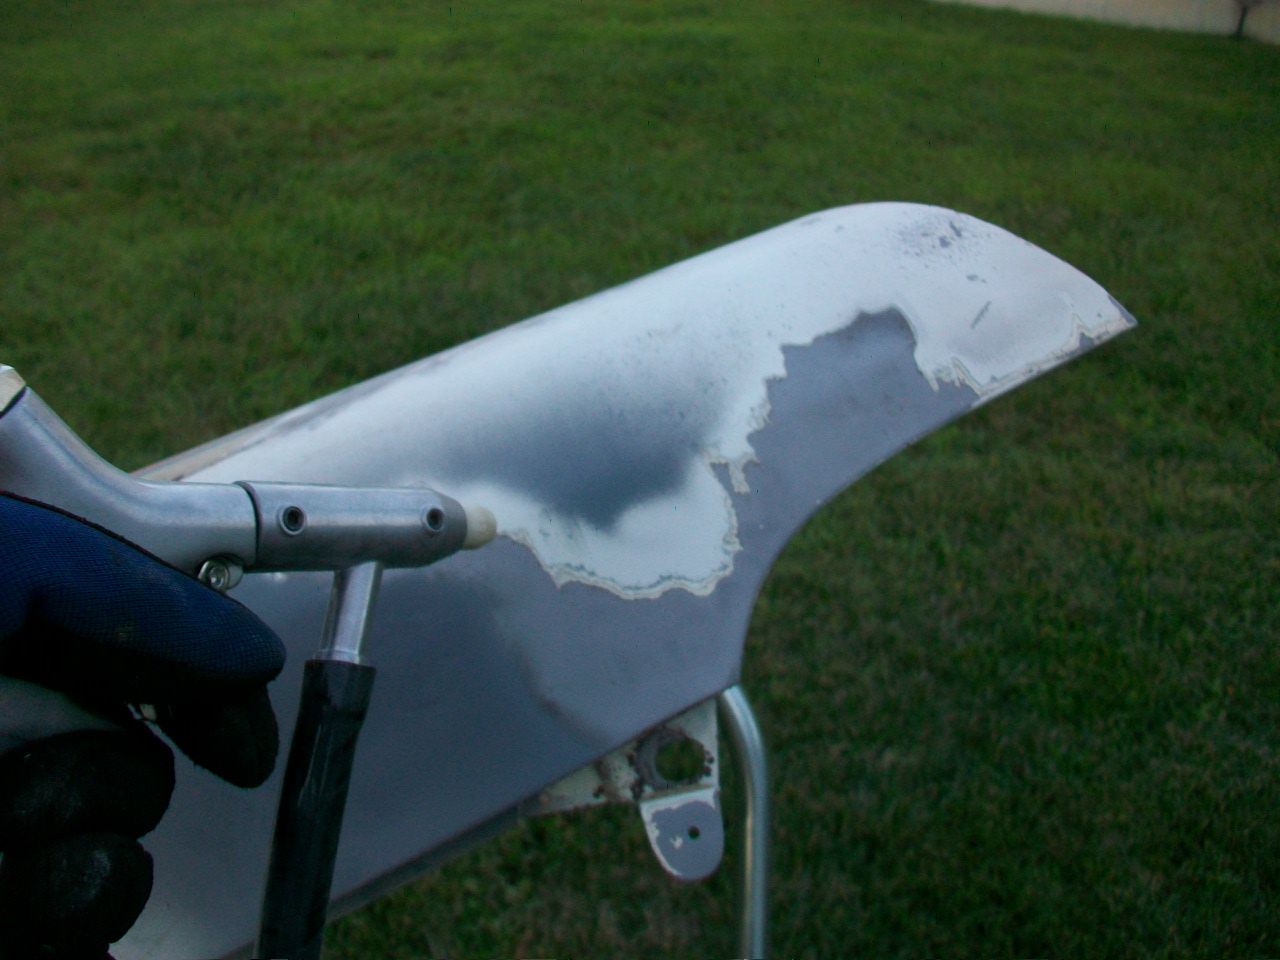 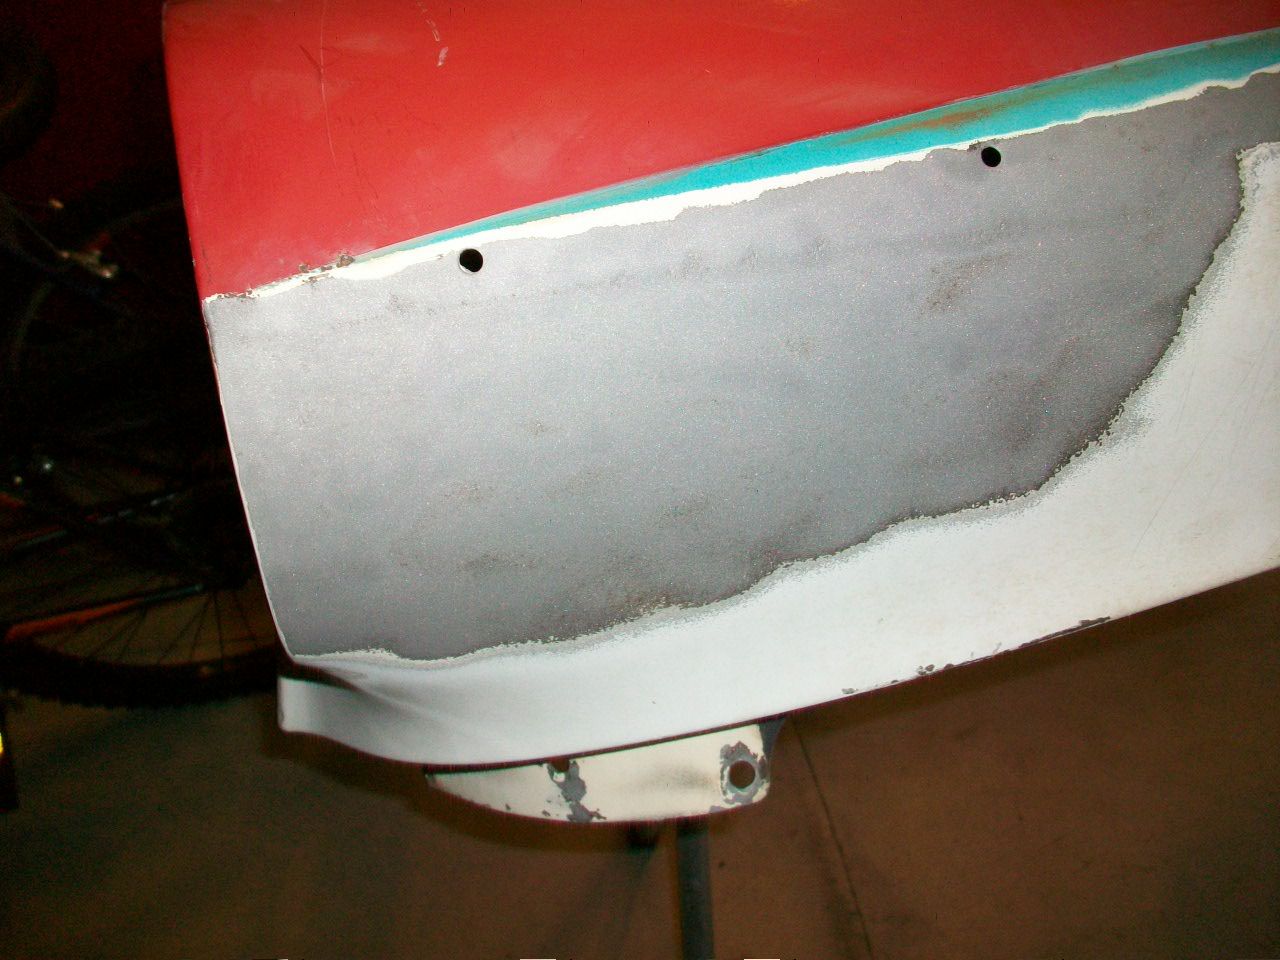 "On with the show..." 
__________________
Lancaster, California Visit hotrodreverend.com to view hundreds of pictures and videos of the build of the 1955 Ford Club Sedan! |
|
|
|

|
|
|
#245 |
|
Senior Member
Join Date: May 2010
Location: Lancaster, CA
Posts: 916
|
We had some time on Monday night to get in the garage and do a little bit... and lo and behold a good lesson learned!!!
Check out these photos: 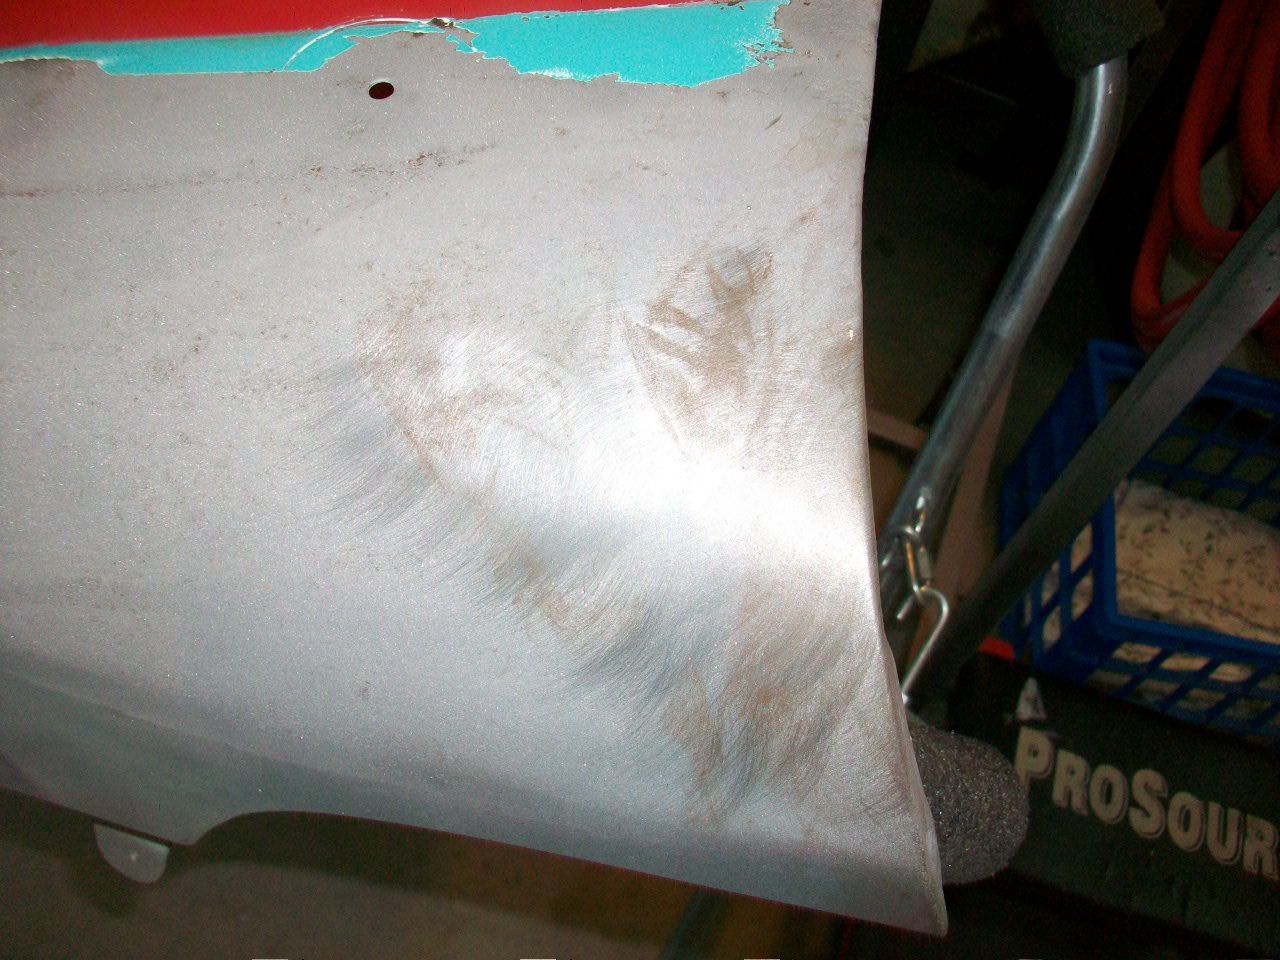 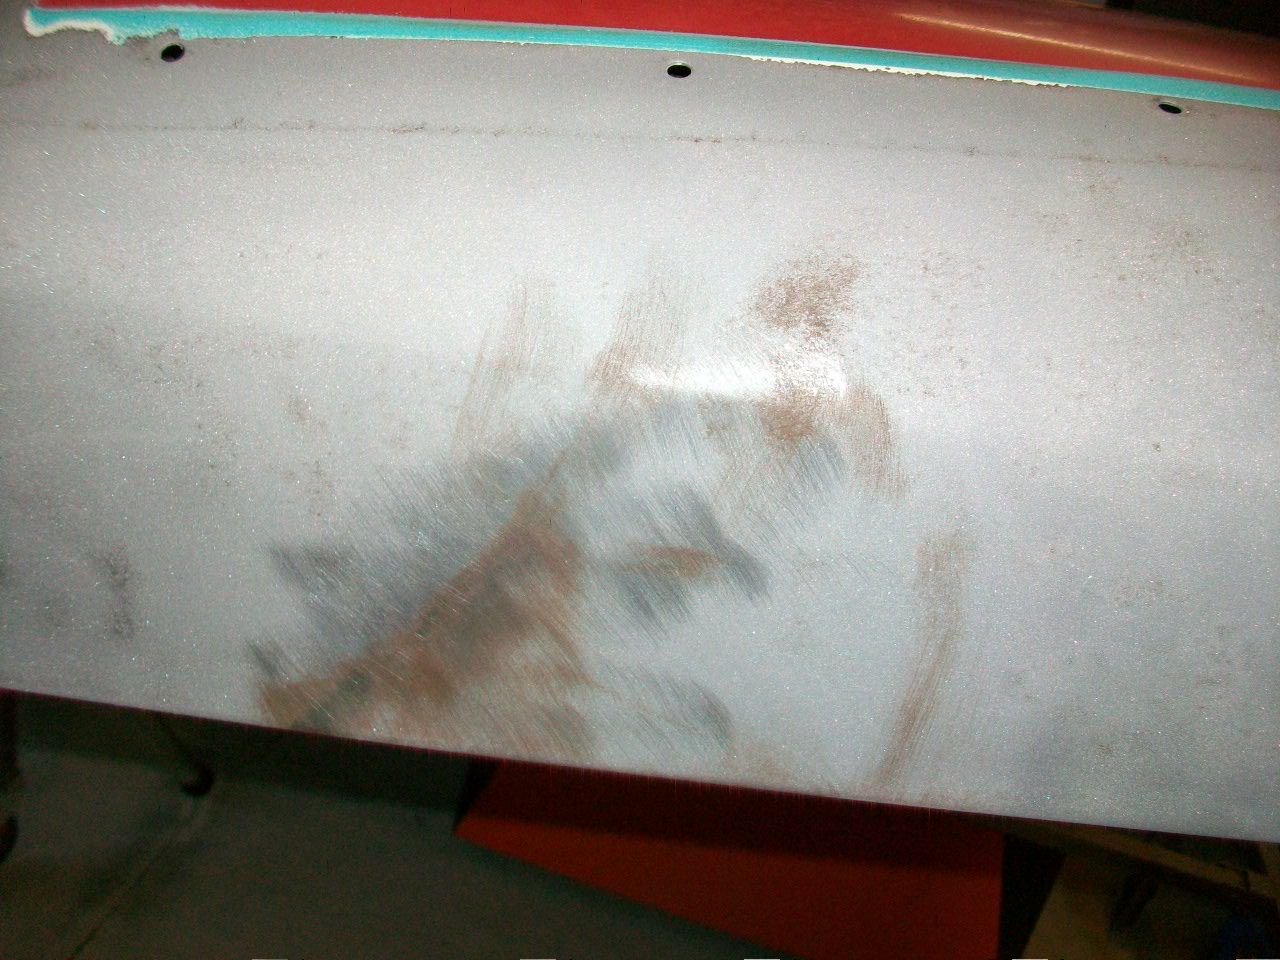 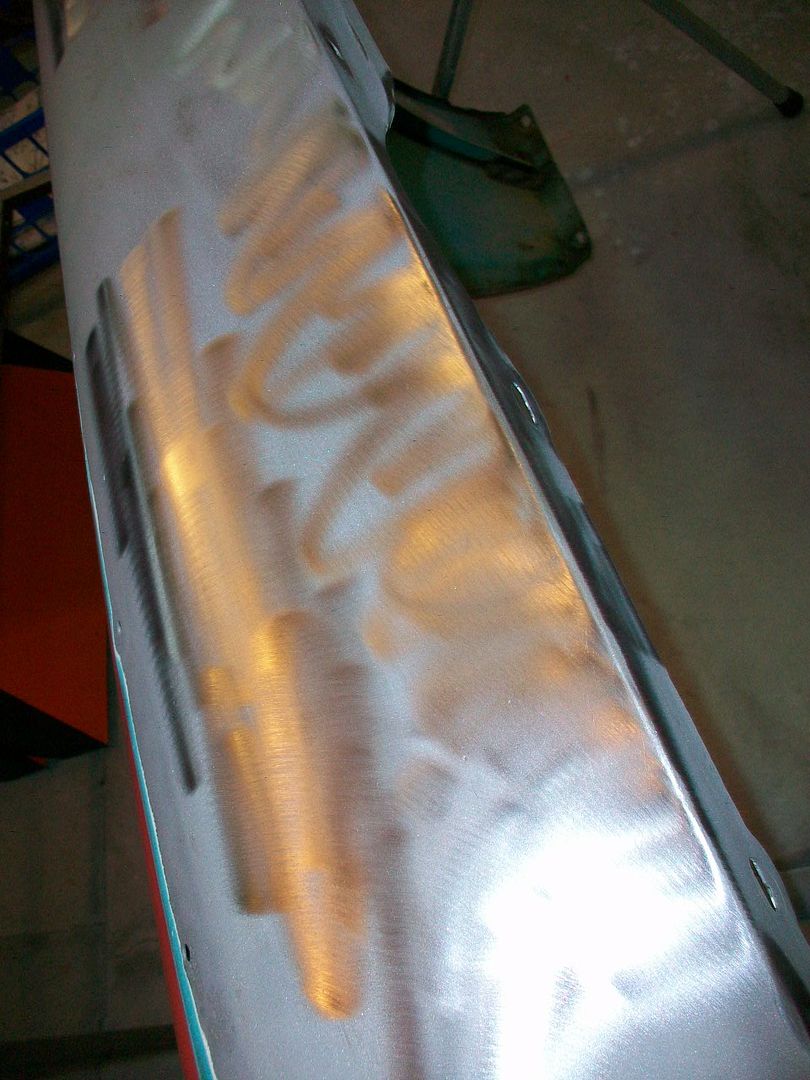 Yep, I was pretty dumb after I blasted this fender - got my sweaty hands all over the freshly cleaned metal and after a few days surface rust began to show.  Just a couple quick shots with the grinder though and it's gone. I've got to get this thing primed soon. Just a couple quick shots with the grinder though and it's gone. I've got to get this thing primed soon.  And of course, it always go to show - keep that metal clean and dry. Hopefully next time I will remember. And of course, it always go to show - keep that metal clean and dry. Hopefully next time I will remember.This passenger fender has a small problem with it's lip up front. 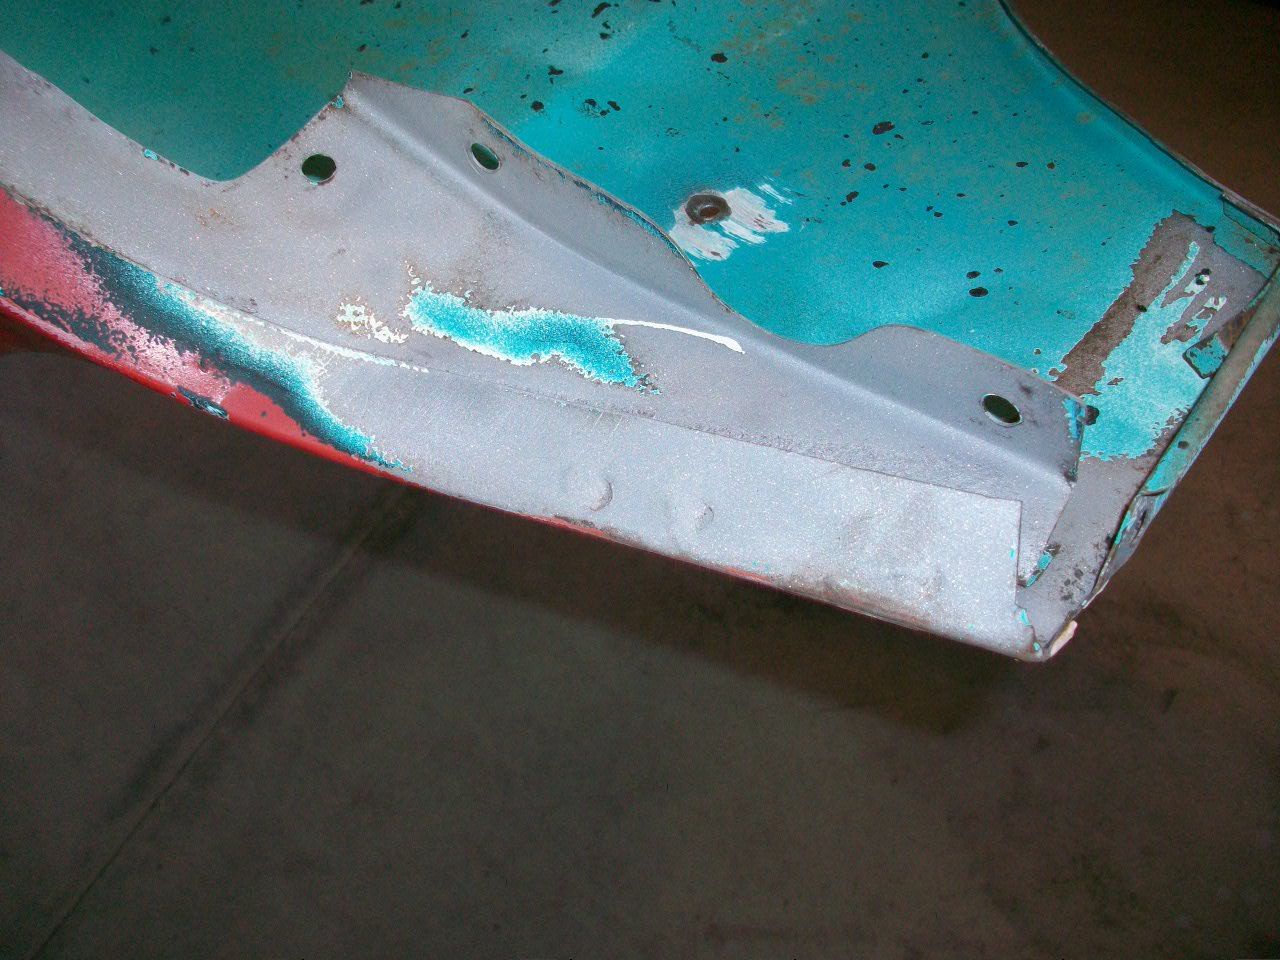 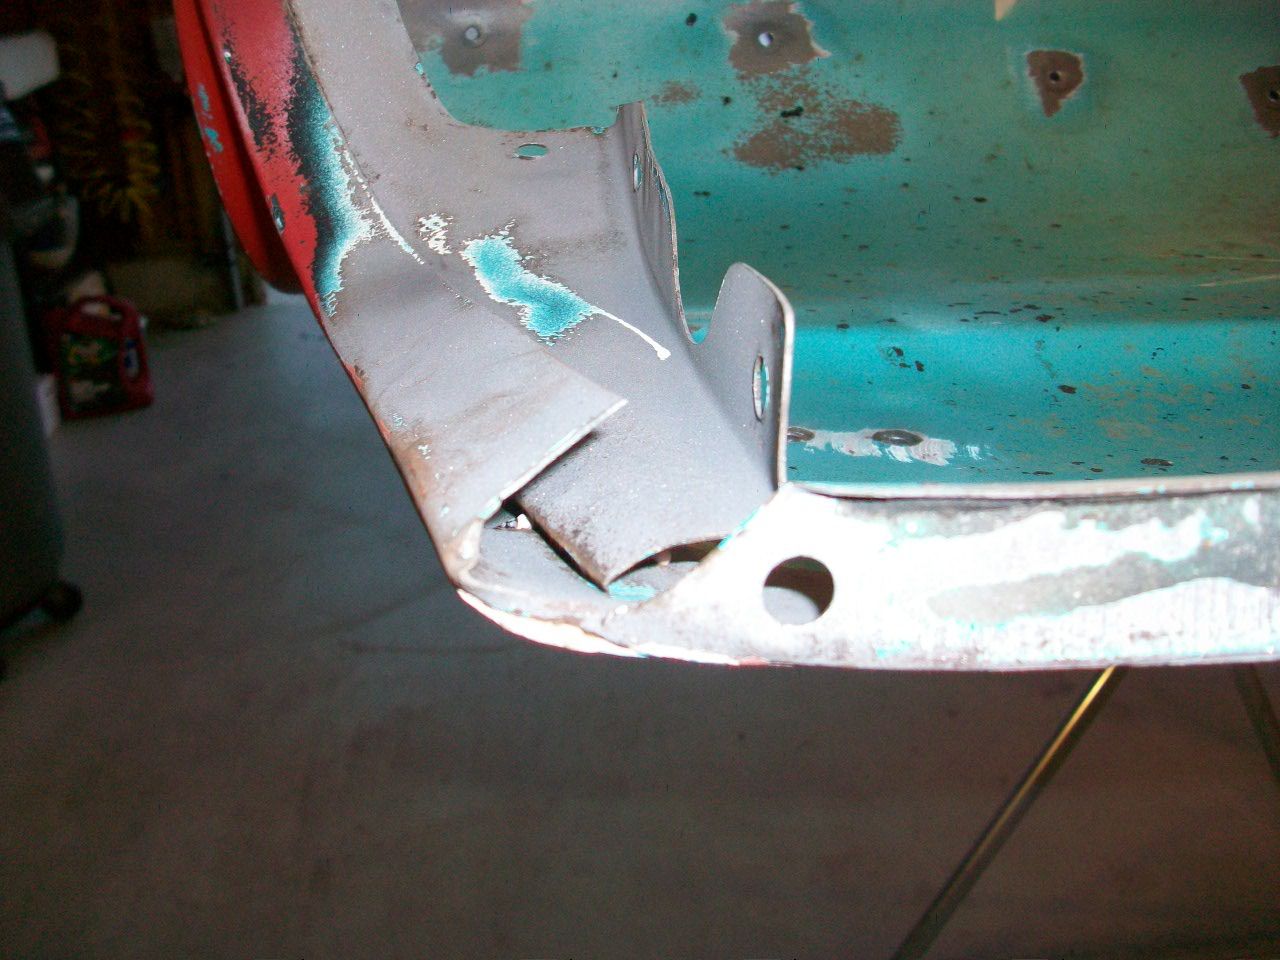 The original spot welds had come apart. This lip does carry some significance since it is in a place where the front part of the fender bolts to the air dam so the pieces have to be welded together to proceed. I drilled 3/16" holes in the overlapping sheet metal and got things lined up with a couple of my handy-dandy vise grips... these things are just the ticket. I probably have 8 or 9 different sizes, shapes, and ends with these things. 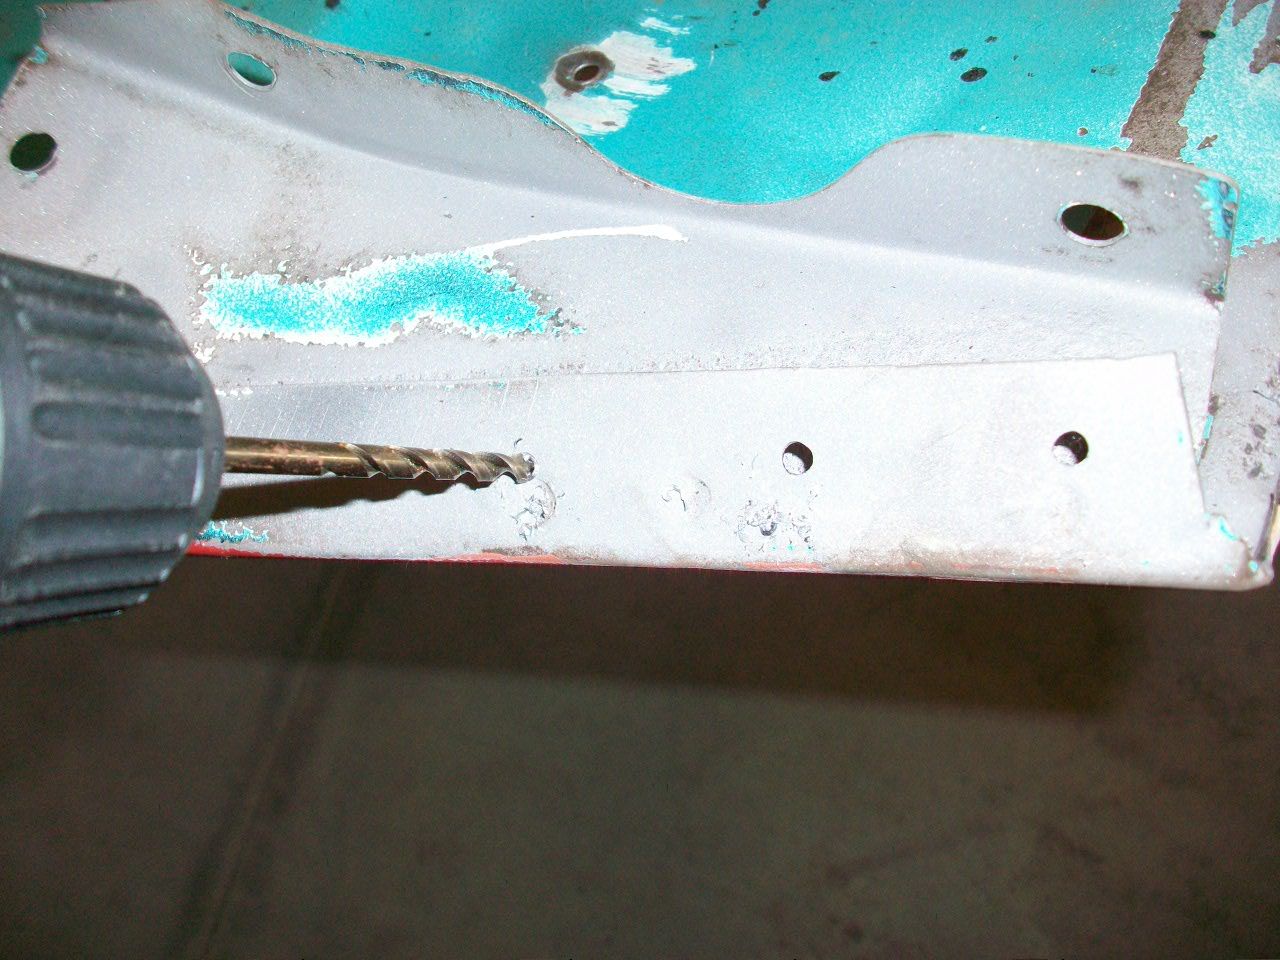 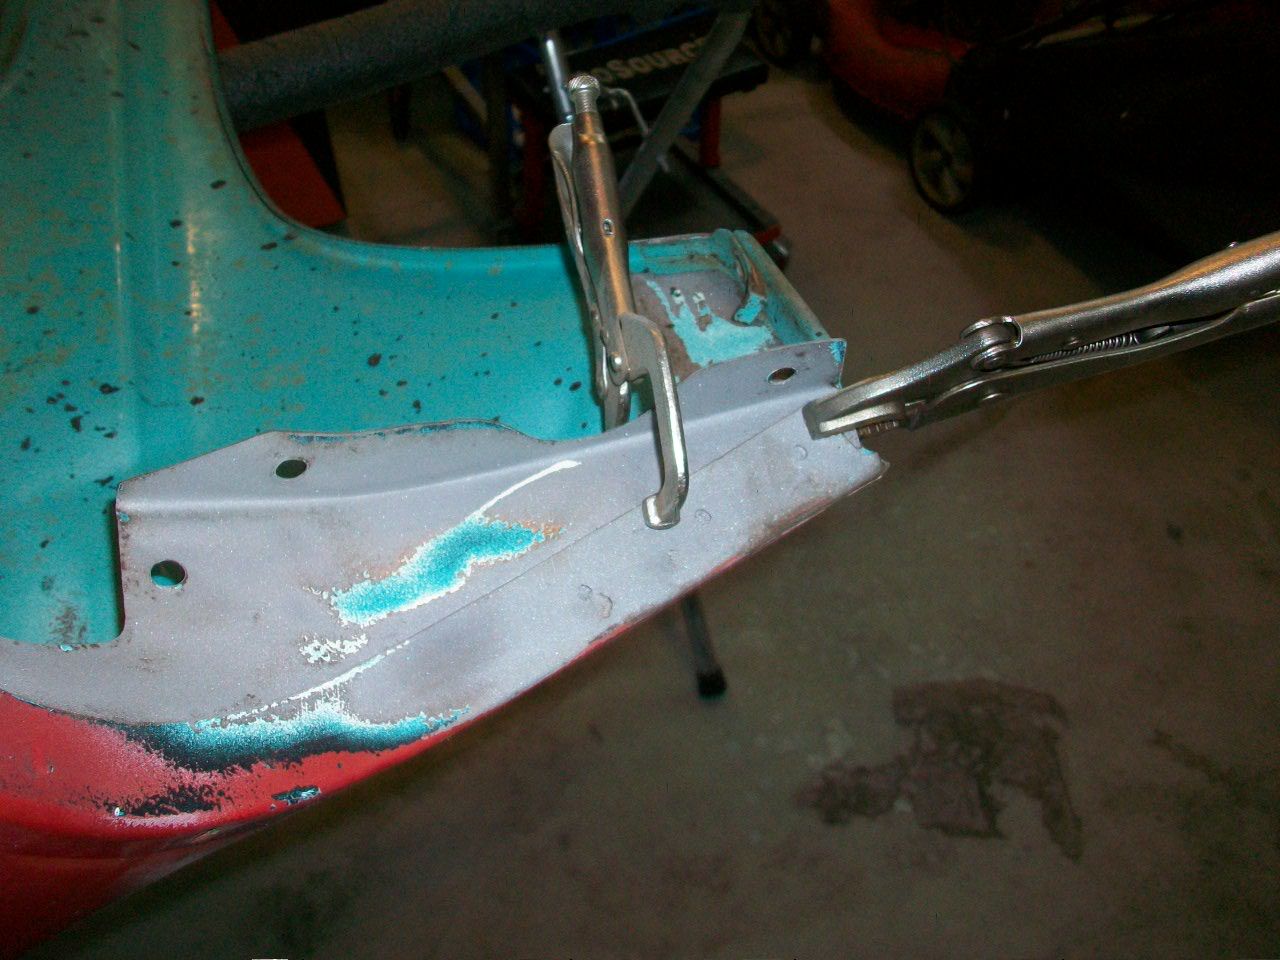 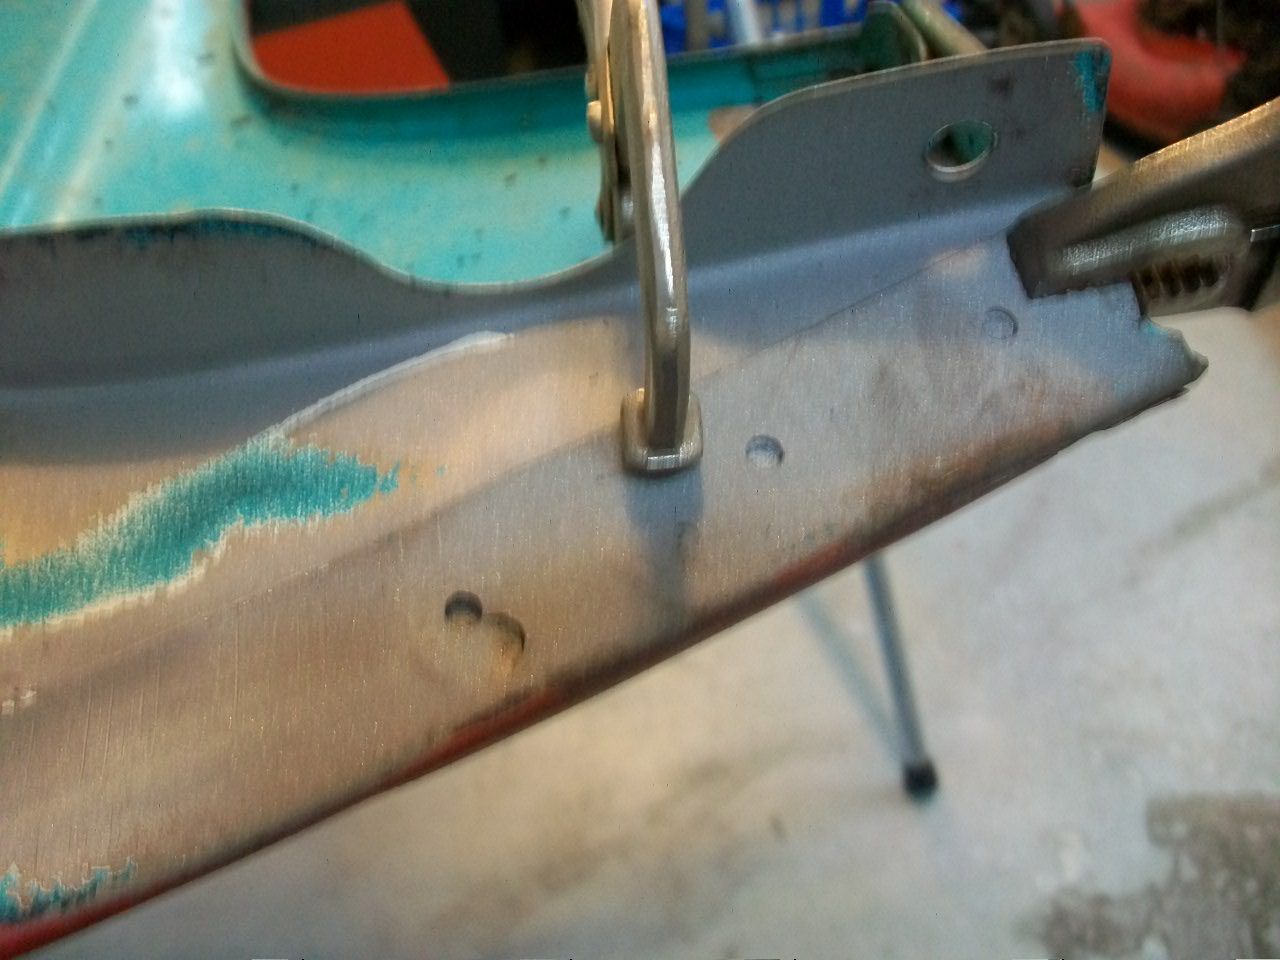 Aaaaaaaaaaand if you check the following photo you will see another lesson learned.  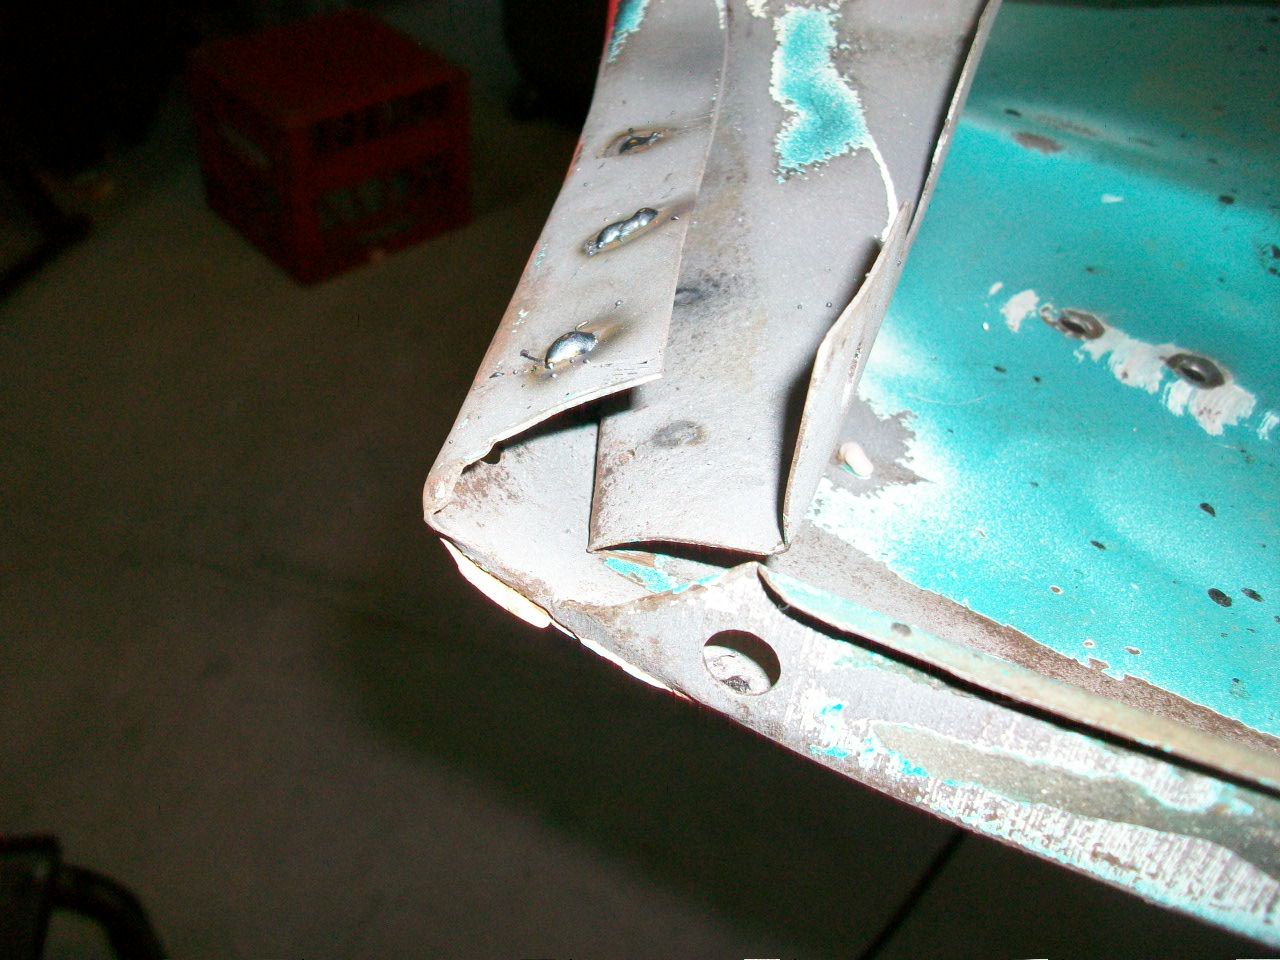 TURN UP THE HEAT! you can see in the photo above that my "welds" did not penetrate, and off popped my lip. So we ground down the proud welds, redrilled holes, and then ended up with this strong repair. 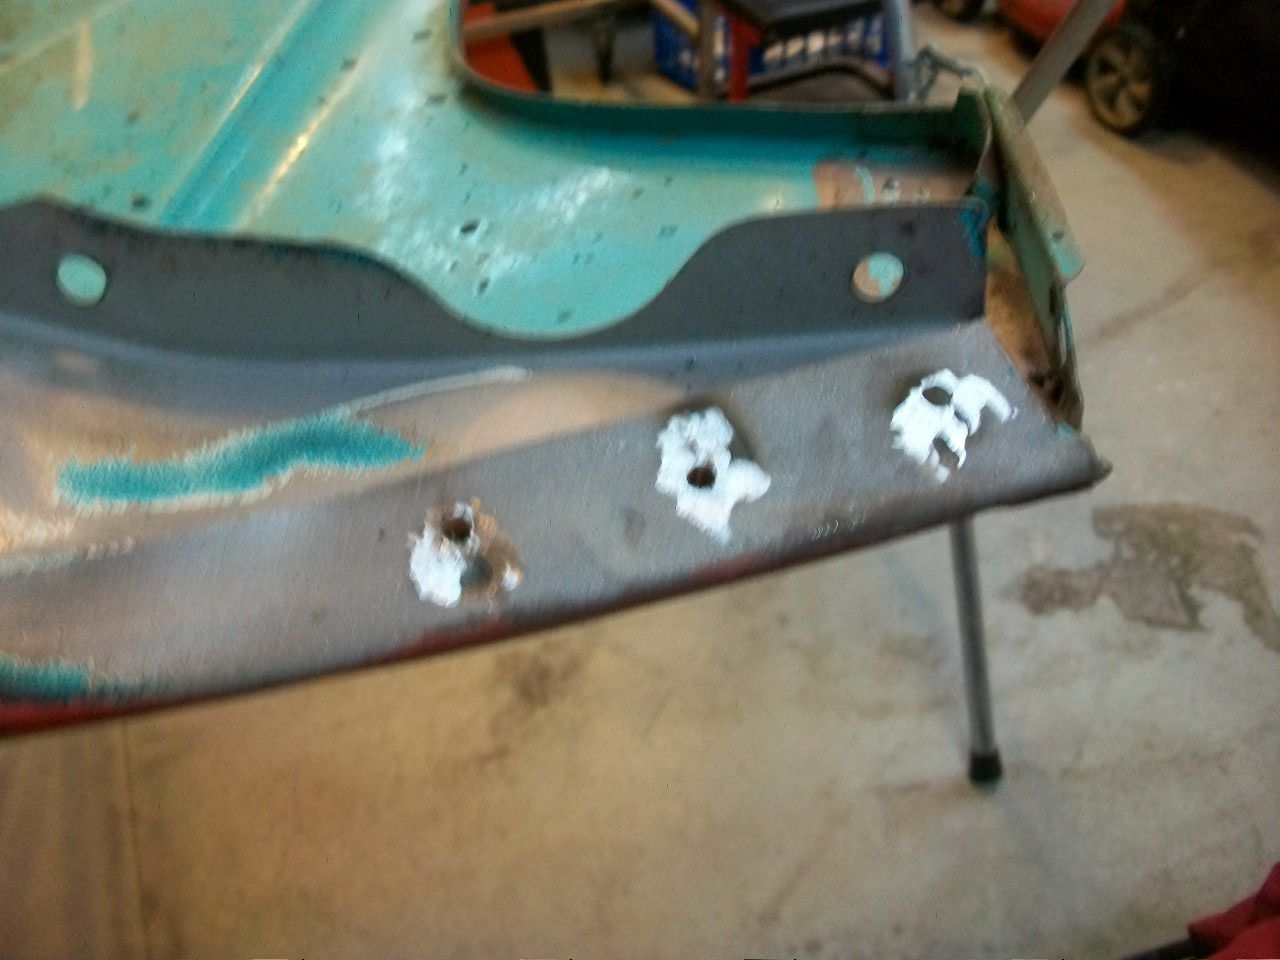 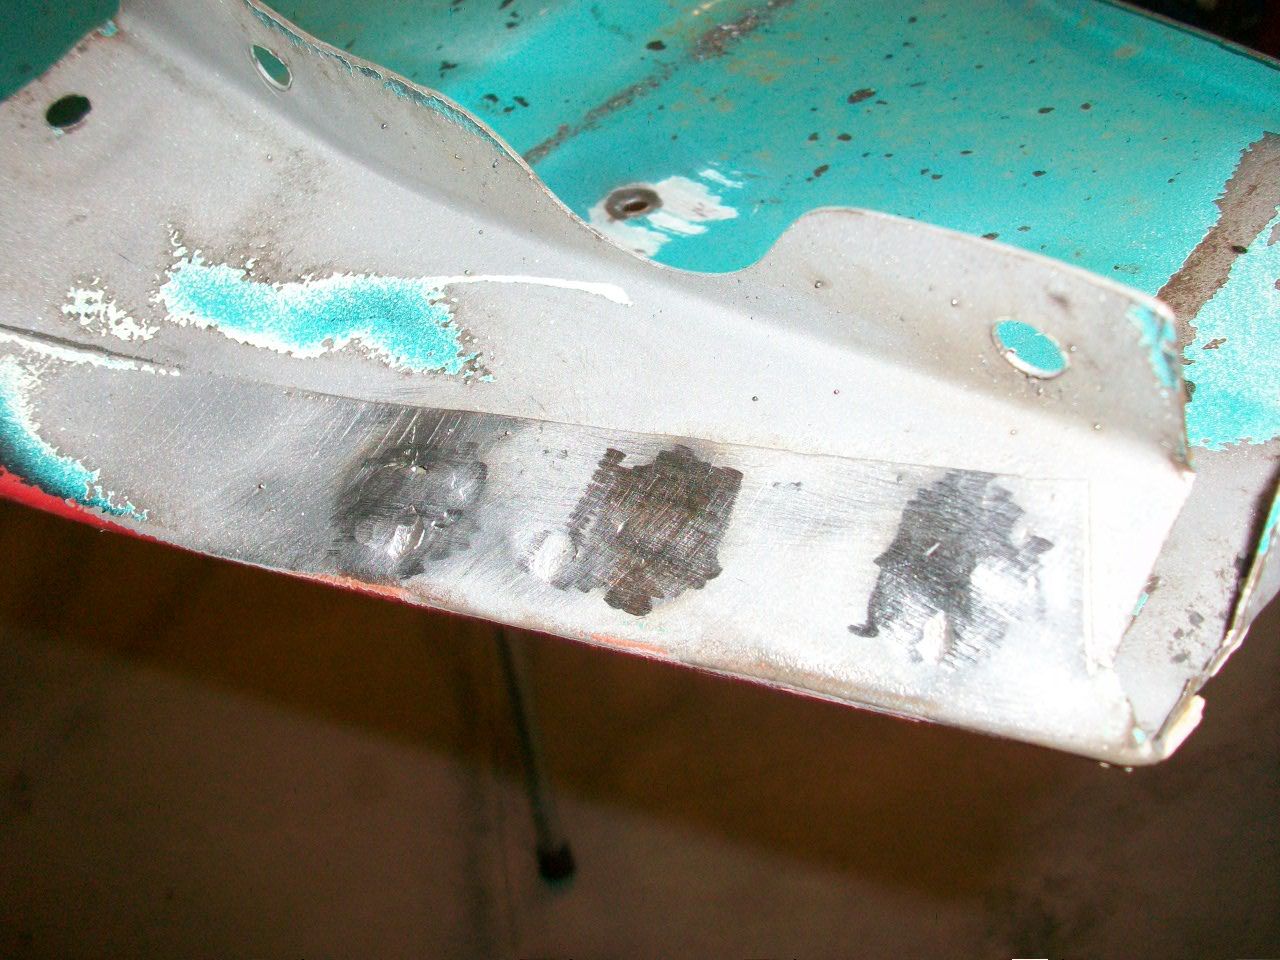 Next, it was on to the horns. What a fun way to wake up the neighborhood. First we did a simple test of each unit to make sure they were working. I broke out the battery charger and hooked up each horn. BBBWWWAAAAAAAHHHHHHH  away we went. No problems there. Just a couple of neighbor's lights came on in the bedroom next door! away we went. No problems there. Just a couple of neighbor's lights came on in the bedroom next door! 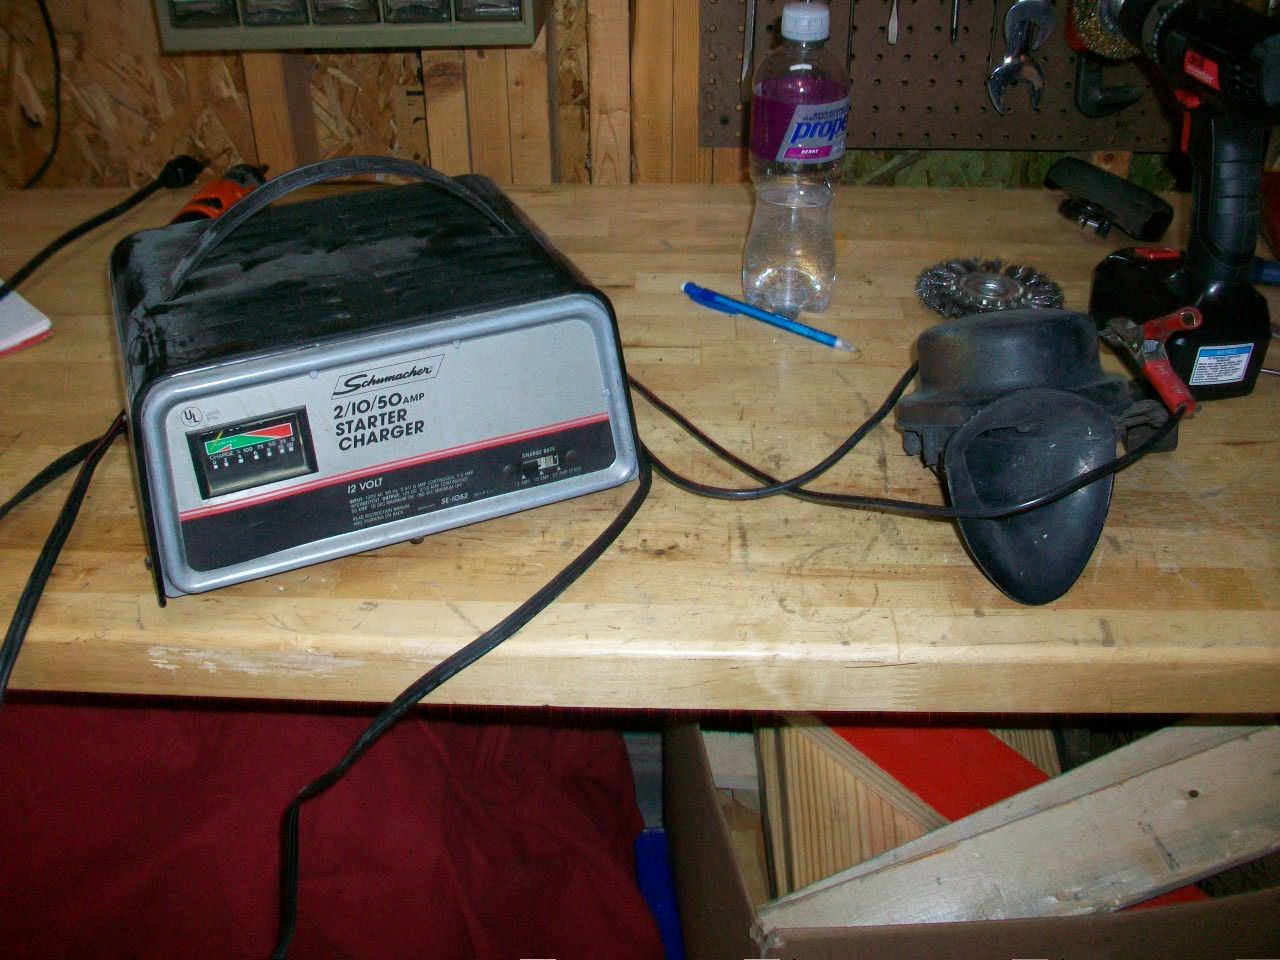 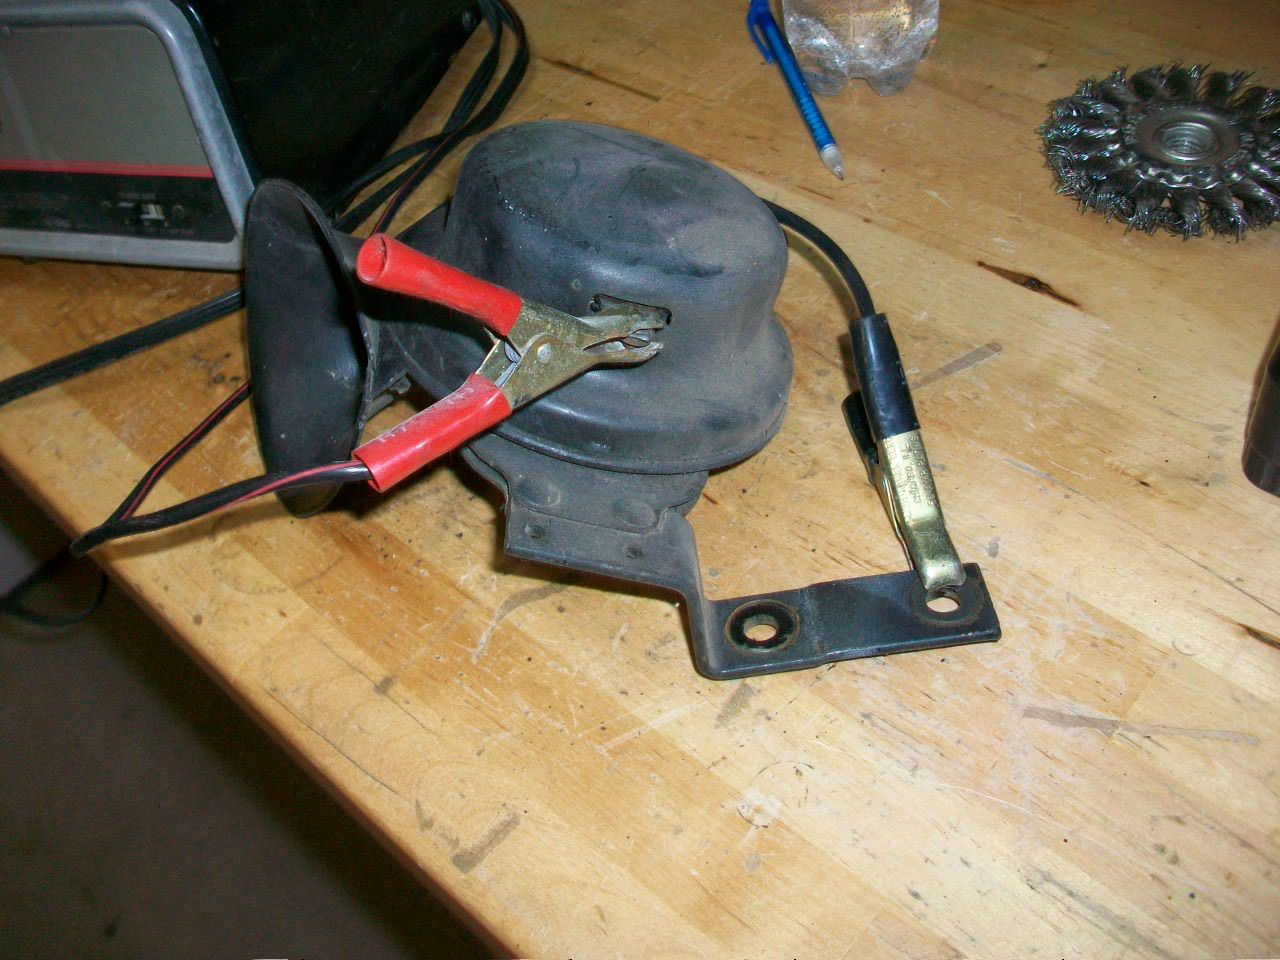 By they way, if you are putting together a basket case, make sure you have a set of Hi and Lo horns. You can find the "Hi" or "Lo" stamped somewhere on the horn itself. Of course, you can also listen to each horn and see what you have too. Note the "Hi" stamped on this horn here... 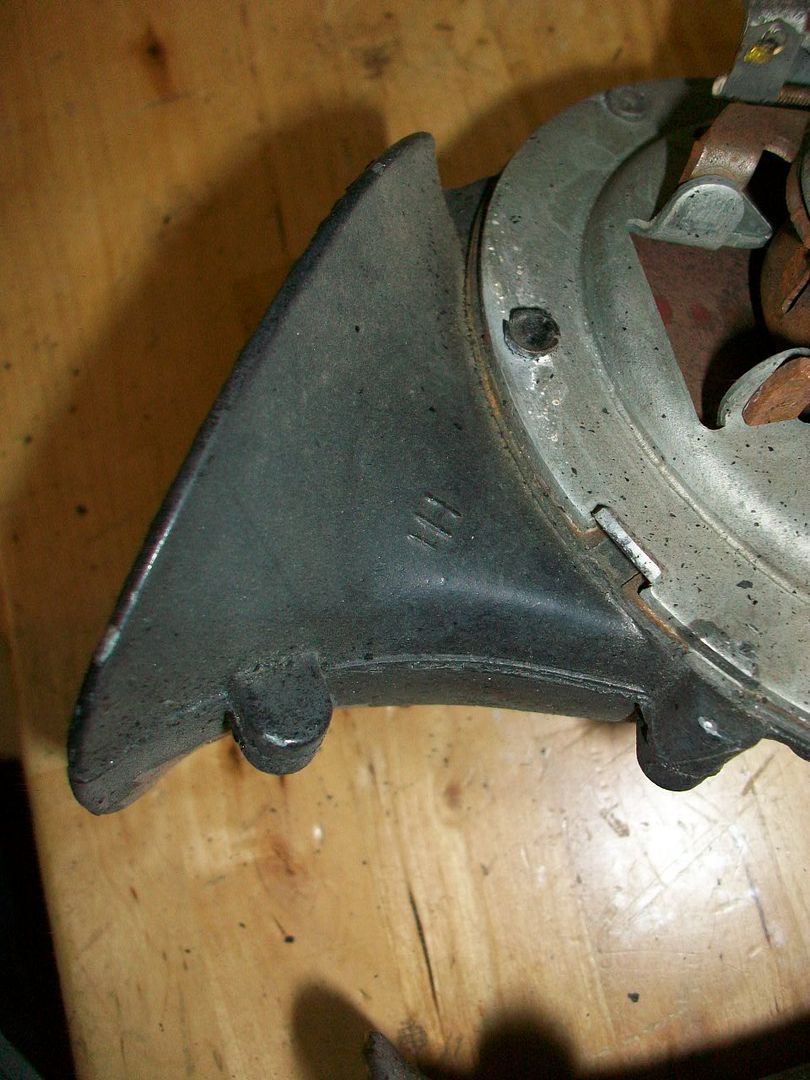 Next would be to disassemble each one. Basically the bracket just unbolts from the side. I like to either zip tie the hardware to the bracket as shown before blasting, or I use a cricket tube like the one in the picture. That way, nothing gets lost and it is easy to hold in the cabinet! 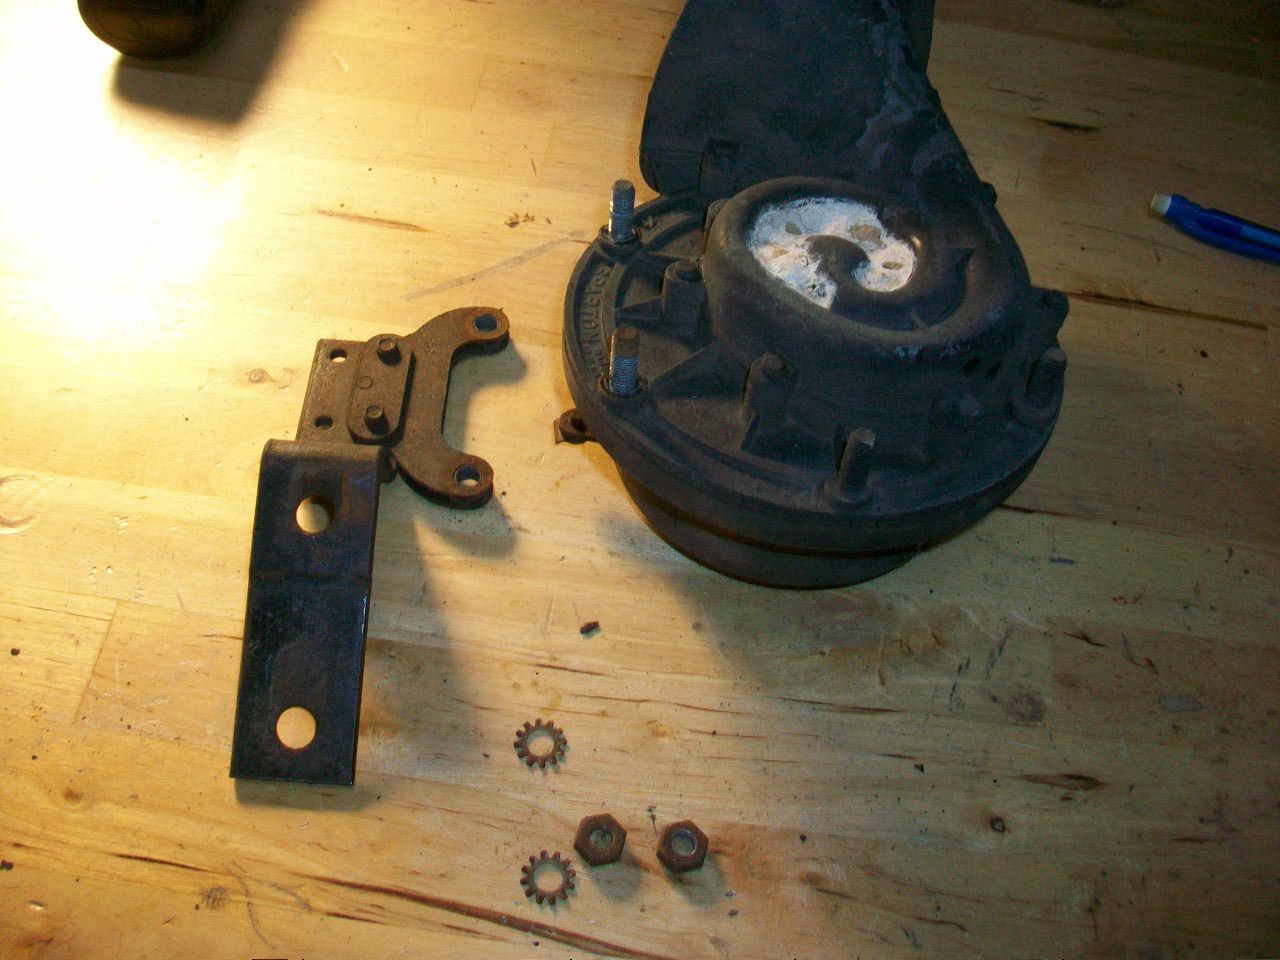 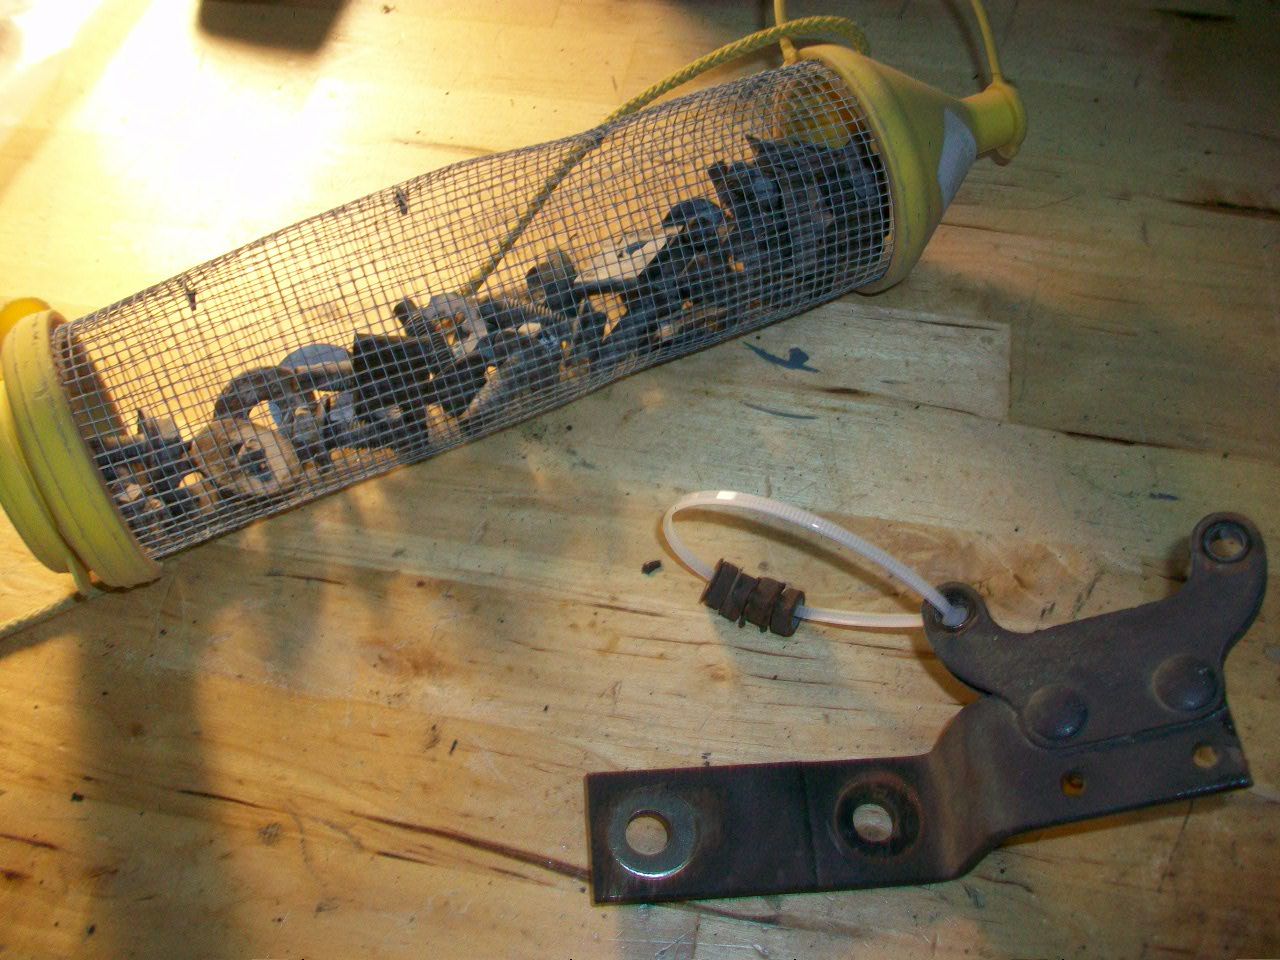
__________________
Lancaster, California Visit hotrodreverend.com to view hundreds of pictures and videos of the build of the 1955 Ford Club Sedan! |
|
|

|
|
|
#246 |
|
Senior Member
Join Date: May 2010
Location: Lancaster, CA
Posts: 916
|
Sponsored Links (Register now to hide all advertisements)
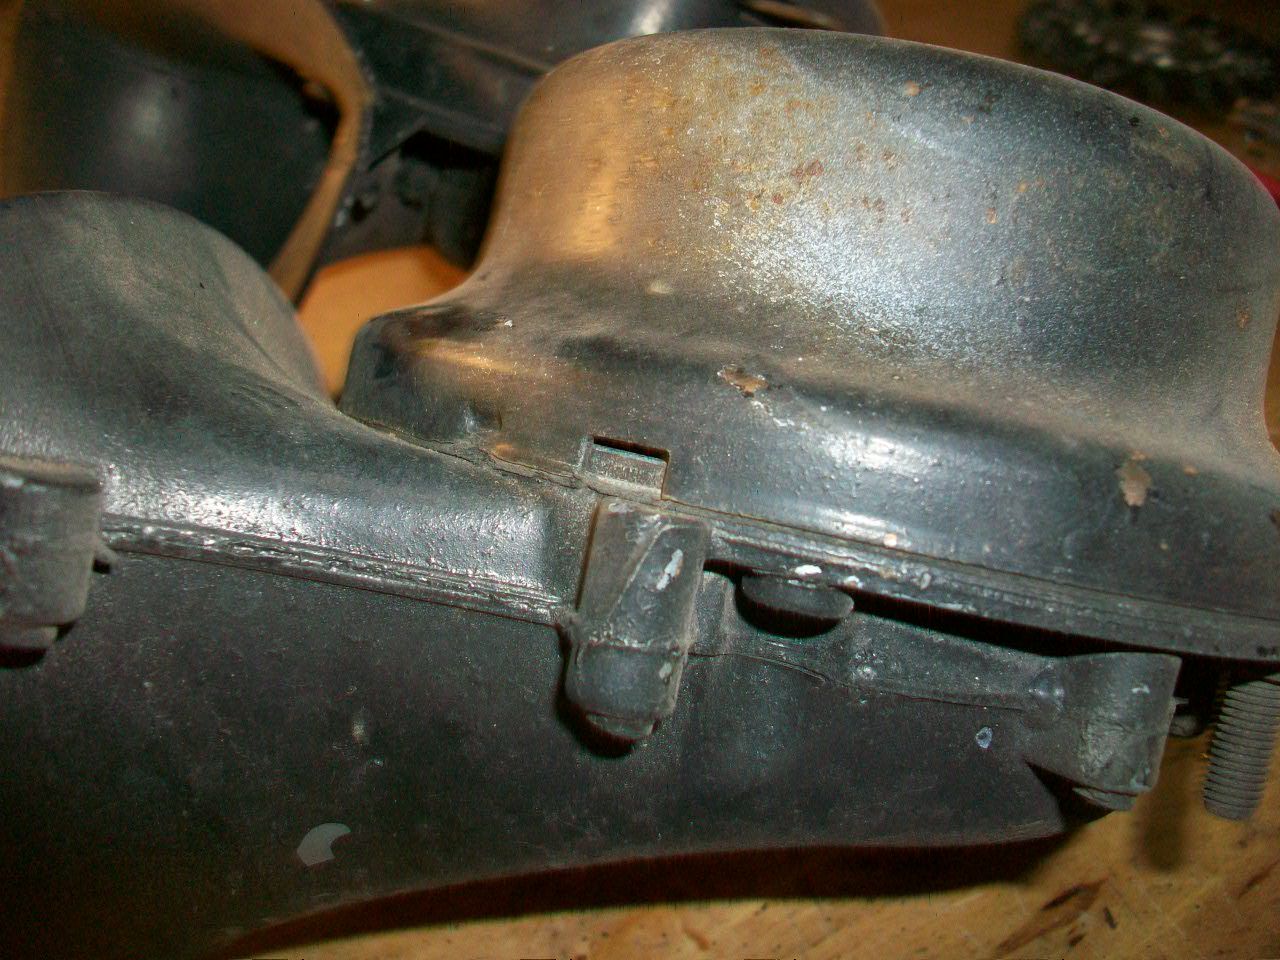 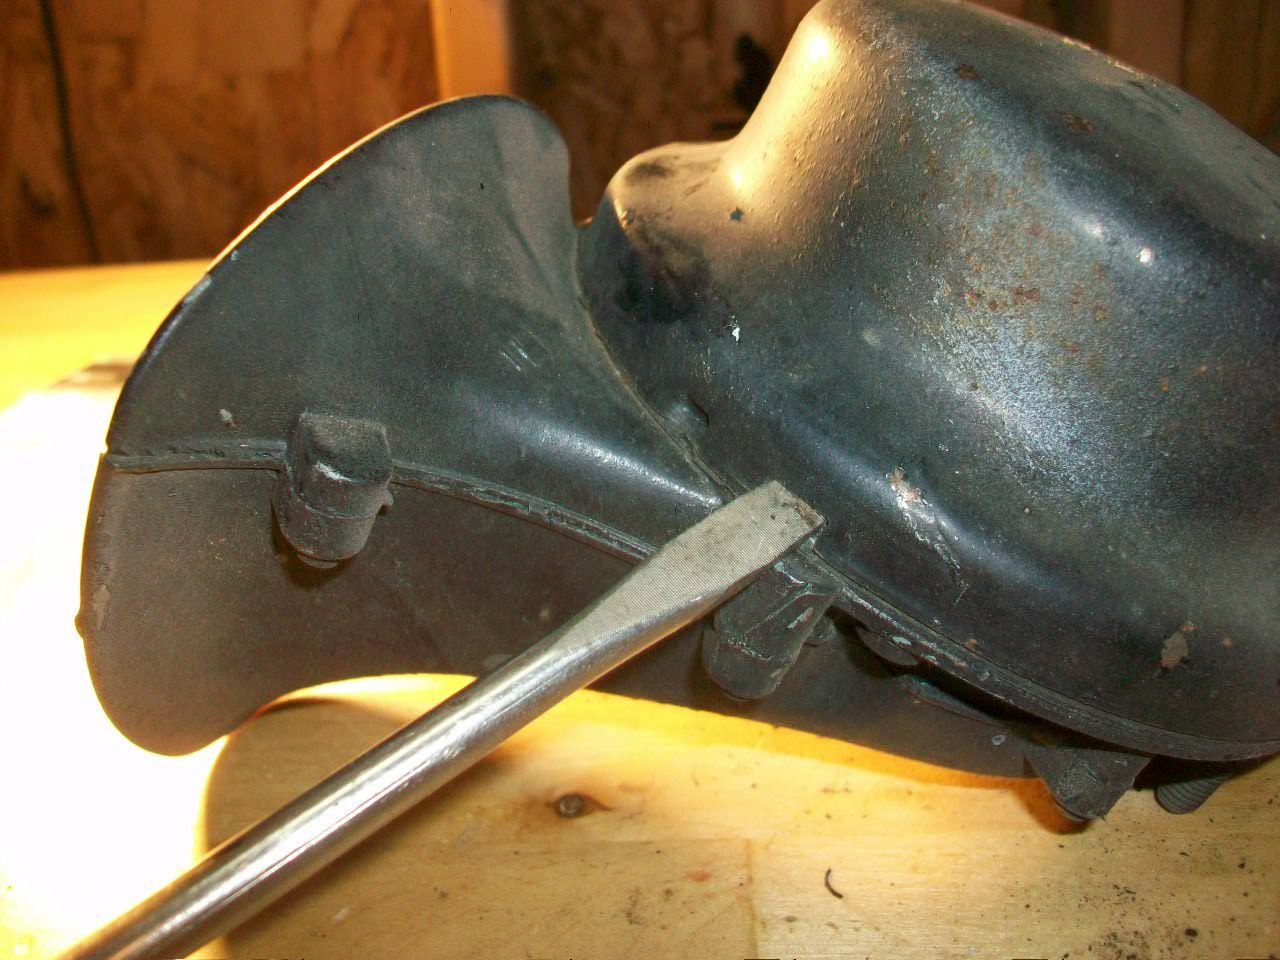 When I removed the covers, I had one horn that looked to be in really clean shape, and the other one had a little corrosion. 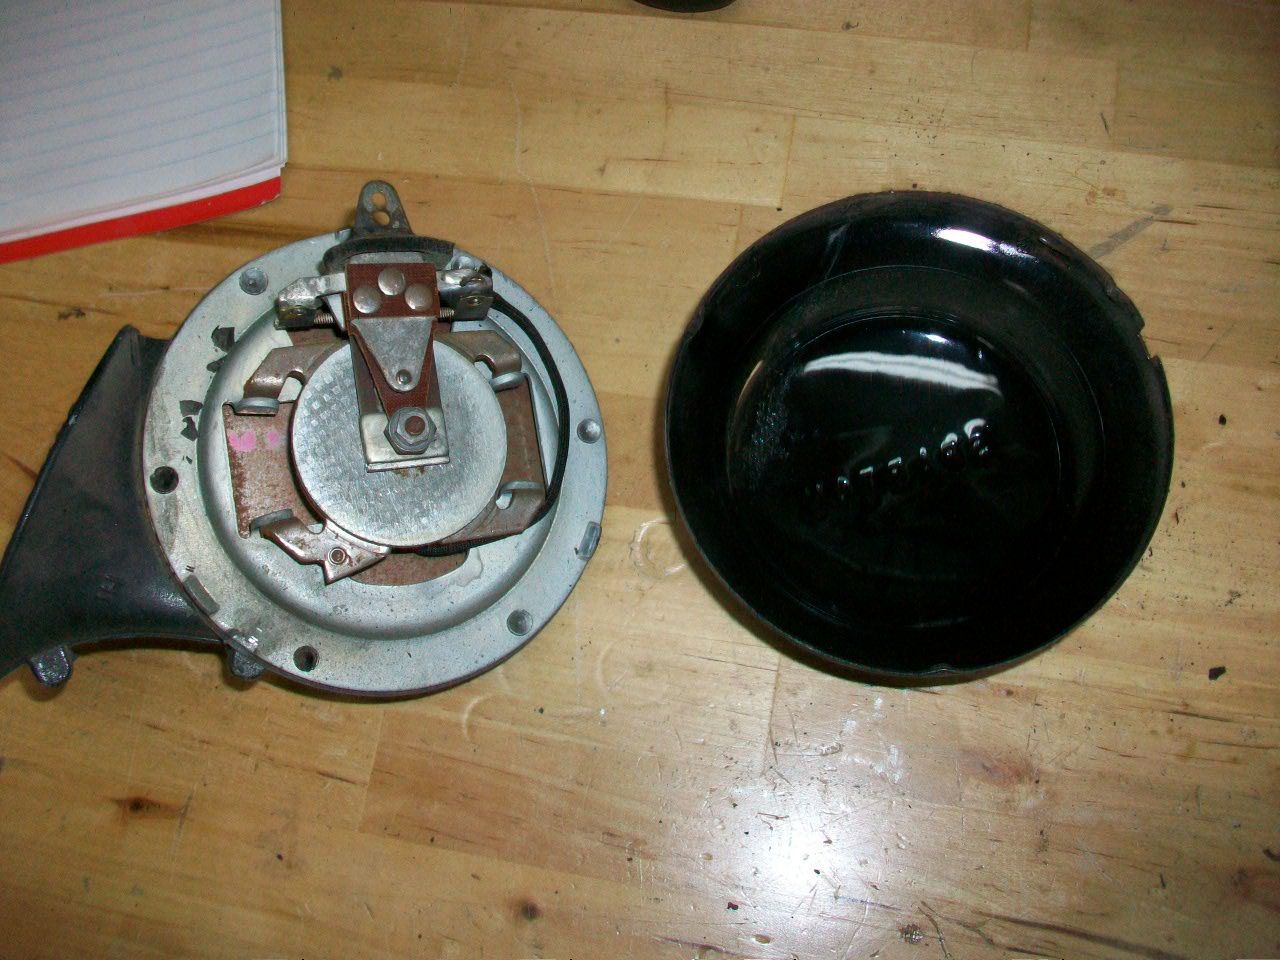 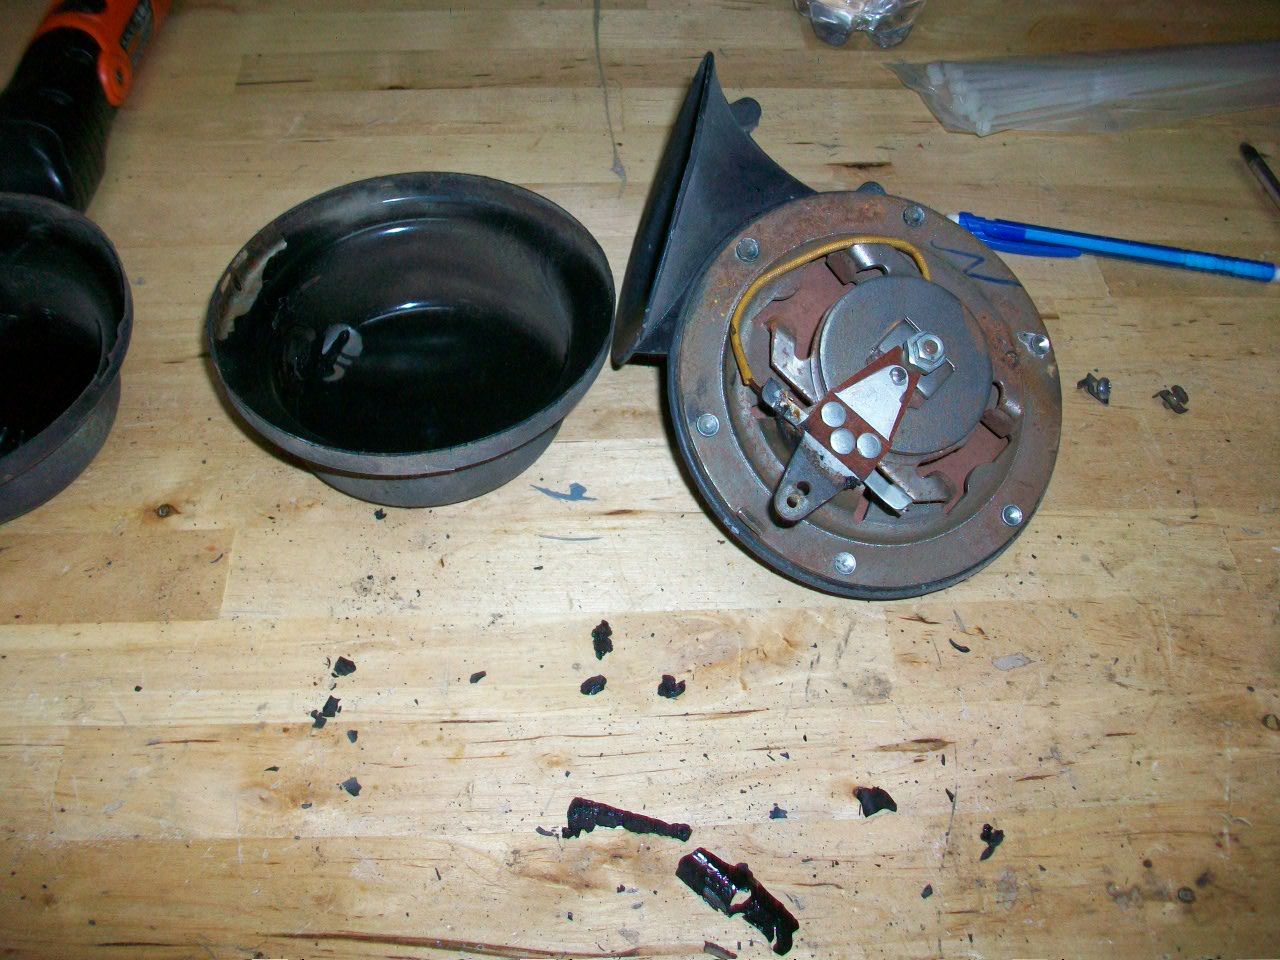 The difference? This small seal that goes in the slot in the cover where the "hot" side of things hooks to each horn. One seal was intact... the other was disintegrated.  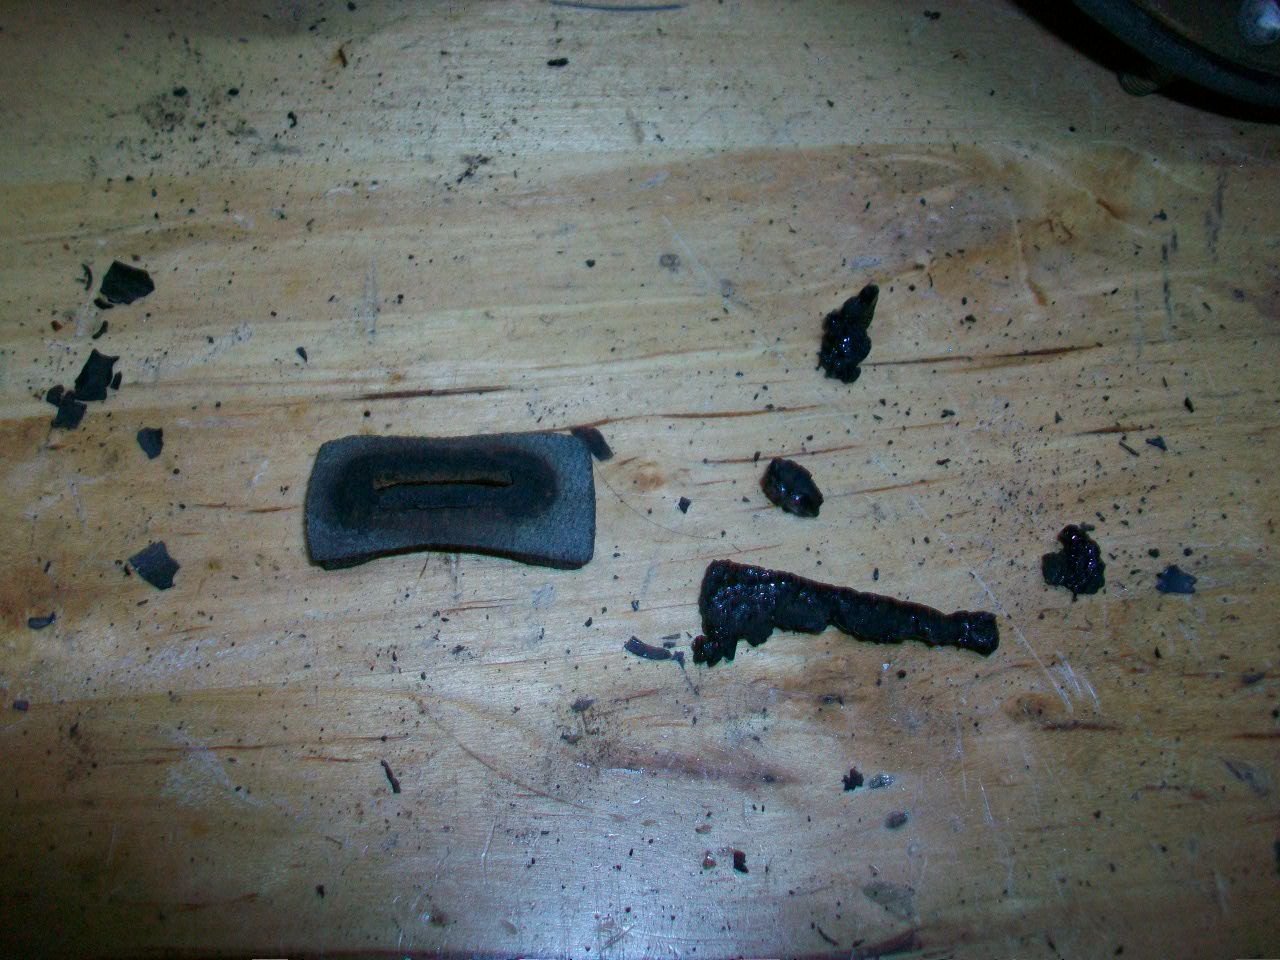 I took the cover and the bracket/hardware and blasted them. But the horn assembly I basically took a wire wheel and other hand-powered instruments to clean so that no debris got into the contacts and what have you. We will paint these horns with Rustoleum Semi Gloss Black, make new seals and affix, and reinstall soon.  Another small detail down, many more to go!
__________________
Lancaster, California Visit hotrodreverend.com to view hundreds of pictures and videos of the build of the 1955 Ford Club Sedan! |
|
|

|
|
|
#247 |
|
Senior Member
Join Date: May 2010
Location: Lancaster, CA
Posts: 916
|
Time for a "bondoscopy" of both the fenders, and the diagnosis/discovery ain't good.
 But it could be worse! But it could be worse!  When you notice some signs of cancer we just know how we can be.... keep digging until you find all traces. But little did I know I would have to grind away about 3 gallons of body filler and other "imitation metal" products that a would be body man used to form 55 Ford body panels. Oh my... check it out. 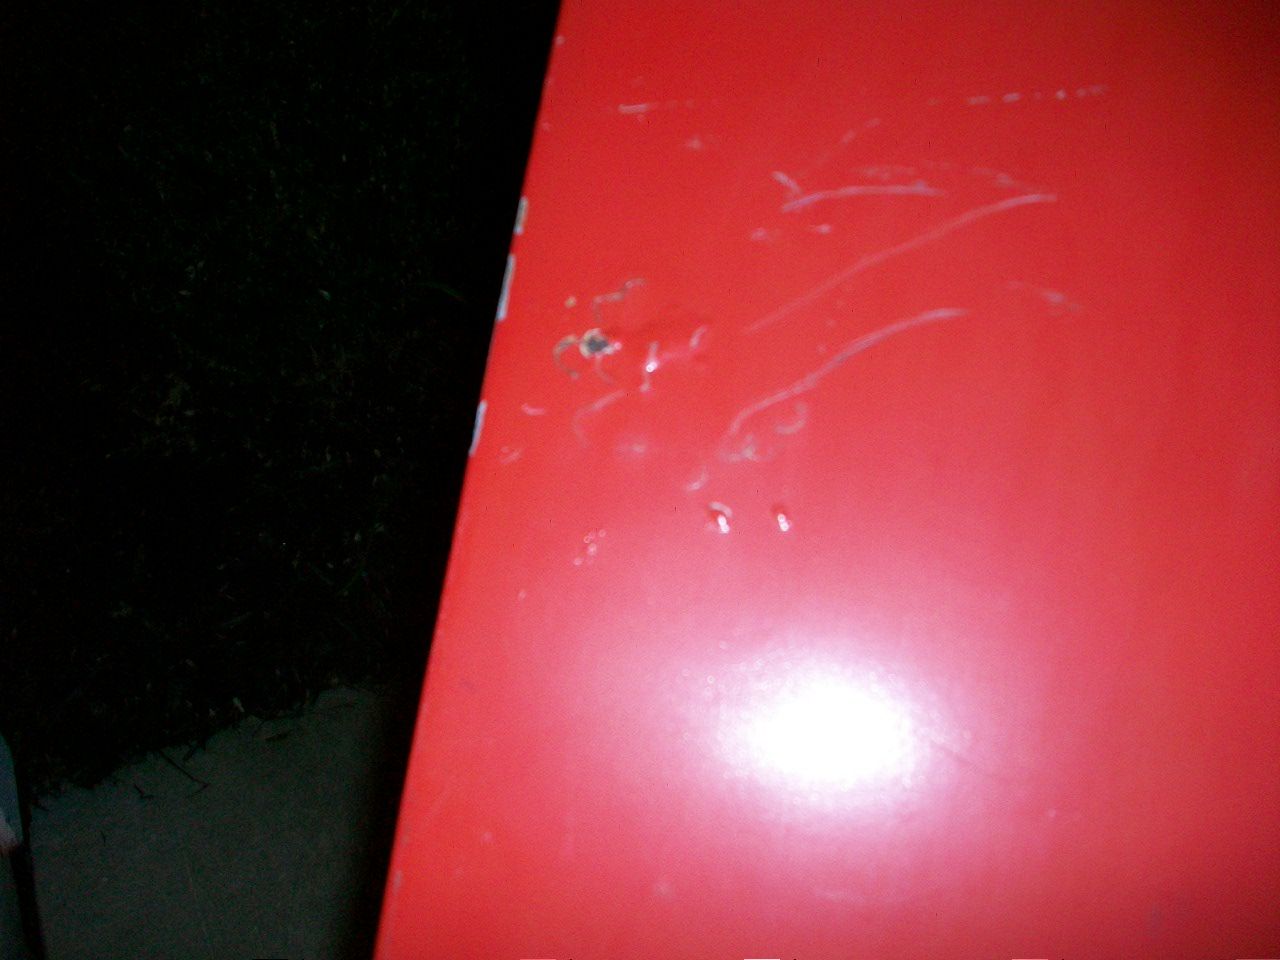 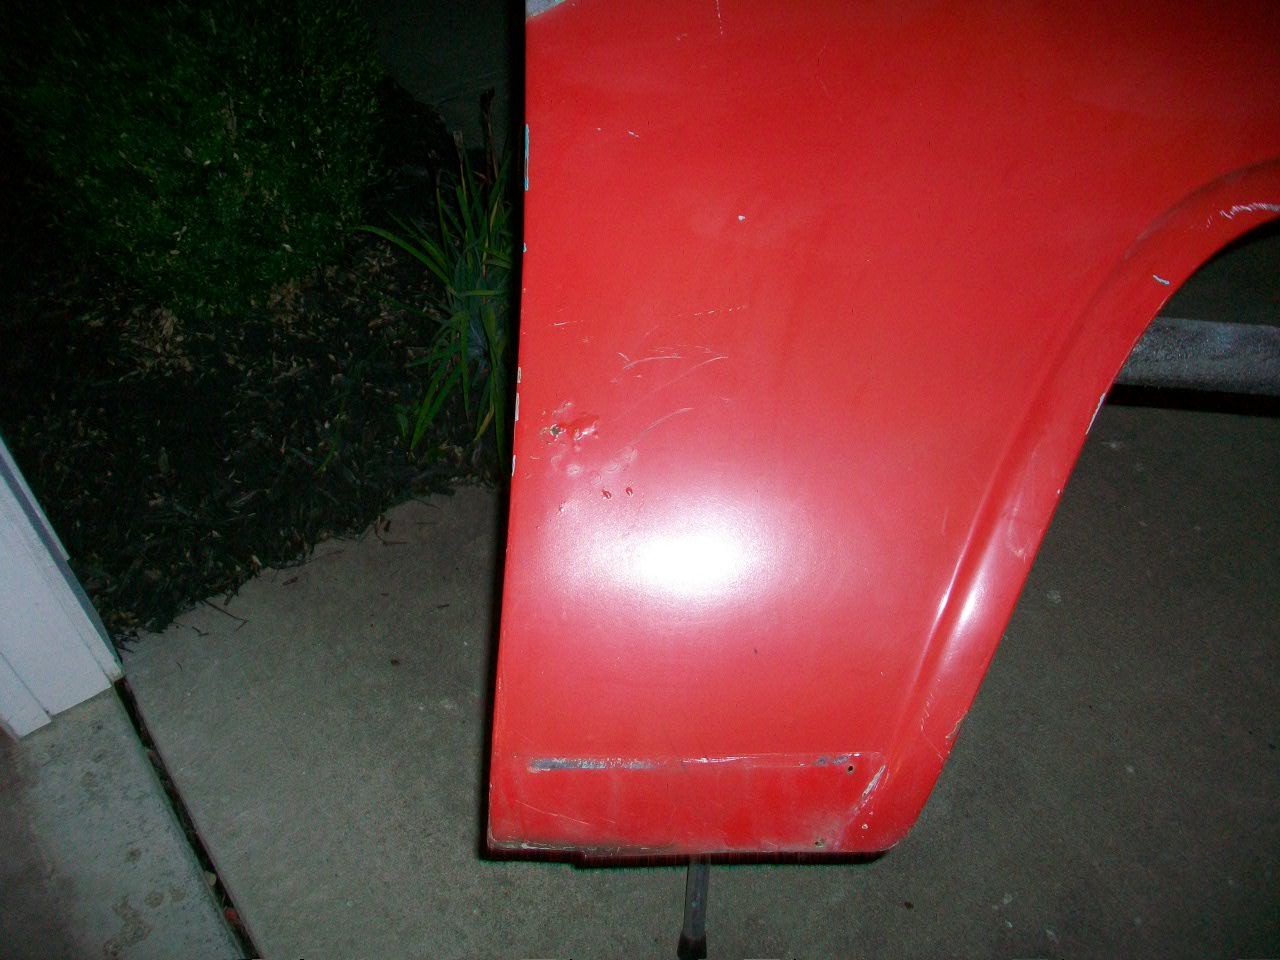 Both areas showed some sign of problems, so time to grind away... 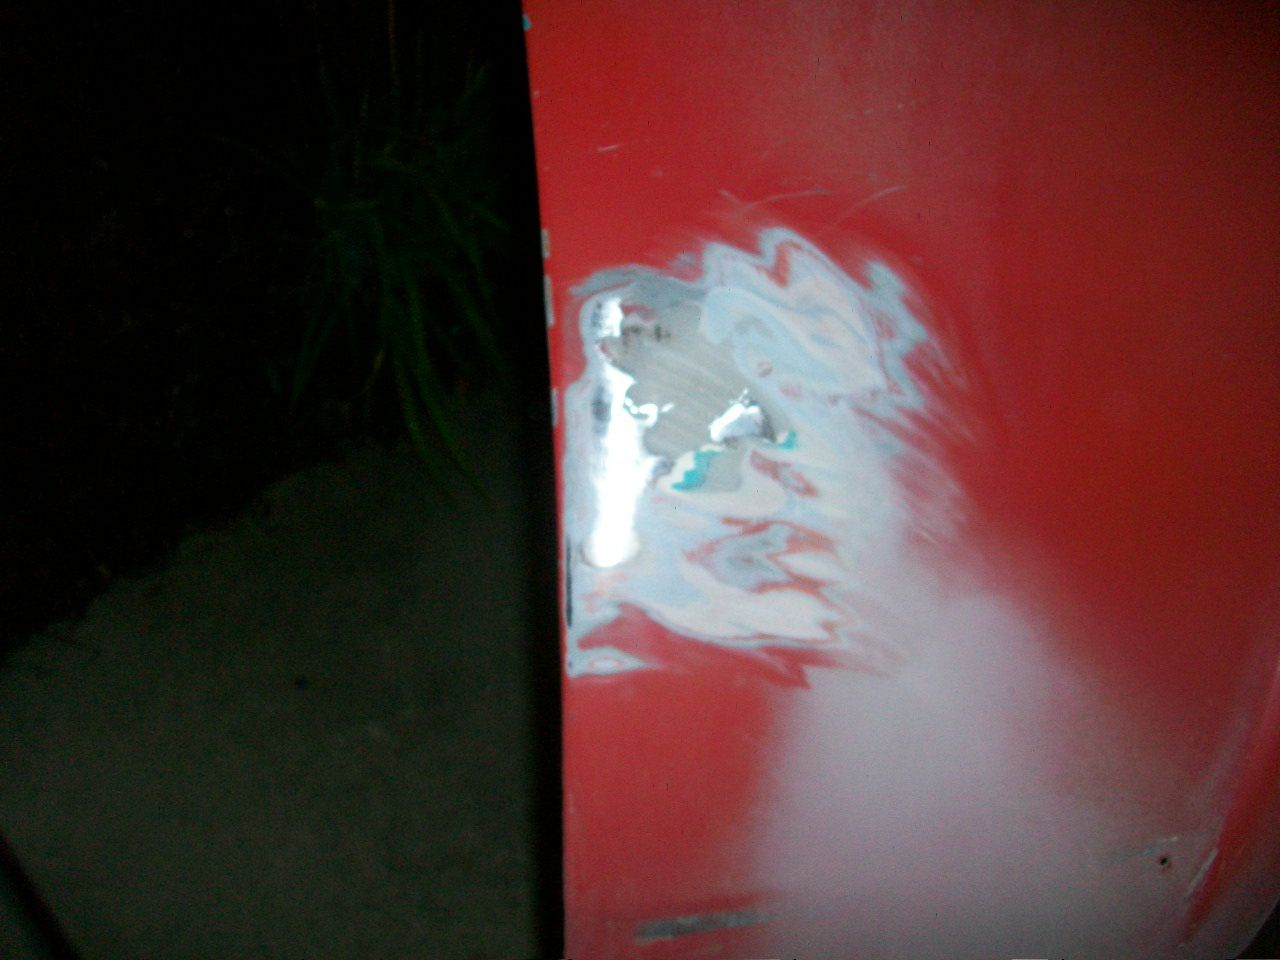 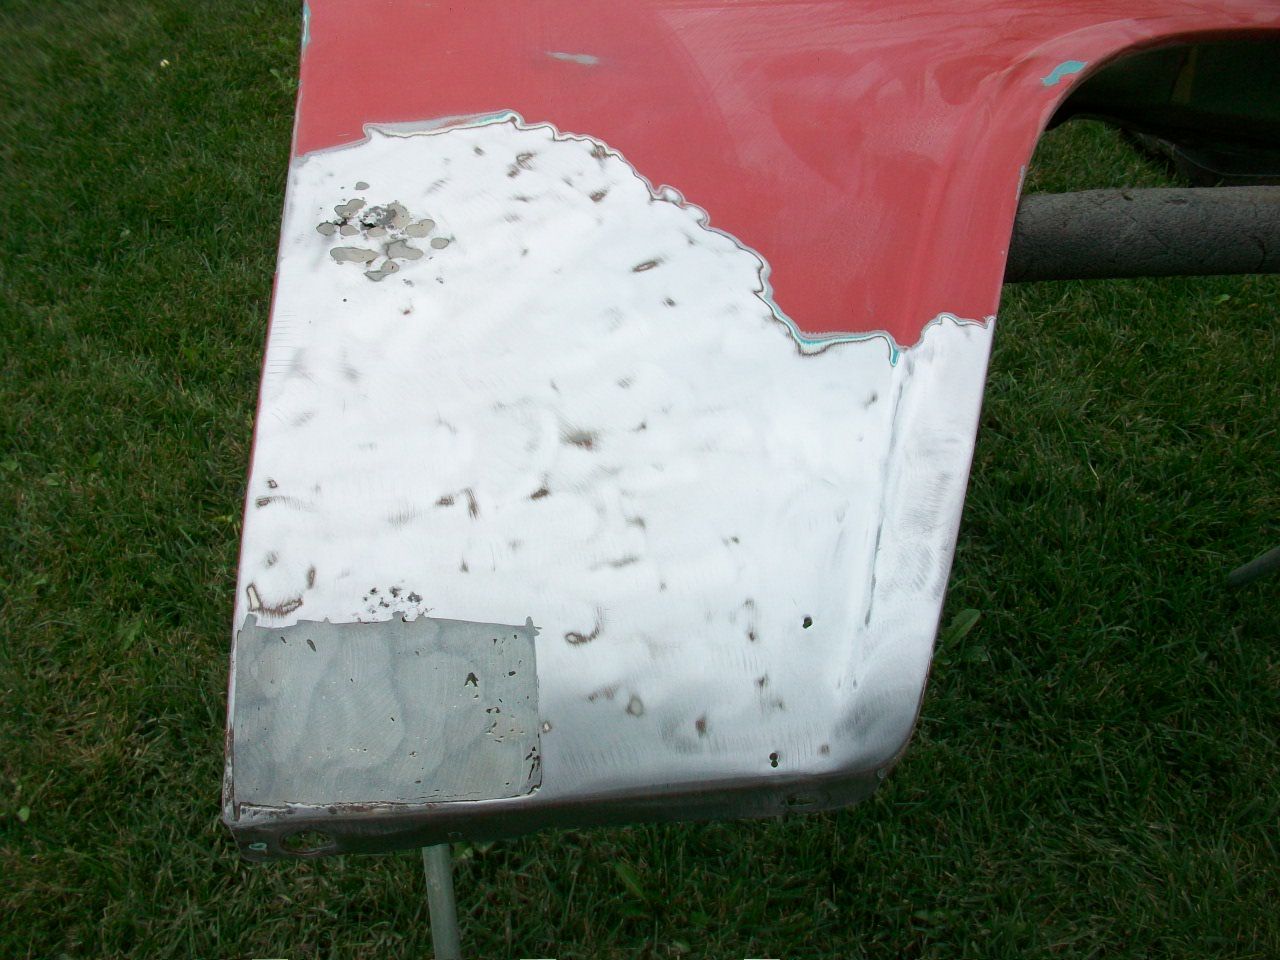 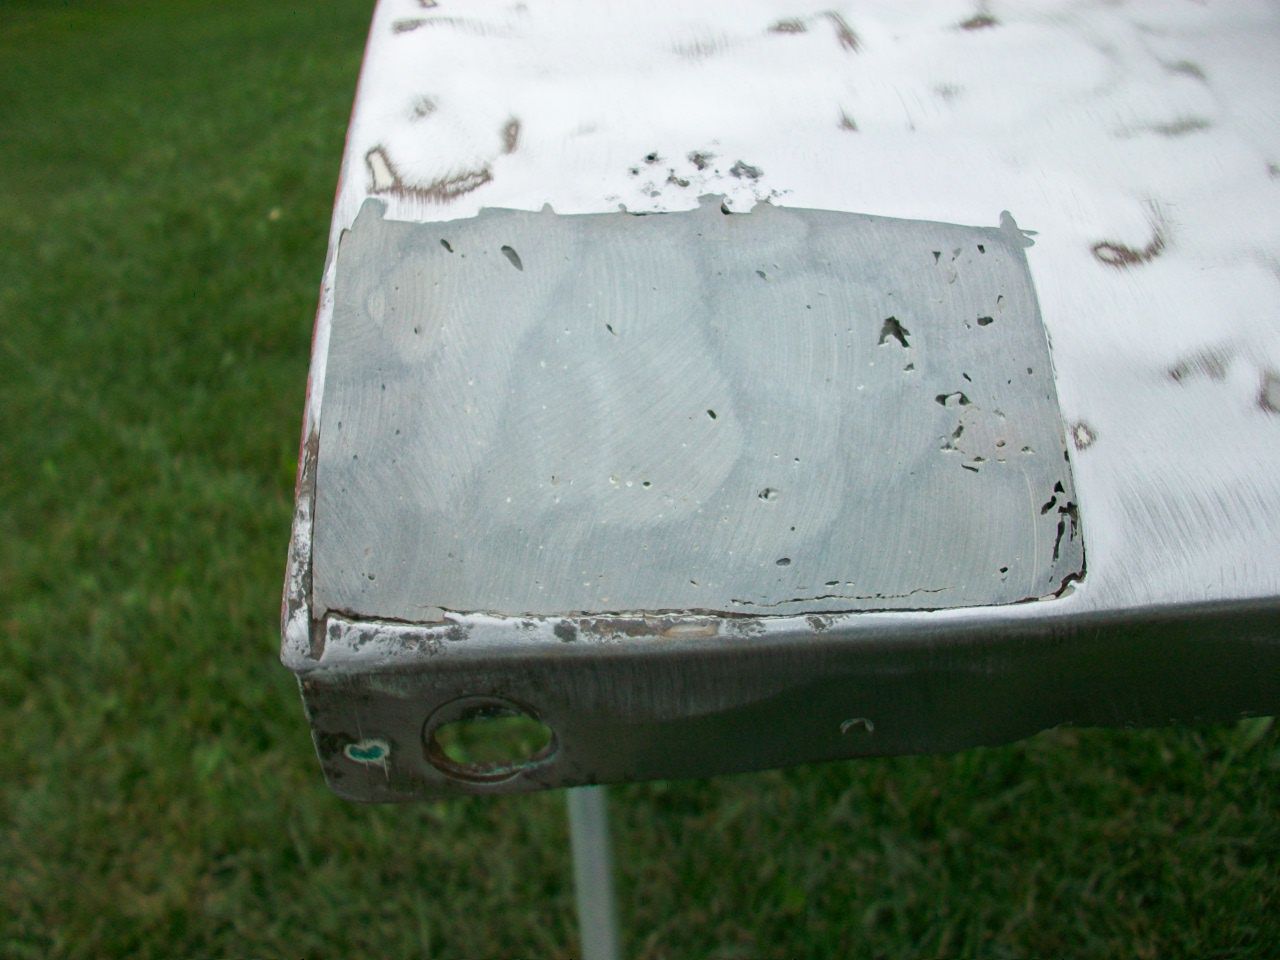 what this gray stuff is I do not know, but it was a different texture than the body filler like the Bondo brand and this stuff was very porous. Maybe it was a part of a kit to "build your own backyard body panel" from the 1980's - I have no idea. You can see this shot of the stuff getting chipped away... 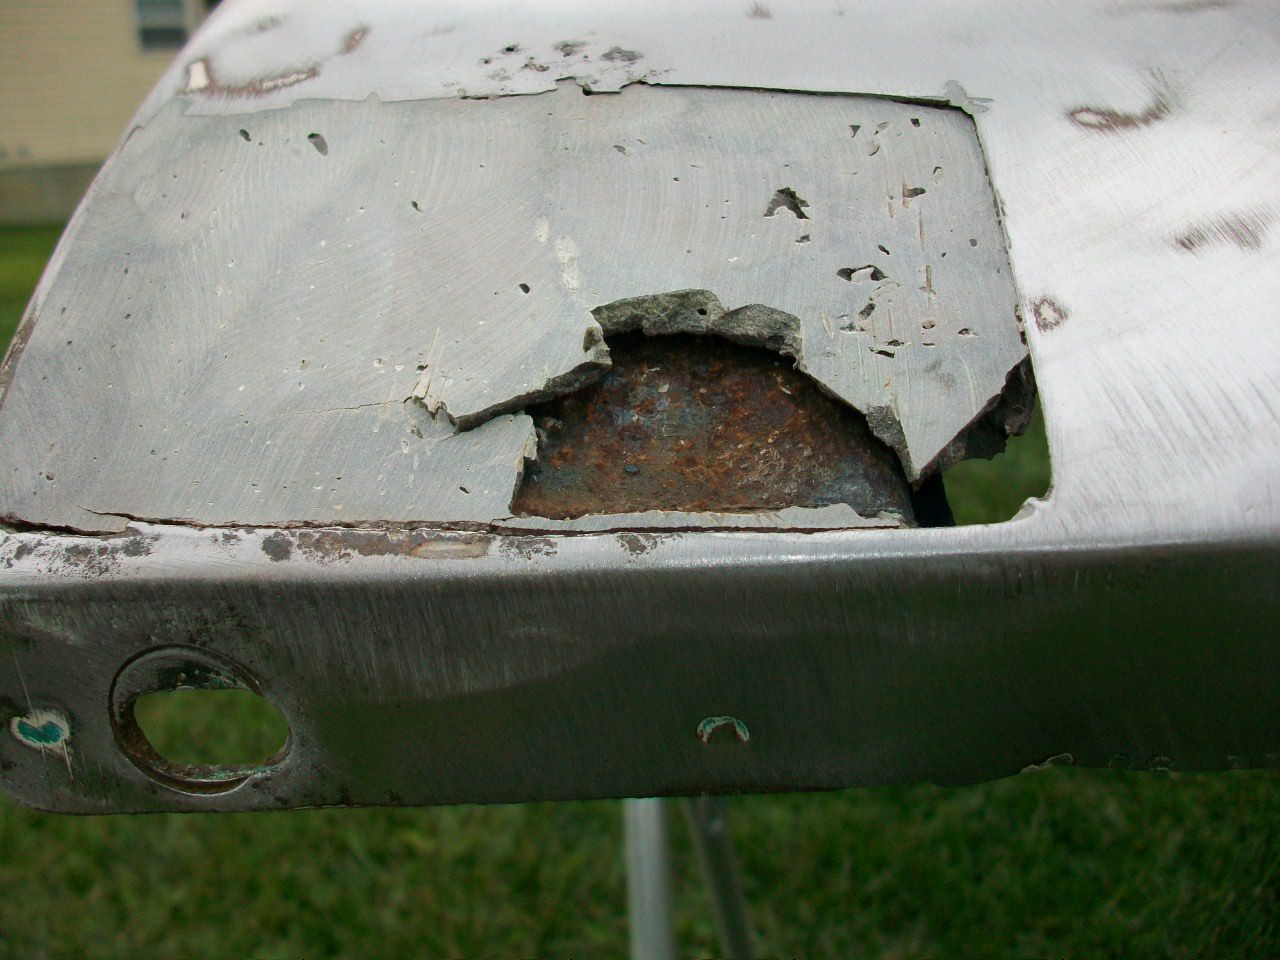 and then... 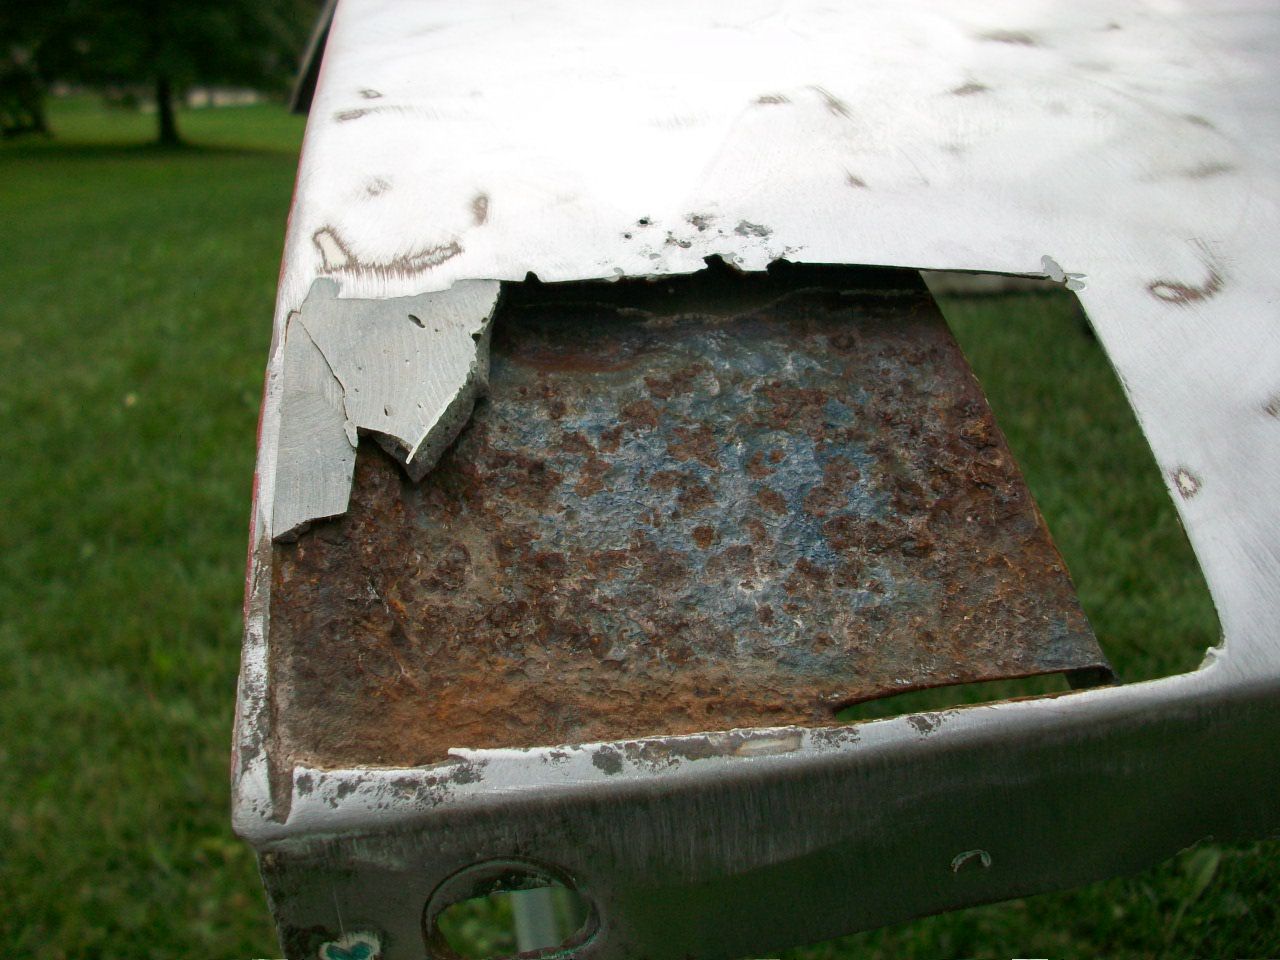 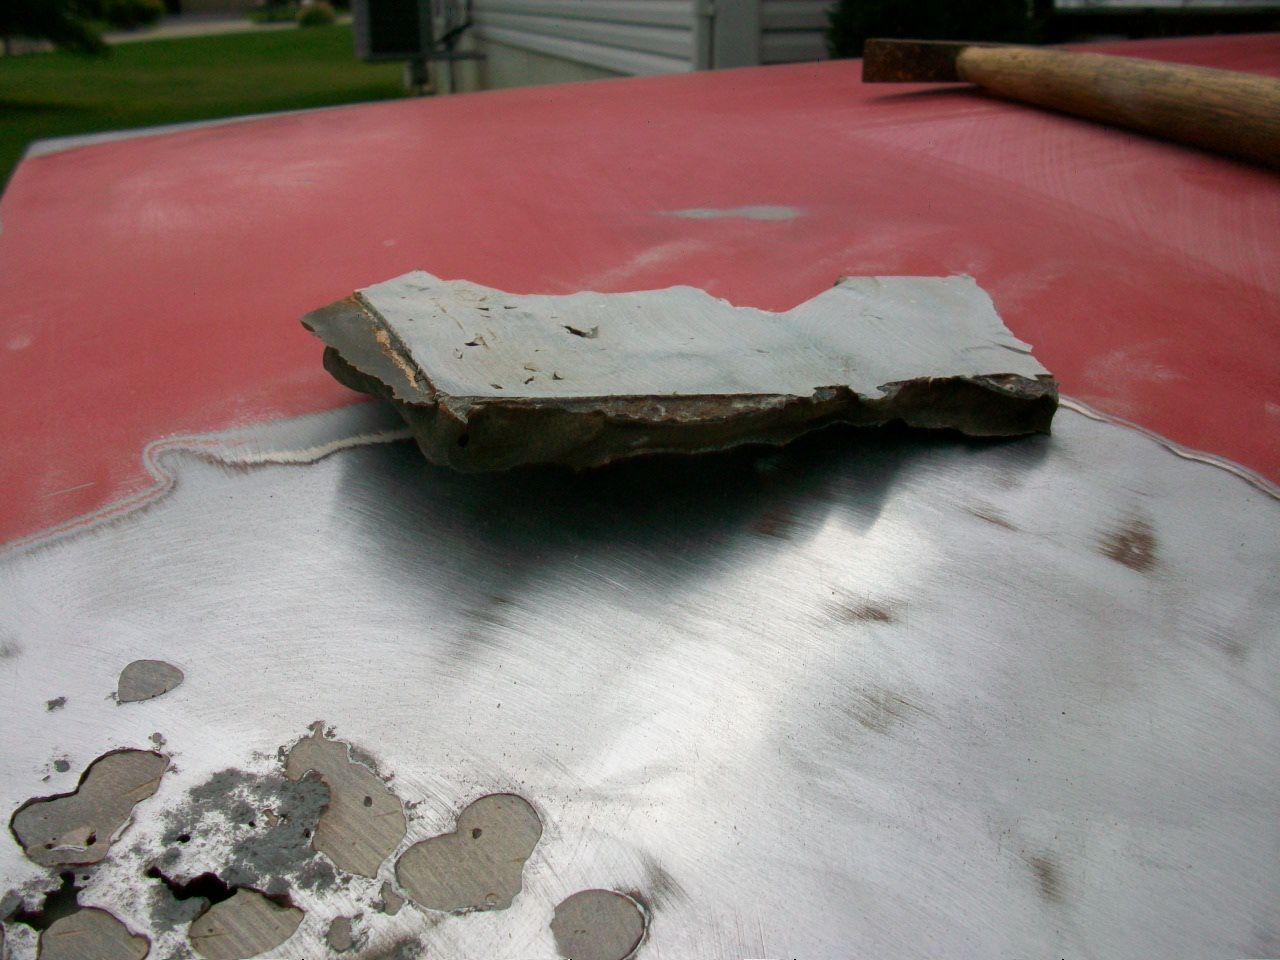 Yes my friends, at least a 1/2" thick in places. On top of this repair was about 1/4" of the regular Bondo brand filler and then primer surfacer, then primer, then base coat. Anybody know what this is? It is still "pliable" - in other words it was not really brittle and was still flexible. It did grind away with a lot of dust like regular body filler. So we did the driver's side fender too, and wouldn't you know it, the same guy did the work! 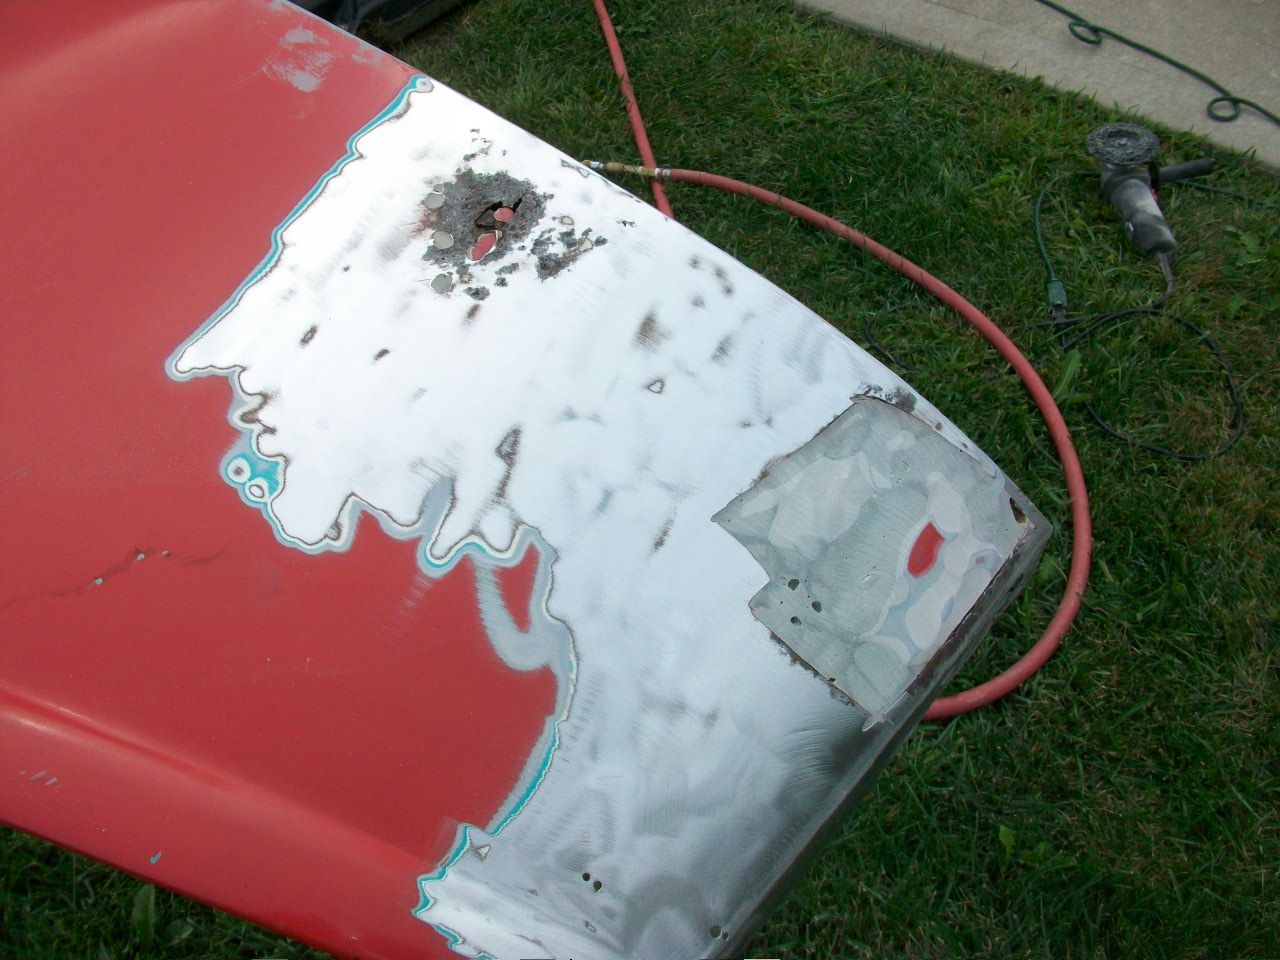 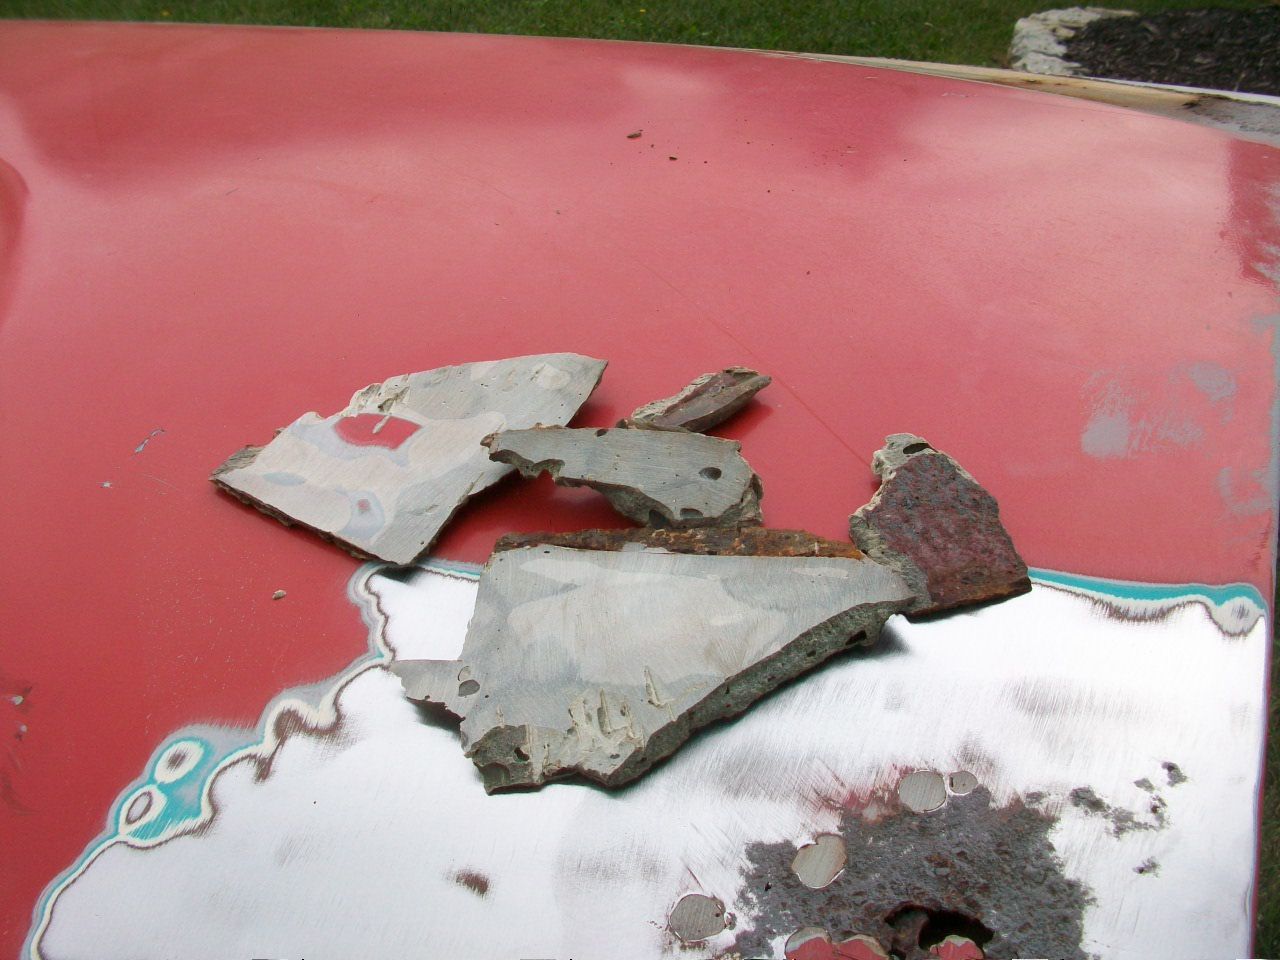 Only the passenger side had some body filler up front near the "V-8" insignia. No rot issues or anything, but it will have to be addressed to make it look it good. How much hammer and dolly I can use because of restricted access may make this one a little difficult. That lip may get in the way more than I want it to. 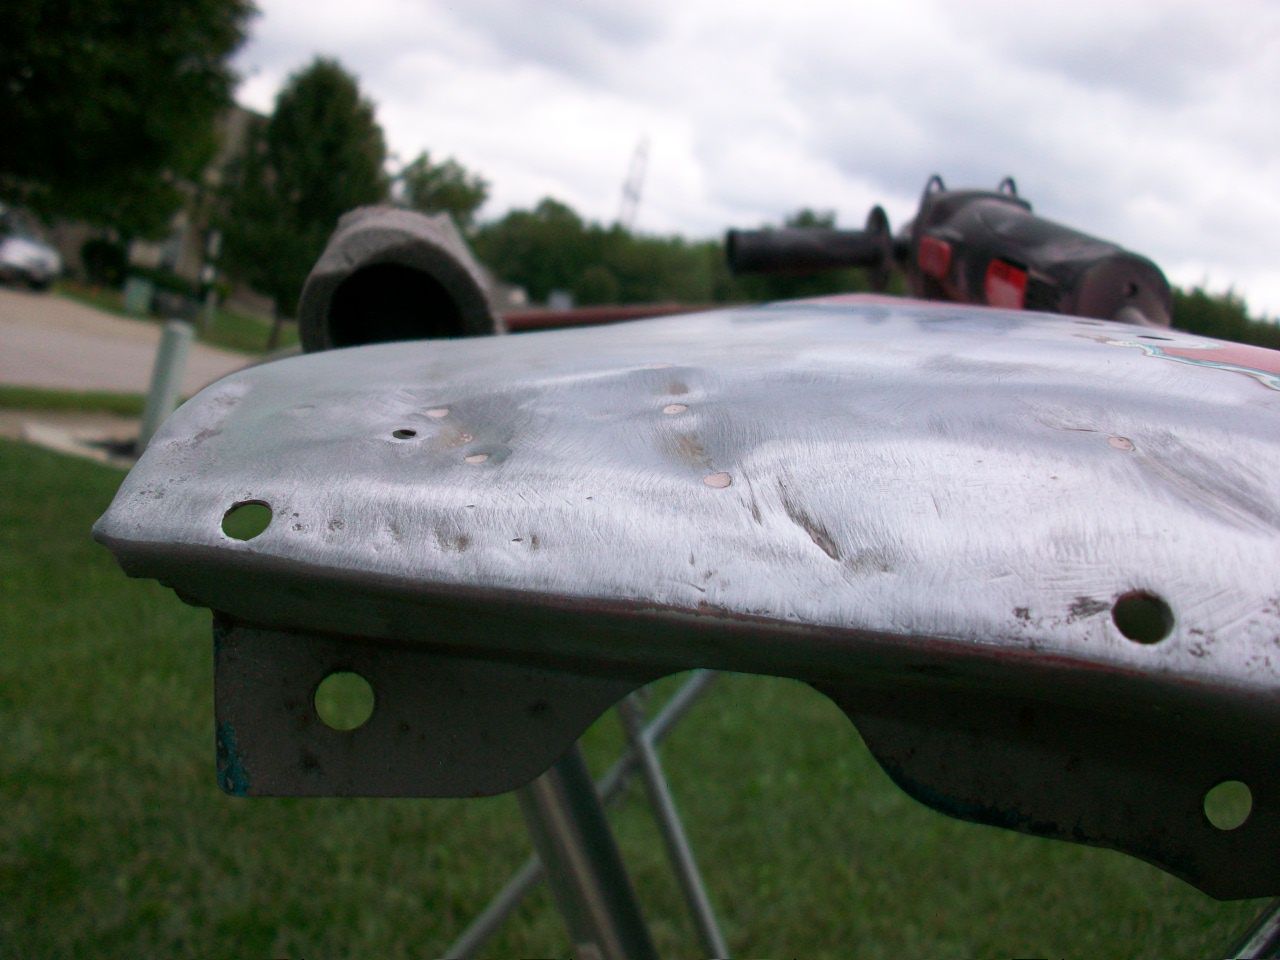 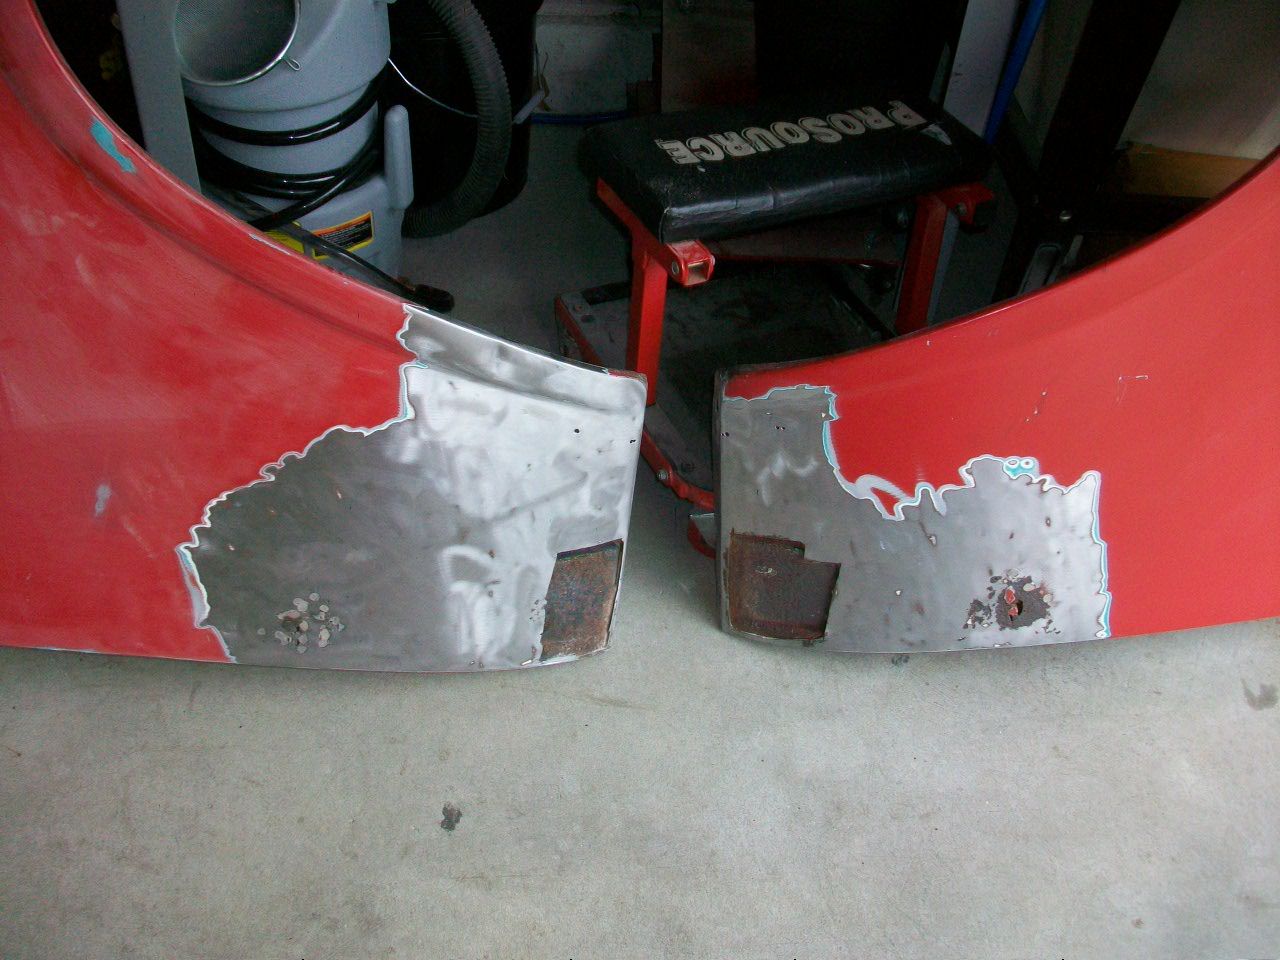 Next session I will cut out the rotted portions, blast the metal underneath as clean as possible, use some weld thru primer, weld in new patches, straighten, epoxy, apply some body filler and get ready for primer. Easy breezy right? Learning as I go... 
__________________
Lancaster, California Visit hotrodreverend.com to view hundreds of pictures and videos of the build of the 1955 Ford Club Sedan! |
|
|

|
|
|
#248 |
|
Senior Member
Join Date: May 2010
Location: westbury ny
Posts: 854
|
rev the gray stuff may be an aluminum based filler that they still make I think it a marson {aluma fill ] product I'm surprised you didn't find screen or something backing it up I have seen some strange things used as for the damage if you know someone with a pin welder those pins are strong h/f has a unit which I use and works great but its $ 100.00 unless you have other uses that's pricey for a one time use
|
|
|

|
|
|
#249 |
|
Senior Member
Join Date: May 2010
Location: Lancaster, CA
Posts: 916
|
thanks for the tips and advice... I will look at the damage a little more closely and see how much i can do to get behind it. I really did not go over it that well what with me doing this work outside and rain coming. I basically wanted to get the dust out of the way. Hopefully in the next few days i will have some to cut out the rot, blast, and then really assess the damage all the way around before I decide what to do.
labor of love
__________________
Lancaster, California Visit hotrodreverend.com to view hundreds of pictures and videos of the build of the 1955 Ford Club Sedan! |
|
|

|
|
|
#250 |
|
Senior Member
Join Date: May 2010
Location: Lancaster, CA
Posts: 916
|
Late night work...
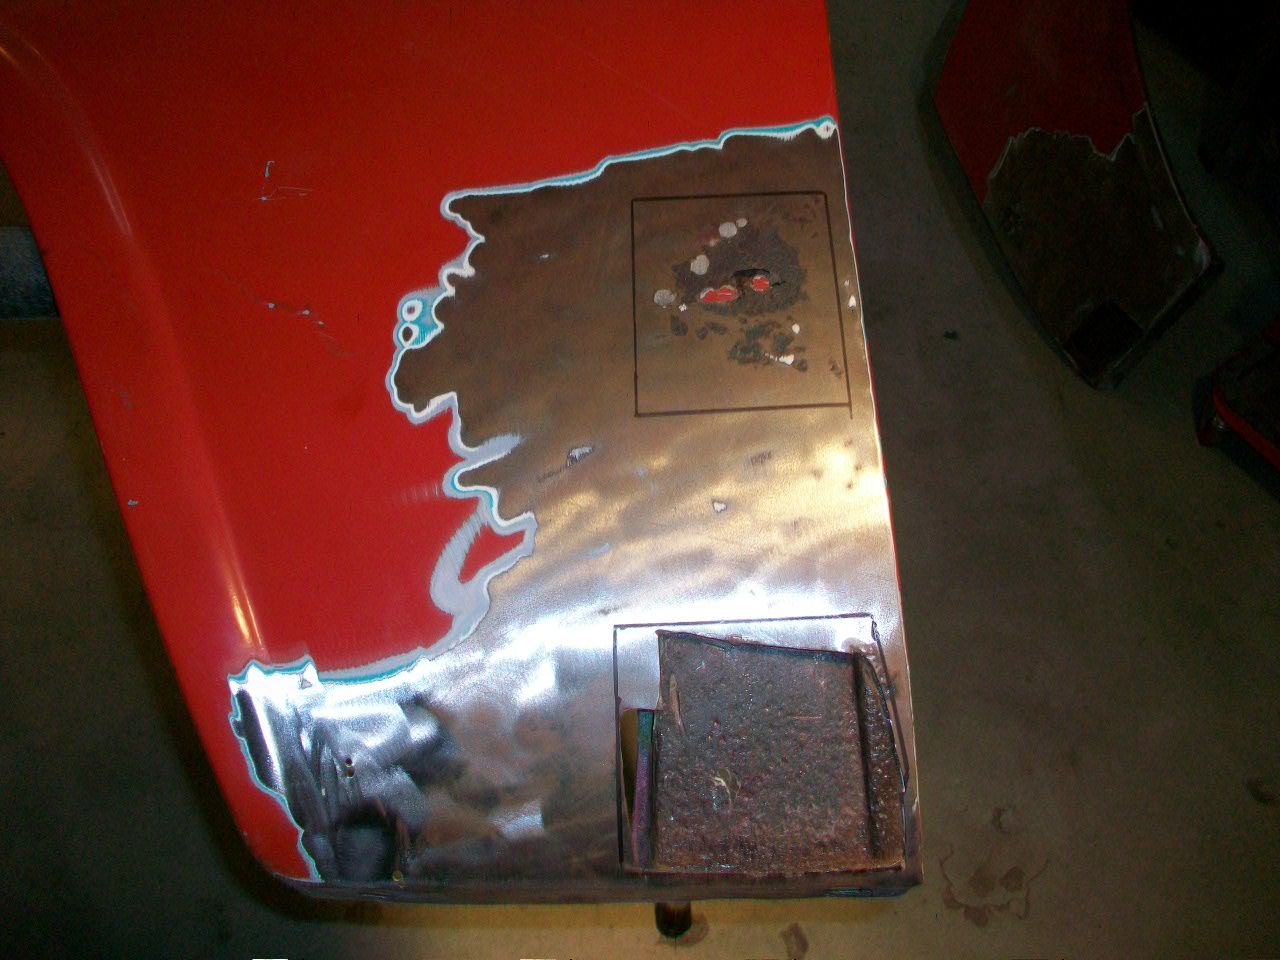 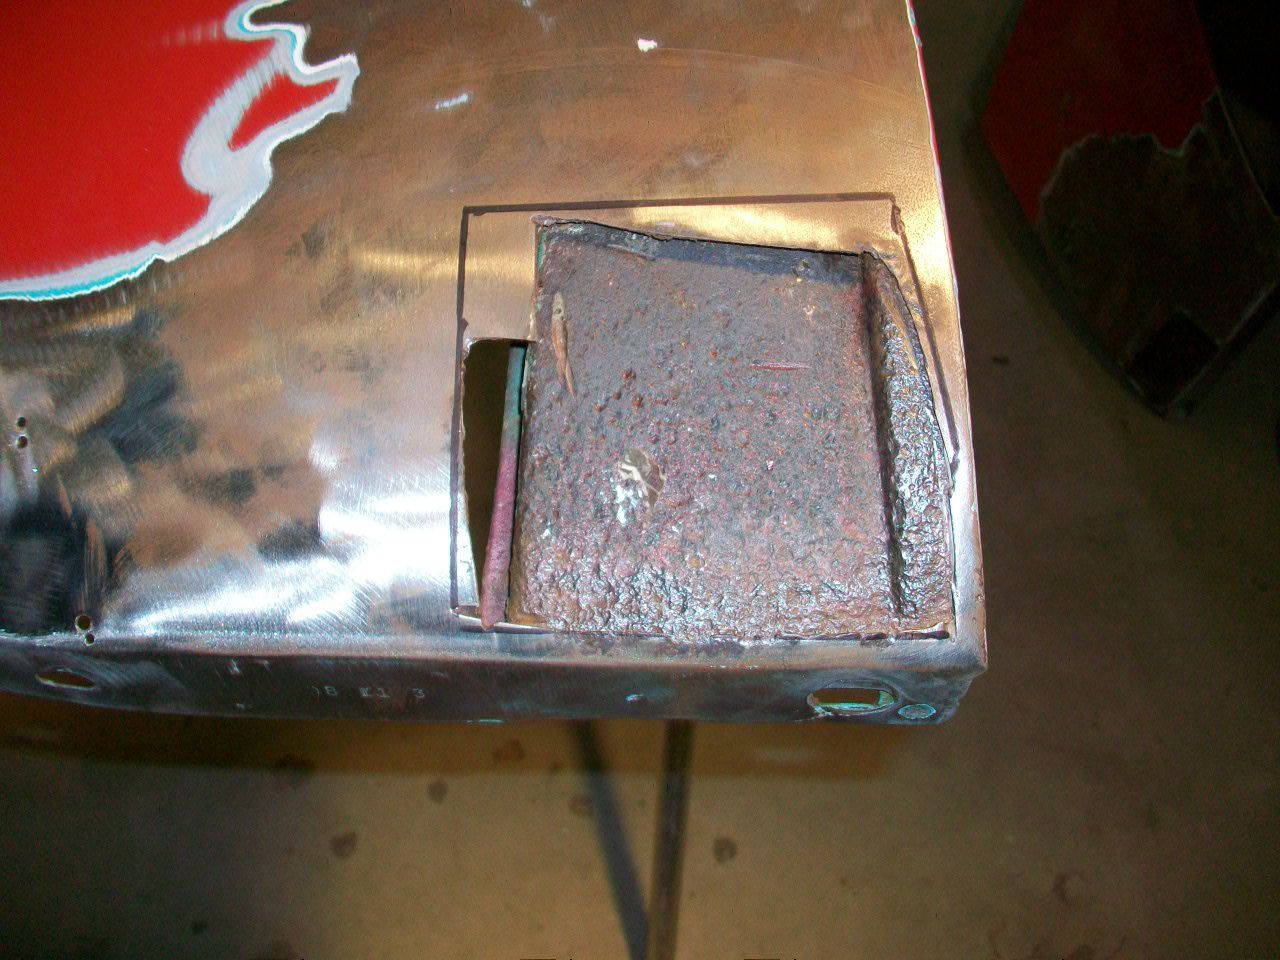 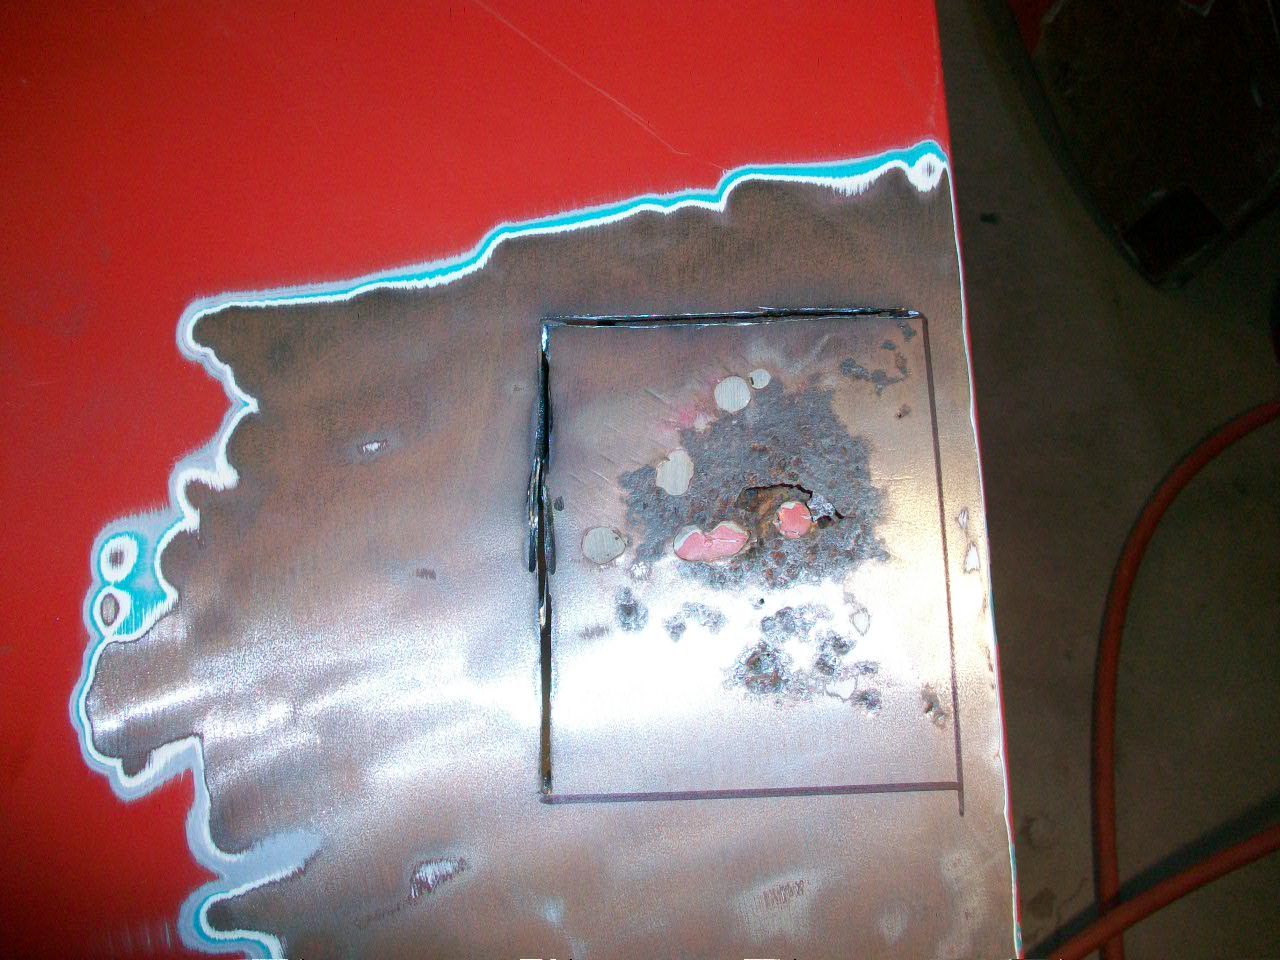 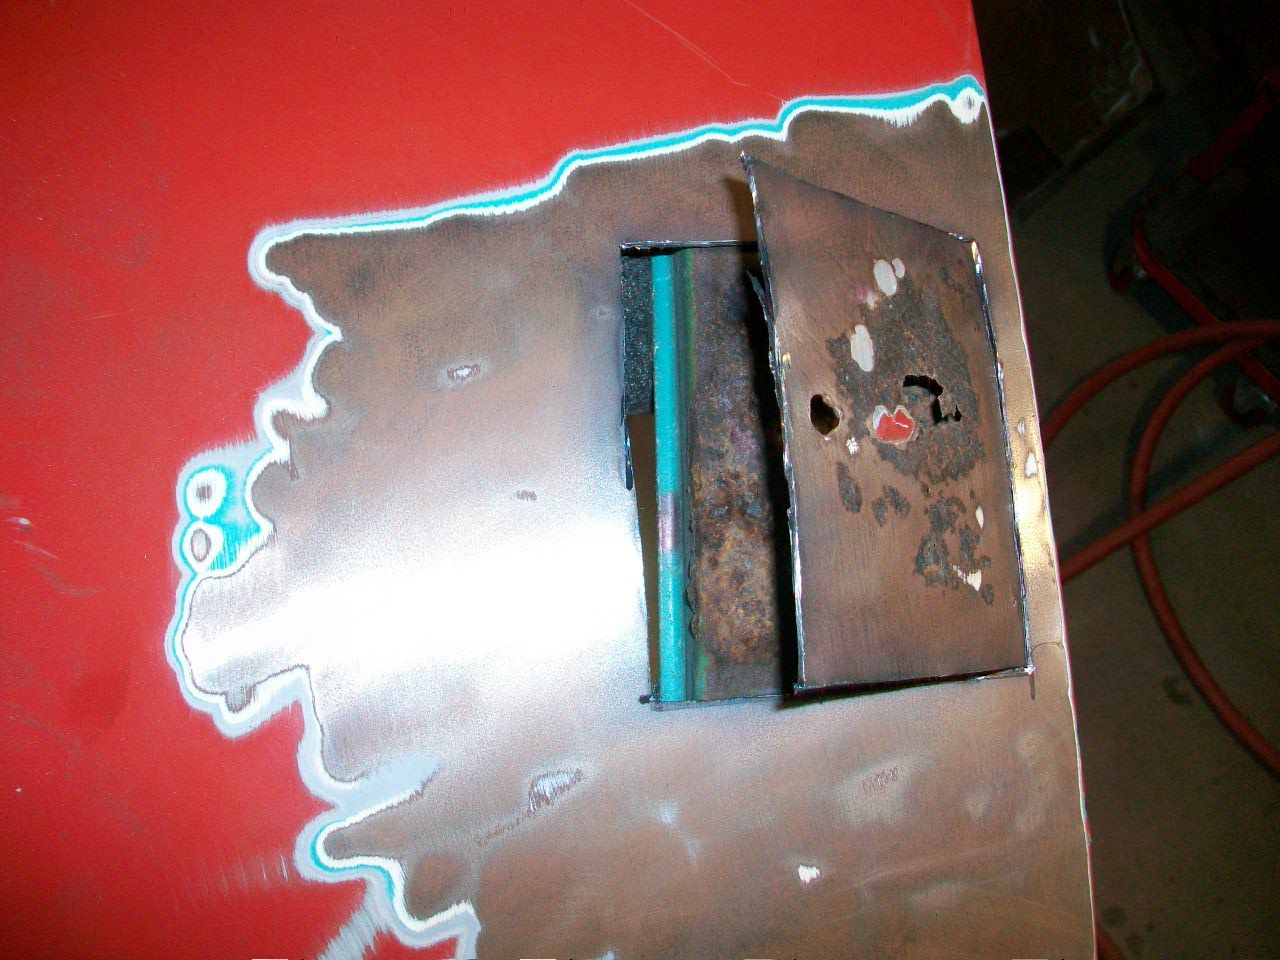 I decided to patch it up as you can see. No one makes a patch panel tall enough to reach up to that place almost in the middle of the height where the rot needs to be cut out. So I figured if I have to make a patch, what's one more?  I basically tried to square things up as much as possible to make my patches easier to cut and fit. For the smaller hole I made above the original "bondo basket" I found, it was pretty easy to take the rectangle piece I cut out and use that as a template to cut a new piece. The lower hole was a little more difficult as it was not completely square and there was not a good way to get thin cardboard behind it to trace it out. I had to use poster board above it, cut, fit, cut, fit, repeat and there we go. 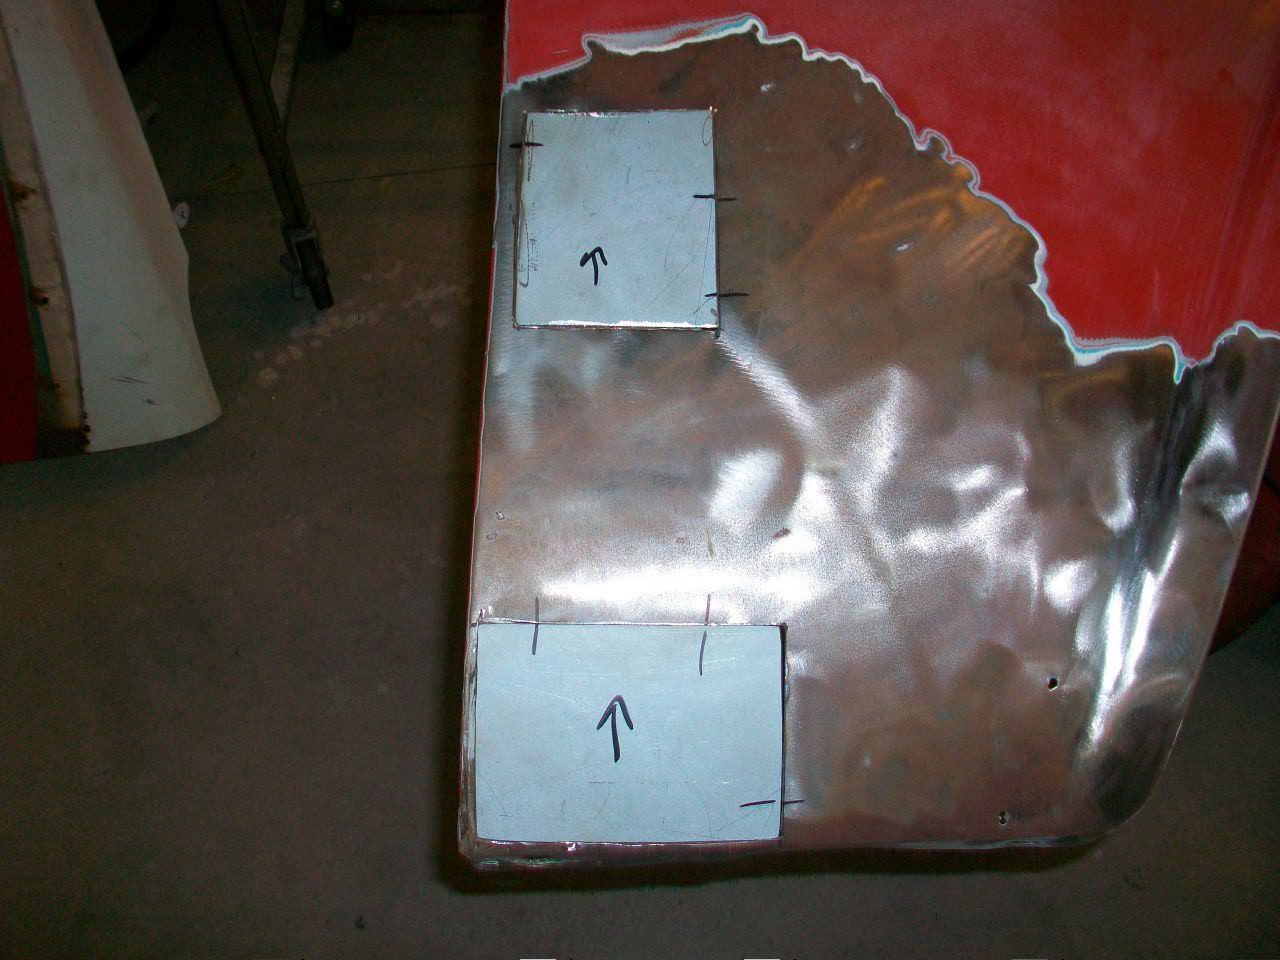 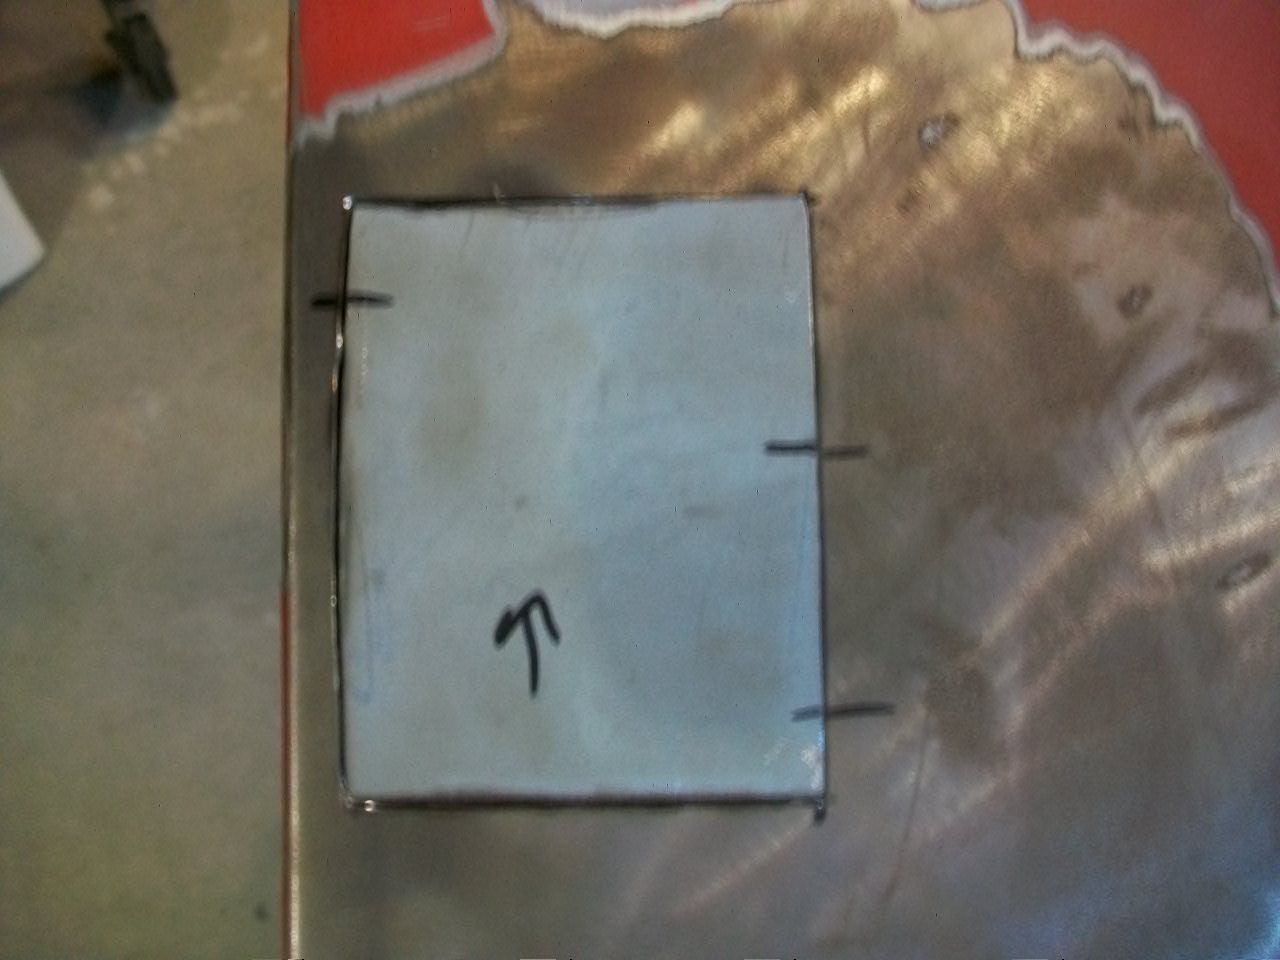 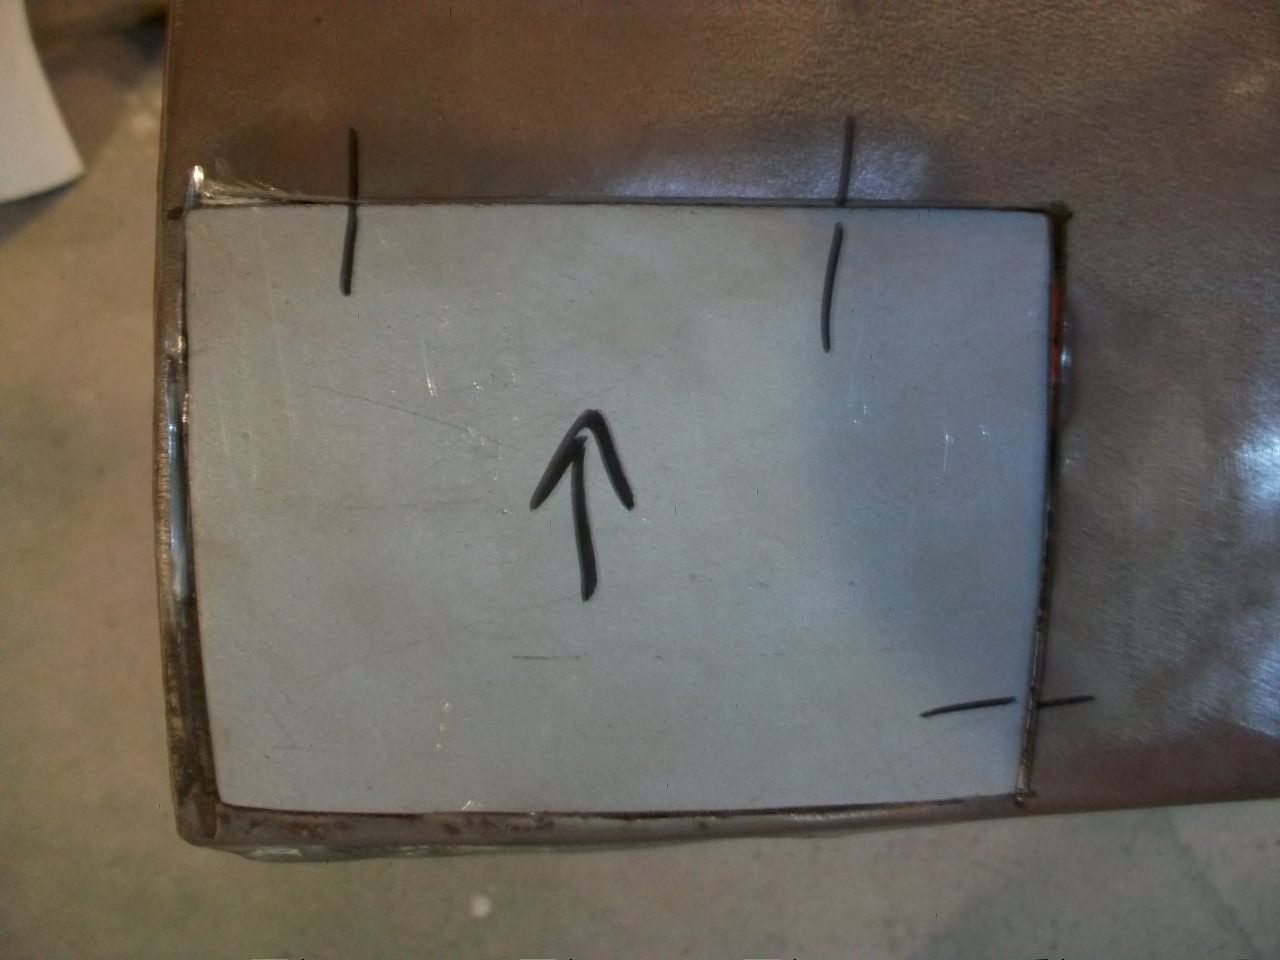 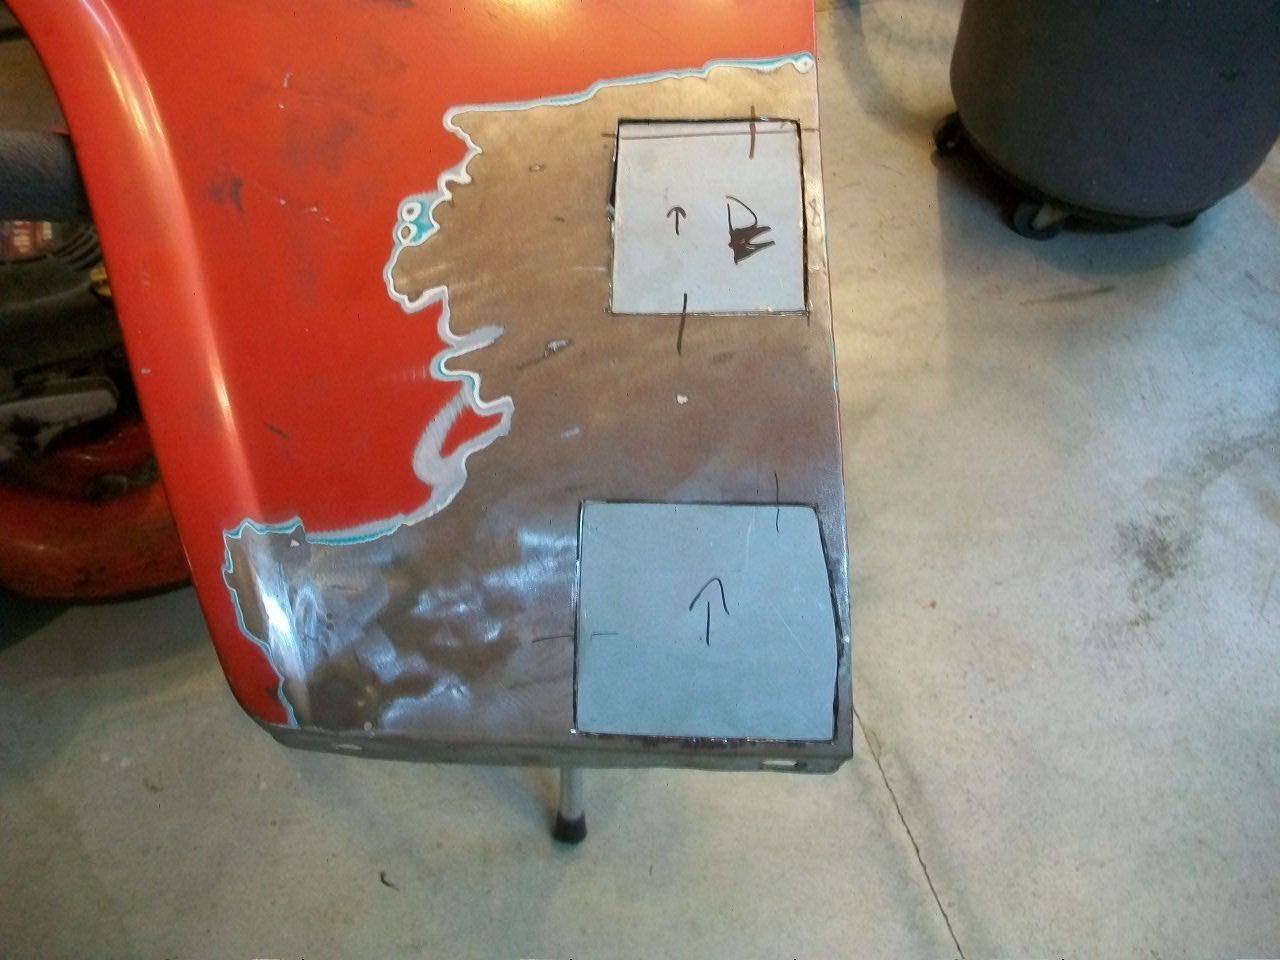 The patches were just cut from some left over stock I had that is the same gauge as the original fender. I was probably too cautious to cut it exactly true because I did have to do quite a bit of dressing and grinding to get each one to fit the hole with very little gap. I do believe for a butt weld with the mig it is best to get the metal edges to be pretty close to each other. You can imagine how long the fitment took!  Hopefully I can blast soon, weld them up, grind them down, and get to spreading some body filler.
__________________
Lancaster, California Visit hotrodreverend.com to view hundreds of pictures and videos of the build of the 1955 Ford Club Sedan! |
|
|

|
|
|
#251 |
|
Senior Member
Join Date: May 2010
Location: westbury ny
Posts: 854
|
looks good just ck your heat and do little spots spreading the heat but you've been there done that its all worth it in the end when people ask who did that and you say me and take pics for the album when you show it
|
|
|

|
|
|
#252 |
|
Junior Member
Join Date: Mar 2016
Posts: 12
|
Nice work so far Rev! It's going to be beautiful.
I thought I'd pass on a little tip I picked up which helps when butt welding with a MIG. If you can secure a copper plate behind the joint that you would like to weld it helps prevent burn through and gives a better finish behind the weld. I've used this technique a few times on my 55 Victoria and other cars and found my amateurish welds greatly improved. Copper plate isn't always easy to find, I just cut up some old copper water pipe and flattened it out. Keep up the great work, Chris |
|
|

|
|
|
#253 |
|
Senior Member
Join Date: May 2010
Location: westbury ny
Posts: 854
|
harbor freight sells a copper spoon also on my prior response to your "gray matter" I said it was a marson product it could also be all metal made by usc not that it matters
|
|
|

|
|
|
#254 | |
|
Senior Member
Join Date: May 2010
Location: Lancaster, CA
Posts: 916
|
Quote:
Fellas, you must be talking about this tool right here. 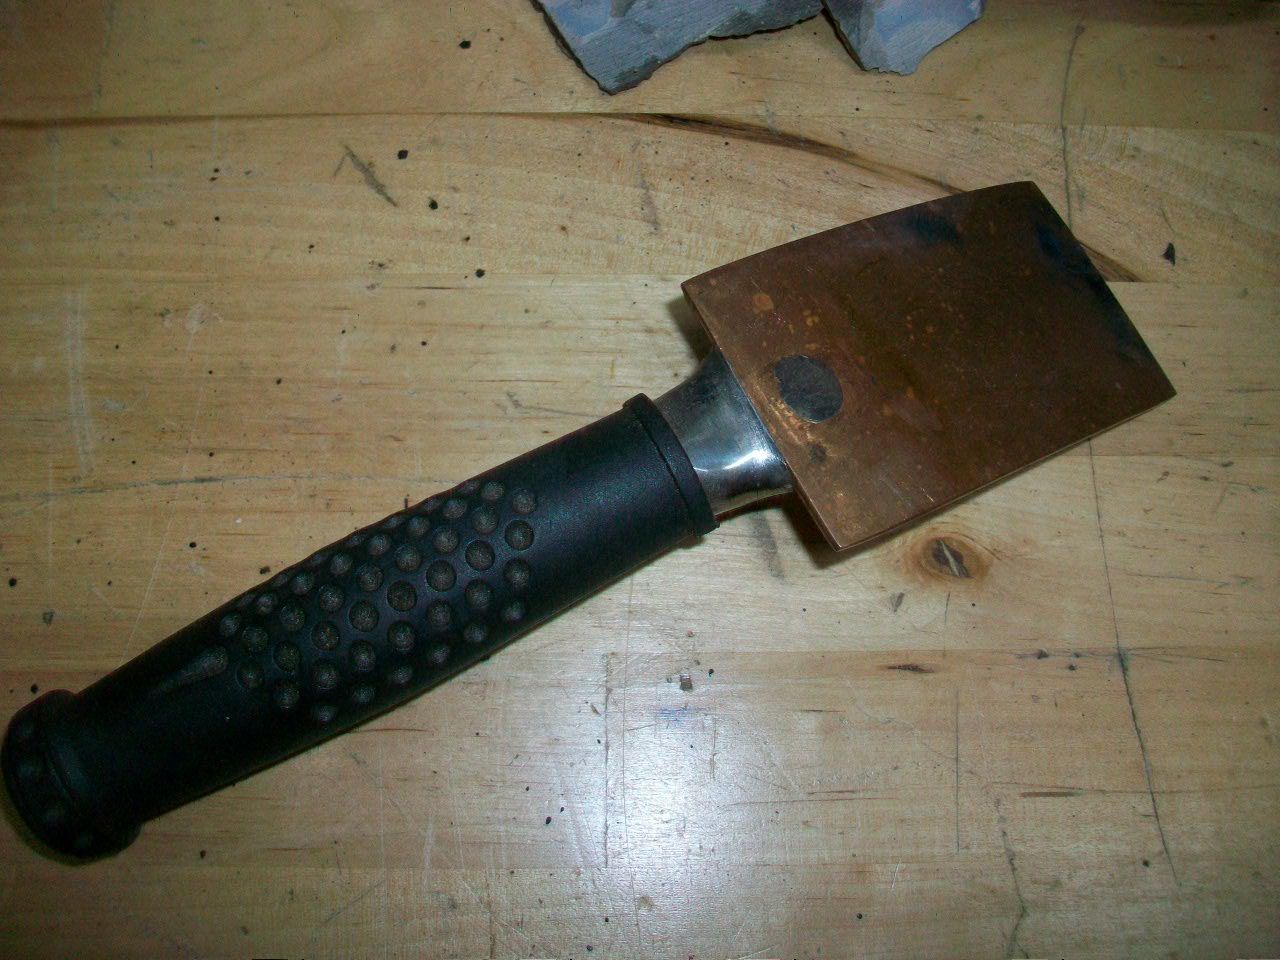 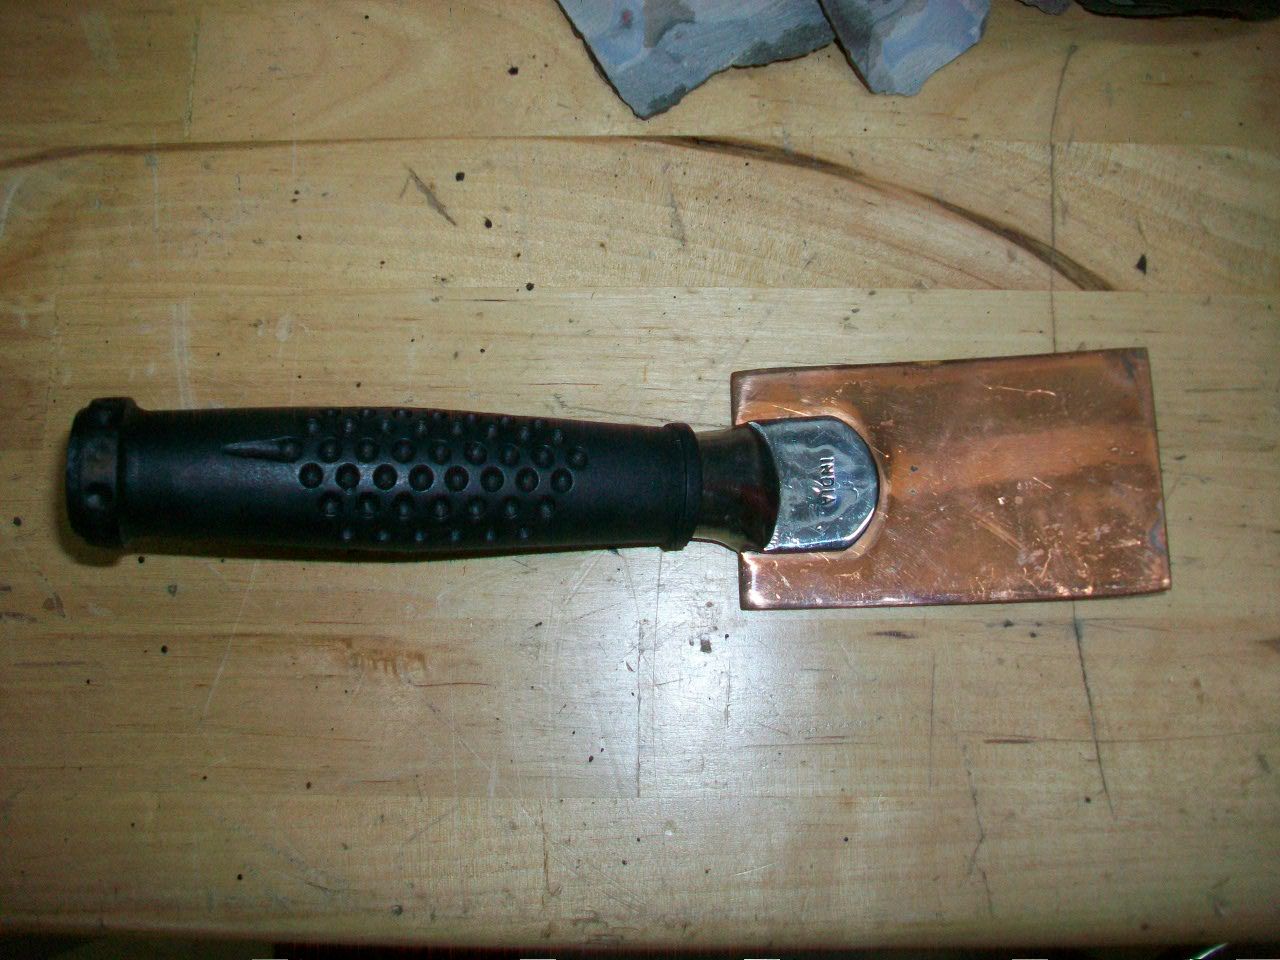 Yes, I have used that before - I had to use it to plug up that antenna hole a few posts ago. The trick here is that the bracing behind the skin of the fender is very tight to the patches I am going to weld in. I am not sure if I want to remove it all or not... this kind of gets down to "how far ya wanna go? how much time ya wanna spend?". I guess some of these things are a trade off on time and speed. I will use that spoon where I can though!
__________________
Lancaster, California Visit hotrodreverend.com to view hundreds of pictures and videos of the build of the 1955 Ford Club Sedan! |
|
|
|

|
|
|
#255 |
|
Junior Member
Join Date: Sep 2016
Location: the corn belt
Posts: 20
|
Something that helped me a lot is putting a dehumidifier in my garage, drain hose hust goes down the drain in the floor.
So much better than fighting humidity and quick rust coming back. Meant this as a reply to a fellow a few posts back about his rust coming back quickly from humidity. Last edited by ButchRed33; 09-24-2016 at 02:58 AM. |
|
|

|
|
|
#256 | |
|
Senior Member
Join Date: May 2010
Location: Lancaster, CA
Posts: 916
|
Quote:
__________________
Lancaster, California Visit hotrodreverend.com to view hundreds of pictures and videos of the build of the 1955 Ford Club Sedan! |
|
|
|

|
|
|
#257 |
|
Senior Member
Join Date: May 2010
Location: Lancaster, CA
Posts: 916
|
Took some time off on Friday afternoon to get on with the work on Driver's side fender. First up was the welding...
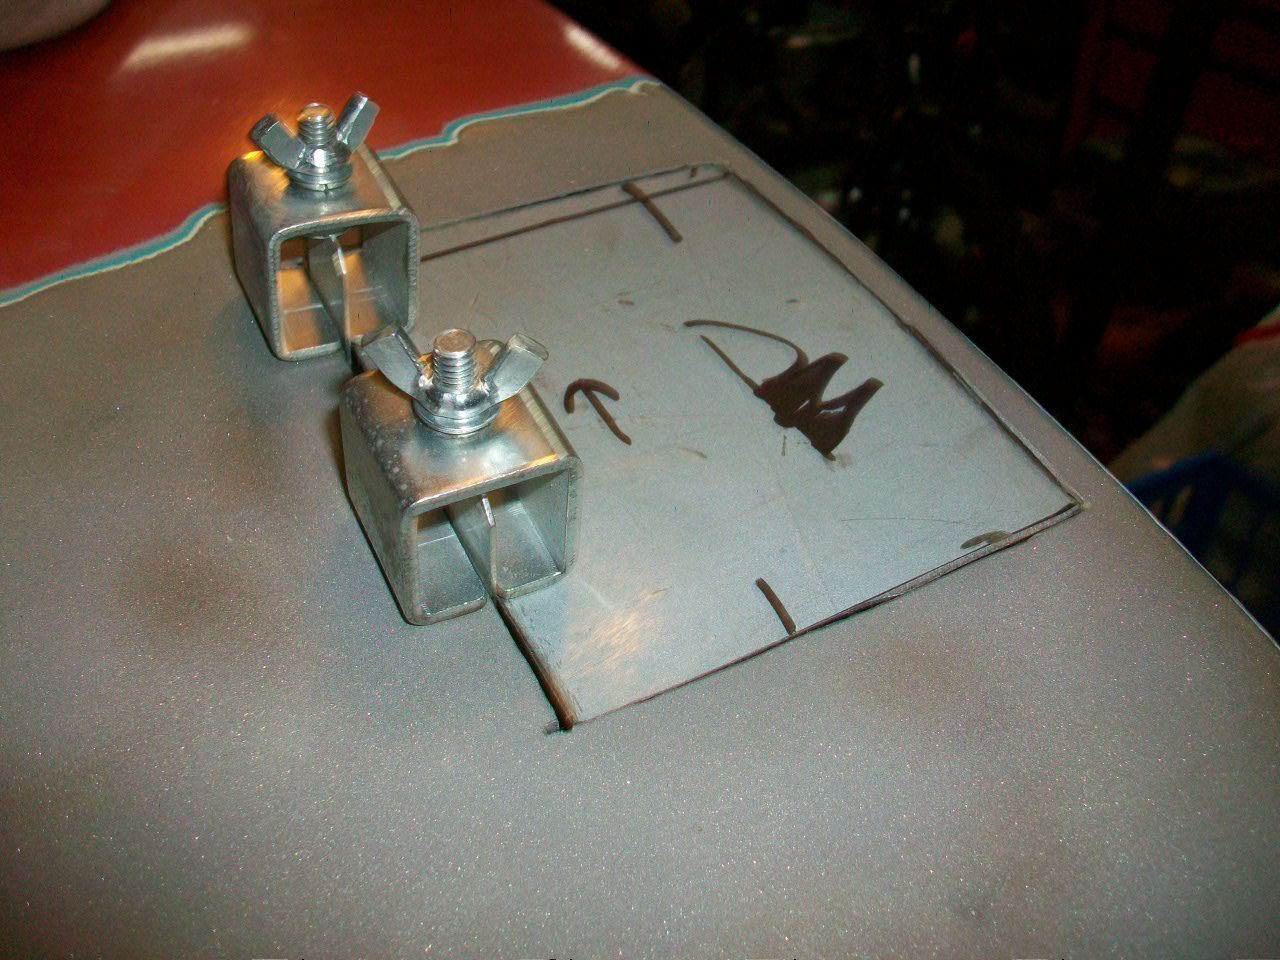 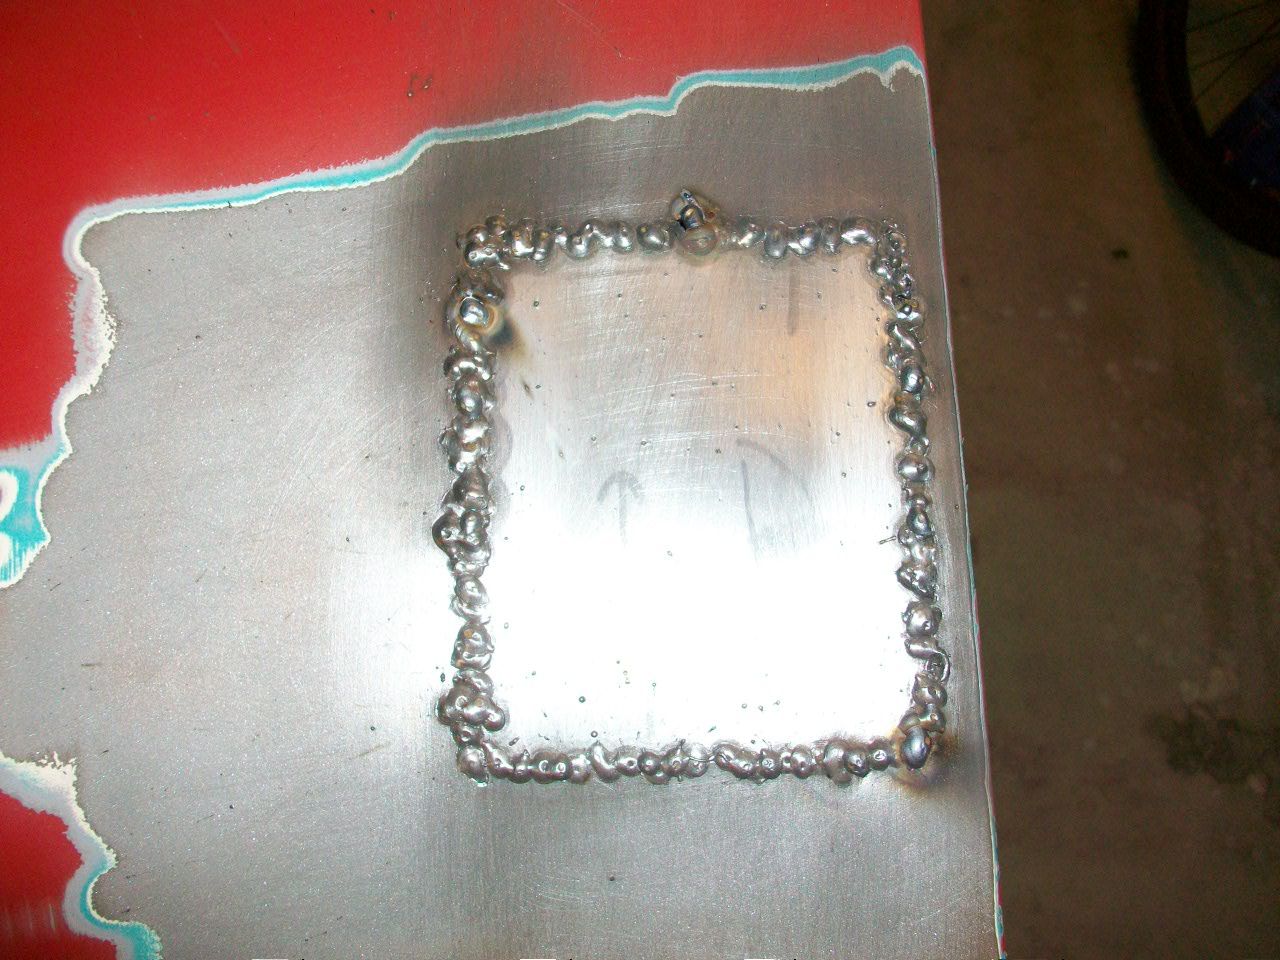 I also filled these small holes by using that copper spoon behind the panel. 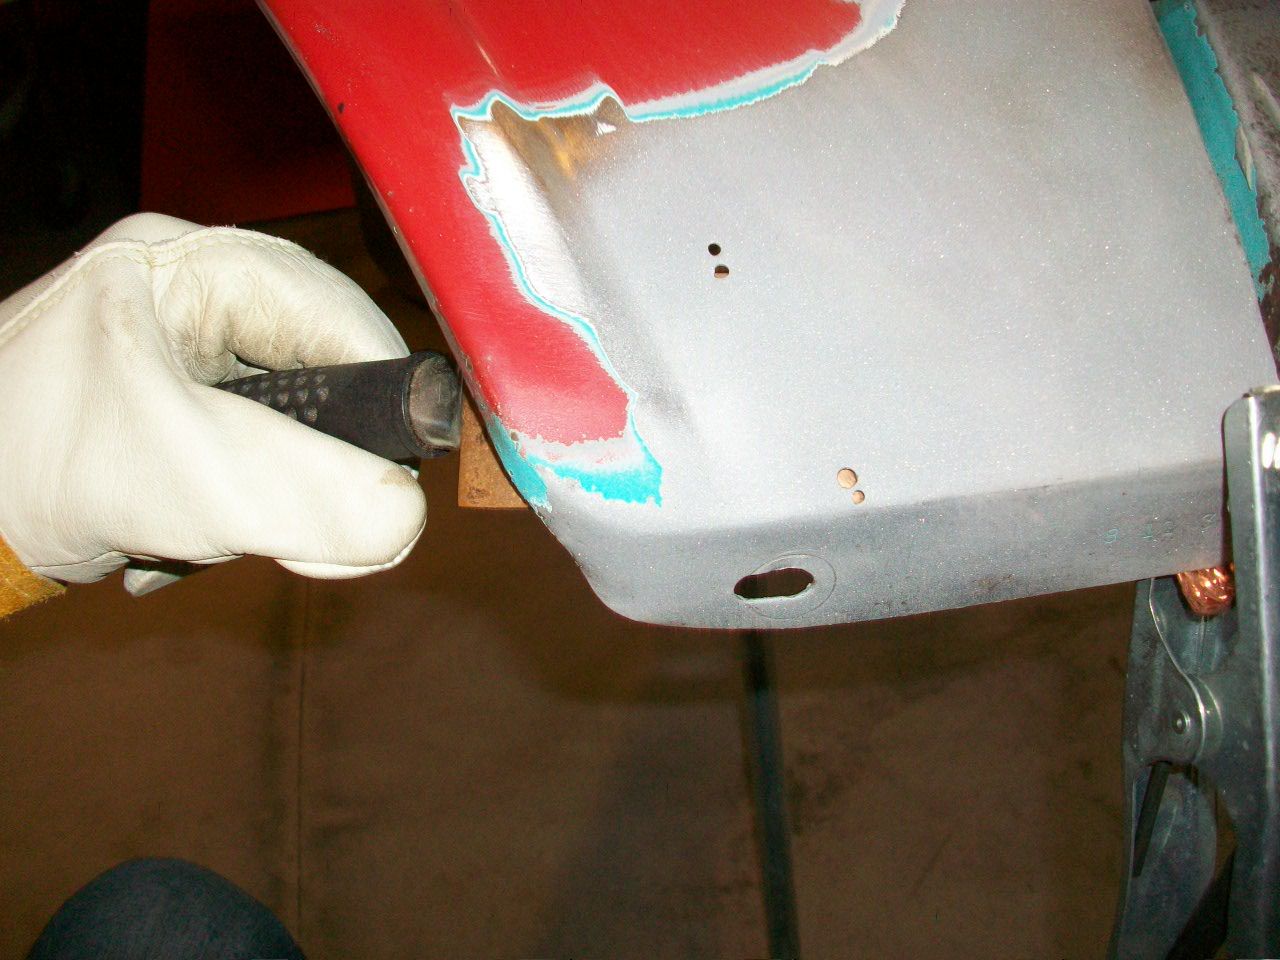 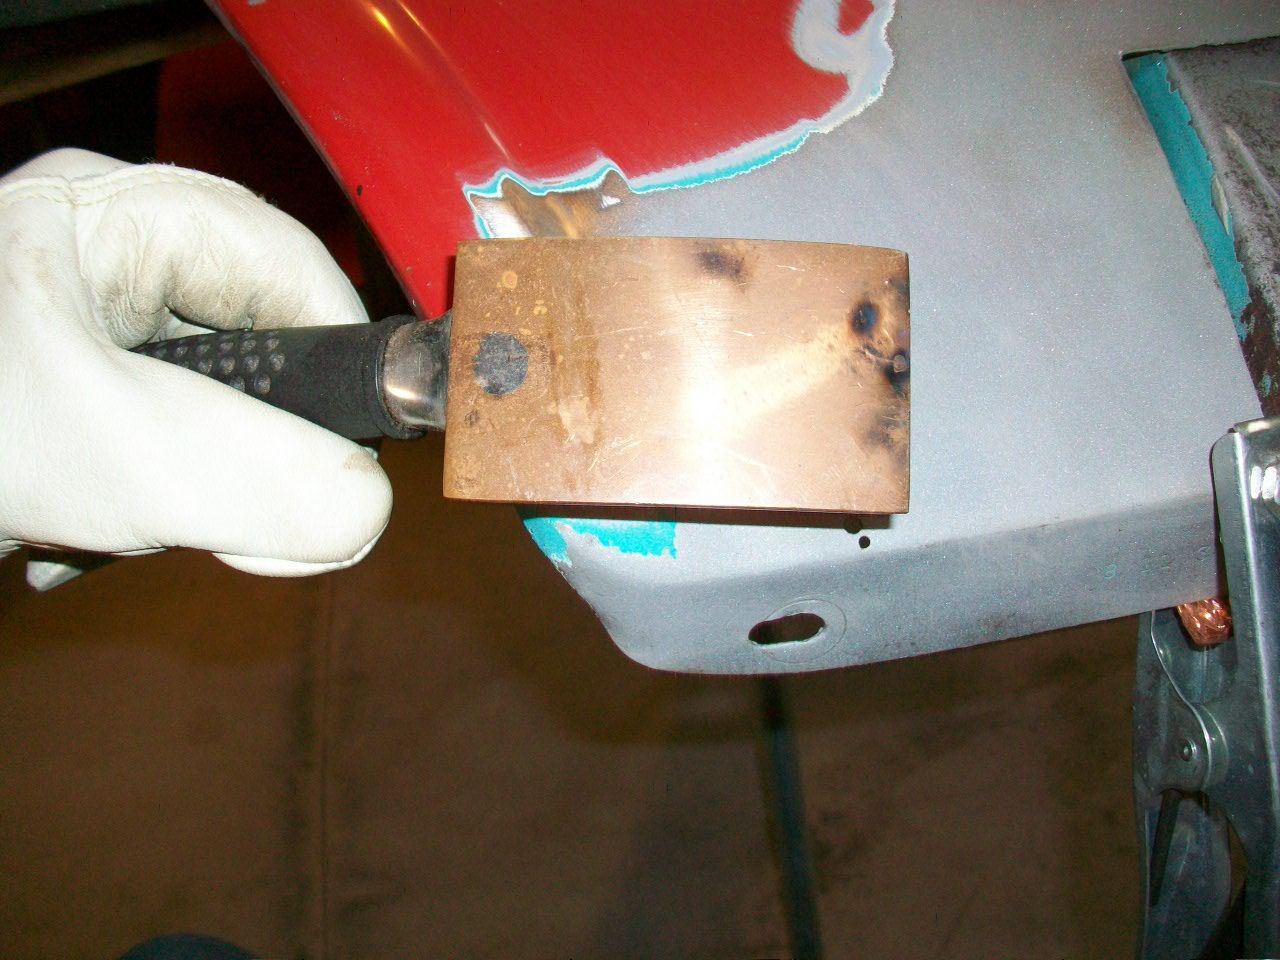 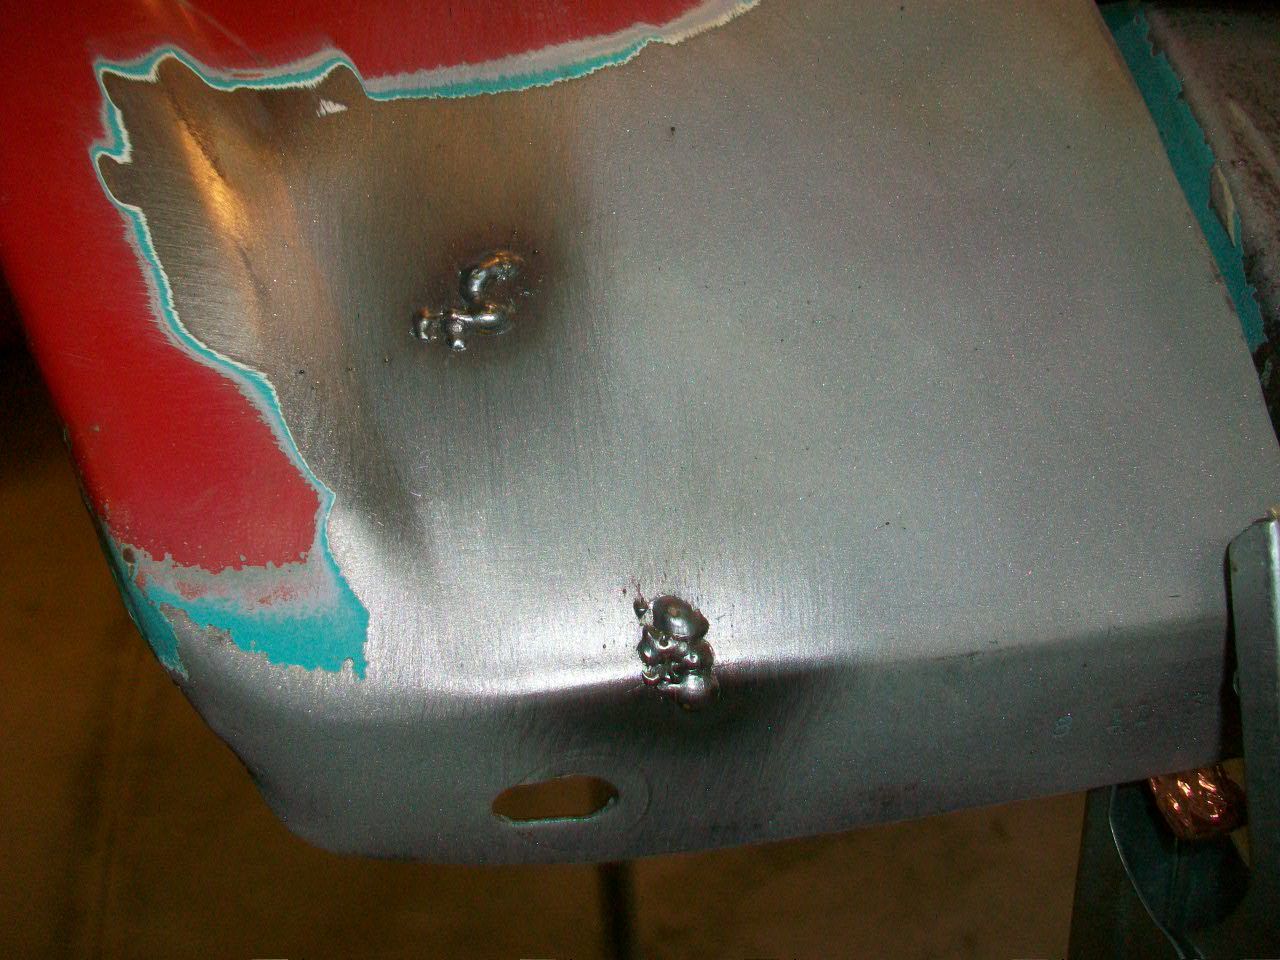 I admit I was pretty agressive here. I guess because I thought I had the copper spoon it was time to just pull the trigger and feed the wire into the thing...  Of course that just meant more grinding - I am not an official welder, just a "trigger puller" who puts more metal into things than needed. It really showed up when I was stitching the panels in. I got carried away with the deal and let the panel get too hot. Take a look at the concave "warped" area. Of course that just meant more grinding - I am not an official welder, just a "trigger puller" who puts more metal into things than needed. It really showed up when I was stitching the panels in. I got carried away with the deal and let the panel get too hot. Take a look at the concave "warped" area. 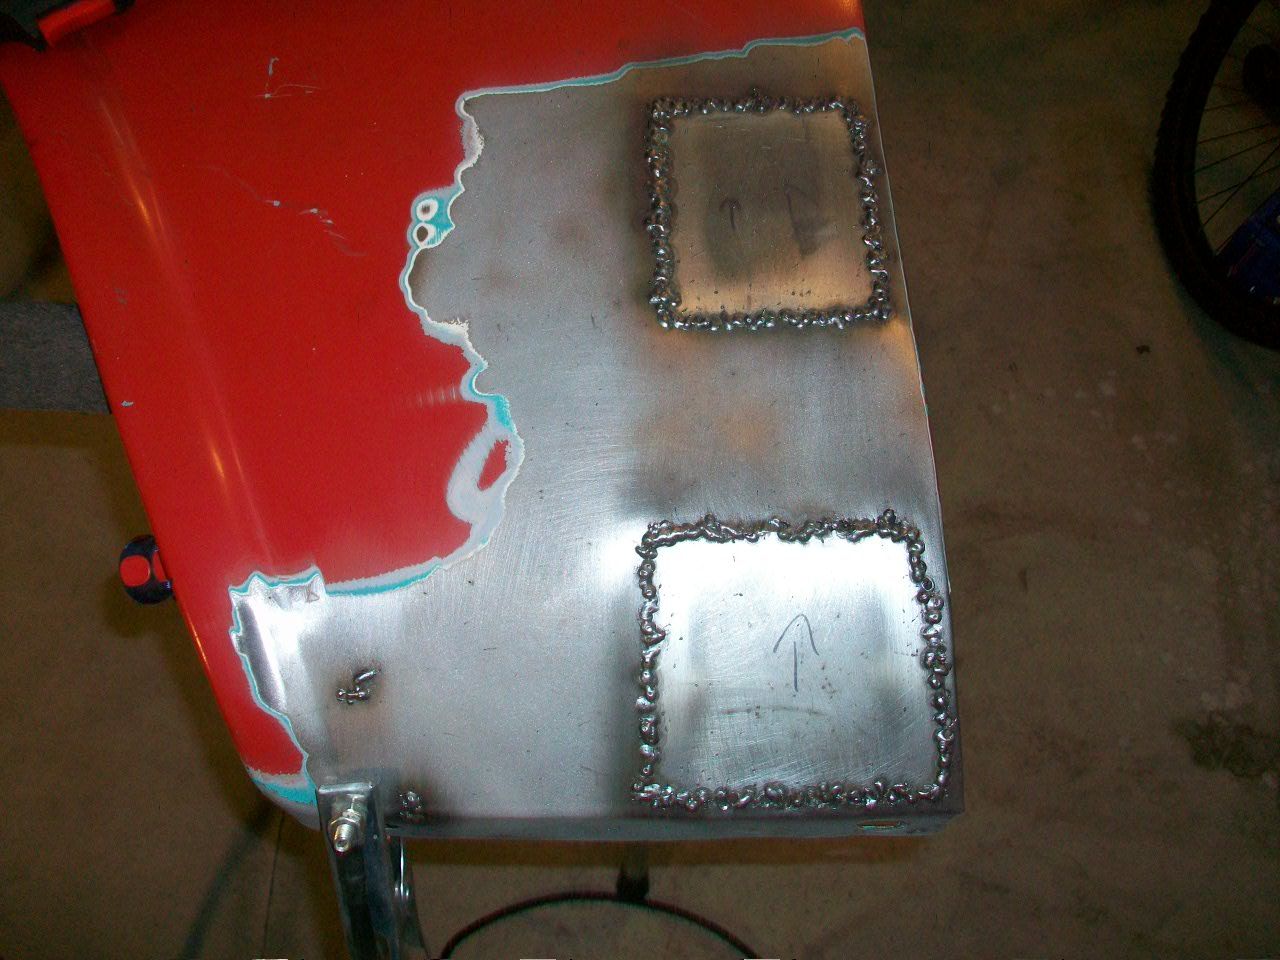 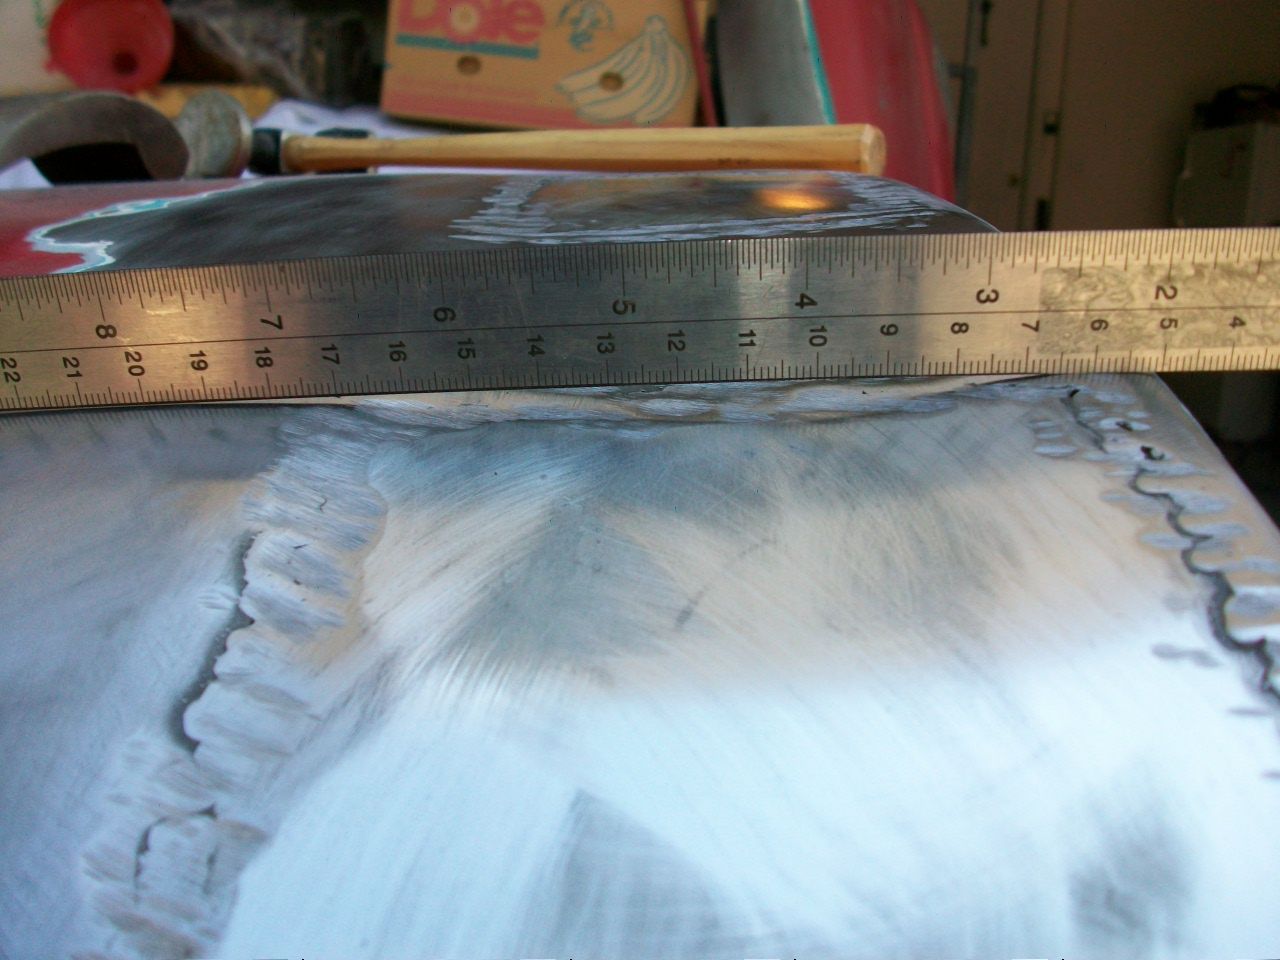 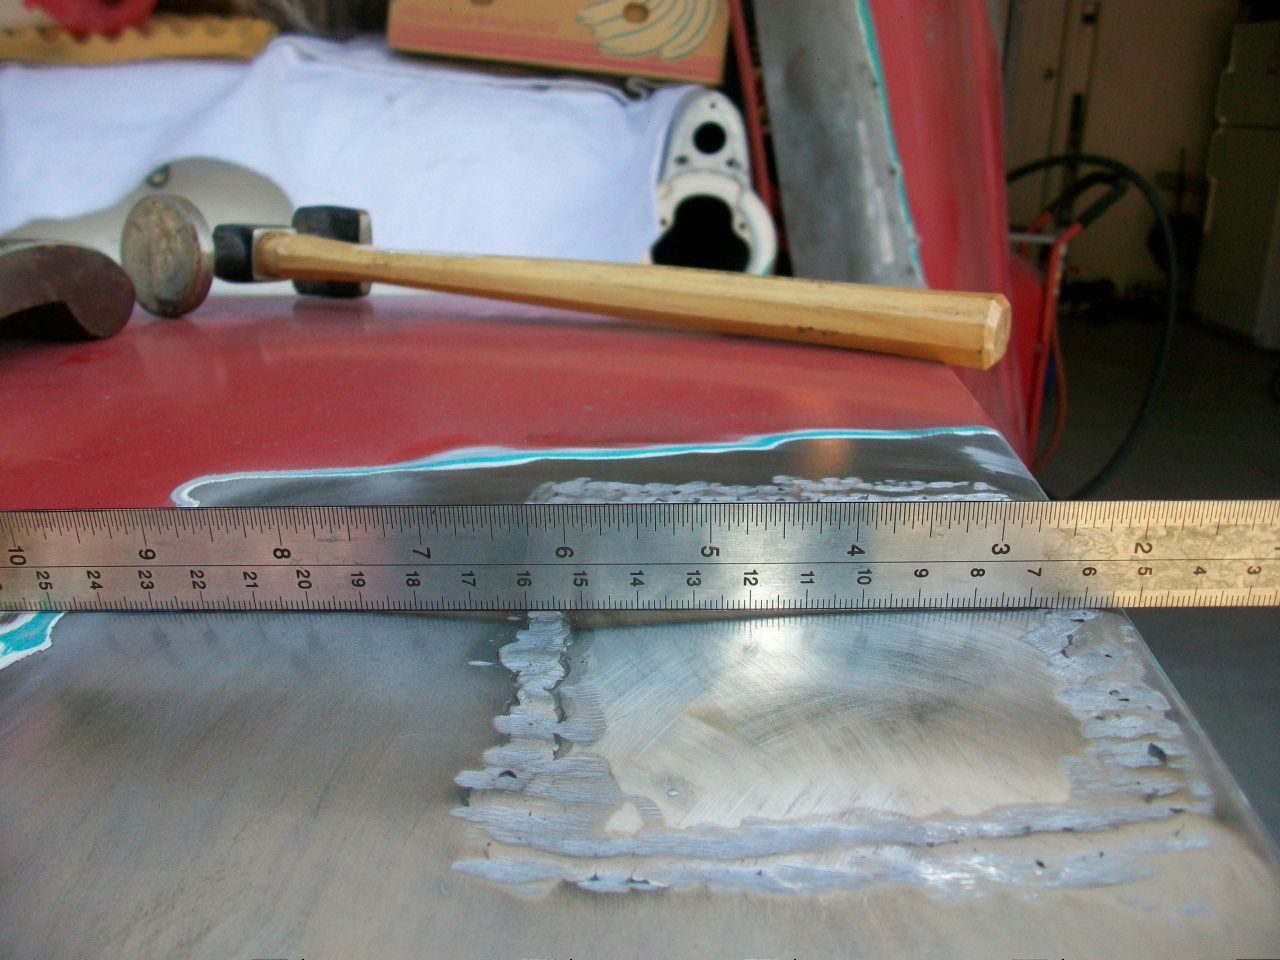 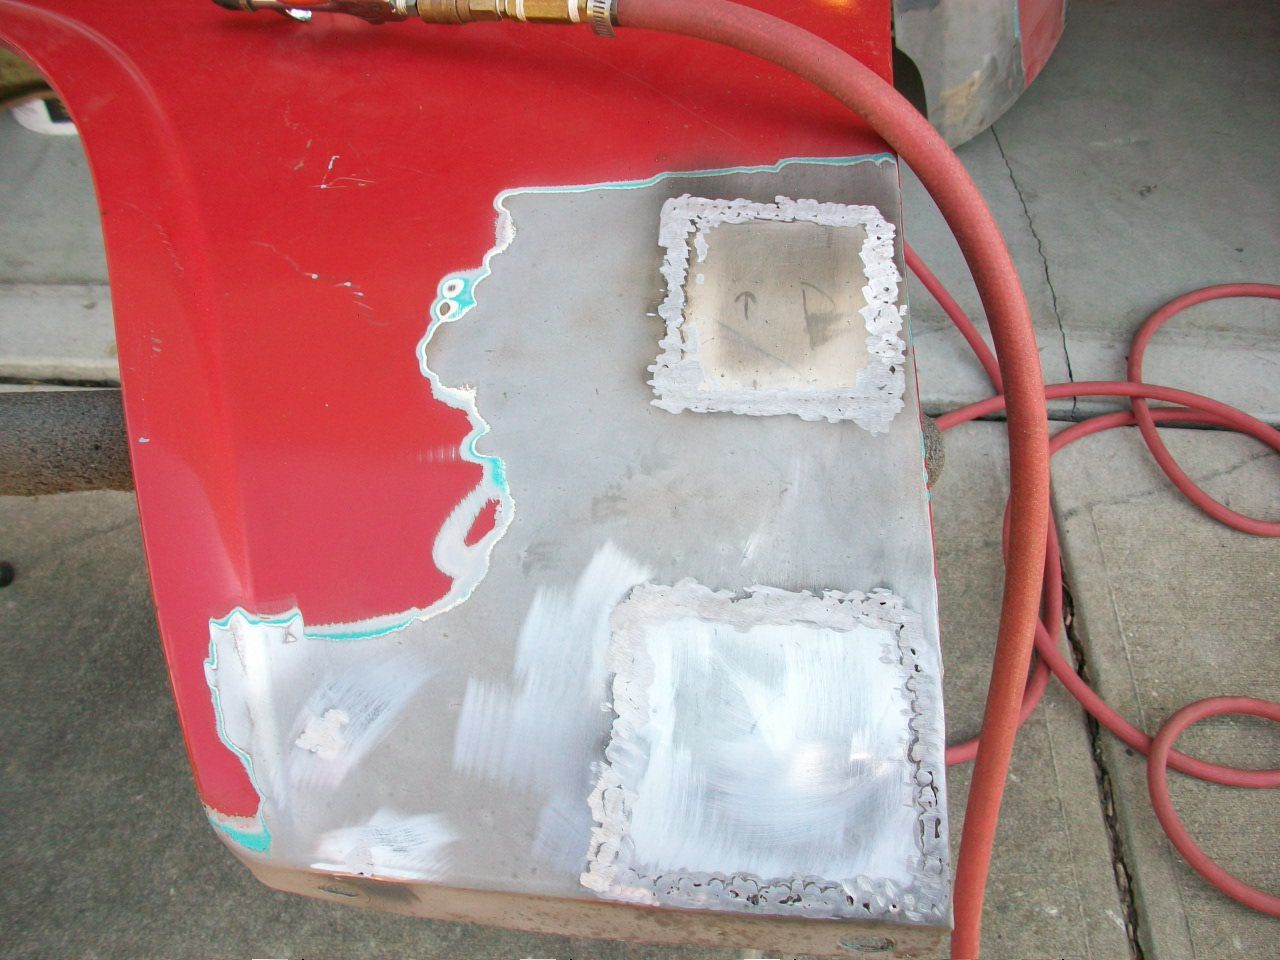 After grinding it all down and checking with a straight edge, it was time to get some filler on the thing and bring it back. Unfortunately that warped area could not be adressed from the back side because of the bracing. I reckon if I was not so lazy I would have removed the spot welds for the full length of the bracing, did some hammer and dolly work, welded the brace back on, etc, etc. Everything is a compromise between the time you have to do the work and what you plan to get out of it. Since the amount of filler needed would be less than 1/4" deep anywhere on the fender patch area I decided to get out the gallon jug and go for it. 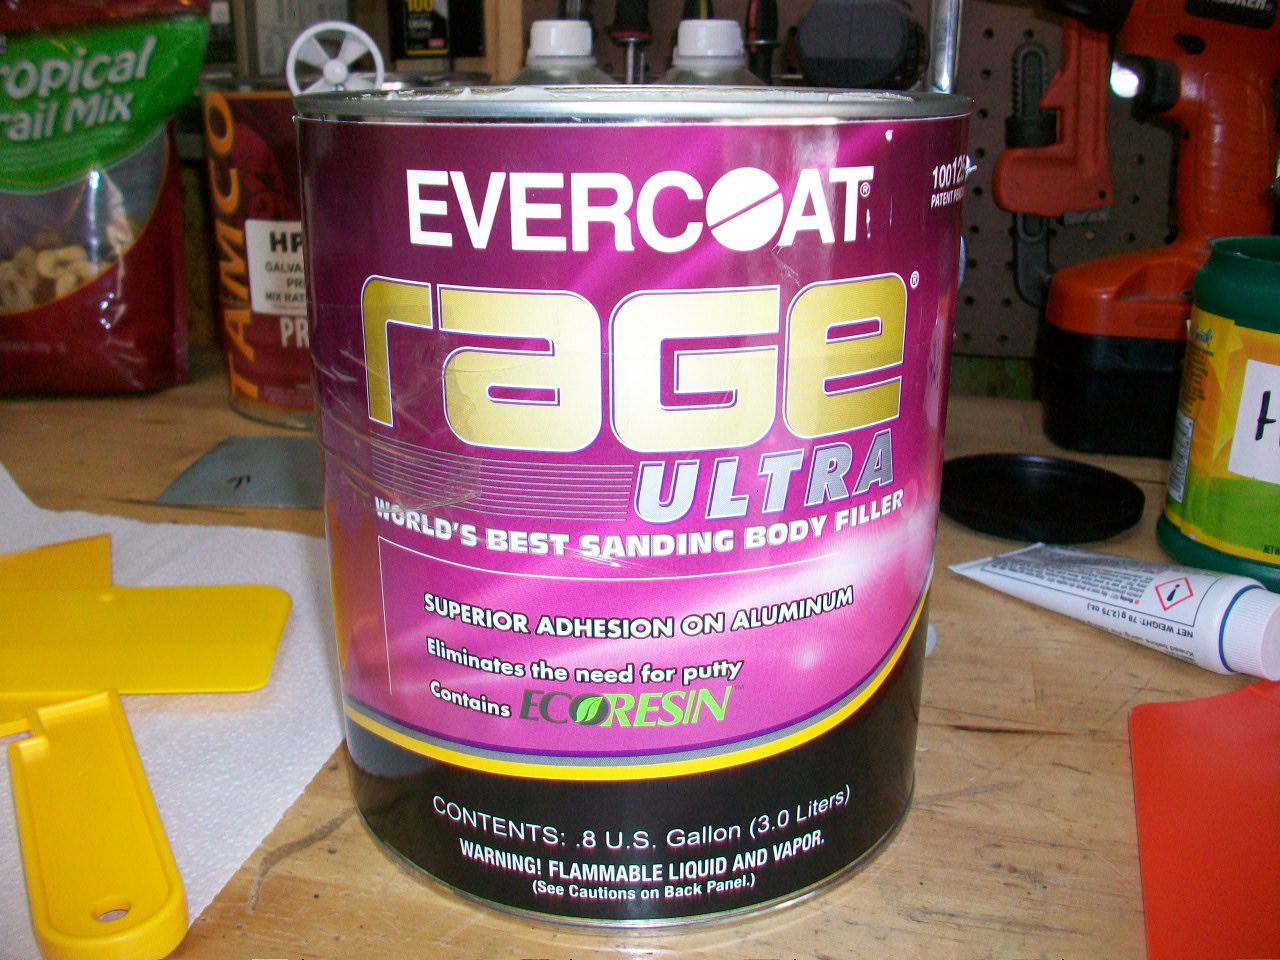 This stuff is worth the price! Thanks to Frank of Long Island for the tip. It has been years since I used any body filler and for this repair I thought I would need quite a bit. I didn't even use half of what I originally mixed. The depth of what I needed to fill was more shallow than it looked. As I went along I did check things with a straight edge. 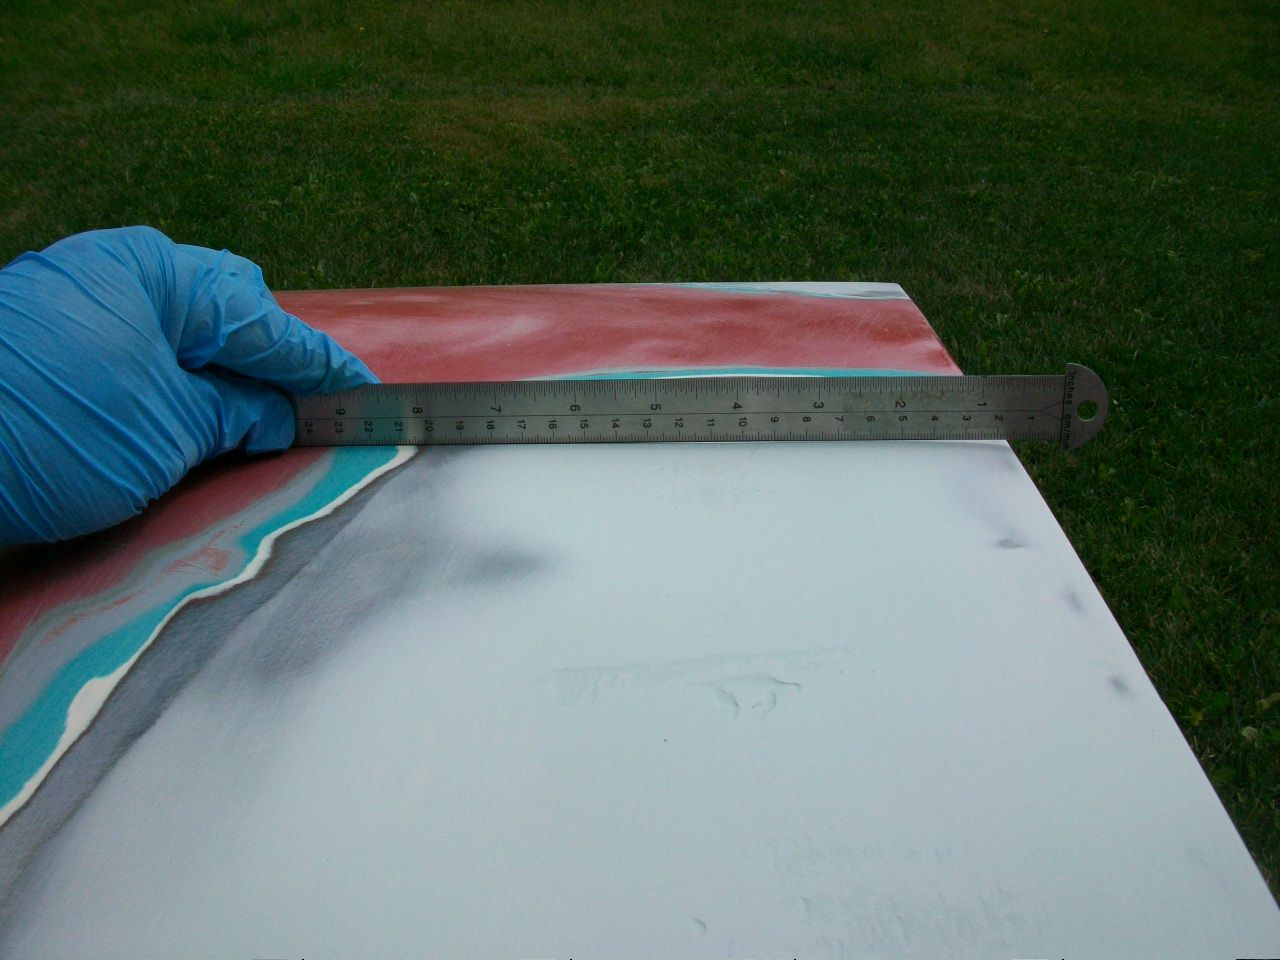 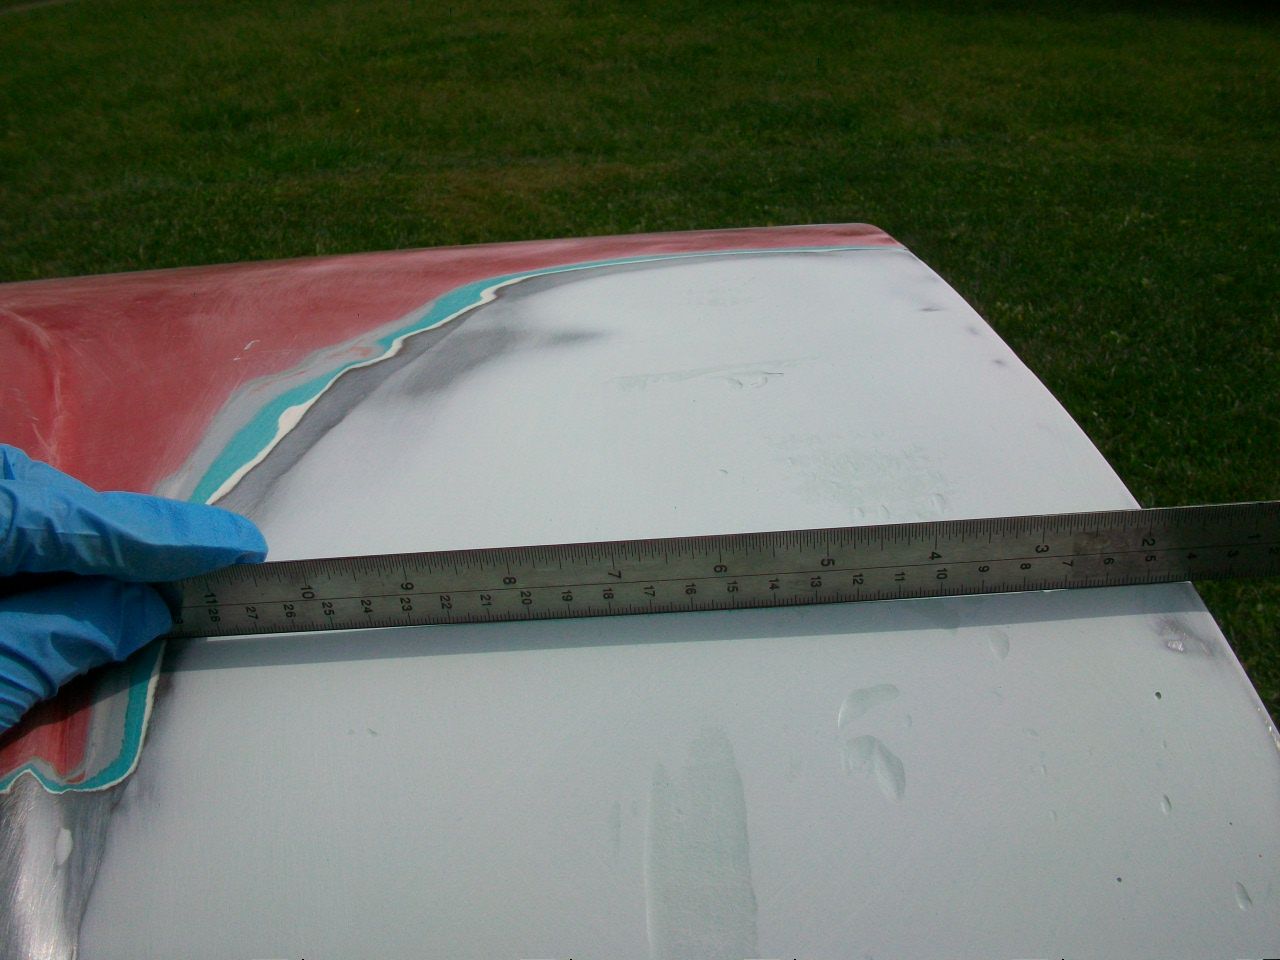 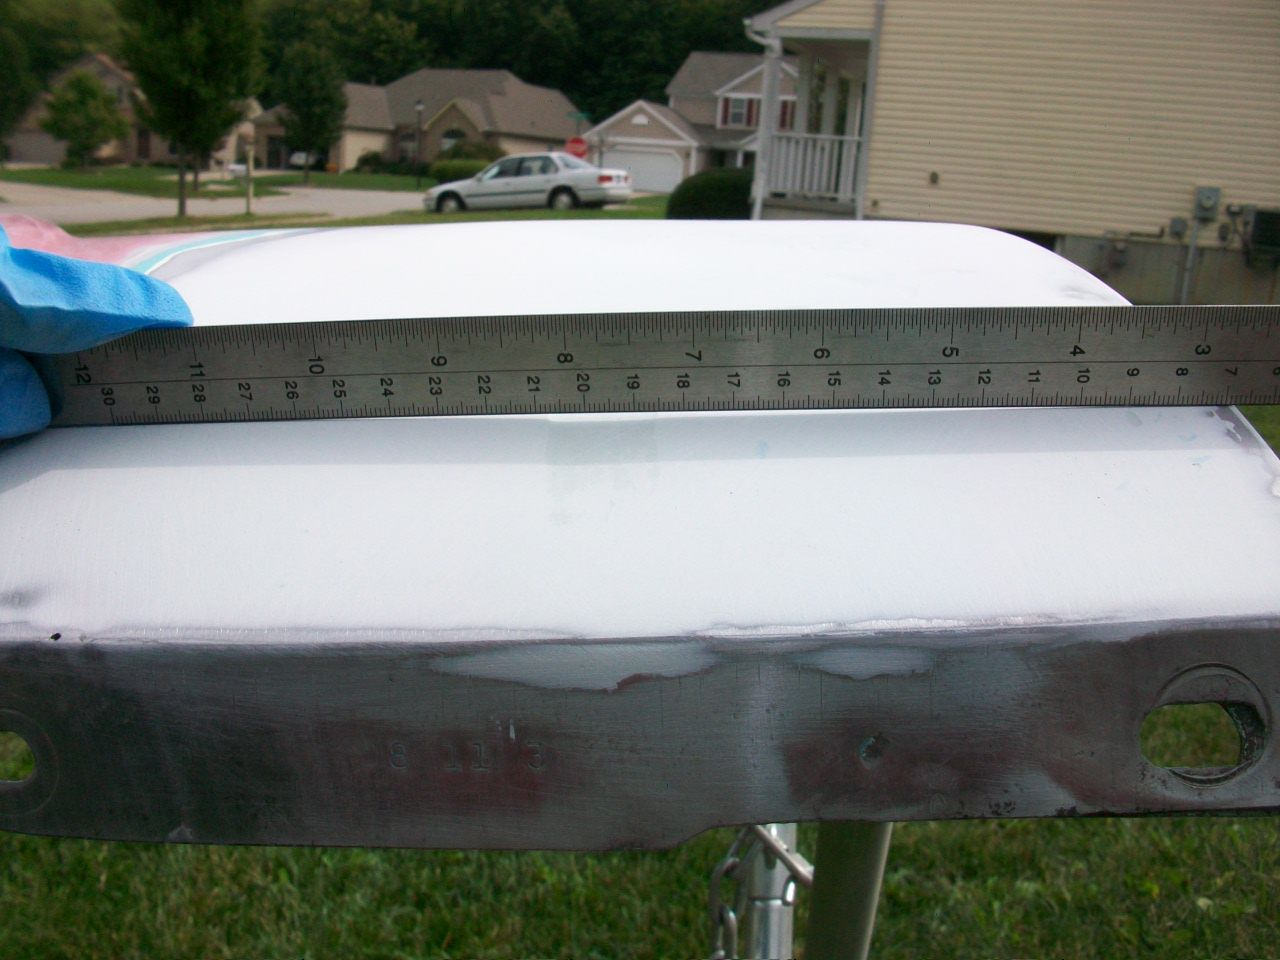 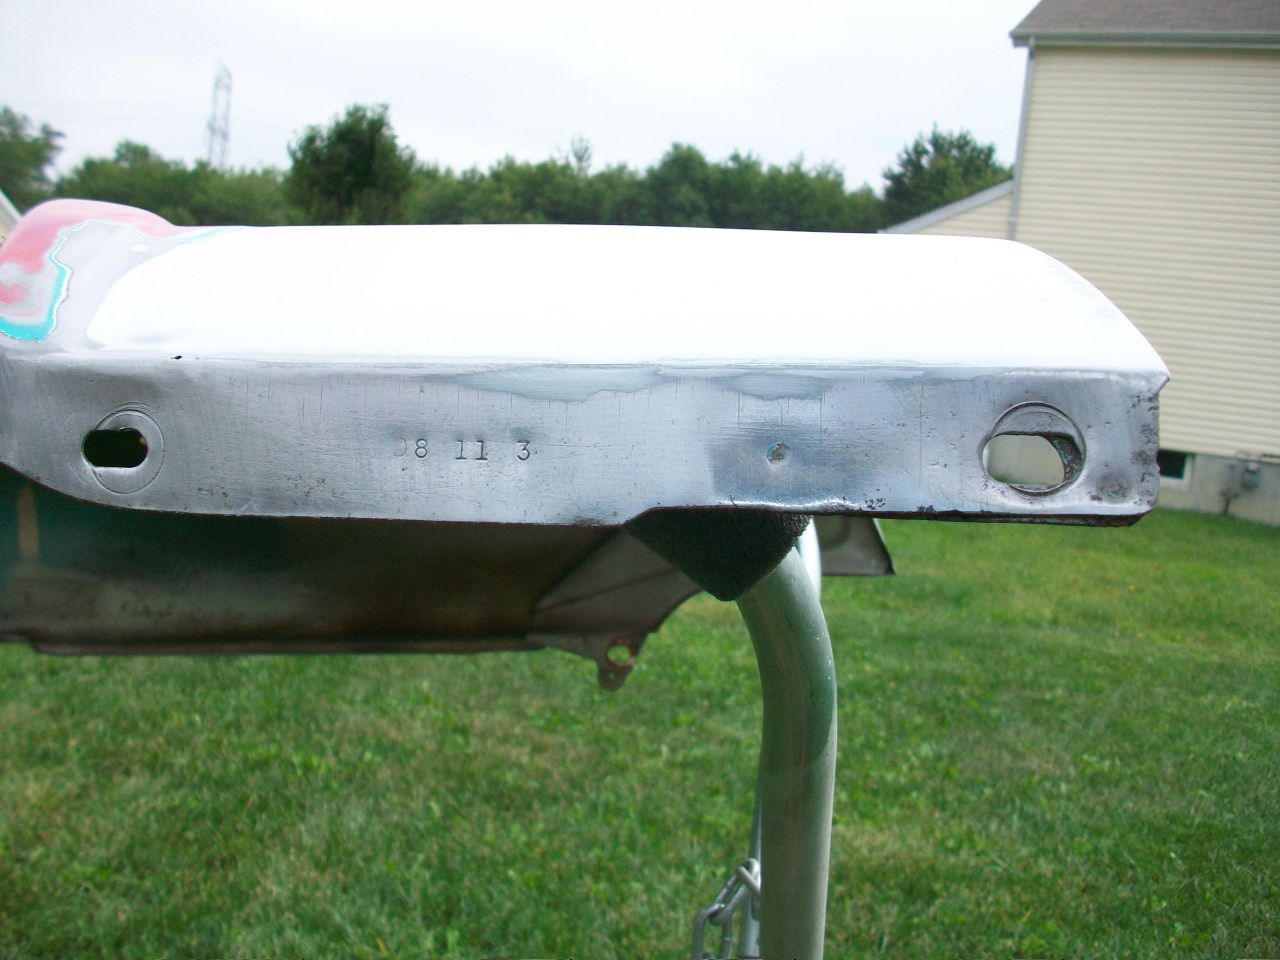 You can see I had some low spots yet to fill in, but that did not take too much. I used a DA with 120 grit to knock it all back down and smooth it all out. As you guys know, most of the filler ends up on the floor.  After the DA work it was time to break out a long sanding block and cross hatch across the entire area. This was also with 120 grit sandpaper. It made for "easy" work, if you call body work easy lol. After the DA work it was time to break out a long sanding block and cross hatch across the entire area. This was also with 120 grit sandpaper. It made for "easy" work, if you call body work easy lol.I did have a couple of pinholes that needed some spot glaze but with this Evercoat product called Rage, the pinholes were few and far between. 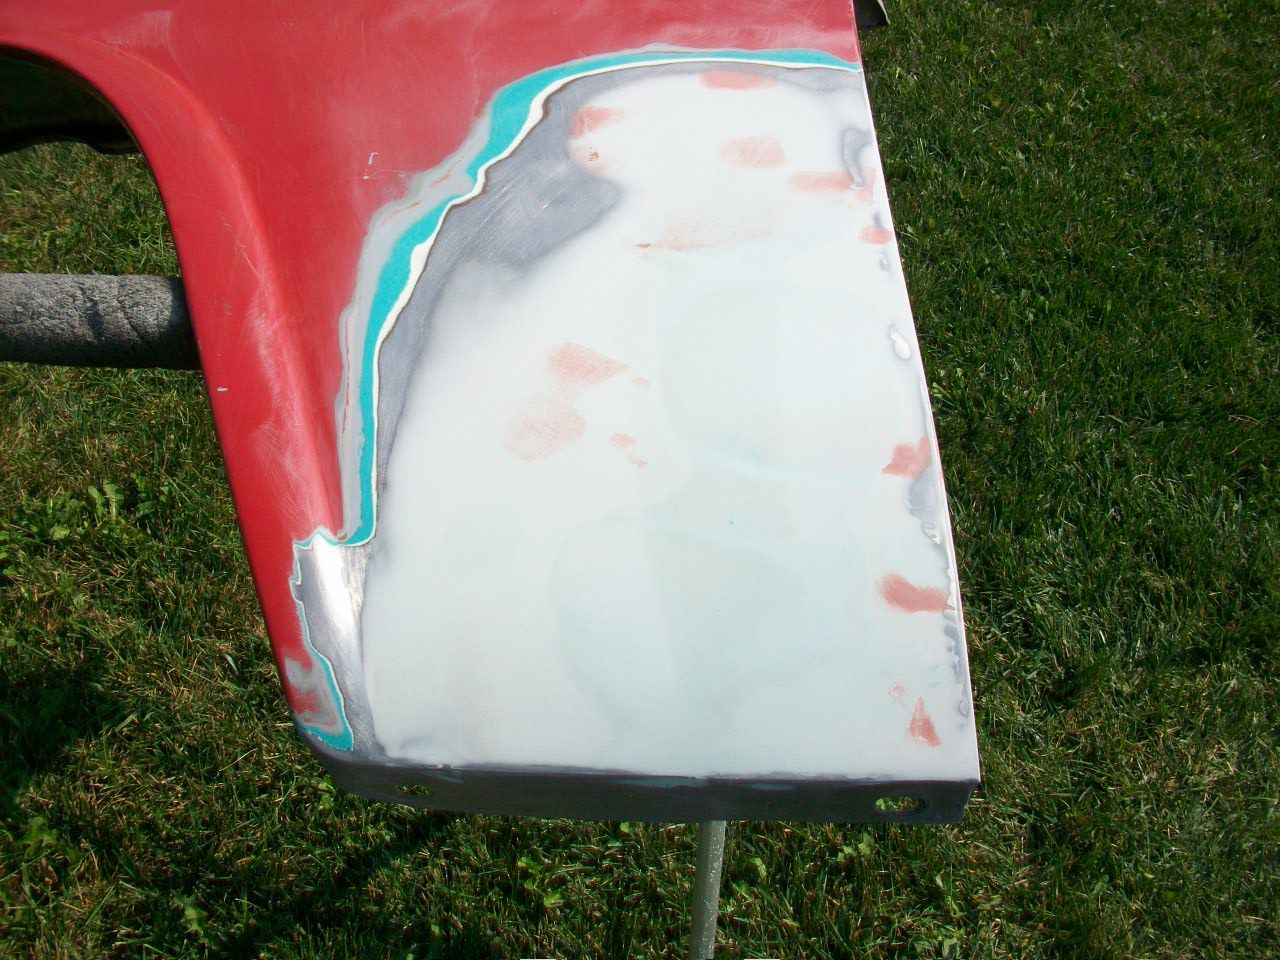 There were some other spots on the fender that got some attention too, a small spot I welded up underneath the headlight housing, a place under the stainless steel molding back towards the door, and another place up near the front under the stainless steel molding. 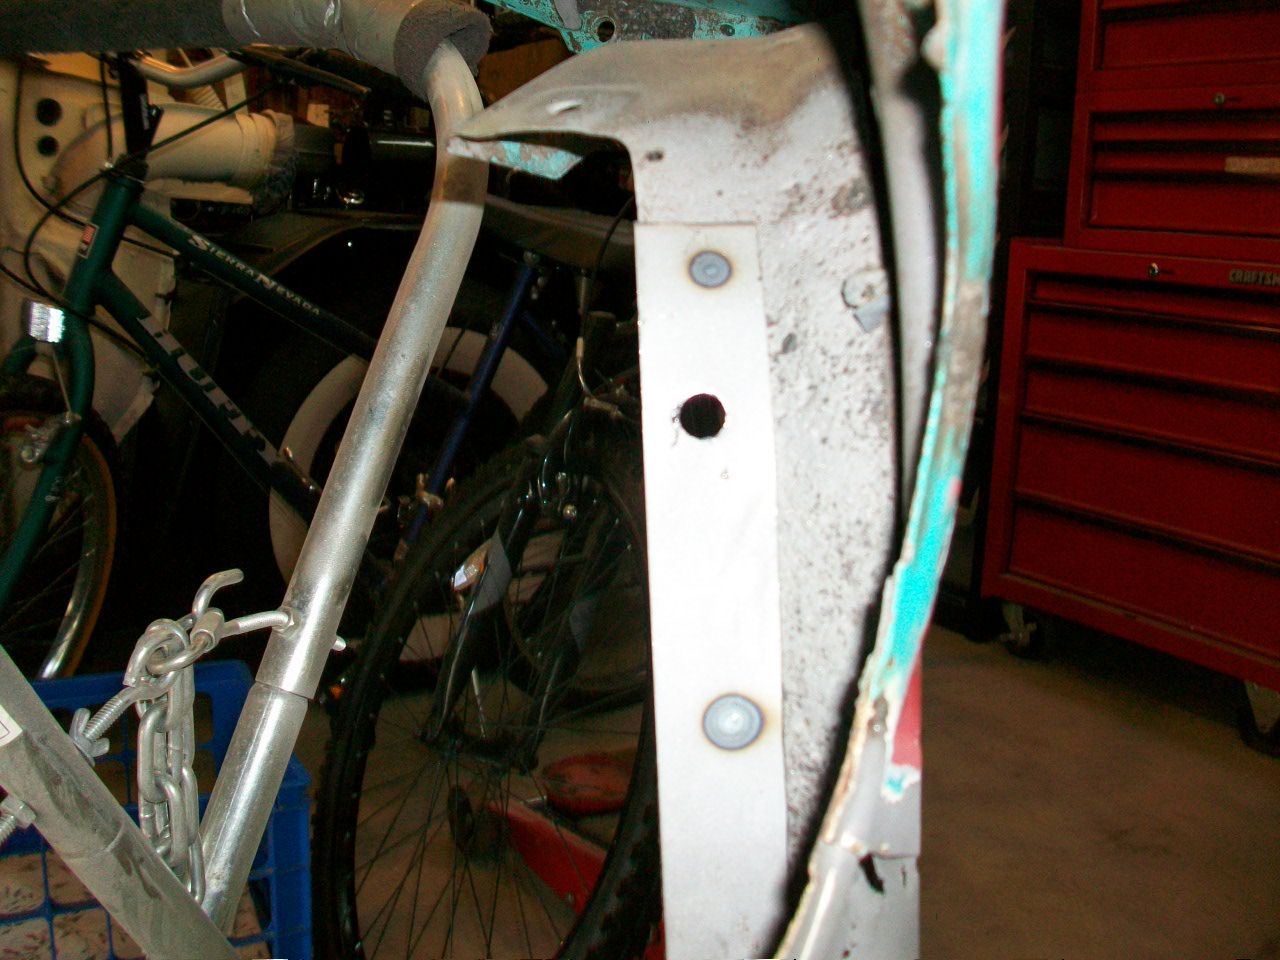 I do need to finish removing the white paint so that I can prime this thing.  I am thinking that with some primer surfacer this fender should come out pretty smooth. I am thinking that with some primer surfacer this fender should come out pretty smooth.
__________________
Lancaster, California Visit hotrodreverend.com to view hundreds of pictures and videos of the build of the 1955 Ford Club Sedan! Last edited by Hot Rod Reverend; 09-24-2016 at 06:55 PM. |
|
|

|
|
|
#258 |
|
Senior Member
Join Date: May 2010
Location: Lancaster, CA
Posts: 916
|
__________________
Lancaster, California Visit hotrodreverend.com to view hundreds of pictures and videos of the build of the 1955 Ford Club Sedan! |
|
|

|
|
|
#259 |
|
Senior Member
Join Date: May 2010
Location: westbury ny
Posts: 854
|
I hear you about it going on the floor I'm working 0n a 30 c---y coupe that was cut down to a roadster style I've dropped it 7 inches over the frame after it came off the chassis in 2 pieces I've used 4 gallons of that plastic as well as 2 gallons of shortstrand filler and lots of grinding disks and mig wire and patch's as far as a primer use a 2k high build 2/3 coats block 3 more coats wet sand and ready for paint I like to dry sand 220 and finish with 320 also a guide coat to find hi/low spots most of the plastic was sanded off just using to massage the panels to straightness
|
|
|

|
|
|
#260 |
|
Senior Member
Join Date: May 2010
Location: Granite City, Illinois
Posts: 3,008
|
Upon many occasions, where I had to cut out a rust hole and the cutout piece was insufficient to use as a template, or in the case of an irregular cutout, or where it was not possible to slide something in behind the cutout, I would pull a cereal box out of the recycle bin. Lay the flat piece of cereal box over the hole on the outside and use the blade of a screwdriver to rub the cardboard along the edges of the hole, then just cut out that pattern with scissors and use the cutout piece as a template for cutting out the new piece of metal.
|
|
|

|
 |
«
Previous Thread
|
Next Thread
»
|
|
| Sponsored Links (Register now to hide all advertisements) |
|
|
All times are GMT -5. The time now is 08:12 PM.



 Linear Mode

