|
|||||||


| Sponsored Links (Register now to hide all advertisements) |
|
|
 |

|
Thread Tools | Display Modes |
 12-11-2017, 03:14 PM
|
#1 |
|
Senior Member
Join Date: May 2010
Posts: 201
|
It has been suggested by a couple of folks that I should post up my problem with my rebuilt flathead. So here goes. This may get a little long winded so bear with me please.
I have a 1950 Ford 8ba that was rebuilt at a local engine rebuilder. He did all of the machine work and assembly to deliver me a completed short block approximately a year ago. I provided all new parts except for the crank and rods. I put everything else on the engine, heads, intake and so on... I recently installed it into my A roadster and got it ready to fire up. I have all new everything here, new battery, new starter, new flywheel, fuel pump, lines, Bubbas distributor, everything. I set the TDC by putting my finger over #1 plug hole and when I felt compression I rotated it until the timing dot on the pulley aligned with the pointer on the cover and stopped it there. I put the distributor in with the rotor pointing to the #1 plug at approximately 12 o'clock on the distributor. I then ran the plug wires going clockwise using the normal flathead firing order, 15486372. Added my oil and zinc via the remote filter lines. Cranked it with no plugs in to build some pressure. Have oil showing in the oil gauge line. I then attempted to get it to fire and nothing. Its got gas, its got spark and turning over real nice. Advanced the distributor nothing. Retarded it, nothing. No kick, no backfire except for just 1 time. Other than that it just spins. Took a compression reading and all cylinders are at 50 lbs. Which was odd to me. Thought maybe valves were hanging open so I went back through setting the lash and all of the valves were within .003 of where they should have been. Tried again to start with no luck. Decided to pull the timing cover off to check the crank and cam gears to see if they are set up properly with the engine still sitting at what I thought was TDC on compression stroke. Looked at cam gear and can see its dot at about the 7 o'clock position. No dot showing on the crank gear? I have spun this crank 360 degrees multiple times and cannot find a mark on it anywhere to indicate where the initial crank position was set. As I understand it the cam dot and the crank dot are aligned at 12 and 6 respectively and from there you should be good to go. I am not sure the cam gear is installed properly either as the machinist has used socket head allen screws to install it? So I am at a point where I need some direction on how to proceed. I can pull the heads, the intake, drop the oil pan and so on, but wanted to see if I can somehow straighten this mess out without doing all that and get this running. Now before you say take it back to the guy who did the work he has moved his business and I found some other things done to the engine that indicate to me he shouldn't have touched it in the first place so I have no faith in his ability to correct whatever he did to it. I can take whatever pictures might help and post them up but I need help on this one. |

|

|
|
12-11-2017, 03:38 PM
|
#2 |
|
Senior Member

Join Date: Dec 2010
Location: East Coast in CT
Posts: 1,523
|
Looks like the rebuilder put the crank gear on backwards! Thats the only reason to not see a dot on the crank gear. Its possible to correct this without removing the crank gear which is near impossible to do with the crank installed. First I would be sure the front of the crank gear is flush to the front of the cam gear if it is then i would move on to the next step. The next step requires the right side head to be removed so the piston can be located at top dead center. When this step is completed now a timing dot can be marked onto the crank gear.
The final step will be a bit more difficult moving the cam shaft to the proper position so the cam gear dot lines up with the crank gear. This step is difficult due to the fact you need to move the cam without the cam gear bolted in place turning the cam with the valve spring pressure is the hard part. To rotate the cam to the correct location I would use two long 6/16 fine thread bolts placed in two of the cam bolt holes this will give a leverage point to turn the cam which at the same time will also be working the valves. The cam gear bolt pattern is not even spaced so the proper location of the cam will be found as you check the bolt pattern to the pattern in the cam gear. This is not a simple job but also not impossible with a little effort you will solve the problem. Ronnieroadster
__________________
I use the F word a lot no not that word these words Flathead , Focus and Finish. "Life Member of the Bonneville 200 MPH Club using a Ford Flathead block" Owner , Builder, Driver of the First Ford Flathead bodied roadster to run 200 MPH Record July 13, 2018 LTA timing association 200.921 in one and a half miles burning gasoline. First ever gas burning Ford flathead powered roadster to run 200 MPH at Bonneville Salt Flats setting the record August 7th 2021 at 205.744 MPH |
|
|
|
| Sponsored Links (Register now to hide all advertisements) |
|
|
|
12-11-2017, 03:39 PM
|
#3 |
|
Senior Member
Join Date: Apr 2015
Location: Sweden
Posts: 3,045
|
If he installed the crankgear outside in the dot is now facing the engine...
Even if the timing is way off some kind of backfiring would happen...or atleast i think so...and you have a good spark ? |
|
|
|
|
12-11-2017, 04:00 PM
|
#4 |
|
Senior Member

Join Date: May 2010
Location: SPEEDWAY INDIANA
Posts: 4,148
|
I agree with Ronnie Roadster . The cams in wrong.!!! Been there done that, just had one here in indy when the customer said it has spark, i asked does it pop or backfire . He said no. Found the cam installed wrong after a few weeks of discussion....

|
|
|
|
|
12-11-2017, 04:40 PM
|
#5 |
|
Senior Member

Join Date: Sep 2010
Location: South Coast NSW Australia
Posts: 2,596
|
You should be able to get your no 1 piston somewhat TDC on no 1 without removing the head.
Certainly close enough to a single tooth tolerance on the timing gear . Put a chalk mark on the crank pulley to a mark on the block. Rotate the engine and look down no 1 spark plug hole until you see both valves rocking , this is where the piston should be on TDC on the backstroke. When they are rocking , your chalk mark should line up with where you marked it. |
|
|
|
|
12-11-2017, 04:54 PM
|
#6 |
|
Senior Member

Join Date: Sep 2014
Location: Wiscasset, Maine
Posts: 1,979
|
Sponsored Links (Register now to hide all advertisements)
http://www.jalopyjournal.com/?p=10940 Once you have determined TDC, use your thumb over the spark plug hole to make sure it is coming up to the compression cycle for number 1 cylinder. |
|
|
|
|
12-11-2017, 05:04 PM
|
#7 |
|
Senior Member
Join Date: May 2010
Posts: 201
|
I have good spark. New coil, new wires, new plugs, and a Bubbas distributor. I don't think the problem lies there.
I have a strong feeling that what is wrong is the cam timing but wasn't sure how to go about fixing it. Is the only way to determine TDC to pull the head? I can look right down through the plug hole on the piston in the cylinder so can see when it stops moving if need be. Bubba you were nice enough to reply to my email about a week ago asking about point gap on the dist I got from you. Thanks. |
|
|
|
|
12-11-2017, 05:09 PM
|
#8 |
|
Senior Member

Join Date: May 2010
Location: Solihull, England.
Posts: 8,741
|
There was a similar thread recently on the same subject.
I'm not that well up on the 8BA, but does it have a timing mark and pointer? If so, when the pointer is lined up, the valves should be "rocking" (exhaust just closing/inlet just opening) on either no1 or no6 cylinder. If neither are rocking, then further investigation is justified. I always look upon this as a "sanity check" when troubleshooting an engine. Oh yeah, when No.6 cylinder valves are rocking, No.1 should be firing. You can apply this to any engine, you just look at the firing order and the next one after the halfway point in the order is No.1 cylinder's companion. The pistons are at tdc at the same time. One or the other will be firing, and the valves rocking on then other. It would have been good if you could have verified the timing mark when the head was off, preferably by a solid stop method. That said, if the engine hasn't run, you ought to be able to pull the head and work out what is going on. You should be able to refit it with the same gasket if it comes off cleanly. Mart. Edit: I wrote this before reading the two replies above. You can see the exhaust valve through the plug hole and possible the edge of the inlet. You can't see the piston on a flathead, only the valve. You could use the cable tie method to determine TDC. You'd get it close enough for the sanity check described above. Last edited by Mart; 12-11-2017 at 05:22 PM. |
|
|
|
|
12-11-2017, 05:14 PM
|
#9 |
|
Senior Member

Join Date: May 2010
Location: Chester Vt
Posts: 8,854
|
Follow Rons suggestions, When I tine the cam on most street engines I wlway check for split overlap. It's a simple thing to d. bring the #1 piston to TDC by the dot. both valves should be open aprox the same amt. If not, give the cranl another trip around and they should both be open. If they are not, you have a problem
Another Ron. |
|
|
|
|
12-11-2017, 05:16 PM
|
#10 |
|
Senior Member
Join Date: May 2010
Posts: 201
|
Also, when I put my finger over the plug hole and turned the motor over I got compression and then rotated the crank just a small amount to get the timing cover pointer and pulley dot to align. Once I did that here is a pic of what I got. It looks to me as if the cam timing is off. So if I leave it set so its on compression on #1 and the marks on the pulley and the pointer are aligned all I should have to do is rotate the cam gear/cam until the dot aligns at 6 o'clock. Now I may have to remove the gear and rotate the cam separately and then reinstall it to get it lined up but wouldn't that work?
|
|
|
|
|
12-11-2017, 05:17 PM
|
#11 |
|
Senior Member
Join Date: Sep 2014
Location: Wiscasset, Maine
Posts: 1,979
|
There is no need to pull the head to find TDC. That's a lot of work for no gain.
Look at the link in my post #6. You slide the head of a large zip tie in the spark plug hole, slowly rotate the engine until it stops and make a mark, rotate in the opposite direction until you hit the stop and make another mark. Half way between the two marks is TDC. This same method is used for OHV motors using a hard adjustable stop that is threaded into the spark plug hole. This of course won't work with our flatheads but the zip tie or similar will. |
|
|
|
|
12-11-2017, 05:21 PM
|
#12 |
|
Senior Member
Join Date: May 2010
Posts: 201
|
Whoops forgot the picture! The picture shows how I found the timing after I set the #1 cylinder using the finger method to determine compression. I then aligned the timing cover pointer and pulley dot. The temp pointer in the picture is pointing to the dot on the pulley. I didn't want to rotate the motor without some reference/indictor as to where the dot was before I pulled it apart.
Last edited by GordonC; 12-11-2017 at 05:29 PM. |
|
|
|
|
12-11-2017, 05:22 PM
|
#13 |
|
Senior Member

Join Date: May 2010
Location: Everett, WA
Posts: 504
|
From the previous thread mentioned above here is a link to the picture of an 8BA crank gear showing the dot.
https://www.fordbarn.com/forum/attac...9&d=1510707802 the thread is here: https://www.fordbarn.com/forum/showt...=233257&page=3 the picture is on post no. 43. |
|
|
|
|
12-11-2017, 05:24 PM
|
#14 |
|
Senior Member
Join Date: May 2010
Posts: 201
|
glennpm and others I am digesting this as fast as I can! Give me a little bit to sort through these suggestions and see what I can find out.
|
|
|
|
|
12-11-2017, 05:38 PM
|
#15 |
|
Senior Member

Join Date: May 2010
Location: Mid coast Maine
Posts: 1,878
|
One good thing you have a dot on crankshaft, so that's TDC
Now just turn the crankshaft till the intake opens and mark with chalk at 6 o'clock,turn in the way the engine turns clock wises. That way to can see how far you are out of time. The crankshaft should be at 12 0clock or the dot. The marks on gears should with in 2or3 teeth. |
|
|
|
|
12-11-2017, 05:40 PM
|
#16 |
|
Senior Member

Join Date: May 2010
Location: Auckland
Posts: 4,700
 |
You can also put a dog leg in a piece of wire such as a 1/16 brass welding rod feed that into top of the piston ,with a wrench rotate it until you are at TDC then mark it with some masking tape. As has been said check through the plug hole ,Or I would remove the inlet manifold and observe the sequence of valve action .As a quick check, On compression stroke both fully closed at TDC ,Ted
|
|
|
|
|
12-11-2017, 05:47 PM
|
#17 |
|
Senior Member

Join Date: May 2010
Location: Long Island, NY
Posts: 1,052
|
Hi Gordon, you MUST establish the 2 marks on the timing gears, this is the very first item to look for, once you've done that you can move forward!
Thanks, Gary in N.Y. P.S. I believe the timing marks are probably on the gears just difficult to see, especially the crank gear. Judging by the photo I also don't believe the bottom gear to be on "backwards", there's a huge chamfer on the backside of that gear to clear the heavy radius from the snout to the face of the front main. It is large enough to stop both gears from being even with each other in the front.
__________________
http://www.stromberg-bulletin.com/me...berg-equipped/ |
|
|
|
|
12-11-2017, 05:54 PM
|
#18 |
|
Senior Member
Join Date: May 2010
Location: Solihull, England.
Posts: 8,741
|
I'm remembering the other thread now. The "take home" message was the dot should be on the third tooth round from the keyway.
|
|
|
|
|
12-11-2017, 06:39 PM
|
#19 |
|
Senior Member

Join Date: Jun 2010
Location: San Antonio, Texas
Posts: 16,416
|
Some of those crank gears have the dot half way into the recess instead of on the tooth so only part of the friggin thing shows and the slinger is in the way. The gear can go on backwards too and it's so close to the main cap it would be hard to see the dot and it won't be in the correct placement for cam timing if it is. There was a purpose made puller for those gears so it could be changed without removing the crank but not that many folks have them now days.
|
|
|
|
|
12-11-2017, 06:42 PM
|
#20 |
|
Senior Member
Join Date: May 2010
Posts: 201
|
Guys I think I found it!! Here is a pic if I can get the darn thing to load.... interestingly enough the cam gear is almost exactly 180 degrees off from this dot. For some reason pictures are rotating 90 degrees on me when I upload them to this site. Doesn't do that on the HAMB?
Last edited by GordonC; 12-11-2017 at 06:48 PM. |
|
|
|
|
12-11-2017, 06:53 PM
|
#21 |
|
Senior Member
Join Date: May 2010
Location: Mid coast Maine
Posts: 1,878
|
Now your valve timing is good your ign is out 180
|
|
|
|
|
12-11-2017, 07:01 PM
|
#22 |
|
Senior Member

Join Date: Jan 2011
Location: Central Ohio
Posts: 5,057
|
A cam can appear to be 180 out - as it will ALWAYS be 180 degrees away from the crank dot at one point - as it turns at half speed. When the crank dot is UP, in one case the cam dot aligns, rotate the crank 360 degrees and the cam dot will be straight up at the top - 180 degrees out.
Hopefully I'm making sense. B&S |
|
|
|
| Sponsored Links (Register now to hide all advertisements) |
|
|
|
12-11-2017, 07:08 PM
|
#23 | |
|
Senior Member
Join Date: Sep 2010
Location: South Coast NSW Australia
Posts: 2,596
|
Quote:
At that point , it should be exactly 180 out. |
|
|
|
|

|
12-11-2017, 07:08 PM
|
#24 |
|
Senior Member
Join Date: Sep 2014
Location: Wiscasset, Maine
Posts: 1,979
|
Hi Gordon,
Look at the gears in post #17. The cam turns 1/2 a revolution for a complete 360 degree revolution of the crank gear. In the picture above assume the crank gear is as shown. A full turn of the crank gear would yield the cam gear with dot 180 degrees out or on top in this picture. Is that what you are seeing? |
|
|
|
|
12-11-2017, 07:16 PM
|
#25 |
|
Senior Member
Join Date: May 2010
Posts: 201
|
Ok. I rotated the crank gear 360 degrees until the dot was at the 12 o'clock position again and the dot on the cam gear is now on the same location as the dot on the crank gear. It looks like it is set up correctly? If the gear is put on the cam correctly this thing should have fired?
|
|
|
|
|
12-11-2017, 07:18 PM
|
#26 |
|
Senior Member
Join Date: May 2010
Posts: 201
|
Sponsored Links (Register now to hide all advertisements)
|
|
|
|
|
12-11-2017, 07:20 PM
|
#27 |
|
Senior Member
Join Date: Sep 2014
Location: Wiscasset, Maine
Posts: 1,979
|
Yes, alignment is correct.
Have you checked to make sure that your ignition wire to #1 and of course the rest in the right firing sequence, is on the compression stroke? |
|
|
|
|
12-11-2017, 07:33 PM
|
#28 |
|
Senior Member
Join Date: May 2010
Posts: 201
|
glennpm I need to put the timing cover back on once I am sure the cam gear is mounted properly and the timing is correct. Then I can go back to checking the distributor and the wiring. I am reasonably sure I had it correct.
|
|
|
|
|
12-11-2017, 07:55 PM
|
#29 |
|
Member Emeritus

Join Date: Nov 2012
Location: Wichita KS
Posts: 16,132
|
There is some conflicting information out there. Be sure you know where the rotor is located inside the distributor when you are establishing No. 1 in the firing order. These two diagrams are 180 to each other.
|
|
|
|
|
12-11-2017, 08:02 PM
|
#30 |
|
Senior Member

Join Date: May 2010
Location: Coral Springs FL
Posts: 10,915
|
On my 8BA the rotor points to number 1 terminal on the cap when number 1 piston is a TDC and the timing marks line up.
|
|
|
|
|
12-11-2017, 08:06 PM
|
#31 |
|
Senior Member
Join Date: May 2010
Location: Mid coast Maine
Posts: 1,878
|
Pic 17 shows how the marks are correct.
The keyway is TDC What they are doing is retarding the TDC 2 1/2 teeth. This is the start of the cam getting ready to open the intake. If you have the dots lined up that's correct. That's cam timing. now turn 180 and get #1 firing. If the cap is marked#1 the rotor should be 6 o'clock +OR_ |
|
|
|
|
12-11-2017, 08:10 PM
|
#32 |
|
Senior Member
Join Date: Sep 2010
Location: South Coast NSW Australia
Posts: 2,596
|
I would still look down no 1 plug hole and get valves rocking on the backstroke and see if your mark is exactly as you posted it post 20.
Then you can diss the cam timing and move on . Rotate the crank 360 so that both marks are lined up. This is TDC firing on #1. Then check your plug wires are correct. After you are sure you have cam and igntion timing correct, and a good spark at plugs, are you pouring a little gas down carby and then spinnng engine over with throttle wide open? |
|
|
|
|
12-11-2017, 08:34 PM
|
#33 |
|
Senior Member
Join Date: Oct 2011
Location: Gloucester VA
Posts: 1,042
|
So from here-on, verifying the cam position is best done when the mark on the 8BA pulley is aligned with the pointer at TDC on the EXHAUST stroke where you can see the valves rocking like Mart described in post #8. Here's an excerpt from Walt Dupont from a long-ago post that walks you through it...
"With the intake off, turn the engine over (right hand rotation) watch the exh. valve on no. one piston (front piston on right side) watch the exh. valve open and close, just before it closes the intake will start to open, you can rock the crank back and forth and both valves rock back and forth, both valves will be off the seat, that's called valve overlap, no. one piston should be on TDC exh. stroke. If the timing cover is on the pointer should line up with the mark on the front pulley. If the mark is off quite aways, the timing gears are not lined up. Could be the dot on the gear is punched in the wrong place. Walt" Lonnie |
|
|
|
|
12-11-2017, 08:39 PM
|
#34 |
|
Senior Member
Join Date: Nov 2012
Location: western Mass
Posts: 365
|
Ok.. so you have the cam that appears to be lined up but we still have to figure out why you are reading only 50lbs of cranking pressure. One question that scares me... if u say he s houldnt have been working on a flathead is did he do the valves correctly? 45 vs 30 degree valves... or grinding the valve seats parallel to the deck.... these are harder to fix.
|
|
|
|
|
12-11-2017, 10:05 PM
|
#35 |
|
Senior Member
Join Date: May 2010
Posts: 201
|
Ok guys all good info now. I am going to have to pull the intake to be able to get a good look at what the valves are doing and when they are doing it in relation to where the cam and crank marks are. I will be doing that tomorrow and see what I get.
Pooch I initially used a shot of starting fluid until I could see gas squirting down the throat of the carburetor. I have 5 1/2 lbs pressure on the line feeding the carb and the fuel is recent as well. Not some junk that has been sitting in the tank for a while. |
|
|
|
|
12-11-2017, 10:41 PM
|
#36 |
|
Senior Member
Join Date: Sep 2010
Posts: 349
|
you may have washed the oil off the cylinders causing low comp.if your sure cam timing and ignition timing are correct pull the plugs makr sure they are dry.oil the cylinders and try pull starting it ive done it many times to get one going.
|
|
|
|
|
12-11-2017, 10:45 PM
|
#37 |
|
Senior Member
Join Date: May 2010
Location: Mid coast Maine
Posts: 1,878
|
If the dots and jetway are like 17 pic do compression check and you will see it's ok
|
|
|
|
|
12-12-2017, 12:00 AM
|
#38 | |
|
Senior Member

Join Date: Dec 2013
Location: Minnesota, Florida Keys
Posts: 10,299
|
Quote:
|
|
|
|
|
|
12-12-2017, 12:38 AM
|
#39 |
|
Senior Member
Join Date: Apr 2015
Location: Sweden
Posts: 3,045
|
I would take a look at the camgear...original bolts and the locking washer perhaps while you have it apart...and just to be sure check so the camgear is on right matching the holes in the camshaft.
|
|
|
|
|
12-12-2017, 01:14 AM
|
#40 |
|
Senior Member

Join Date: May 2010
Location: Santee, California
Posts: 3,505
|
Of the two diagrams in post number 29. As you stand on the passenger side viewing the distributor cap, number one should be on the bottom. Of course it can be made to work anywhere, as long as you have the rotor in sync with your chosen position. 1 at the bottom is stock.
|
|
|
|
|
12-12-2017, 03:20 AM
|
#41 |
|
Senior Member
Join Date: May 2010
Location: Solihull, England.
Posts: 8,741
|
180 degrees out ought to be ok. If you turn the crank 1 turn, the marks should align. If it were me, I'd pull the pulley to expose the keyway and check the dot is 3 full teeth around from the keyway in a clockwise direction. If the marks align, then it's find TDC and do the valve rocking sanity check.
Good luck, you're making good progress already. Wish I were closer. Mart. |
|
|
|
|
12-12-2017, 09:01 AM
|
#42 |
|
Senior Member
Join Date: May 2010
Location: Mid coast Maine
Posts: 1,878
|
The 8ba has a dot on pulley that is TDC. Now when you rock the valves were is the dot up top or down on cam gear. Up means you are on firing stroke and both valves are closed. Down and lining up dots means the intake is just opening.
Now if the dot is down you are out 180 degs for ign timing. You have a coat hanger pointing to TDC. |
|
|
|
| Sponsored Links (Register now to hide all advertisements) |
|
|
|
12-12-2017, 09:02 AM
|
#43 |
|
Member
Join Date: Jan 2013
Posts: 57
|
If you have low compression on a fresh rebuild the cylinders are dry , put a few cc of oil in each cylinder before trying to start it [ the cylinders are most likely washed down from from trying to start it ] .
|
|
|
|
|
12-12-2017, 11:21 AM
|
#44 |
|
Senior Member
Join Date: May 2010
Posts: 201
|
I will be trying some of the suggestions today. Going to pull the intake to get a look at where the valves are when this is sitting with dots aligned on cam and crank gears. Also going to see if I can find the original cam bolts and keeper to install. I know I have them somewhere. I will give each of the cylinders a couple squirts of mystery oil when I get ready to attempt to fire it again. I will be back later today with what I find.
|
|
|
|
|
12-12-2017, 11:30 AM
|
#45 |
|
Member Emeritus
Join Date: Nov 2012
Location: Wichita KS
Posts: 16,132
|
Don't forget to check where the rotor is in the dist when your at TDC. The part of the cycle that would fire #1.
|
|
|
|
|
12-12-2017, 11:58 AM
|
#46 |
|
Senior Member

Join Date: Oct 2011
Location: Shelton, WA
Posts: 3,800
|
Sponsored Links (Register now to hide all advertisements)
|
|
|
|
|
12-12-2017, 12:09 PM
|
#47 | |
|
Senior Member
Join Date: Nov 2012
Location: western Mass
Posts: 365
|
Quote:
I would like to know what other things the builder did that make gordon think he shouldn't have touched a flathead though. |
|
|
|
|
|
12-12-2017, 12:40 PM
|
#48 |
|
Senior Member
Join Date: May 2010
Posts: 201
|
The builder assembled the valve train and installed the guides and left out the guide retainers. Claimed they were press fit into the block and wouldn't move. He also said he wasn't sure how to get the crank and cam in time with each other. I had to explain that they had dots on them and all he had to do was bolt the cam gear to the cam (it only goes on one way with the bolt pattern it has) and align the dot on the cam with the one on the crank. Once I learned of these couple of things I questioned his ability to have done the work on this motor properly. I am not going to bash the guy in a public forum as I have heard good stuff about his Chevy small block and big block work, which he may be great at, but flatheads are not his forte. A lesson I learned too late. Plus he is not on here to defend himself. I would rather solve the issues I am now faced with and move forward...
|
|
|
|
|
12-12-2017, 01:16 PM
|
#49 |
|
Senior Member
Join Date: Nov 2012
Location: western Mass
Posts: 365
|
wow... left off the retainer clips! that's flathead 101. that would scare me to death. did he put the galley plugs in?? did he clean the galley out?? crank plugs?? and as I questioned before, did he do the valve job correctly... when you pull the head i would pop out a valve and check the fit... make sure it's lapped in correctly and you have a good seal all the way around the seat.
|
|
|
|
|
12-12-2017, 01:29 PM
|
#50 | |
|
Senior Member

Join Date: May 2010
Location: Oshkosh, Wi
Posts: 4,524
|
Quote:
|
|
|
|
|
|
12-12-2017, 01:51 PM
|
#51 |
|
Senior Member

Join Date: May 2010
Location: Yucaipa, CA
Posts: 1,093
|
You definitely have a timing gear alignment problem if you only have 50 lbs. of pressure on "all" the cylinders. That is not enough pressure to fire a cylinder. They don't always backfire if when the timing gears are not aligned properly. Especially if they are off so far they are not creating enough compression.
As far as knowing if you have the distributor in correctly. Just put a timing light on it, while you are cranking the engine and see if the timing marks are close. Don't forget to turn the key on. The light will flash every time #1 fires, it will just flash really slow. Set it where it needs to be while cranking the engine before you ever attempt to start a new engine. The timing will change a little when the engine starts and you will probably need to make a slight timing adjustment. I also always take an old oil squirt can filled with fuel and fill up the float bowl and make sure the accelerator pump is primed and squirting. Pull the plugs and crank it until you get oil pressure. Then stick the plugs back in and it "should" fire-up immediately. Most mechanics are taught that the furthest forward cylinder on a V8 is always #1. That works on every V8 engine I know but a flathead. That's one of things that if you have worked on cars a lot you might just assume number #1 is the most forward cylinder so you would end up having the firing order wrong. Just like you would assume the long brake shoe goes towards the rear and the short one towards the front. That theory don't work either on Early Fords. And ground is not ground. |
|
|
|
|
12-12-2017, 02:31 PM
|
#52 |
|
Senior Member
Join Date: May 2010
Posts: 201
|
revkev6 I had to replace all the guides, which I did. I had provided all new valves and valve seats and they appeared to be installed correctly when I had the guides out. I marked all valves prior to uninstalling them. I then installed the new guides and returned all valves to the cyl they came out of and lapped them at that point. I have no way of knowing for sure what all he did or didn't do as the engine came back to me assembled with the oil pan on and timing cover on. I put the intake, water pumps, and starter on and installed it in my project roadster. At this point without completely tearing this engine down I just want to see if it will run properly. If it doesn't it will come out and I will get another probably completely stock runner if possible. I am so tired of all the crap that has gone on around this engine.
flatjack9 all the crank gears I saw had the dot centered on the tooth as well. This one is not, but I think it is there more to indicate the tooth to be used for alignment than the exact dead nuts position. Plus I cannot see the keyway without pulling the front pulley off and I am trying not to do more work than is necessary to get this squared away. |
|
|
|
|
12-12-2017, 02:33 PM
|
#53 |
|
Senior Member
Join Date: May 2010
Location: Mid coast Maine
Posts: 1,878
|
You need some good info from years ago.
Take the pulley and gear off and look at the pic. Note the keyway is to the right dot to left. Just line up the dots as shown. Take any cylinder and check for compression. I'm sure it will be better then 50lbs. Just do like pic and if the ign timing is off ,its easy to turn dist use the thumb way for TDC |
|
|
|
|
12-12-2017, 02:43 PM
|
#54 |
|
Senior Member
Join Date: May 2010
Posts: 201
|
Ok, on with the show!
I pulled the intake. With the cam and crank dots aligned I made a mark on the pulley where my temp pointer was pointing. I set this pointer up while the pulley dot was in the same position as it was for the pointer on the timing cover. I then took pictures of the valves on cyl #1 and #6. I then moved the crank so the dot on the pulley was lined up with the pointer and took pictures of the valves again. I am not knowledgeable enough to know what I should be looking for so am going to try to post the pics. First set with cam and crank dots aligned. First pic is of valves in cyl #1 while looking in from the drivers side. Second pic is for cyl #6 looking in from the passenger side. |
|
|
|
|
12-12-2017, 02:47 PM
|
#55 |
|
Senior Member
Join Date: May 2010
Posts: 201
|
Second set of pics. First pic is of pulley dot at pointer. Second pic is the valves in cyl #1 looking in from drivers side. Last pic is the valves in cyl #6 looking in from the passenger side.
|
|
|
|
|
12-12-2017, 02:53 PM
|
#56 |
|
Member Emeritus
Join Date: Nov 2012
Location: Wichita KS
Posts: 16,132
|
Flathead Fever the timing light check will not tell you if the distributor is wiried 180 out. It's an easy check to remove the cap and check the rotor position.
|
|
|
|
|
12-12-2017, 03:28 PM
|
#57 |
|
Senior Member
Join Date: May 2010
Location: Mid coast Maine
Posts: 1,878
|
I can't see the gears and marks. I don't like to see shiny parts all painted nice.
Pull the pulley and show the marks like the pic get it. |
|
|
|
|
12-12-2017, 03:34 PM
|
#58 | |
|
Senior Member
Join Date: Dec 2010
Location: East Coast in CT
Posts: 1,523
|
Quote:
So this expert in agent orange engines decides he can build a Flathead what a joke. Do yourself a big favor DO NOT run this engine until someone who knows exactly whats needed for a Flathead rebuild looks this engine over completely.
__________________
I use the F word a lot no not that word these words Flathead , Focus and Finish. "Life Member of the Bonneville 200 MPH Club using a Ford Flathead block" Owner , Builder, Driver of the First Ford Flathead bodied roadster to run 200 MPH Record July 13, 2018 LTA timing association 200.921 in one and a half miles burning gasoline. First ever gas burning Ford flathead powered roadster to run 200 MPH at Bonneville Salt Flats setting the record August 7th 2021 at 205.744 MPH |
|
|
|
|
|
12-12-2017, 03:37 PM
|
#59 | |
|
Senior Member
Join Date: Nov 2012
Location: western Mass
Posts: 365
|
Quote:
|
|
|
|
|
|
12-12-2017, 04:07 PM
|
#60 |
|
Senior Member
Join Date: May 2010
Location: Mid coast Maine
Posts: 1,878
|
Have you changed the gears and moved them at all.
What you should if you want to fix this. Pull the crank gear and see if it looks like the pic I posted. Key way to right dot to left. If you have it on backwards no good. MacsAuto shows a gear stamped wrong. I trust my book. Ford made it simple. right gear, mark correct ,just line up marks. |
|
|
|
|
12-12-2017, 04:24 PM
|
#61 | |
|
Senior Member
Join Date: May 2010
Location: Long Island, NY
Posts: 1,052
|
Quote:
If you "flip" the picture it is correct but the print becomes wrong! Thanks, Gary in N.Y. P.S. Also difficult to tell from Gordon's photos but the valve springs MAY be upside down, can't say 100% from the photos? It will run this way but it's not right if they that's how they are? Looks like "progressive-wound" springs to me.
__________________
http://www.stromberg-bulletin.com/me...berg-equipped/ |
|
|
|
|
|
12-12-2017, 04:49 PM
|
#62 |
|
Senior Member
Join Date: May 2010
Location: Mid coast Maine
Posts: 1,878
|
The gear should only go on one way.
There is only on way to check. Put keyway at 12 0clock. then line up pointer coat hanger at TDC on pulley. Looking at the intake valve #1 turn engine till you see the intake just start to open. Turn in one direction. Now look at pulley. It should about 3 degs BTDC If this is true button it up. |
|
|
|
| Sponsored Links (Register now to hide all advertisements) |
|
|
|
12-12-2017, 04:58 PM
|
#63 |
|
Senior Member
Join Date: May 2010
Posts: 201
|
Georg I appreciate your attempts to help. I found a dot on the crank gear and I found the dot on the cam gear. I have posted pictures showing the both of them lined up. Thats not the problem at the moment. The only question now is if the cam gear was properly installed on the cam, which I am figuring out by looking at the valve positions relative to the crank and cam being set with the dots in alignment.
|
|
|
|
|
12-12-2017, 05:28 PM
|
#64 |
|
Senior Member
Join Date: Sep 2010
Location: South Coast NSW Australia
Posts: 2,596
|
I dont' see the point in removing the intake nor the pulley just to check if cam timing is correct.
Simply look down plug hole as already been described. With #1 and #6 at tdc, looking at the bottom of the valve will tell you nothing. Abeit, one set will have clearance and one set will be slightly raised. Much easier to see the rocking action from up top. But now you have the intake off, rock the crank back and forth a little and if you are on #1 TDC FIRING stroke , look at #6 as you rock the crank a little back and forth and stop it when both valves are rocking . Now look at your timing dots. They should align when #6 is rocking. And if the builder is very suspect so far, I would not attempt to start this engine without force feeding it some oil into the gallery to get static pressure before spinning it over. Who knows if he ever primed the pump? In your attempts so far to get this running, have you noticed oil pressure on the guage ? If so, disregard this last bit. Last edited by pooch; 12-12-2017 at 05:34 PM. |
|
|
|
|
12-12-2017, 05:41 PM
|
#65 |
|
Senior Member

Join Date: Jul 2012
Location: Bellingham, WA
Posts: 213
|
I'll agree with Gosfast, something looks fishy with those valve springs...
All this brings up something I dealt with 45 years ago; I assembled a freshly rebuilt later model Ford engine and even though I was a punk kid I knew enough to double check the cam/crank timing before I put the front timing cover on. The two marks on the gears lined up correctly so I bolted everything up and put it back in the car. Only problem was that it wouldn't start, did some farting and popping but wouldn't run. Over the next week I checked everything, including ignition and fuel. When I checked compression it was low, just as you've found. My first guess at that point was that I had messed up the cam timing, but I knew that couldn't be the case. So I tore it down and sure enough... the marks lined up just as I had installed them. Then I blamed the cam grinder; so pulled that, and found all the lobes to be in the right place. Decided to put the stock cam back in it and when re-installing the timing gears and chain finally discovered that I had originally installed the cam gear backwards and had been timing the cam off of a small balance hole on the back side of the gear. Now that is a "learning experience"... |
|
|
|
|
12-12-2017, 06:16 PM
|
#66 |
|
Senior Member
Join Date: May 2010
Location: Solihull, England.
Posts: 8,741
|
Sponsored Links (Register now to hide all advertisements)
https://www.fordbarn.com/forum/showthread.php?t=233257 What I learnt from this: The tooth that should have the dot is on the 3rd full tooth to the right from the keyway. If you look at the pictures of the block on the stand, the keyway appears to be pointing to No.1 cylinder. And No.1 cylinder is at TDC. Some simple math: for the keyway to be pointing at no.1 cylinder and the marked tooth pointing straight up, they need to be 45 degrees apart. The gear has 22 teeth. 45 degrees is one eighth of a full circle. One eighth of 22 is 2.75. Look at the picture of the gear again. Count full teeth back from the dotted tooth to the keyway. 2.75 teeth. Following me? The only thing that has not been established so far on this engine is whether No.1 cylinder is at TDC. Pull the pulley and you will see where the keyway is. How long will it take? A couple of minutes? You don't even have to pull the pulley. Just take the bolt out and look at the end of the pulley, with a mirror if necessary. If the keyway is pointing at No.1 cylinder and the marks are aligned then the valves on either no.1 or no.6 should be rocking. You can see from the other thread that what looks like a perfectly good mark is 180 degrees out. The mark that needs to be aligned to make the motor run is very poorly marked and just happens to be on the third tooth round to the right. Your gear could be like that. You will get nowhere without being able to verify the position of the keyway and the mark. Mart. |
|
|
|
|
12-12-2017, 06:21 PM
|
#67 |
|
Senior Member
Join Date: Oct 2011
Location: Gloucester VA
Posts: 1,042
|
Looks like the valves, springs and retainers are not compatible.
1. Those are not flathead valves with that much stem sticking out below the retainer. 2. The springs are upside down and are the longer springs for earlier engines without rotating type retainers. These springs will likely bind and destroy the retainers. Lonnie |
|
|
|
|
12-12-2017, 06:23 PM
|
#68 |
|
Senior Member
Join Date: May 2010
Posts: 201
|
pooch I poured oil into the engine via the remote oil filler lines as well as filled the oil filter before hand. I then pulled all the plugs and cranked it over to see if I got pressure to the gauge. Good news was I was able to see oil feeding up the line to the gauge. Bad news was I was never able to get it to fire to check and see what I had for pressure. I do know having pulled the intake there seems to be plenty of oil splashed around in the galley. Ill also rock the engine as suggested and see what happens with the valves on #6.
As for the valve springs on properly or not that might be on me as when I redid the guides I reassembled the valve assemblies. In looking at them I did not see any difference but put them back the way I thought I found them. I can correct this if it has any bearing on this problem. |
|
|
|
|
12-12-2017, 06:26 PM
|
#69 |
|
Senior Member
Join Date: May 2010
Location: Solihull, England.
Posts: 8,741
|
Ok. Look at this pic:
Can you see the the original timing mark at 90 degrees to your mark? That's funny, isn't it? With the cam gear marks aligned No.1 should be at TDC. The timing mark should be aligned with the timing pointer. Where is the timing pointer on an 8BA? check this pic. 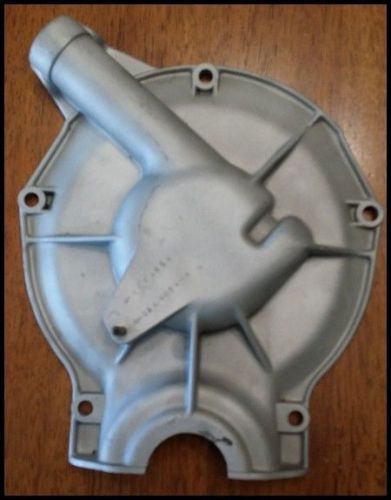 It's not where the timing mark is, it's roughly in line with No.1 cylinder. Your gear is either fitted wrong or marked wrong. I'll repeat: Your gear is either fitted wrong or marked wrong. Ignore any comments about distributors, springs and the cam even, the first thing to establish is the relationship between the crank, the keyway, no.1 tdc and the mark on the gear. All the other things can be looked at in turn once the correct cam timing has been established. Mart. |
|
|
|
|
12-12-2017, 06:34 PM
|
#70 |
|
Senior Member
Join Date: May 2010
Posts: 201
|
Binx those are chevy valves in my engine and all the other valve parts came from 8ba engines I had. Never had any earlier ones. It was my understanding you could run the chevy valves if you ran a reground cam and adjustable lifters? No?
Looks like Ill be pulling the heads... |
|
|
|
|
12-12-2017, 06:35 PM
|
#71 | |
|
Senior Member
Join Date: May 2010
Location: Oshkosh, Wi
Posts: 4,524
|
Quote:
|
|
|
|
|
|
12-12-2017, 06:36 PM
|
#72 |
|
Senior Member
Join Date: May 2010
Location: Mid coast Maine
Posts: 1,878
|
Gordonc Seeing you have the intake off would you do a quick test for me.
When at TDC with coat hanger pointer.turn engine and see when both valves are closed at TDC. Do a 360 and see when the intake opens. What I want to know is when both valves are closed you can make sure by going both ways to make sure. When both valves are closed were is the dot on cam gear. If it at 12 oclock you are at the firing position. This is good because you can put dist in and should be 6 oclock with the rotor. But #1 must be marked on cap with stock dist. In reading your post who lined up the gears and were they ever changed. |
|
|
|
|
12-12-2017, 06:39 PM
|
#73 |
|
Senior Member
Join Date: May 2010
Posts: 201
|
Mart I liked your suggestion on pulling the bolt and seeing where the keyway was and then going 3 teeth from there to see if that is where the mark is on the crank gear. Give me a little bit to see if I can do that. I appreciate the help. I'm not ignoring or arguing with you, just need time to process all of what is being suggested.
|
|
|
|
|
12-12-2017, 06:57 PM
|
#74 |
|
Senior Member
Join Date: May 2010
Posts: 201
|
Ok flatjack, ease up a bit dude! Mart suggested pulling the bolt and looking at where the keyway was. I didn't realize you could see it from the end of the pulley with the bolt removed. I just did that. With the 2 dots aligned the keyway appears to be at the 7 o'clock position. If I rotate it 360 degrees until they align again it is then on the other side of the center line of the crank at about the 5 o'clock position.
Here is a pic of what I saw. |
|
|
|
|
12-12-2017, 06:58 PM
|
#75 |
|
Senior Member
Join Date: May 2010
Posts: 201
|
George give me a little bit and I will try out what you want to know. The builder installed the crank and cam as well as the cam gear. I do not know that he changed the crank gear from the one that was originally on it when I gave it to him.
|
|
|
|
|
12-12-2017, 07:07 PM
|
#76 | |
|
Senior Member
Join Date: May 2010
Location: Oshkosh, Wi
Posts: 4,524
|
Quote:
Last edited by flatjack9; 12-13-2017 at 01:09 PM. |
|
|
|
|
|
12-12-2017, 07:34 PM
|
#77 |
|
Member Emeritus
Join Date: Nov 2012
Location: Wichita KS
Posts: 16,132
|
Yep, the photo you posted shows a problem. Know you don't what hear this, but the pulley needs to come off. The mark you are seeing on the crank gear is not the correct mark and you need the pulley off to see what is going on.
|
|
|
|
|
12-12-2017, 07:36 PM
|
#78 |
|
Senior Member
Join Date: May 2010
Posts: 201
|
flatjack9 I agree. I am not arguing with you buddy. I just need time to do this stuff. I don't have a computer connection in my garage so this stuff doesn't happen instantly. I had to unbolt the motor mounts to raise the motor enough to remove the pulley. It hung up just a bit on the leaf spring bolts for the front spring.
Anyway, I have spun the motor over a number of times. For what its worth, and don't shoot me as this is just what I have observed, when I get compression starting on #1 cylinder with my finger in the plug hole and rotate it until I hit close to what I think is TDC the keyway is at about the 5 o'clock position. The intake valve is open and the exhaust valve looks closed. It is obvious to me that I cannot trust the mark on the crank gear or where he has set the cam in relation to it. If I rotate the crank until the keyway is at about at 10/10:30 then it looks like both valves on #1 are closed. |
|
|
|
|
12-12-2017, 07:37 PM
|
#79 |
|
Senior Member
Join Date: May 2010
Posts: 201
|
JSerry I pulled the pulley to get a look at the keyway better.
|
|
|
|
|
12-12-2017, 07:56 PM
|
#80 |
|
Member Emeritus
Join Date: Nov 2012
Location: Wichita KS
Posts: 16,132
|
You should be able to set the cam gearing correctly now. Look very close at the crank gear 3 teeth over from the keyway, sometimes the mark is way down and difficult to see.
|
|
|
|
|
12-12-2017, 08:40 PM
|
#81 |
|
Senior Member
Join Date: May 2010
Posts: 201
|
Guys I just rolled the crank over so the keyway would be at 12 o'clock so we could see 3 teeth to the right or left of it at one time. No dot to be found anywhere. Not on the teeth, not behind the oil slinger, not anywhere. I am beginning to believe the 1 dot I did find on the gear is one he put there...
|
|
|
|
|
12-12-2017, 08:44 PM
|
#82 |
|
Senior Member
Join Date: May 2010
Location: Mid coast Maine
Posts: 1,878
|
If the position isn't the same when lined up.
My guess you may not the correct count on gears. cam is 44 and crank is 22 Also when both valves closed #1 is the dot at 12 o'clock or 6 o'clock? |
|
|
|
| Sponsored Links (Register now to hide all advertisements) |
|
|
|
12-12-2017, 08:44 PM
|
#83 |
|
Member Emeritus
Join Date: Nov 2012
Location: Wichita KS
Posts: 16,132
|
The 3rd tooth over to the right is the one and it is a little hard to see in the photo. The key needs to be over to the left pointing toward the #1 cylinder and the 3rd tooth straight up. Clean it near the crank and check, but looks like it may not be marked. Looks like the slinger is still in place, can you see behind it?
|
|
|
|
|
12-12-2017, 08:46 PM
|
#84 |
|
Senior Member
Join Date: May 2010
Location: So Cal
Posts: 8,741
|
I just was looking at the factory service manual and noticed the keyway on the crank for the cam gear is about 180 from the keyway for the pulley. Didn't know that.
looking at your picture you need to turn the crank about 180 to see the cam gear keyway. Bob Last edited by Bob C; 12-12-2017 at 08:52 PM. |
|
|
|
|
12-12-2017, 08:49 PM
|
#85 | |
|
Senior Member
Join Date: Oct 2011
Location: Gloucester VA
Posts: 1,042
|
Quote:
When I say "earlier" I mean '49 and '50 engines had the long springs with single piece retainers. When the timing issue is solved, the valve issue comes down to installed height. With a stock cam and long springs like you have installed, you'll need 2.125" which will be stock spring pressure. If you find it considerably less, you may run into a binding problem. Lonnie |
|
|
|
|
|
12-12-2017, 08:52 PM
|
#86 | |
|
Member Emeritus
Join Date: Nov 2012
Location: Wichita KS
Posts: 16,132
|
Sponsored Links (Register now to hide all advertisements)
Quote:
|
|
|
|
|
|
12-12-2017, 09:00 PM
|
#87 |
|
Senior Member

Join Date: May 2010
Location: on the Littlefield
Posts: 6,155
|
So treat it like there are no marks, --better with head off, but find top dead center #1, make mark on crank gear straight up (paint, marker, etc), then with all plugs out watch valves in #1 cylinder (much easier with head off), if in chassis put in 3rd gear and rock car watching valves, when one closes and the other is opening rock it back and forth till is seems the valves are both open slightly and are even ---now make mark on cam gear straight down -------if marks match cam timing probably ok
make sure to put in neutral before using starter |
|
|
|
|
12-12-2017, 09:05 PM
|
#88 |
|
Member Emeritus
Join Date: Nov 2012
Location: Wichita KS
Posts: 16,132
|
Ok, I went and pulled a gear. You can see where the mark would be. I also took a photo of the rear of the gear. The rear has a camphor that is much larger than the front side.
|
|
|
|
|
12-12-2017, 09:17 PM
|
#89 |
|
Senior Member
Join Date: May 2010
Posts: 201
|
Guys a question. It is safe to say at this point the cam to crank timing is screwed so before I do anything more should I remove the timing gear? I can then rotate the crank into what should be the TDC position and after that I can rotate the cam to get it into the correct position. I can't see anyway of doing that with the gear still on.
Kurt I don't know I can trust what the valves are doing at this point. I can feel compression when rolling it over and get close by eyeball but when I do the crank keyway is 180 off from where its supposed to be. It is at about 5 o'clock as opposed to at 10 or so... |
|
|
|
|
12-12-2017, 09:32 PM
|
#90 |
|
Senior Member
Join Date: May 2010
Posts: 201
|
JSeery from what I can see the gear is on backwards as I can see the larger chamfer behind the oil slinger. So I rotated the crank until the keyway came up to about the 10 o'clock position. Interestingly enough I had suction on my finger when bringing it up to this position. Would this be correct if the cam timing was 180 out? I then marked the 3rd tooth to the right from the keyway. If I read everything everyone has been saying this is where the timing dot is supposed to be, or close to it.
|
|
|
|
|
12-12-2017, 09:32 PM
|
#91 | |
|
Senior Member

Join Date: May 2010
Location: Auburn, MA
Posts: 2,106
|
Quote:
__________________
The technique of infamy is to start two lies at once and get people arguing heatedly over which is true. ~ Ezra Pound |
|
|
|
|
|
12-12-2017, 09:38 PM
|
#92 |
|
Senior Member
Join Date: May 2010
Posts: 201
|
Frank you may be seeing the keyway slot in the oil slinger. It is there so you can slide the slinger into position with the key in place in the crankshaft.
|
|
|
|
|
12-12-2017, 09:44 PM
|
#93 | |
|
Senior Member
Join Date: May 2010
Location: Oshkosh, Wi
Posts: 4,524
|
Quote:
|
|
|
|
|
|
12-12-2017, 09:46 PM
|
#94 |
|
Senior Member
Join Date: May 2010
Posts: 201
|
WHOOOOOAAAAA Nellie! I think I just did this thinking the keyway on the crank that the pulley sets on is the one you guys are talking about when in fact you are talking about the keyway for the crank gear itself! DOH! My bad! I'll see if I can see it behind the slinger.
|
|
|
|
|
12-12-2017, 09:47 PM
|
#95 |
|
Senior Member
Join Date: May 2010
Posts: 201
|
flatjack 9 try to contain your joy LOL!
|
|
|
|
|
12-12-2017, 09:53 PM
|
#96 |
|
Senior Member

Join Date: May 2010
Location: Canada Where it snows
Posts: 2,058
|
This should have been solved long ago "LOL"
R |
|
|
|
|
12-12-2017, 10:07 PM
|
#97 |
|
Senior Member
Join Date: May 2010
Posts: 201
|
Sorry Ronnie I never claimed to be a flathead genius and when you have to guess your way around some other persons screwy work it just takes a bit longer...
Ok, redid my stuff. Used the cut out in the slinger to locate the keyway in the crank gear! Turned the keyway to the 10 o'clock position and then counted 3 teeth over and marked the gear. This should be the timing mark now. This time I had compression on #1 as I came up to TDC and the "pulley" keyway is 180 degrees to the right of the gear keyway. Approximately at 5 o'clock. Sorry for the additional confusion as I was reading one thing and doing another. My bad. If you look at the picture I have left the slingers cut out in front of the crank gears keyway and you can see it through the cut out. The dot on the cam gear is now about 5 teeth away from the new dot I made. |
|
|
|
|
12-12-2017, 10:15 PM
|
#98 |
|
Senior Member
Join Date: Sep 2010
Location: South Coast NSW Australia
Posts: 2,596
|
OK as you have TDC on #1 when the crank and cam dots are aligned.
Grab the crank and move it back and forth about 1 tooth on either side of the dots.. Look at #6 valves , yes both of them at once. They should be rocking together, one closin as the other is opening or both very slighlty open together . Stop moving the crank when you have these valves evenly rocking. Your dots shold be exactly aligned. Not 1 tooth out.....exactly. Last edited by pooch; 12-12-2017 at 10:25 PM. |
|
|
|
|
12-12-2017, 10:21 PM
|
#99 |
|
Senior Member
Join Date: May 2010
Posts: 201
|
Pooch I think it is on backwards from looking at the crank gear pictures that JSeery posted. I can see the larger chamfer on the face of it looking behind the oil slinger as indicated in his pictures. I am just going to mark this one in the correct location and let it go at that. I still have to figure out how to get the cam to the correct place now that I have the crank location correct. Once I have that done then I may pull the heads to look into whats up with the valve springs. Some of the guys have mentioned they don't look correct.
|
|
|
|
|
12-12-2017, 10:58 PM
|
#100 |
|
Senior Member
Join Date: Jan 2011
Location: sw minnesota
Posts: 4,566
|
glad to see the puzzle has been solved, just one comment, that blue gook around the crankshaft, is it grease, or silicone? you do not want gobs of silicone running loose thru your new motor. best wishes, skip
|
|
|
|
|
12-12-2017, 10:58 PM
|
#101 |
|
Senior Member
Join Date: Apr 2015
Location: Sweden
Posts: 3,045
|
Don´t shoot the messenger...but that engine has to come apart completely...so you can check the rest of it.
I wouldn´t run it...cheaper to adress any other problems now then when it blows up on you. Sorry for the bad news. |
|
|
|
|
12-12-2017, 11:11 PM
|
#102 |
|
Senior Member

Join Date: May 2010
Location: Star, MS
Posts: 4,024
|
Another reason to pull the heads/valves: Using longer (Chevy) valves locates the keeper groove lower, making spring pressure less. I don't see any shims on the valves pictured. I used the Zephyr springs and still had to put at least .060 shims in all of them to get around 50# seat pressure. .
|
|
|
|
| Sponsored Links (Register now to hide all advertisements) |
|
|
|
12-12-2017, 11:41 PM
|
#103 |
|
Senior Member
Join Date: May 2010
Location: Chester Vt
Posts: 8,854
|
Now if you had an engine with no marks on the gears, whow would you proceed . Well you could just use the Split overlap for a quickie, or you could degree the cam in. If you have the numbers. It's been a very interesting thread.
|
|
|
|
|
12-12-2017, 11:52 PM
|
#104 |
|
Member Emeritus
Join Date: Nov 2012
Location: Wichita KS
Posts: 16,132
|
Hang in there Gordon, your getting there! I do think there is merit in checking everything out from the get/go. I would want to check the bearing clearances, the ring gaps, and so on. I agree it is almost impossible for the spring seat pressure to be correct with the current setup you have, so there are things than need to be straightened out.
|
|
|
|
|
12-13-2017, 12:37 AM
|
#105 |
|
Senior Member
Join Date: Sep 2010
Location: South Coast NSW Australia
Posts: 2,596
|
I guess the chamfer on crank gear would be to clear a radius ground on crank?
So it would not be advisable to leave that crank gear on backwards for a sharp edge to bite into crank? |
|
|
|
|
12-13-2017, 01:42 AM
|
#106 |
|
Senior Member
Join Date: May 2010
Location: Mid coast Maine
Posts: 1,878
|
Sponsored Links (Register now to hide all advertisements)
Some times leaving the key out then line up the dots and then slide the keyway in place. I would do the job right and get it over. |
|
|
|
|
12-13-2017, 03:57 AM
|
#107 |
|
Senior Member
Join Date: May 2010
Location: Solihull, England.
Posts: 8,741
|
I'm glad we're getting somewhere.
My only concern right now is regarding the gear. If it is on backwards, the relationship between the keyway and the teeth may not be the same as it is when viewed from the front. It also may not be seating against the crank correctly. If you want to run it as it is, please make double sure you have the correct tooth marked. It's difficult from here, thousands of miles away looking at a monitor. If you decide to drop the pan and pull the gear, (might only need to lower the pan slightly) It can be closely inspected and the correct tooth identified for the mark. I'd be strongly leaning towards removing the motor and carefully dismantling it. It can then be put back together methodically with any areas of concern checked along the way. Hopefully, other than the cam timing issue, all may be well. If it is, you would still be able to say you built it yourself instead of hoping it was put together right by someone not familiar with these old lumps. Mart. |
|
|
|
|
12-13-2017, 08:32 AM
|
#108 | ||
|
Senior Member
Join Date: Nov 2012
Location: western Mass
Posts: 365
|
Quote:
Quote:
|
||
|
|
|
|
12-13-2017, 09:22 AM
|
#109 |
|
Senior Member
Join Date: May 2010
Posts: 201
|
Guys I appreciate all the assistance. Blue stuff is grease.
I noticed last night while looking at this setup that the front edges of the pan gasket pulled away when the timing cover came off so Ill have to pull the pan to put new gaskets on there. When I do that I will see if I can get this crank gear off and put it on the correct way. I saw some stuff about getting the old one off and I'll get a new one and put it on correctly if need be. I have new head gaskets so at the same time I will pull all the valves again and do whatever needs to be done to correct that. It'll make the cam easier to reposition anyway won't it? I don't know that I am going to pull the crank and pistons and check stuff like the ring gap. I'll consider that when I get to pulling the pan off. As we are heading into the holiday season and I am going to be traveling for the next 3 weeks progress on this is going to be halted until I get back in town. I do appreciate all the suggestions because there is literally zero persons in my area interested in running or building an engine this old. I have 1 friend in the area into old cars but he is running a Willys with a blown 468 in it so isn't much help with what I am doing. I'll start updating again as soon as I get back on it and will check in on this as often as possible. I will still need direction on solving the valve issues. |
|
|
|
|
12-13-2017, 09:33 AM
|
#110 |
|
Member

Join Date: Nov 2015
Location: South Texas
Posts: 59
|
Gordon thanks for your posting and to all the members who have tried to help along the way. This has been a very interesting read as I have just started on my first flathead and this has been very valuable information.
|
|
|
|
|
12-13-2017, 09:56 AM
|
#111 |
|
Senior Member
Join Date: May 2010
Location: Oshkosh, Wi
Posts: 4,524
|
I think this experience shows the need to run an engine before installing it in the chassis. And just for your info, that crank gear does not come off easily. It takes a strong puller and I usually give it a little heat to aid in the pull.
|
|
|
|
|
12-13-2017, 10:07 AM
|
#112 |
|
Senior Member
Join Date: May 2010
Posts: 201
|
A couple of times members here told me I should post my troubles so others could benefit and I'm glad they have helped. Your welcome buzz4041.
flatjack9 I have torches so can and will put heat to it when I go to give it a pull. If that doesn't work I have seen posts of folks giving the gear a good whack between teeth with a sharp chisel and it splits and then can be pulled off. In which case I will get a new one and put it on. Your correct about running an engine before installing but I don't have a test stand. It went from the engine stand to the chassis. In the future I will purchase no engine unless I get to see and hear it run first! |
|
|
|
|
12-13-2017, 10:10 AM
|
#113 |
|
Senior Member
Join Date: May 2010
Location: Star, MS
Posts: 4,024
|
Gordon, good for you for sticking with it and sorting through all the suggestions thrown at you at one time. With your patience and determination I feel sure you will see this through. I'm looking forward to continuing this journey with you. Merry Christmas and enjoy your holidays.
|
|
|
|
|
12-13-2017, 10:42 AM
|
#114 |
|
Senior Member
Join Date: May 2010
Posts: 201
|
Thanks 40cpe! Same to you and your family!
|
|
|
|
|
12-13-2017, 12:12 PM
|
#115 |
|
Senior Member
Join Date: May 2010
Location: Auburn, MA
Posts: 2,106
|
I say these are nothing more than glorified lawn mower engines but even those have gotten more high tech. There are some flathead nuances that a rebuilder should know about, such as grinding a radius on the crank but this is a real rookie mistake for anyone who knows how to assemble an engine. If this guy were building an interference engine he would be paying big bucks to fix it. I do not see this as lack of knowledge as much as sloppy workmanship.
__________________
The technique of infamy is to start two lies at once and get people arguing heatedly over which is true. ~ Ezra Pound |
|
|
|
|
12-13-2017, 02:24 PM
|
#116 | |
|
Senior Member
Join Date: May 2010
Location: now Kuna, Idaho
Posts: 3,778
|
Quote:
Sometimes, "the long way around the barn is the quickest way home", plus you avoid that mean bull! |
|
|
|
|
|
12-13-2017, 02:26 PM
|
#117 |
|
Senior Member
Join Date: May 2010
Posts: 201
|
Frank Miller, it can both I guess. Either way I have ended up with a whole lot of issues I now have to fix and even though I tried hard to not be in this situation, I am. So I'll work through it with everybody's help. FYI I used to live in Westborough right off rt.9 by the state hospital and Lake Chauncy.
|
|
|
|
|
12-13-2017, 02:27 PM
|
#118 |
|
Senior Member
Join Date: May 2010
Posts: 201
|
40 Deluxe I hear that!
|
|
|
|
|
12-13-2017, 02:55 PM
|
#119 | |
|
Senior Member
Join Date: Nov 2012
Location: western Mass
Posts: 365
|
Quote:
also, after reading ronnieroadsters reply (second post) I went back and looked at your pictures of the gear alignment. it appears that your crank and cam gears mesh nicely. if that is the case you don't need to pull the crank gear at all. just stamp it and move on! pull the valves out to check spring pressures. with the valves out you can unbolt the cam gear, set it to the correct point and rotate the cam to match. easy peasy! Last edited by revkev6; 12-13-2017 at 03:01 PM. |
|
|
|
|
|
12-13-2017, 03:29 PM
|
#120 |
|
Senior Member
Join Date: May 2010
Posts: 201
|
revkev6 I moved down to Wilmington NC about 13 years ago. Just got too tired of the short summer, long winters, and too much snow shovelling! Don't have any of that down here and I can actually work in the shop almost all year round without heat. I have to pull the pan anyway so I will decide then if I need to pull the gear or not. If it fights me too much I may just mark it and move on...we will see.
|
|
|
|
|
12-13-2017, 03:57 PM
|
#121 |
|
Senior Member
Join Date: Nov 2012
Location: western Mass
Posts: 365
|
hope you enjoy that weather... I have aunts and uncles talking about the carolinas all the time... but they haven't run from their kids yet lol.
most people recommend you not put the valve gear you have back in. those are 1951-1953 rotator type keepers on the valves. they use a shorter valve spring that has a tendancy to bind up if you run a performance cam... etc. basically they don't make it all the parts for it because they got ditched as soon as you swapped cams. I have no idea how they work with a chevy valve as I haven't ever heard of someone using your combination of parts! what you need to do is grab a set of dividers and check your open and closed spring length. you can then check your spring pressure at the closed length (i used a bathroom scale and a drill press to get an idea) then check for coil bind at your open length. you have lots of options if that doesn't work out. DO NOT RUN THE MOTOR WITHOUT CHECKING THE SPRINGS!! if you don't have enough pressure the valve will hit the head and pop. bored and stroked has posted on the HAMB how he does chevy valves.. reds headers sells a kit. one more question i have is, where did you get the valve springs from?? they don't look like ford units to me. most stock ford springs dont have a pronounced set of coils that are closer together at one end. the lincoln zephyr springs do though. you may need to pick up some new 49-50 style retainers and some shims depending on what you find when you check the springs. |
|
|
|
|
12-13-2017, 03:59 PM
|
#122 |
|
Senior Member

Join Date: May 2010
Location: Reseda, Calif.
Posts: 2,188
|
Not to throw out more ideas than you have already gotten, But I have been following this from page one. Just my 2 cents, but do your self a favor and turn that crank gear around. If it gets buggered up during removal, then buy a new one. They aren't that expensive. Plus they are chamfered on the inside for a reason. I just rebuilt my flathead a few months ago. Stock valves, adjustable lifters, Honed and new rings and bearings as it was 60 over from a failed completed past engine builder. New gears, and an Isky cam also. Runs perfect. Your chevy engine builder obviously did not no nuttin about a flathead. A good inspection of the whole thing would be wise in my opinion. But hey, just take your time and sort thru some of the reply's and do it right. Good luck with it.
|
|
|
|
| Sponsored Links (Register now to hide all advertisements) |
|
|
|
12-13-2017, 05:02 PM
|
#123 | |
|
Senior Member
Join Date: Apr 2015
Location: Sweden
Posts: 3,045
|
Quote:
|
|
|
|
|
|
12-13-2017, 05:07 PM
|
#124 |
|
Senior Member
Join Date: May 2010
Posts: 201
|
revkev6 I very much enjoy the weather here! So do my arthritic knees! The valve springs came out of a flathead that was used as the power unit for a sawmill. I thought it may be a useable engine as it had been inside out of the weather but it turns out someone left water in it and the pan rails on both sides had freeze cracks several inches long. I had 5 flatheads at 1 time and I saved a lot of parts from all of them. All 8ba engines. I have 3 3/4 cranks, rods, pistons, main caps, dist., intakes exhaust manifolds, flywheels, pressure plates, starters and so on... didn't want to get rid of anything until I knew what I needed for the one I was using. All 4 blocks had bad cracks by the way.
zzlegend I pretty much plan on doing as you suggested when I pull the pan. I'll check everything out as much as I can and do what I can to get things straightened out. Thanks! |
|
|
|
|
12-13-2017, 05:09 PM
|
#125 |
|
Senior Member
Join Date: Sep 2010
Location: South Coast NSW Australia
Posts: 2,596
|
From REVKEV6
regarding your post about the gears being in relation when spun... I would guess if the gear is chamfered heavily for the crank fillet then it will be too far forward without the chamfer. if the gears are not in line with each other the cam timing will be out of alignment with the gear. JWL talks about checking the cam clearance to the front cover being in the area of .009 max if memory serves. allowing the cam to move forward or back allows the cam to rotate relative to the crank. the same movement would apply to the crank gear. this could advance or retard the cam. interesting info Even tho this is only the tip of the iceberg on this engine, I think most of us have learned something new already. I don't have a crank gear in front of me right now, and the pics so far posted are not real square on.....but it looks to me that the keyway is not central to any two teeth, so counting 3 teeth one way and 3 teeth the other way when reversed is not the same . The keyway could end up anywhere at the back side in relation to a tooth because of the helical cut.. As well as REVKEY6/s info on, if the gear is not seated properly , it will be turned more in relation to where it would sit if it was fully home. That gear has to come off. It would be interesting info if one could mark exactly where the cam timing is now with the gear on backwards and what it will be when it is reversed. Maybe someone could post a pic of two crank gears laid side by side , one up and one down to show relationship of where the keyway is to teeth. |
|
|
|
|
12-13-2017, 05:10 PM
|
#126 |
|
Senior Member
Join Date: May 2010
Posts: 201
|
Sponsored Links (Register now to hide all advertisements)
|
|
|
|
|
12-13-2017, 05:20 PM
|
#127 |
|
Senior Member
Join Date: May 2010
Posts: 201
|
pooch I plan on pulling the gear if I can. I'd be happy to mark where I think the timing mark should be based on 3 teeth from the keyway, align the cam with the phantom dot I found, then look to see how far off either is from where it should be if I have a dot on the other side. Right now the cam dot doesn't align with anything other than the phantom dot I found which may be one he added? Just fyi the cam gear is pretty much flush with the face of the crank gear. The face of it is not out from the face of the crank gear.
|
|
|
|
|
12-13-2017, 05:22 PM
|
#128 | |
|
Member Emeritus
Join Date: Nov 2012
Location: Wichita KS
Posts: 16,132
|
Quote:
|
|
|
|
|
|
12-13-2017, 05:50 PM
|
#129 |
|
Senior Member
Join Date: May 2010
Location: Solihull, England.
Posts: 8,741
|
JSeery: You might be able to help with this:
I looked at the pics posted by JSeery in post 88. I blew them up and studied the relationship between the keyway and the ends of the teeth. I'm 99% sure the relationship is different if viewed from the rear rather than the front. What I'm saying is that it would be impossible to correctly time the engine if the gear is fitted backwards. If I had a gear in front of me I could scribe a line through the centre of the gear past the centre of the keyway. I would do this on both sides and look at the relationship between the line and the tooth. From the pics already posted they look different, but the angle the pics are taken at is not ideal for making an exact judgement. Can anyone help with that investigation? Mart. |
|
|
|
|
12-13-2017, 06:15 PM
|
#130 | |
|
Senior Member
Join Date: May 2010
Location: So Cal
Posts: 8,741
|
Quote:
Bob |
|
|
|
|
|
12-13-2017, 06:30 PM
|
#131 |
|
Senior Member

Join Date: May 2015
Location: Frelighsburg, QC
Posts: 166
|
GordonC... It's important to recognize that the crankshaft (drive) and camshaft (driven) gears are helical. The 8BA flatheads had an opposite gear angle than the earlier (e.g. 59A) versions which were designed to thrust the cam into the timing cover. If your gears are indeed reversed, it becomes all the more important to get them off and oriented properly (from both the thrust & timing perspective). And, yes, you'll need to sort out your valve and valve spring setup while at it. Hang in there. All will become clear soon!
|
|
|
|
|
12-13-2017, 06:31 PM
|
#132 |
|
Member Emeritus
Join Date: Nov 2012
Location: Wichita KS
Posts: 16,132
|
LOL, looks like Bob beat me to it, but mine has a Christmas background! Little difficult to take procession measurements with pencil marks, but it does look off about half a tooth as Bob suggested.
Last edited by JSeery; 12-13-2017 at 06:55 PM. |
|
|
|
|
12-13-2017, 06:57 PM
|
#133 |
|
Senior Member
Join Date: May 2010
Posts: 201
|
Guys half a tooth is a hell of lot better than where I am now!
|
|
|
|
|
12-13-2017, 07:03 PM
|
#134 |
|
Senior Member
Join Date: May 2010
Location: Long Island, NY
Posts: 1,052
|
Hi Gordon, I know you've been inundated with help here but I beleive it all helps to a point??
I'm going to put 2 more photos below here with the crank gear on the cranks snout, it may help a bit more still? The crank gear keyway is in direct line with the #1 throw, the damper keyway is exactly 180* opposite! Thanks, Gary in N.Y. P.S. These shots show the location of the crank gear with respect to BOTH keyways, the timing gear one and the damper one. When you do eventually get past this issue and up to straightening out all the valve train components drop me an e-mail!
__________________
http://www.stromberg-bulletin.com/me...berg-equipped/ |
|
|
|
|
12-13-2017, 07:08 PM
|
#135 |
|
Senior Member
Join Date: May 2010
Location: Mid coast Maine
Posts: 1,878
|
I think you will find the dot on other side.
I posted a pic of the gears and key that was in my motor book, and was brought to my attention is was trans backward. I may have did the same thing trusting to old book, I also found the firing order was wrong. Note using this book I think he put the gear on like to pic and It was correct but being 86 degs off. Grinder use the books for the specs. That's my guess Last edited by George/Maine; 12-13-2017 at 07:36 PM. |
|
|
|
|
12-13-2017, 07:27 PM
|
#136 | |
|
Member Emeritus
Join Date: Nov 2012
Location: Wichita KS
Posts: 16,132
|
Quote:
|
|
|
|
|
|
12-13-2017, 09:25 PM
|
#137 | |
|
Senior Member
Join Date: May 2010
Location: Reseda, Calif.
Posts: 2,188
|
Quote:
 Great pictures also JSeery. Great pictures also JSeery.  After the timing gears are ironed out, I would next question those chevy valves and springs. Keep plugging away Gordon. You will get it. |
|
|
|
|
|
12-13-2017, 09:29 PM
|
#138 |
|
Senior Member
Join Date: Jan 2011
Location: Central Ohio
Posts: 5,057
|
I've pulled quite a few crank gears in the past - have never needed to use heat. As long as you have the right puller - it should come off. BUT - if it is stuck, some heat won't hurt it. Don't 'whack' it to split it . . . that is a great way to ruin the crank.
Thrust doesn't change when you reverse the gear - that is not an issue. What is an issue is having the timing marks in the correct place and having the gear seated all the way back as it should be. This appears to me to just be a machine shop screw up. Cam Gear: It only goes on one way (due to bolt pattern) - so there really isn't a mistake to be made on that end of this deal. |
|
|
|
|
12-13-2017, 09:38 PM
|
#139 |
|
Senior Member
Join Date: Jan 2011
Location: Central Ohio
Posts: 5,057
|
There is nothing wrong with Chevy valves - they are a bit longer and the reason that I run them is due to the fact that I run very high performance cams - which means the base circle is a lot smaller than a normal setup. So - having longer valves helps take of that slack. Another reason is that I like some of the valve options for chrome stems, performance profiles below the head, materials, etc.. I have my own valve grinder, so I do massage them to achieve the profiles and head thicknesses that I desire. I usually run Manley Pro-Flow valves in most higher-performance engines.
There are other ways to deal with the issue of smaller cam base circles (and too short of valves in a stock valve situation) --> like using lash caps on the stock length valves. Or, running stock lifters and welding up the valve stems (like in the old days). Regardless - if you're using adjustable lifters, the goal is to NOT have to turn adjustable lifter screws a long ways out (like you would with stock length valves and a high-lift cam). The reason you don't want the adjuster screws all the way out is that there are not enough interference fit threads to hold the adjusters in their original position -- what happens then is that they usually thread back into the adjustable lifter . . . making all sorts of valve noises and low-lift on the associated valves. I learned all these things the hard way (40 years ago) . . . running a .450 lift cam with stock length 49-53 valves and Johnson lifters - they were always loosening up and I was constantly adjusting them. Good luck - stick with it and you'll get it sorted out. You have a lot of "cooks in your kitchen" at the moment - hopefully you create a fine flathead meal as a result. B&S |
|
|
|
|
12-13-2017, 10:03 PM
|
#140 | |
|
Senior Member
Join Date: May 2010
Location: Reseda, Calif.
Posts: 2,188
|
Quote:
Just to clarify,,,I should have stated, I see nothing wrong with using Chevy valves and quite a few flatheads out there are running them, but I would question the builder that installed them and what, if anything was done to the seats and where the valve springs came from. The crank gear and timing mark problems raise other possible red flags in my opinion. |
|
|
|
|
|
12-13-2017, 10:24 PM
|
#141 |
|
Senior Member
Join Date: May 2010
Posts: 201
|
Guys thank you for the suggestions and the encouragement it really helps. I was depressed as hell when this thing wouldn't fire but considering all I/We are finding wrong with it I am most thankful it didn't!
Just so we are all singing the same song, I will pull the pan. I will see if I can get the crank gear off and either turn it or replace it and reset the cam timing correctly. While I am looking at the lower end I will check to see if there are areas I need to be concerned about. While I am doing that I will pull the heads and pull the valves and do whatever I need to do to use the valves I have. The seats are new, the valves are new, the lifters are new, the guides are new, the springs are from a 1950's 8ba. May or may not have been original to that engine. I may have other used ones in my stash but these looked to be the best of what I had. I'll do whatever needs to be done to correct their geometry and put them back into the same cylinders they came out of and relap them. I will use all new gaskets and reassemble it. Sound like a plan? Have I missed anything? Only problem is all of this has to wait until after my trip. |
|
|
|
|
12-13-2017, 11:11 PM
|
#142 | |
|
Senior Member
Join Date: May 2010
Location: Yucaipa, CA
Posts: 1,093
|
Quote:
It does not apply here but we use to have ignition modules fail. There would be all kinds of spark, fuel and compression but the engine would not run. When the modules failed for some reason they were able to produce a nice hot blue spark but not deliver it at the proper timing. That's where the timing light came in handy to check the timing while cranking. If the timing mark was no where in sight there was a good chance the module had some kind of a stroke. Its just another tool to try when your going nuts trying to figure out a weird problem. They never break the way the shop manual says they will! |
|
|
|
|
| Sponsored Links (Register now to hide all advertisements) |
|
|
|
12-14-2017, 01:58 AM
|
#143 |
|
Senior Member
Join Date: May 2010
Location: Solihull, England.
Posts: 8,741
|
Thanks for confirming what I suspected, Guys.
Mart. |
|
|
|
|
01-12-2018, 12:22 PM
|
#144 |
|
Senior Member
Join Date: May 2010
Posts: 201
|
Ok guys holiday stuff is over and it's time to get back to business. Now that the temps are a little better in the garage I started pulling everything off the motor in preparation for pulling it out of the chassis and setting it up on an engine stand so I can get good access to everything. Here is a picture of it. I am going to pull it Mon.
Also just for shits and grins I pulled an old 3 3/4" crank I had and decided to see how hard it was to remove the timing gear. I heated the gear with a propane torch and hit from the backside with a drift and heavy hammer. It came off pretty easily after a half dozen whacks so I am hoping the same is true for the one in the motor! |
|
|
|
|
01-12-2018, 12:27 PM
|
#145 |
|
Senior Member
Join Date: Dec 2013
Location: Minnesota, Florida Keys
Posts: 10,299
|
Welcome back, Gordon! I am quite curious to see how this turns out.
|
|
|
|
|
01-12-2018, 12:45 PM
|
#146 |
|
Senior Member
Join Date: May 2010
Location: Mid coast Maine
Posts: 1,878
|
Sponsored Links (Register now to hide all advertisements)
When you put the gear on good to have slip on. This will give you better lineup of gears then replace the key way. |
|
|
|
|
01-12-2018, 05:41 PM
|
#147 |
|
Member Emeritus
Join Date: Nov 2012
Location: Wichita KS
Posts: 16,132
|
Believe he has multiple issues he is attempting to address and it is easier to work on out of the chassis.
|
|
|
|
|
01-14-2018, 08:53 PM
|
#148 |
|
Senior Member
Join Date: May 2010
Posts: 201
|
Thank you guys for the welcome back. I do have more than just the gear issue to deal with and it will be easier to keep the rest of the chassis and body in as new a condition as I can by doing this work out of the chassis. Temps will be in the low 40's next couple of days but I'm hoping to get the engine up onto the stand so I can start by pulling the pan. The pan gaskets at the front where the timing cover bolts on got pulled up when I pulled the timing cover so I at least need to replace the pan gaskets along with fixing the gear. Once that is done I need to check into my valves to see what is up with the springs.
|
|
|
|
|
01-15-2018, 07:24 PM
|
#149 |
|
Senior Member
Join Date: Jan 2011
Location: Central Ohio
Posts: 5,057
|
Welcome back Gordon - I think you have a good plan and it will be much easier and a better situation to check the whole thing out on the engine stand. If you have any issues, feel free to check back - you can ping me via a PM if needed. Good luck!
|
|
|
|
|
01-16-2018, 11:24 AM
|
#150 |
|
Senior Member
Join Date: May 2010
Posts: 201
|
Thanks guys! Just need a little bit of time in my schedule. I promise to grab pics of whatever I'm doing when I get to it.
|
|
|
|
|
01-16-2018, 12:16 PM
|
#151 |
|
Senior Member
Join Date: May 2010
Location: Mid coast Maine
Posts: 1,878
|
See if the gear is on backwards and if dot was there.
|
|
|
|
|
01-16-2018, 06:19 PM
|
#152 |
|
Senior Member
Join Date: May 2010
Posts: 201
|
Will do George.
|
|
|
|
|
01-17-2018, 04:02 PM
|
#153 |
|
Senior Member
Join Date: May 2010
Posts: 201
|
Ok boys I know you have all been waiting for an update so here goes.
I pulled the motor out of the car and set it up on a stand I have. Also supported the crank at the front with a little tool I made just for that job. I just get all jumpy with that lump hanging there by 4 bolts! Rolled it over and removed the pan. Once it was done pissing its remaining fluids all over the floor I wiped everything down and cleaned it all up then hit everything with some marvel mystery oil so rust won't get a chance to set in. Just for giggles I stuck two large screw drivers down by the backside of the timing gear as shown and tapped them down into position which put pressure on the gear slightly and it started to move! I'll be dipped in what makes the grass grow green! I didn't even have to put any heat to it, cuss, throw tools around the shop, or anything! Just kept tapping lightly and the screw drivers worked their way down and pushed the gear off the front of the crank. What a relief! Ok for those that are still here the gear WAS on backwards and the timing mark was on what was the backside. Once the old gear was off I cleaned up the snout of the crank, greased it up and tapped the new gear into place. So, I now have a new crank gear with the timing dot on the outside like it should be. Now to button up the lower end as everything looks pretty good down below. Then turn the cam into position so I can get the 4 bolts in the timing gear to line up and the timing mark to match the crank mark. Once that is in position I can bolt the aluminum cam gear back on and reinstall the timing cover. Got new bolts and keeper for that as well. After that its on to the valve assemblies to see what needs to be addressed there. Oh, I was wondering should I pull the studs and reseal them while I have it apart? I did have a few that were dripping a little antifreeze when I had the cooling system full. Not having had a chance to heat cycle and torque everything I wasn't too worried about it at the time. |
|
|
|
|
01-17-2018, 04:53 PM
|
#154 |
|
Senior Member
Join Date: May 2010
Location: So Cal
Posts: 8,741
|
How come that gear looks rusty and a little pitted??
Bob |
|
|
|
|
01-17-2018, 05:35 PM
|
#155 |
|
Senior Member
Join Date: May 2010
Posts: 201
|
Bob,
Are you referring to the one I pulled? If so that was a used crank that I had which was out of the engine it came from and sat in the shop before it got installed. It has a little flash rust on it. The other gear is a brand new Offenhauser gear from Speedway. |
|
|
|
|
01-17-2018, 05:39 PM
|
#156 |
|
Senior Member
Join Date: Sep 2010
Location: South Coast NSW Australia
Posts: 2,596
|
Prob too late now if you have put the pan back on, but you could have done an easy quick check on the mains and big ends if you did not have any plastigauge.
I would have pulled the front main cap and put a piece of copy paper about 1/2 wide across the crank and torqued the cap back down. The crank should not move or be very tight. Remove it. Then do the same with at least one big end. This gives you some idea what the guy before did as to clearances. |
|
|
|
|
01-17-2018, 05:57 PM
|
#157 |
|
Senior Member
Join Date: May 2010
Posts: 201
|
Pooch I don't have any plastigage but can get some. The pan isn't back on just yet and I can go as far into this as I need to.
|
|
|
|
|
01-17-2018, 06:48 PM
|
#158 |
|
Senior Member
Join Date: Dec 2013
Location: Minnesota, Florida Keys
Posts: 10,299
|
If you still have the pan off, I agree with "Pooch" on this. I did it on the used Merc I put in my '51 and it was nice to know everything was up to spec.
|
|
|
|
|
01-19-2018, 05:15 PM
|
#159 |
|
Senior Member
Join Date: May 2010
Posts: 201
|
OK! Heres another update. I pulled all the valve assemblies which made the cam a whole lot easier to turn. I then put the cam gear over the snout of the cam with the cam timing mark lined up on the crank gear timing mark. I then turned the cam behind it until I could get the 4 bolt holes to line up with the cam and turn the bolts into their holes easily by hand. Do I need to do anything else other than pull the bolts and put the keeper on it? IN other words is there ANY way this can bolt together other than how it has? I don't like rework and want to make sure it is correct this time.
Also for those that suggested it I got some plastigauge and checked the clearance on 1 of the mains and it was at .002. I checked 1 of the rods as well and the clearance on that was .003. Help me understand if these are good numbers or not? The rods and crank were used but everything else was new. Last is a picture of the valve assemblies as they were removed. I have done nothing to them yet so need to know what I need to do here. I measured the valves length and they are anywhere from 4.865 to 4.905. What should this length be? I have a reground cam and adjustable lifters. All springs as installed measured approximately 1.900. Some were a little less some were a little more but that was the average from what I could tell. Gary in NY you called this out from something you saw in one of my previous pictures so is there anything you can suggest that I do to move forward on those. As always, all help appreciated guys. |
|
|
|
|
01-19-2018, 06:11 PM
|
#160 |
|
Senior Member
Join Date: Dec 2013
Location: Minnesota, Florida Keys
Posts: 10,299
|
It sounds to me like you are doing everything you should. The bottom-end clearances seem to be within spec, you should be good to go once you get the valves sorted out. You weren't clear; was the cam out of time or not?
|
|
|
|
|
01-19-2018, 06:16 PM
|
#161 |
|
Senior Member
Join Date: May 2010
Location: Oshkosh, Wi
Posts: 4,524
|
You're fine on the cam installation. Bottom end as mentioned should be fine. Did you measure the length of the spring when it was installed?
|
|
|
|
|
01-19-2018, 06:48 PM
|
#162 |
|
Senior Member
Join Date: May 2010
Posts: 201
|
flatjack9 I didn't have much of a way to really measure it in the block as installed so I didn't do that. I can reinstall a couple and see what I can come up with to check that if it is important to getting this correct.
|
|
|
|
| Sponsored Links (Register now to hide all advertisements) |
|
|
|
01-19-2018, 06:54 PM
|
#163 |
|
Member Emeritus
Join Date: Nov 2012
Location: Wichita KS
Posts: 16,132
|
Valve spring height determines the valve seat pressure. Say you want 50 lbs of seat pressure, you would have to measure what spring height gives you the 50 lbs. Then the spring height needs to be set to that height on the valves. The install height is measured on the valve assembly without the spring and then shims added to archive the install height desired. I sure this is totally in-clear! You should be able to find a step by step procedure online.
Last edited by JSeery; 01-19-2018 at 07:11 PM. |
|
|
|
|
01-19-2018, 07:22 PM
|
#164 |
|
Senior Member
Join Date: May 2010
Posts: 201
|
JSeery so to determine what height gives you that 50 lbs as in your example you need to check all the springs at a set height to see what pressure they give and then adjust from there? Not enough pressure add shims. What do you do for too much?? Is this done on just the valve springs by themselves?
I have been reading as much as I can find online about this stuff as I want to make sure that I only go through this once. |
|
|
|
|
01-19-2018, 07:27 PM
|
#165 |
|
Member Emeritus
Join Date: Nov 2012
Location: Wichita KS
Posts: 16,132
|
The springs should have a height associated with them and you check the pressure at that height. But, you don't have that information so you will have to determine what the spring pressure is for a given height. It is a little confusing to explain in text only (at least for me!).
|
|
|
|
|
01-19-2018, 07:39 PM
|
#166 |
|
Senior Member
Join Date: May 2010
Location: So Cal
Posts: 8,741
|
Sponsored Links (Register now to hide all advertisements)
https://www.youtube.com/watch?v=3Hyw3fantpk Bob |
|
|
|
|
01-19-2018, 08:02 PM
|
#167 |
|
Member Emeritus
Join Date: Nov 2012
Location: Wichita KS
Posts: 16,132
|
Disclaimer, I don't use rotators! So, keep that in mind, it is possible I'm not 100% correct on this information. What I looked up for 1952 is 39 - 40 lbs at 1.89 install height. Need to install a valve guide with a valve and the retainer assembly on the valve (a little weight check spring is helpful, but not required). With the valve assembly (minus the spring) in place, measure the install height (from the top of the retainer to spring seat on the guide). Inside measuring dividers (the compass type with the manual adjuster) work good for this. Then measure the calipers to determine the install height. Now measure the spring pressure at this height, if the pressure is to low at the install height, then determine the shims required to get the spring pressure correct. Clear as mud I'm sure! Slightly higher spring pressure at install height is ok, just don't want it too high, saw something like 50 max.
Last edited by JSeery; 01-19-2018 at 09:03 PM. |
|
|
|
|
01-19-2018, 08:11 PM
|
#168 |
|
Senior Member
Join Date: Jan 2011
Location: sw minnesota
Posts: 4,566
|
how important is it? i have torn down lots of old motors, and never seen a shim yet! are the new springs that far off?
|
|
|
|
|
01-19-2018, 08:25 PM
|
#169 | |
|
Member Emeritus
Join Date: Nov 2012
Location: Wichita KS
Posts: 16,132
|
Quote:
The earlier valve spring free height should be around 2.5 inches and the later spring with the rotators should be around 2.2 inches. Last edited by JSeery; 01-19-2018 at 08:47 PM. |
|
|
|
|
|
01-19-2018, 09:47 PM
|
#170 |
|
Senior Member
Join Date: May 2010
Posts: 201
|
Bob C thanks for the link to that video. He kept referring to specifications? What specifications?
JSeery thanks. I think I better understand what you are saying. |
|
|
|
|
01-19-2018, 11:15 PM
|
#171 |
|
Senior Member
Join Date: Oct 2011
Location: Gloucester VA
Posts: 1,042
|
Installed valve spring seat pressure.
First off, Ol' Ron gets full credit for this method to measure installed height pressure... With fully installed valve assembly resting off the lifter, measure the spring from the bottom of the guide to the top of the retainer with a divider or dowel. Find or grind a bolt and nut to match this dimension. Disassemble valve assembly. Place a bathroom scale on the table of your drill press and cover it with a square of plywood so it doesn't get damaged. Chuck an old valve in the drill press with a small block of wood handy. Set the spring and measured bolt/nut assembly side-by-side on the plywood with the wood block over the top of spring. Pull chuck down until spring is even with bolt assembly then read scale. Note: Every valve may have a different reading. Lonnie Last edited by Binx; 01-19-2018 at 11:22 PM. |
|
|
|
|
01-20-2018, 07:52 AM
|
#172 | |
|
Senior Member
Join Date: May 2010
Location: Long Island, NY
Posts: 1,052
|
Quote:
They appeared to be a "progressive" wind and the closer wound coils need to be at towards the guides not towards the retainers? Thanks, Gary in N.Y. P.S. While you're this deep into checking I would strongly recommend installing some "bronze-lined" guides or down-the-road you run the risk of having to open it all up again to "free-up" any hung valves, not worth taking that risk in my opinion! Changing the guides at this time alone has no effect on anything else you've already done!
__________________
http://www.stromberg-bulletin.com/me...berg-equipped/ |
|
|
|
|
|
01-20-2018, 08:55 AM
|
#173 |
|
Senior Member
Join Date: May 2010
Location: Star, MS
Posts: 4,024
|
Checking spring pressure: I had a hard time coordinating drill press with the spring not at eye level and reading the scale. I made this indicator to tell me when the spring and guide were at the same height. A carriage bolt through a piece of board with a ground wire at the bottom. Cut the bolt to the length of the shortest installed height you measured. Place a nut on the threads to adjust for varying heights. Use a flat, rigid, piece of steel to press the valve. Attach an analog ohm meter to the carriage bolt ground and to the flat piece on top of the valve. Press the valve until the analog meter swings and read the scale.
sorry about the rotated pictures, they were straight on my computer. |
|
|
|
|
01-20-2018, 10:40 AM
|
#174 |
|
Senior Member
Join Date: May 2010
Posts: 201
|
Guys thanks for the additional info on using a home made tester to get the spring pressures. I will probably rig one up.
Gary what I am I looking at for a set of the bronze lined guides? Don't mind doing whatever makes sense. Also guys I have asked this a couple times now but nobody has answered me on this yet. Do I need to worry about the different length valves? These are chevy 1.5" valves and they were anywhere from .035 under 4.9" to 4.910" length. If I can compensate for the variance using the adjustable lifter and the reground cam I can just forget about this if I can get an answer. |
|
|
|
|
01-20-2018, 11:01 AM
|
#175 |
|
Member Emeritus
Join Date: Nov 2012
Location: Wichita KS
Posts: 16,132
|
The issues are: What springs do you have? And what spacer are going to be required to get to the spring pressure you are wanting? I provided the stock specifications, but that is of little value in this situation. You are not using a stock valve and the Chevy valves are longer, so you are going to have to figure out what is required to get to a usable spring pressure (50 lbs would be a good goal). Start by measuring a loose spring and see if it will help ID it. I have no idea what the setup will end up being with the rotator retainers, but a guess would be:
Pre rotators stock springs were 2.5 inches free height. Post rotators stock springs were 2.2 inches free height. So, there is a difference of .3 inches. If is also possible you have LZ springs. It is difficult with a normal retainer and a Chevy valve to get enough shim to work properly. On of the folks here on the Barn who has a shop can provide a special made spacer for this application. But, I'm not sure how that would work with the rotators. Hopefully he will supply some answers! |
|
|
|
|
01-20-2018, 11:02 AM
|
#176 |
|
Senior Member
Join Date: May 2010
Posts: 201
|
Gary here is a closer look at the valve set ups. I think I see what you are saying about the closer wound coils.
|
|
|
|
|
01-20-2018, 11:30 AM
|
#177 | |
|
Senior Member
Join Date: May 2010
Location: Star, MS
Posts: 4,024
|
Quote:
|
|
|
|
|
|
01-20-2018, 11:44 AM
|
#178 |
|
Senior Member
Join Date: May 2010
Location: So Cal
Posts: 8,741
|
I found these valve specs in the Ford truck service manual, I think the car
would be similar. 1949-50 Test Length 2.13" 37-40 lbs 1951 Test Length 1.89" 40-43 lbs Bob |
|
|
|
|
01-20-2018, 12:18 PM
|
#179 |
|
Senior Member
Join Date: May 2010
Posts: 201
|
Thanks Bob C! I appreciate that.
|
|
|
|
|
01-20-2018, 12:41 PM
|
#180 | |
|
Senior Member
Join Date: May 2010
Location: Long Island, NY
Posts: 1,052
|
Quote:
I'll PM you later with the bronze-guide info! Thanks, Gary in N.Y. P.S. Here's a photo showing a quick method for measuring the spring hgts and pressures using a common bathroom scale and a drill press and a 6.000" pocket ruler! It is very accurate and it's all you really need to find the numbers!
__________________
http://www.stromberg-bulletin.com/me...berg-equipped/ |
|
|
|
|
|
01-20-2018, 02:13 PM
|
#181 |
|
Senior Member
Join Date: May 2010
Location: Oshkosh, Wi
Posts: 4,524
|
I don't think the length difference will cause a problem. They also make stem locks that will reduce the spring length .060 and thus requiring less shim.
|
|
|
|
|
01-20-2018, 02:13 PM
|
#182 |
|
Senior Member
Join Date: Sep 2010
Location: South Coast NSW Australia
Posts: 2,596
|
cancel.
Last edited by pooch; 01-21-2018 at 12:08 AM. |
|
|
|
| Sponsored Links (Register now to hide all advertisements) |
|
|
|
01-20-2018, 02:34 PM
|
#183 |
|
Senior Member
Join Date: May 2010
Posts: 201
|
I appreciate the try pooch!
|
|
|
|
|
01-20-2018, 02:35 PM
|
#184 |
|
Senior Member
Join Date: May 2010
Posts: 201
|
Thanks Gary!
|
|
|
|
|
01-20-2018, 03:54 PM
|
#185 |
|
Senior Member
Join Date: May 2010
Posts: 201
|
I have measured the length of the springs themselves uninstalled from the guides and the list of measurements is in the first picture. Don't know if this is good or bad, just here it is. I also installed #1 intake valve and guide back in the block and installed the retainer clip. I pressed the guide up to hold the clip in place and then took a measurement using my dividers as best I could. I got a measurement of 1.675 when I measured the tips of the dividers using my verniers. Is this the correct way to get the installed height?
|
|
|
|
|
01-20-2018, 04:16 PM
|
#186 |
|
Senior Member

Join Date: Sep 2010
Location: warner robins ga 31088
Posts: 494
|
Sponsored Links (Register now to hide all advertisements)
|
|
|
|
|
01-20-2018, 04:24 PM
|
#187 |
|
Senior Member
Join Date: May 2010
Location: Canada Where it snows
Posts: 2,058
|
In your pictures it appears that the valve stems have 2 grooves and not 1 groove. The valve locks are installed in the groove closest to the valve tip and not in the second groove. The 2nd groove is used for a stock Chevy stem seal (square o ring) and not for a valve keeper. Ignore the second groove and use only the others for your keepers. Installing them this way the installed height will be greater. Hope this makes your measuring easier and correct.
R |
|
|
|
|
01-20-2018, 05:30 PM
|
#188 | |
|
Member Emeritus
Join Date: Nov 2012
Location: Wichita KS
Posts: 16,132
|
Quote:
If you were building an all out performance engine I would check each spring assemble, but for a street engine the one set of measurements should be ok and just set all of them to that value. Last edited by JSeery; 01-20-2018 at 05:47 PM. |
|
|
|
|
|
01-20-2018, 05:43 PM
|
#189 | |
|
Member Emeritus
Join Date: Nov 2012
Location: Wichita KS
Posts: 16,132
|
Quote:
|
|
|
|
|
|
01-20-2018, 06:11 PM
|
#190 |
|
Senior Member
Join Date: May 2010
Location: Oshkosh, Wi
Posts: 4,524
|
As Ronnie said, you should be using the bottom groove. I'm thinking the spring might bind at the top of the lift if you use that groove. This is another thing you need to check. If your spring is installed at 1.675, you need to subtract the lift at the cam from that number and check the spring to make sure it doesn't bind. If the lift is .300, you need to check it at 1.375. Also check the pressure at that height.
|
|
|
|
|
01-20-2018, 06:25 PM
|
#191 |
|
Member Emeritus
Join Date: Nov 2012
Location: Wichita KS
Posts: 16,132
|
Sorry I glossed over the valve groove issue Ronnie and flatjack pointed out! The shop was most likely using this to get around the shim requirement. You need to recheck the valve assembly with the retainer in the proper valve stem groove. And it will almost certainty require shims. I believe that the second groove will not hold the retainer properly and can throw the retainer in use. It's kinda a big deal.
|
|
|
|
|
01-20-2018, 06:36 PM
|
#192 |
|
Senior Member
Join Date: May 2010
Posts: 201
|
Ok! A little back yard engineering and we have a super duper high performance spring tester courtesy of some of the ideas you boys have shown here. Picked up an el cheapo $12 scale from Wally world. Grabbed an old scrap valve I had laying around. Cleaned it up and chucked it up in the drill. Threw the scale on the drill table. Leveled it. Placed a piece of scrap steel on it for protection. Set the needle to zero. Set the handle to stop at 1.675" and then tested all the springs. Here are a few pictures along with the results.
I wondered about the 2 grooves on the valve. Interestingly enough the valve spring locks have the width on the keeper to fit the second groove perfectly. The top groove is somewhat larger so they will probably fit on there as well. Oh, just for grins because there was some concern for these being progressive wound springs installed incorrectly I tested them from both sides and the posted numbers were the same in either direction. Last edited by GordonC; 01-20-2018 at 06:42 PM. |
|
|
|
|
01-20-2018, 06:58 PM
|
#193 |
|
Senior Member
Join Date: May 2010
Posts: 201
|
It just dawned on me that my installed spring height was done with the keeper in the second groove on the valve, not the lowest groove as has been pointed out. Should I just remeasure all of the valves installed height in each cylinder and do it with the lock in the correct groove? Or just redo #1 with the lock in the correct grove and then recheck the valve spring pressures?
|
|
|
|
|
01-20-2018, 07:43 PM
|
#194 |
|
Senior Member

Join Date: May 2010
Location: NorCal
Posts: 2,617
|
As shown, Gordon, use a scale & a drill press to get a pressure reading & measurement.
Easy & cheap |
|
|
|
|
01-20-2018, 07:49 PM
|
#195 |
|
Senior Member
Join Date: Jul 2016
Location: Lake worth Florida
Posts: 1,087
|
Make sure NOT to use the Chevy oil o ring groove with a retainer ! It will not secure your spring for long .
|
|
|
|
|
01-20-2018, 08:26 PM
|
#196 |
|
Senior Member
Join Date: May 2010
Location: Long Island, NY
Posts: 1,052
|
Hi Gordon, you're going to wind up needing some "special" valve guides (bronze) with our "adjustable" spring seat registers.
They are an "exclusive" here with us and solve ANY desired spring hgt setting. You can "stack" as many as 6 (.060") shims under the springs if necessary! The main reason we tell all our own customers to avoid "at any cost" using Chevy valves in these Flatties is due to the issues you are experiencing! If you need longer valves simply use some lash caps with the OEM length Flathead valves! This maintains the required correct spring hgts! Thanks, Gary in N.Y. P.S. I'll say this one last time, if you end up using those "progressive-wound" springs get them installed the correct way?? Here's a shot of our "adjustable-spring-seat-registers", custom made here in-house!
__________________
http://www.stromberg-bulletin.com/me...berg-equipped/ |
|
|
|
|
01-20-2018, 09:54 PM
|
#197 |
|
Senior Member
Join Date: May 2010
Posts: 201
|
Gary I fully intend to install the springs the correct way. It was the whole reason I got into pulling everything out after you mentioned it. I never said otherwise? Happy to consider the bronze guides and the spring seat registers. If you would like we can take that discussion offline via email. My email address is [email protected] (underscore between first and last name)
I have sunk a lot of money into this motor and before I keep spending good money after bad I would prefer to use what I have, if practical. Many of the books we use for reference on flatheads note using the 1.5 inch chevy valves and that is why I have what I have. I understand your position on them, but they are what I have currently. |
|
|
|
|
01-20-2018, 11:18 PM
|
#198 |
|
Senior Member
Join Date: Jan 2011
Location: sw minnesota
Posts: 4,566
|
it sure is easy to sink money into ol flatheads! , but they sure are cool
|
|
|
|
|
01-21-2018, 10:57 AM
|
#199 |
|
Senior Member
Join Date: May 2010
Location: Chester Vt
Posts: 8,854
|
I wonder just what cam your using? The chevy valve is longer than the ord valve and is used oNLY when installing a hi lift cam. You also would have to remove some material from the top of the guide to get at the adjusting nut on the lifter.
Now back to the chevy valve with the two groves. How many of you have used the upper grouve and had a problem, or dod somebody just say it doesn't work. I've used the upper grouve a number of times, and so fare their still running. Just "Fake news". Yes an old scale and a stop in a drillpress will check all the springs in a hurry. I can see why is easier and cheaper to install a SBC here, with all this miss information |
|
|
|
|
01-21-2018, 11:05 AM
|
#200 |
|
Senior Member
Join Date: May 2010
Location: Oshkosh, Wi
Posts: 4,524
|
Ol Ron, have you installed springs in the second groove with the shorter style springs? I don't see how that would work. Your probably going to have pretty high spring pressures and possibly coil bind.
PS: see next post. Last edited by flatjack9; 01-21-2018 at 11:55 AM. |
|
|
|
|
01-21-2018, 11:54 AM
|
#201 |
|
Senior Member
Join Date: May 2010
Location: Oshkosh, Wi
Posts: 4,524
|
I checked a stock spring at recommended installed height and compressed .030 (cam lift) witht the following results: 39lb at 1.89" and 80lb at 1.59". Then 60lb at 1.675 and 110 lb at 1.375. (no coil bind). More pressure than needed for a stock cam.
|
|
|
|
|
01-21-2018, 12:16 PM
|
#202 | |
|
Member Emeritus
Join Date: Nov 2012
Location: Wichita KS
Posts: 16,132
|
Quote:
|
|
|
|
|
| Sponsored Links (Register now to hide all advertisements) |
|
|
|
01-21-2018, 12:23 PM
|
#203 |
|
Senior Member
Join Date: May 2010
Location: Oshkosh, Wi
Posts: 4,524
|
I was referring to the 60 lb at 1.675 where he originally had the spring set. I thought that was pretty clear, but I guess not.
|
|
|
|
|
01-21-2018, 12:25 PM
|
#204 |
|
Member Emeritus
Join Date: Nov 2012
Location: Wichita KS
Posts: 16,132
|
Wasn't clear to me, LOL. Thanks for the clarification. What was the free height of the spring you were checking?
|
|
|
|
|
01-21-2018, 12:31 PM
|
#205 |
|
Senior Member
Join Date: May 2010
Location: Oshkosh, Wi
Posts: 4,524
|
2.17
|
|
|
|
|
01-21-2018, 02:01 PM
|
#206 |
|
Senior Member
Join Date: May 2010
Posts: 201
|
Sponsored Links (Register now to hide all advertisements)
.355 lift 260-F 260- Duration [email protected]" 112 Lobe Center Valve Lash Intake - .010 Exhaust - .012 |
|
|
|
|
01-22-2018, 11:24 AM
|
#207 |
|
Senior Member
Join Date: May 2010
Location: NorCal
Posts: 2,617
|
Gordon, I think that cam will be just great: reasonable lift & duration. Good job
Jim |
|
|
|
|
01-22-2018, 08:24 PM
|
#208 |
|
Senior Member
Join Date: Jan 2011
Location: Central Ohio
Posts: 5,057
|
That cam should be great for this engine. What spring pressure did you end up with - on the seat? Depending on how high you are planning on revving the thing, I'd go somewhere around 60 lbs on the seat.
|
|
|
|
|
01-22-2018, 09:13 PM
|
#209 |
|
Senior Member
Join Date: May 2010
Posts: 201
|
Kahuna thanks! Hot damn I have a part that I don't need to think about replacing!
Bored&Stroked. I haven't gotten to the end of my valve spring fiasco yet. I had published the list of numbers I got when I used the second groove on the chevy valve for the valve keeper and then checked the installed height. (See post 192 on previous page.) I was told by a lot of folks I had to use the first groove on the valve?? So I remeasured the installed height using the first groove for the keeper and it went from 1.675" with about 60 lbs to 1.905" and about 25 lbs. So I just went and dug around in my stash and found some other longer springs. I am going to go through the same exercise again with the longer springs when I get back into the shop. I'm also awaiting spring retainers and guides from Gary in NY. I have a feeling I am going to have to shim some either way I go. This is going to be just a nice street motor. Not ever going to be on a track or anything close to it? |
|
|
|
|
01-23-2018, 08:56 PM
|
#210 |
|
Senior Member
Join Date: May 2010
Posts: 201
|
So today while awaiting valve parts to show up I decided to get brave and drill the lifter bores to accommodate using something other than the Johnson style lifter adjustment tools. Happened to have an extra long drill type chuck and a 1/8" drill that just happens to fit it. Piece of cake really compared to some of the other crap I have been going through on this motor. Seeing as I have the pan off and could get at the lower end to make sure there are no random chips or debris where there shouldn't be I figured why not do it. Another of the things the builder was supposed to take care of that he didn't do. Still need to run some emery cloth down the bores to make sure there are no burrs. A couple pics.
|
|
|
|
|
01-24-2018, 01:00 AM
|
#211 |
|
Senior Member
Join Date: Sep 2010
Location: South Coast NSW Australia
Posts: 2,596
|
I recall that consensus here is to drill 3/16ths.
The johnsons are fairly stiff to crack and turn. I feel more secure with a 3/16ths hole and the biggest allen key that will fit in. I think an allen key that would fit thru a 1/8th hole would cause a bit of sweating at maybe breaking off. Although , it is your call. |
|
|
|
|
01-24-2018, 09:12 AM
|
#212 |
|
Senior Member
Join Date: May 2010
Posts: 201
|
pooch I only had a 1/8" drill for that chuck so thats what they got. I'll see if I can round up a 3/16". The end of a 1/8" straight punch fits nicely in it but I wondered what would happen should you break the tip? You'd probably have to pull that valve assembly and get the lifter out and remove any broken part of the punch. So going to 3/16" won't hurt my feelings at all! Thanks.
|
|
|
|
|
01-24-2018, 10:08 AM
|
#213 |
|
Senior Member
Join Date: May 2010
Location: Oshkosh, Wi
Posts: 4,524
|
Never had a problem with 1/8" holes in 20 years.
|
|
|
|
|
01-27-2018, 11:50 PM
|
#214 |
|
Senior Member
Join Date: May 2010
Posts: 201
|
Ok guys. Here is a small update as I am still trying to figure out what I will do about my valves. Everything looks pretty good on the lower end and the cam and crank are now in time so I am going to button up the lower end this week. Any tips on reinstalling the oil pan and timing cover so I don't have leaks are welcome!
A follow up on the crank gear timing thing. Where I guessed at and marked a timing mark on what was the back of the gear, when turned around it was as best as I can tell 1 tooth out of position from the actual timing mark on the other side. Not sure how it would run doing it by guessing the location from the crank keyway but I think it might have been close enough to fire. Now to measure up all the valves, springs, keepers, and other associated hardware to see if I can put together a set that will do the job I need. Last edited by GordonC; 01-28-2018 at 12:25 AM. |
|
|
|
|
01-28-2018, 07:31 AM
|
#215 |
|
Senior Member
Join Date: May 2010
Location: Mid coast Maine
Posts: 1,878
|
On post 132 left pic keyway goes on left. There is no guessing do what pic says.
|
|
|
|
|
01-28-2018, 10:20 AM
|
#216 |
|
Senior Member
Join Date: May 2010
Posts: 201
|
Post 159 picture 1 and 2. Already been done George.
|
|
|
|
|
01-28-2018, 11:40 AM
|
#217 |
|
Senior Member
Join Date: May 2010
Location: Chester Vt
Posts: 8,854
|
Schneider makes a good cam, this one is similar to the Isky Max #1. If you've read JWL's book you'll see that will reduce the torque output if the engine at low RPM's. Increasing the displacement and compression will increase torque through the RPM range.I don't think #60 of valve spring is necessary, but it probably won't do any harm. A street engine spends 90% of it's life under 3000 rpm. I used #50/55 lbs on the seat and used the second grove in the Chevy valve many times with no problem. Most of the time a stock spring wit a .060' shim is all that's needed. Now with all this said, you can spend more money on improving this, but I don't think it's necessary. What hasn't been addressed is the guides? Have they been knurlled? the reason for this is the fact that a loos valve stem to guid clearance is where oil is sucked into the cylinder under hi Vacuum. Knurling prevents this, It also lubricates the valve stem. This is a better place to spend you money. Also piston to cylinder head clearance. Mill head for .045/.050" clearance. This improves throttle response and economy. probably the best bang for the buck. I don't like to spend allot of money on these engines unless it's necessary and most (not all) of my engines are still running. I was just informed that Dons Engine has passed the 40 K mark and Ron Horrell's 296 50K Just lov these flat motors.
|
|
|
|
|
01-28-2018, 12:40 PM
|
#218 |
|
Senior Member
Join Date: May 2010
Posts: 201
|
Ron thanks for the additional info. My engine is bored out to 3 5/16" and it has the 4" crank and the Schneider cam and adjustable lifters. All new rings, bearings, cam bearings, and new oil pump. New timing gear, new crank gear. Drilled out for the 95% full flow oil filter I have new Offenhauser aluminum heads as well as a set of Mercury 8CM heads. I have both copper and regular head gaskets. I have a 3 deuce intake with rebuilt 97s for it but for start up I am just going to do the break in with a single 4 bbl carb.
My guides were just standard Speedway guides which I have sent them up to Gary in NY to have them bronze lined. Is this different than having them knurled? |
|
|
|
|
01-28-2018, 12:47 PM
|
#219 |
|
Senior Member
Join Date: May 2010
Location: Chester Vt
Posts: 8,854
|
Bronze lining the guides is better than Knurl ling them, if properly fitted to the valves. If Gary did them, not to worry. I just don't think it worth the money for a Flathead. The 8CM heads have a large combustion chamber, which gives low compression. Check the CC's of the heads for a proper CR ratio. Sounds like a nice build
|
|
|
|
|
01-28-2018, 01:08 PM
|
#220 |
|
Senior Member
Join Date: May 2010
Posts: 201
|
Thanks Ron.
|
|
|
|
|
02-05-2018, 09:10 PM
|
#221 |
|
Senior Member
Join Date: May 2010
Posts: 201
|
Ok guys a small update. I have 3 different sets of valve springs taken from different 8ba's I have had.
Set #1-Length of 2.400" with 1 .060" shim at install height of 1.900" gives 55 lbs. Set #2-Length of 2.200" with 4 .060" shims at install height of 1.900" gives 55 lbs. Set #3-Length of 2.160" with 4 .060" shims at install height of 1.900"gives 50 lbs. I got the installed height of 1.900" using the chevy valve with a normal spring retainer and keeper (not the rotator set up) in the 2nd groove on the valve stem. If Walt feels this grove will work without problem then thats good enough for me. So given the info above I should be able to use set #1 with 1 shim each per valve and get 55 lbs of seat pressure at the installed height. The only problem is 3 or 4 of the springs in this set are bowed or bent. Not sure how that happened but need to know if anyone has some 2.400" extra valve springs I could buy? I need about 4. Also when checking my retainers I found the one in the pics. I am going to need a couple of those as well. So if I can come up with a few good used springs and a couple retainers I should be able to reassemble my setup and get the pressure needed. My guides came back from Gary (look great!) and he was nice enough to throw in some extra shims for me so if I can use the longer springs with just 1 shim I will be able to return the extras to him. Thanks guys! |
|
|
|
|
02-05-2018, 09:26 PM
|
#222 |
|
Senior Member
Join Date: Dec 2013
Location: Minnesota, Florida Keys
Posts: 10,299
|
Gordon,
I've got a lot of this stuff laying around; I'll go up to my shop tomorrow with a caliper and see if I have what you need. If I don't have it, I'm sure someone else does. It looks like you are finally closing in on this. |
|
|
|
| Sponsored Links (Register now to hide all advertisements) |
|
|
|
02-05-2018, 09:37 PM
|
#223 |
|
Senior Member
Join Date: May 2010
Posts: 201
|
Thanks Tubman. I appreciate the help! I think once I have all the valve parts assembled I'll be on the home stretch.
|
|
|
|
|
02-10-2018, 06:53 PM
|
#224 |
|
Senior Member
Join Date: May 2010
Posts: 201
|
Ok Guys here is an update and file this one under "What I just learned!" Decided to start putting things back together today as the lower end and timing issues appear to be dealt with. So got my new gasket set. Rolled the motor over on the engine stand and put the oil pan gasket on. (I had previously pulled all the lifters and marked their location and set them aside so they wouldn't fall out.) Bolted the pan down using some silicon and torqued the bolts to 18 lbs.ft. Rolled her over and started bolting the timing cover on the front. Everything going good. Using anti seize on the stainless bolts. Get to the last one and pick it up and a washer bounces off the end of it and falls into the lifter galley and straight down a lifter bore and into the lower bowels of the engine! Arrrggghhhh!!! I think I heard it hit the oil pan? Finish up the timing cover and remove the clean out plate on the truck pan I have. Look around in there with a flashlight and don't see anything. Try squeezing a magnet in there and rolling it around to see if it picks up anything just in case this was a steel washer, but NOOOO, nothing. So guess what I get the joy of re doing tomorrow! I tell you if I didn't have shitty luck with this engine i would have no luck and right about now i am ready to turn it into a part of a coral reef here off the coast of NC!
I guess the good news is that I have a new set of valve springs on their way here and I should be able to get the valves back together and installed this coming week. |
|
|
|
|
02-10-2018, 08:02 PM
|
#225 |
|
Senior Member

Join Date: May 2010
Posts: 4,743
|
18 Ft Lb on the pan bolts seems excessive. Did you see somewhere that had this torque spec?
|
|
|
|
|
02-10-2018, 08:06 PM
|
#226 | |
|
Senior Member

Join Date: Nov 2010
Location: NM
Posts: 2,438
|
Sponsored Links (Register now to hide all advertisements)
Quote:
__________________
'52 F-1, EAB flathead |
|
|
|
|
|
02-11-2018, 05:55 PM
|
#227 |
|
Senior Member
Join Date: May 2010
Posts: 201
|
Well boys I dodged a bullet! When I removed the clean out on the oil pan last night the washer that I lost down a lifter hole had fallen out and I didn't know it. I had a shop rag on the floor under the engine stand to catch any oil drips from the motor and when I lowered the clean out the washer landed in it nice as you please, only very quietly so I didn't know it had. I sat down this morning and got ready to pull the oil pan. Looked down and there it was!! Wheeeww!! One for the home team!!
|
|
|
|
|
02-11-2018, 05:59 PM
|
#228 |
|
Senior Member
Join Date: May 2010
Location: Solihull, England.
Posts: 8,741
|
Ha hah! That's brilliant!.
Mart. |
|
|
|
|
02-11-2018, 08:43 PM
|
#229 |
|
Senior Member
Join Date: Dec 2010
Location: East Coast in CT
Posts: 1,523
|
When I build any flathead engine the oil pan is always the last part I install. Theres still a number of other parts that at times can and will fall into the lower areas of the engine. Watch as you install the valve assembly's those two little little valve to spring retainer parts can fall out when you least expect it and guess where into the oil pan! Also have seen the pin used to hold the lifter for adjustment fall into the pan due to the open slots in the lifter. At times gravity can cause some extra work so I always leave the pan off.
__________________
I use the F word a lot no not that word these words Flathead , Focus and Finish. "Life Member of the Bonneville 200 MPH Club using a Ford Flathead block" Owner , Builder, Driver of the First Ford Flathead bodied roadster to run 200 MPH Record July 13, 2018 LTA timing association 200.921 in one and a half miles burning gasoline. First ever gas burning Ford flathead powered roadster to run 200 MPH at Bonneville Salt Flats setting the record August 7th 2021 at 205.744 MPH |
|
|
|
|
02-11-2018, 08:48 PM
|
#230 |
|
Senior Member
Join Date: May 2010
Posts: 201
|
I hear you Ronnieroadster! I am going to be extremely careful finishing up the work I need to do up top. Doing the oil pan last is a great idea. I will remember that. I was trying to make some progress while awaiting parts and figured as long as I was waiting... you know how it goes.
|
|
|
|
|
02-11-2018, 09:37 PM
|
#231 | |
|
Senior Member
Join Date: Dec 2010
Location: East Coast in CT
Posts: 1,523
|
Quote:
I hear what your saying I to learned this lesson the hard way LOL
__________________
I use the F word a lot no not that word these words Flathead , Focus and Finish. "Life Member of the Bonneville 200 MPH Club using a Ford Flathead block" Owner , Builder, Driver of the First Ford Flathead bodied roadster to run 200 MPH Record July 13, 2018 LTA timing association 200.921 in one and a half miles burning gasoline. First ever gas burning Ford flathead powered roadster to run 200 MPH at Bonneville Salt Flats setting the record August 7th 2021 at 205.744 MPH |
|
|
|
|
|
02-11-2018, 11:32 PM
|
#232 |
|
Senior Member

Join Date: May 2010
Location: Ft Mohave,Az
Posts: 1,985
|
One of those little cheap magnets is very handy at holding things together
|
|
|
|
|
02-12-2018, 11:08 AM
|
#233 |
|
Senior Member
Join Date: May 2010
Posts: 201
|
Yes they are B-O-B but I think I am just going to make sure all holes are covered or plugged before I do much more.
|
|
|
|
|
02-12-2018, 11:49 AM
|
#234 |
|
Senior Member
Join Date: May 2010
Location: NJ
Posts: 6,177
|
Gordon, since you've got things apart, I would also suggest adding the lock tab ring under the cam bolts. I noticed it was missing in your pictures. It looks like a square with tabs the bend up against the bolts to keep them in place.
|
|
|
|
|
02-12-2018, 12:32 PM
|
#235 |
|
Senior Member
Join Date: May 2010
Posts: 201
|
Thanks Tim already took care of it. In the pics I just wanted to make sure it could only go on the end off the cam 1 way and once I was assured that was the case I put a new lock tab ring under it. Appreciate it!
|
|
|
|
|
02-12-2018, 07:05 PM
|
#236 |
|
Senior Member
Join Date: May 2010
Posts: 201
|
Ok I need the advice of the experts.
My springs came in - thank you Gary! - and I am assembling my valves. The picture I have is of 2 different ways of assembling the chevy valves I have. All springs are new and measure 2.48". I was shooting for an installed valve spring height of 2.125" and with a .060" thick shim I had 65 lbs. pressure. The valve on the left has a 2.150" assembled height which should be good to go except for the discussion on if the rotators should be used or not and the lock is in the first groove on the valve. I also assembled a second one. This time using a conventional retainer and new valve lock but this time I put it on the second groove of the chevy valve just to see the difference. On this valve I got about 2.170" with a .060" shim when assembled in the second groove. This valve may have a little less pressure but would probably be ok as well, if I can get over using the second grove. Last I did this same valve with the normal retainer and new lock installed on the first groove of the chevy valve and got 2.400". So I would somehow need to make up .375 of an inch if I used the top groove on the chevy valve with a standard retainer. SO have at it boys pick your poison and let me know what you think. I have not assembled anything else yet until I hear some opinions here. |
|
|
|
|
02-12-2018, 11:34 PM
|
#237 | |
|
Senior Member
Join Date: Jan 2011
Location: Central Ohio
Posts: 5,057
|
Quote:
|
|
|
|
|
|
02-13-2018, 10:25 AM
|
#238 |
|
Senior Member
Join Date: May 2010
Posts: 201
|
Bored&Stroked all numbers that I have were taken with an assembly in the block minus the spring with the horseshoe clip in place. Just because your questions makes me wonder I am going to check them one more time just to make sure I am working with the correct number on the correct groove with the correct keeper and lock.
|
|
|
|
|
02-13-2018, 12:16 PM
|
#239 |
|
Senior Member
Join Date: Jan 2011
Location: Central Ohio
Posts: 5,057
|
Hey Gordon: What length are your Chevy valves? I'm real curious - just seems you have a LOT more installed spring height than I would expect.
When I used 4.911 stock length Chevy valves, to get to a 1.950 spring height with an Isky 185-G spring, I use a cut-down Crane spring retainer and about a .200 aluminum spacer at the top --- I figure I use about .350 - .400 of total spacer . . . but I'm going all the way down to 1.950 . . . which is .200 less than you. |
|
|
|
|
02-13-2018, 03:20 PM
|
#240 |
|
Senior Member
Join Date: May 2010
Posts: 201
|
Bored&Stoked I am in and out today and won't be able to check this out completely until late this evening or early tomorrow morning but I will get a measurement and post it up. I did a quick check of the installed height in between appointments today but all I did was confuse myself!
|
|
|
|
|
02-14-2018, 01:52 PM
|
#241 |
|
Senior Member
Join Date: May 2010
Posts: 201
|
Bored&Stroked here is what I have. My valves are 4.890" to about 4.905". Not sure if they were ground on the end or not as some of what the builder did I cannot be sure of. These are 2 groove valves with the groove closest to the end of the valve supposedly for the lock and the other for the seal. The above not withstanding I again measured my installed height, and thank you by the way as your question made me recheck all my measurements. Earlier I had confused myself by adding a ford valve installed height (2.125") into what I was doing and that just made things worse as my thinking then became I had to somehow match that measurement using the chevy valve and springs. So this morning I installed a chevy valve with a normal retainer (not rotator) and lock in the second groove of the chevy valve with the horseshoe clip. I got an installed height of 1.950". So with that as my working height I measured a spring at that height and got about 50 lbs. I added a .060" lower spring retainer (Gary's machined ones) to the spring and checked it again and got 58 lbs. So I have assembled my valves using that info and process. I know there are folks who come out on either side of using the second groove and not using it but to be honest the lock seems to fit better in that groove than the other one. Plus some of the folks who say it is ok are guys that have done a serious amount of flatheads. So good enough for them is good enough for me.
I still have 2 issues. First is I still need 1 more normal type retainer if anybody has 1? Happy to pay for it plus shipping. Second is I need to install the seals on the intake guides. Does anybody have any tips on making this easier? |
|
|
|
|
02-14-2018, 04:49 PM
|
#242 |
|
Senior Member
Join Date: Dec 2013
Location: Minnesota, Florida Keys
Posts: 10,299
|
Gordon, do you need the round piece that goes above the two keepers and supports the bottom of the spring? I think they are different for rotating and non-rotating valves. I am almost positive I have some of both kinds. I didn't get to my shop today, but I will tomorrow. I'll lete you know tomorrow afternoon.
|
|
|
|
| Sponsored Links (Register now to hide all advertisements) |
|
|
|
02-14-2018, 05:22 PM
|
#243 |
|
Senior Member
Join Date: May 2010
Location: Canada Where it snows
Posts: 2,058
|
You can choose here
|
|
|
|
|
02-14-2018, 05:48 PM
|
#244 |
|
Senior Member
Join Date: May 2010
Posts: 201
|
Tubman I need the regular retainer/keeper. There is a pic of it in post #221. Its part #6514 in Ronnies picture above. Thanks Ronnie! And thanks Tubman!
|
|
|
|
|
02-14-2018, 06:23 PM
|
#245 |
|
Senior Member
Join Date: Dec 2013
Location: Minnesota, Florida Keys
Posts: 10,299
|
OK. I'll send a couple. I had to ask because there are so many valve types that have been mentioned that my head is swimming.
|
|
|
|
|
02-14-2018, 06:49 PM
|
#246 |
|
Senior Member
Join Date: May 2010
Posts: 201
|
Sponsored Links (Register now to hide all advertisements)
|
|
|
|
|
02-22-2018, 08:07 PM
|
#247 |
|
Senior Member
Join Date: May 2010
Posts: 201
|
Guys I have finally started installing the valves now that I have gotten all the parts needed. Got through most of them pretty well but did damage 2 of the guides and need replacements. Thanks Gary! That was probably more due to my inexperience with the pickle fork than anything else. Had a real difficult time of it until I ground the leading edge of the fork fingers down a bit. Once I did that I could get the fingers through the progressive wound spring and onto the guide for a decent register and that allowed me to pull em down and install the clips. For those that are still tuned in I used chevy 1.5" valves. I used the top regular lock groove on the valve. Normal retainers, not the rotators. I used a 2.480" spring. I had to use 5 .060" shims plus Gary's retainer which is also .060". This gave me the 67 lbs pressure I wanted. I set the lash at .010"/.012" for the intakes and .014"/.016" for the exhaust.
This thread has gotten way longer than I had ever dreamed but was a good exchange. Going forward with the rest of the reassembly, install, and attempted fire up of the motor, I am going to do a separate post for that as it should be pretty straight forward. (Kiss of death right there!) Anyway here are a couple of pics. |
|
|
|
|
02-22-2018, 08:43 PM
|
#248 |
|
Member Emeritus
Join Date: Nov 2012
Location: Wichita KS
Posts: 16,132
|
Making real progress!
|
|
|
|
|
02-22-2018, 09:29 PM
|
#249 |
|
Senior Member
Join Date: Dec 2013
Location: Minnesota, Florida Keys
Posts: 10,299
|
Gordon,
Keep at it! I'm sure the results will be worth it! If nothing else, it will help a lot of other folks here facing the same problems. Denny |
|
|
|
|
02-23-2018, 03:08 AM
|
#250 |
|
Senior Member
Join Date: May 2010
Location: Solihull, England.
Posts: 8,741
|
Glad you are making real progress. I have one of those long bar forks and a much older one from back in the day. The end of the older one has quite a lot of subtle details in the shape of the fork.
Keep up the good work. Mart. |
|
|
|
|
11-16-2020, 01:17 PM
|
#251 |
|
Member
Join Date: Jun 2019
Posts: 38
|
It may be my comprehension problems ,But i do not understand the zip tie way of finding TDC. Put the zip tie in the spark plug hole and rotate engine clockwise until what stops? then turn engine in counter clockwise until it hits what stop? Confused.
|
|
|
|
|
11-16-2020, 01:20 PM
|
#252 |
|
Senior Member
Join Date: May 2010
Location: Oshkosh, Wi
Posts: 4,524
|
The piston
|
|
|
|
|
11-16-2020, 02:36 PM
|
#253 |
|
Member
Join Date: Jun 2019
Posts: 38
|
So you turn engine by hand until the zip tie stops going down. Hold the zip tie in that position and turn motor counter clockwise until it hits the zip tie again? Won't it hit the zip tie immediately?
|
|
|
|
|
11-16-2020, 03:22 PM
|
#254 |
|
Senior Member
Join Date: May 2010
Location: Solihull, England.
Posts: 8,741
|
No. The zip tie stops it getting to the top. You then wind the motor in the other direction until the piston goes all the way down, and back up again and comes to rest against the zip tie.
I did a video on it which might help.. https://youtu.be/dn446jjCVRg This one is similar but better, but only shows solid stop. https://youtu.be/XDlNSuW-47Q Mart. |
|
|
|
|
11-16-2020, 05:08 PM
|
#255 |
|
Senior Member

Join Date: Jun 2010
Location: Marana, AZ
Posts: 1,194
|
Thank you, Mart. I found the first video very helpful!!
|
|
|
|
|
01-15-2021, 07:00 PM
|
#256 |
|
Senior Member

Join Date: May 2010
Location: Upstate SC
Posts: 252
|
Resurrecting a thread like this makes me cringe. But I think I perhaps may be a tooth off.
Going with WaltÂ’s method here my timing mark is approximately an inch past the TDC Mark. My engine has a bad stumble that all the money in the world has not remedied after reassembly. Was a great running motor with no issues. Anyone care to talk me out of pulling the radiator and grille shell off before the morning ? ItÂ’s all half apart now anyways. |
|
|
|
|
«
Previous Thread
|
Next Thread
»
| Thread Tools | |
| Display Modes | |


 Linear Mode

|
|

| Sponsored Links (Register now to hide all advertisements) |
|
|
All times are GMT -5. The time now is 12:02 AM.