|
|||||||


| Sponsored Links (Register now to hide all advertisements) |
|
|
 |

|
Thread Tools | Display Modes |
 11-26-2017, 09:50 PM
|
#1 |
|
Member

Join Date: Sep 2016
Location: Excelsior Springs, MO
Posts: 77
|
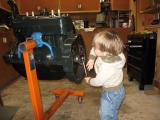
I’ve caught some warm weather the last few weeks - and got my hood painted before winter. I just thought I would post a few pictures of the process.
The Passenger top panel had a crease about 18” long in it. I placed it over the edge of my workbench and gently worked it out. The rest is elbo grease, primer, guide coat, more primer (and a little spot pudy). Hard part is painting each side, then having to wait for the paint or clear to dry before I could flip it and do the other side. |

|

|
|
11-26-2017, 10:00 PM
|
#2 |
|
Member
Join Date: Sep 2016
Location: Excelsior Springs, MO
Posts: 77
|
Part 2
Last picture is my rear window install - took most of today for 22 screws. 
|
|
|
|
| Sponsored Links (Register now to hide all advertisements) |
|
|
|
11-26-2017, 10:03 PM
|
#3 |
|
Senior Member
Join Date: May 2010
Location: Clinton,WA/Whidbey Island
Posts: 4,104
|
Coming along Very Nice,Nice work!
__________________
www.whidbeymodelaclub.com |
|
|
|
|
11-26-2017, 10:08 PM
|
#4 |
|
Member
Join Date: Sep 2016
Location: Excelsior Springs, MO
Posts: 77
|
Shoot, left out a few steps....
|
|
|
|
|
11-26-2017, 10:50 PM
|
#5 |
|
Senior Member

Join Date: May 2010
Location: Between Seattle & Tacoma
Posts: 2,354
|
That’s the way it works. A half he job turning into 2 hours••••or more.
Lookin Good! |
|
|
|
|
11-27-2017, 12:03 AM
|
#6 |
|
BANNED
Join Date: Feb 2015
Location: East Central Iowa
Posts: 1,275
|
Sponsored Links (Register now to hide all advertisements)

__________________
Good enough.. Isn't. |
|
|
|
|
11-27-2017, 10:35 AM
|
#7 |
|
Senior Member

Join Date: Dec 2010
Location: FRESNO, CA
Posts: 12,560
|
You COUNTED the window screws?????--The Dog can only count to 16.
Bill Lostcount
__________________
"THE ASSISTANT GURU OF STUFF" |
|
|
|
|
11-27-2017, 11:23 PM
|
#8 |
|
Member
Join Date: Sep 2016
Location: Excelsior Springs, MO
Posts: 77
|
Yea, I counted them because I managed to loose two of them... How hard is that, they should have been in the cab, right? Then try to find two more that arent Phillips head......
Now Ive discovered that my visor over the windshield has been drilled for tacks in front of the tack strip. More body work to do, after I had a nice coat of paint on it.  
|
|
|
|
|
11-28-2017, 12:42 PM
|
#9 |
|
Member
Join Date: Sep 2016
Location: Excelsior Springs, MO
Posts: 77
|
Sorry - duplicate post
Last edited by Brace Bailey; 11-28-2017 at 08:39 PM. Reason: Duplicate |
|
|
|
|
11-28-2017, 03:00 PM
|
#10 |
|
Senior Member

Join Date: May 2010
Location: new britain,ct 06052
Posts: 9,390
|
Next time hang your panels.....................
Paul in CT |
|
|
|
|
11-28-2017, 07:57 PM
|
#11 | |
|
BANNED
Join Date: Feb 2015
Location: East Central Iowa
Posts: 1,275
|
Quote:
__________________
Good enough.. Isn't. |
|
|
|
|

|
11-28-2017, 08:36 PM
|
#12 |
|
Member
Join Date: Sep 2016
Location: Excelsior Springs, MO
Posts: 77
|
I dont have a very good way to hang the items - and from my experience in painting the Visor - it starts moving, and becomes pretty hard to control. Like Pop says, its easier to paint it flat.
Started to weld up all the holes... after some major grinding to get to clean Metal.... I found that trying to weld the holes created bigger holes. Then the battery in my welding helmet decided it was done doing the darkening/lightning thing, so I was also done with the welding. Have a nice coat primer drying over the bondo now. Got to buy more Vagabond green. Still have to work on my tailgate, so will need it anyway. |
|
|
|
|
11-28-2017, 10:53 PM
|
#13 | |
|
BANNED
Join Date: Feb 2015
Location: East Central Iowa
Posts: 1,275
|
Quote:
But, like most others say, it's yours, so paint it whatever color you want.. Wouln't the extra holes be covered when the top is installed?
__________________
Good enough.. Isn't. |
|
|
|
|
|
«
Previous Thread
|
Next Thread
»
 Linear Mode

|
|

| Sponsored Links (Register now to hide all advertisements) |
|
|
All times are GMT -5. The time now is 05:38 PM.