|
|||||||


| Sponsored Links (Register now to hide all advertisements) |
|
|
 |

|
Thread Tools | Display Modes |
 07-16-2012, 04:01 PM
|
#1 |
|
Senior Member

Join Date: May 2010
Location: Solihull, England.
Posts: 8,744
|
Just spent the last 3 months working on a survivor 33 5W coupe. This post will cover the first month, roughly mid April to Mid May.
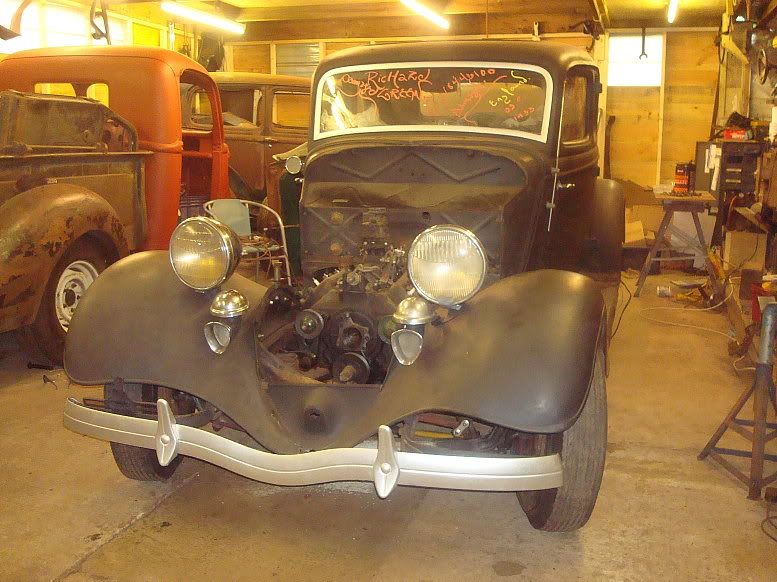
The car had been laid up in a barn in 59. It used to run around Kansas City Missouri in the mid to late 50's. It passed through a few hands recently and was blown over in black primer and the chromework painted silver, but what attracted me to it was that it was almost complete, had some mild mods from back in the day, and best of all it had never been stripped to a bare shell, as so many have. Most of the posts will be pasted in from another forum so will be written as they were happening, rather than in recap form now. I tried to lump a load of posts together, but can't do that as there are too many images. I'll have to keep replying with the next installment. Mart. =============================================== Collection: Got up at 5:15 this morning, on the road at 5:45. Nice easy ride down. In the '58 GMC towing a very nice hired trailer. Bit of traffic, not too bad, got to Chatham at about 9:30. Russ from R and R turned up and we got the coupe pushed outside. 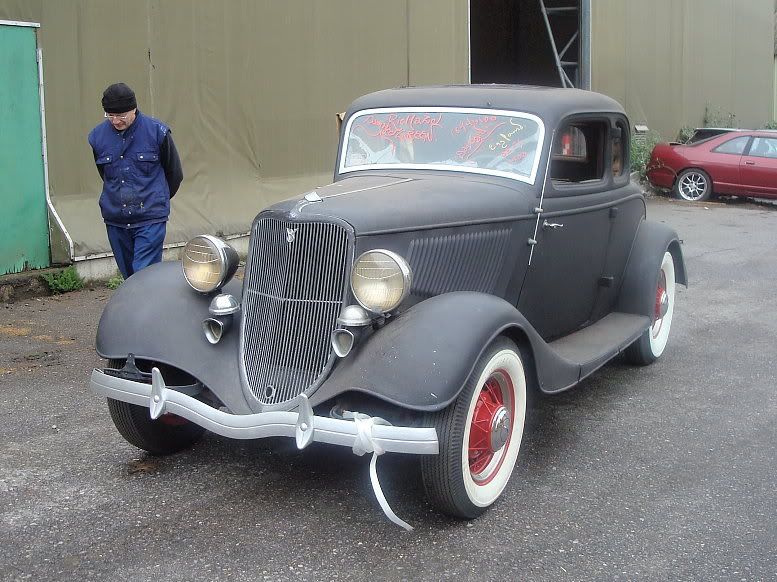 After making a right arse of myself reversing the trailer, I managed to get it loaded up. 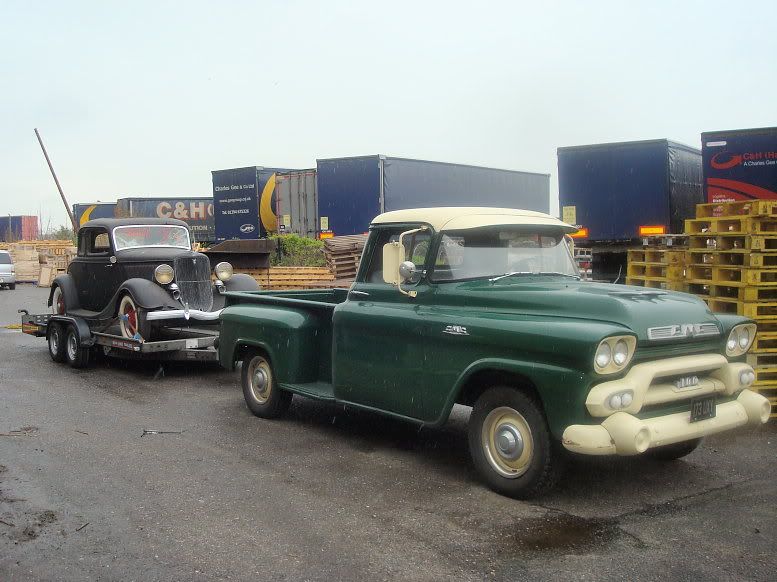 And on the way out took a shot by the cranes: 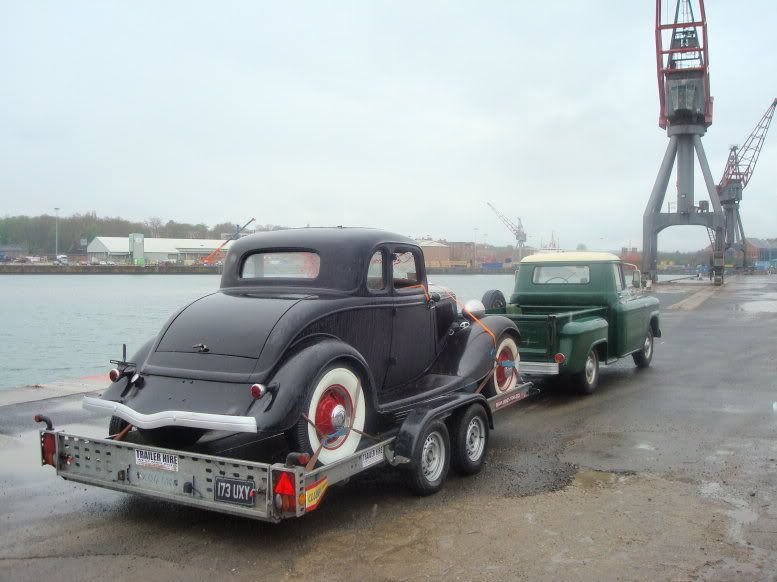 It was raining by now, thje paint is much more matt than it looks in this shot. A couple of the obligatory "tailgater" pics: 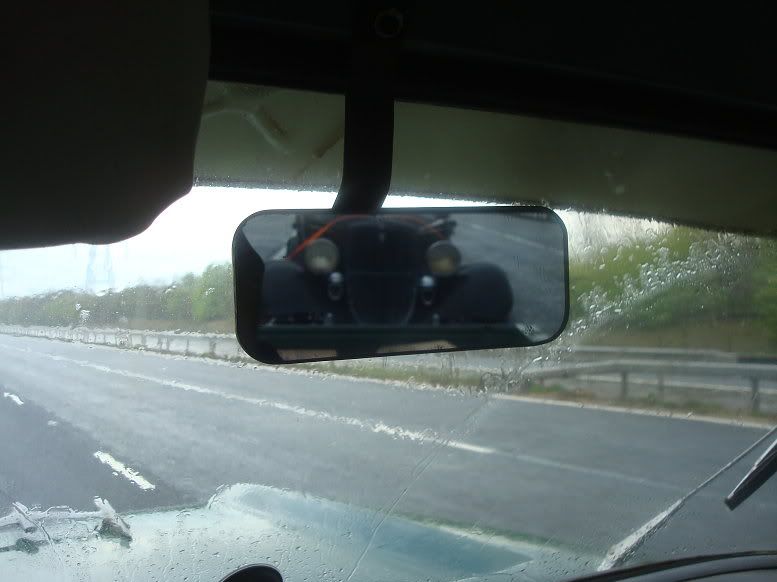 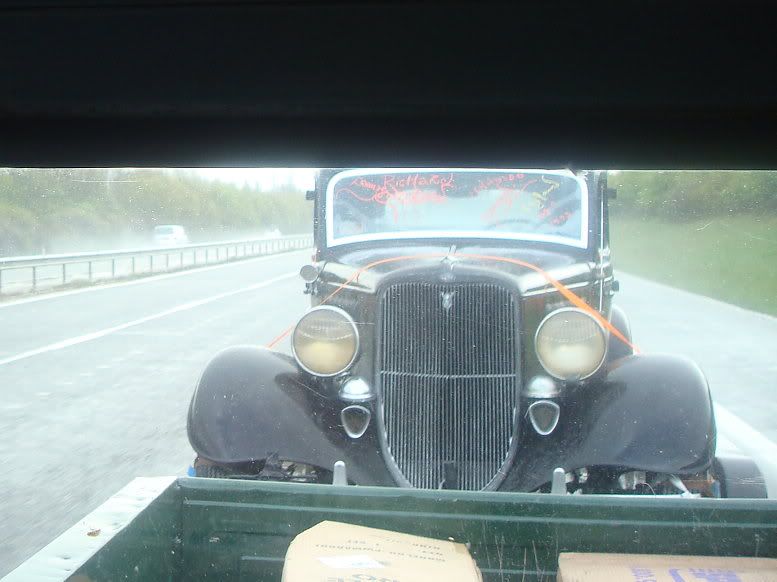 Home by 2:30, and managed to reverse alongside the house. GMC is now known as "The CHAMP". 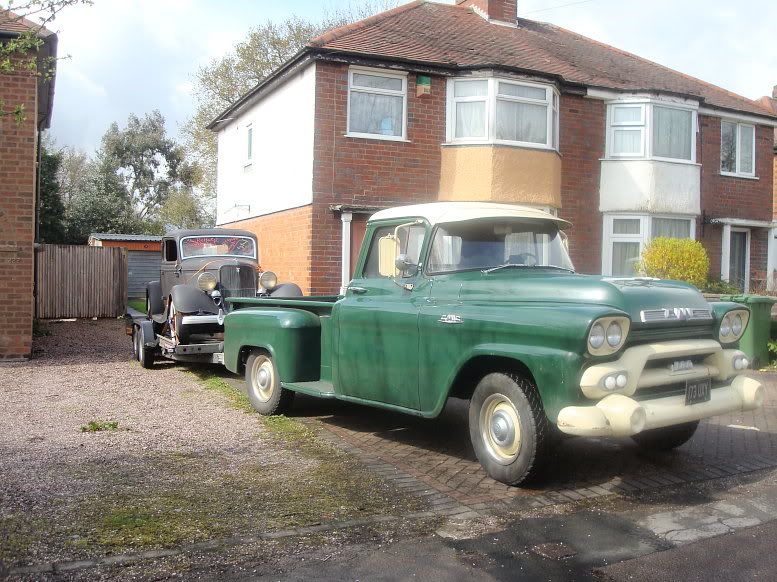 And as luck would have it, a mate just happened to be passing so we were able to offload the 33. (I offloaded it and he helped me push it into the garage). 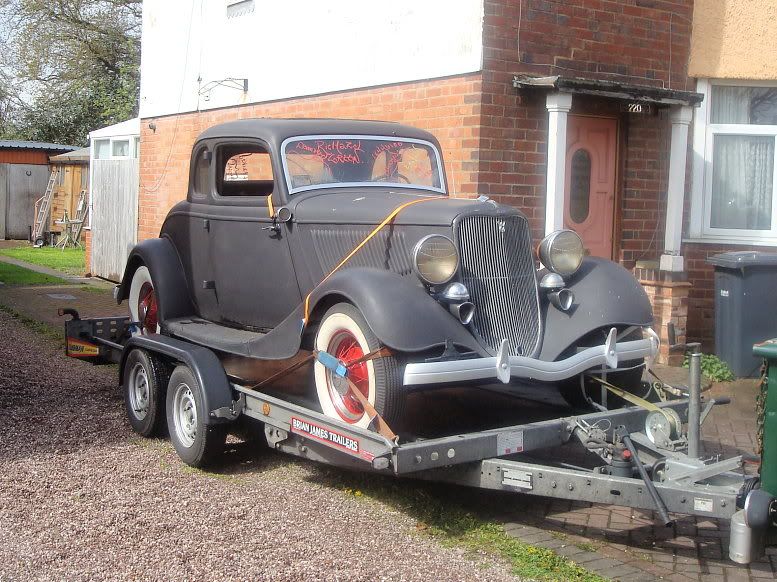 So now it's safely tucked up in my recently tidied garage while I make my mind what to do. I can guarantee though, that much tinkerage will ensue. Will start a proper build thread when appropriate. Mart. |

|

|
|
07-16-2012, 04:02 PM
|
#2 |
|
Senior Member
Join Date: May 2010
Location: Solihull, England.
Posts: 8,744
|
===============================================
4/22/12 Getting started: This thread is to document the work done on my 33. It will show everything - warts and all and will also be a record of the as found condition. I don't have a real clear cut plan, just a few ideas. I just looked and realised it was 3 months since contacting the seller about the coupe, and picking it up. The deal was delayed when the seller changed his mind about selling it, but at least I was first in the queue when he did then re-decide to sell it. I'll take some detail pictures when I start doing something, but the plan of attack is loosely based around: First problem is now lack of space in the garage due to the truck being dismantled. (41 pickup). There were parts in with the coupe that I ordered for the truck, so first I want to use those parts to enable me to get the truck at least loosely assembled so it takes up less space. First firm point of the plan is that the truck will go on the backburner so I can concentrate on the coupe. With the truck put away as much as possible, I will tackle the coupe in a 3 part plan. 1, running 2, driving 3, legally on the road. 1. Running. First off, this will not be a restoration. It will simply be a repair what is necessary job. The whole underside of the car is surface rust. To clean it up would require complete stripdown and that is not going to happen. I will remove the rad and grille, and remove the engine and box. The engine is a rebuild core at best, scrap at worst. I have the running 21stud out of Old Rusty, complete with all ancillaries. So having a running engine will be no problem. I can't bolt it to an unknown box though, so I will inspect the box and either use it with new parts as necessary or replace it with either the one that was in Old Rusty (the one with welded teeth) or fit another one I have. The box has a 1941 serial number, so it is not critical that it stays in the car, but I would like to use it as it has been in there a long time and to me is part of the car. It has an early shift tower so I suspect it has early gears in a later case. So Engine and box out, replacement engine and box in. New engine and trans mounts will go in. The rad can be cleaned out and the tank cleaned out and there is no reason why the engine could not be hot wired to run at this stage. Driving: With a good engine and box fitted, all it needs is a working set of brakes to drive. But some of the shackle bushes are badly worn, and I have bought replacements, so I will pull the axles. Front will get new brake shoes, cylinders and hoses. Wheel bearings will be inspected and reused if possible. New kingpins will go in, new track rod ends and shackle bushes too. Hopefully the drums will be serviceable. A new rubber ball on the wishbone and the front will be good to go. Rear will get new shackle bushes and brakes, including all the handbrake stuff. The car does have a handbrake, so it should be a case of cleaning and reusing what is already there. I won't strip the axle unless something 'orrible comes out with the oil, or it makes nasty noises when turning over. The rear has already had leaves removed from above, and fitted below. I need to remove a leaf or two to get the nuts further onto the u bolts. Steering box will not be touched using the same logic as the axle. Drag link will be replaced as it looks cobbled up. Brake Master cylinder will be replaced with a new unit of the same type. Will use new pipes, re-run in a proper manner. The old pipes seem to have been done well, so may just copy that and add a few clips as necessary. Once all is back in and hooked up with appropriate linkages etc. then it should drive. Legally on the road: Not so much detail here as this will be further down the road (pun intended!). Glass: New windshield and side glass required. Shockers: It has none on the front, so will have to find some or convert to tube shocks. Not out of place as it was mildly rodded years ago. It has some on the back but no arms or links. Chances are they are siezed, so maybe a tubular conversion would be in order. Exhaust: The remnants of an exhaust system are in place but require complete replacement. May fit headers if enough room. Floorboards: A new toeboard is required. Seat: Seat needs bolting down properly. And that should be it.  The car has some rust in the rockers and the quarter panels appear to have some filler but none of this should stop it getting an MOT. And unless I find major chassis rot the body will stay on the chassis. Lights and other wiring: The car will be rewired and lighting set up to legal requirements. So that's the plan. I guess I did have a plan all along, I just needed to get it all down in a logical sequence. It will be nice to do all the fixing up and get it on the road and be able to drive an UNRESTORED mildly rodded 1933 Ford." So lets pick it up from there. Here's the coupe straight after unloading and being pushed back into the garage. 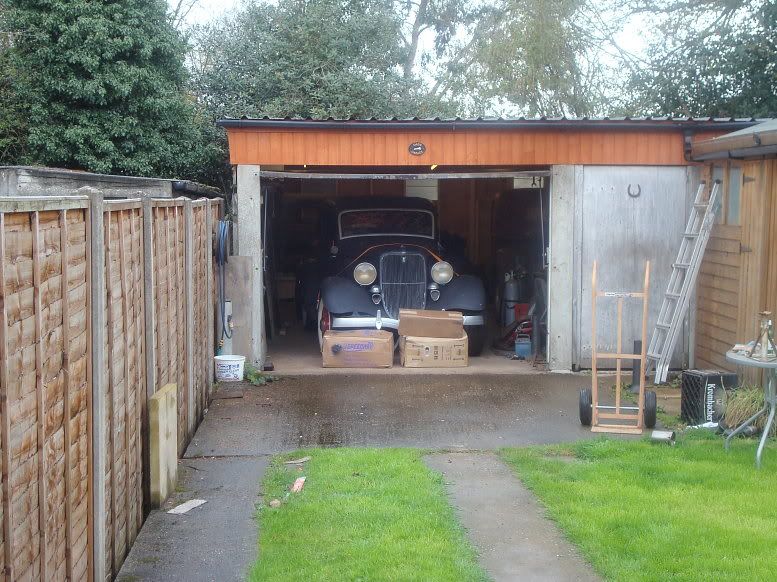 A massive clearup ensued and I roped my kids in to help me push the cars around, and managed to get the coupe properly situated so I could work on it. 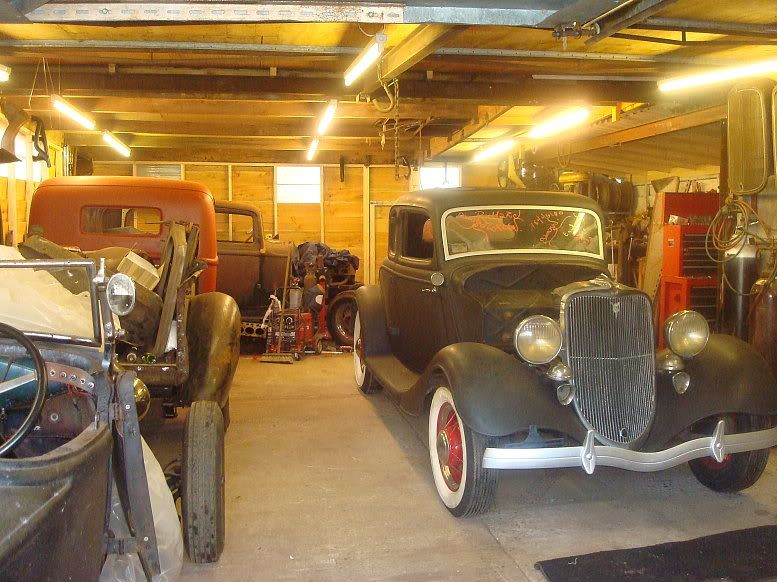 The hood was the first thing to come off. 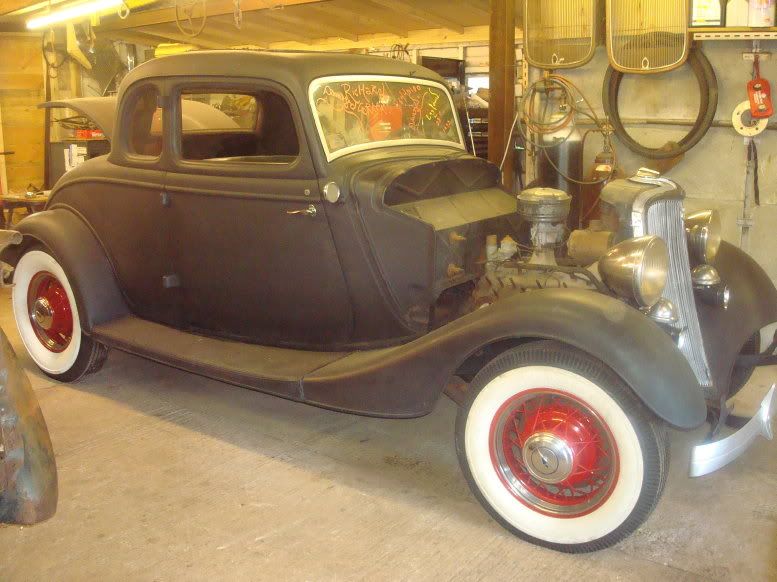 Now, buying a car is a voyage of discovery. Some things are better than hoped for, but most things are worse. But that's the fun of the game. I was told the engine was stuck, but being the optimist I sort of hoped that rocking it in gear might free it up. The heads were only loosely fitted, so it took no time at all to find out my hopes were misfounded. 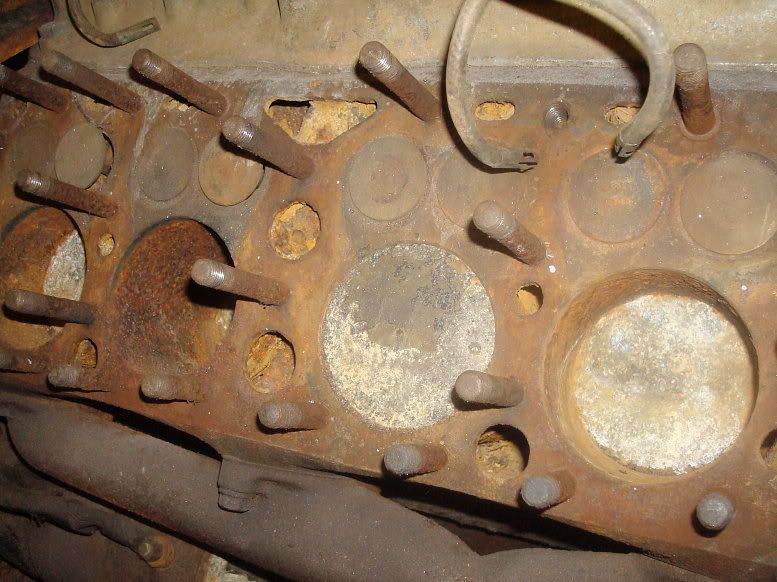 Lots of rust and water damage. But hey ho. Keep looking around and taking stock. Crab dizzy and what I presume is a cut down pulley. 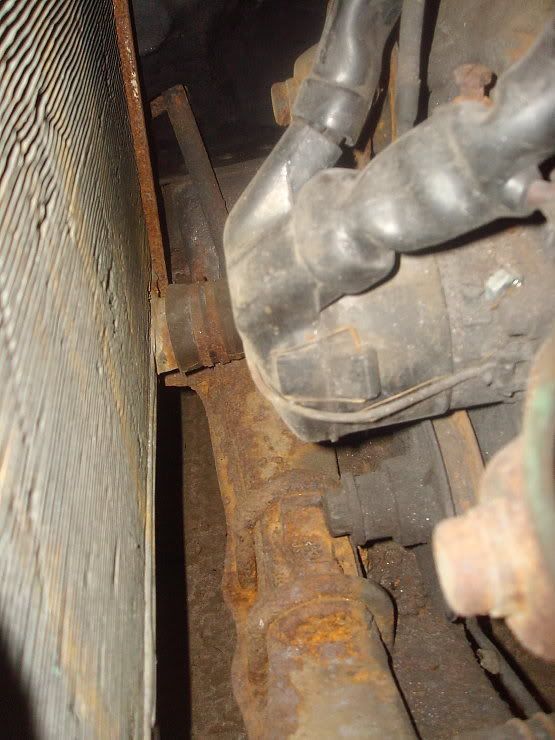 39 pedals fitted to the x-member, stepped off at an angle on spacers. Still not square to the car but it must have worked. 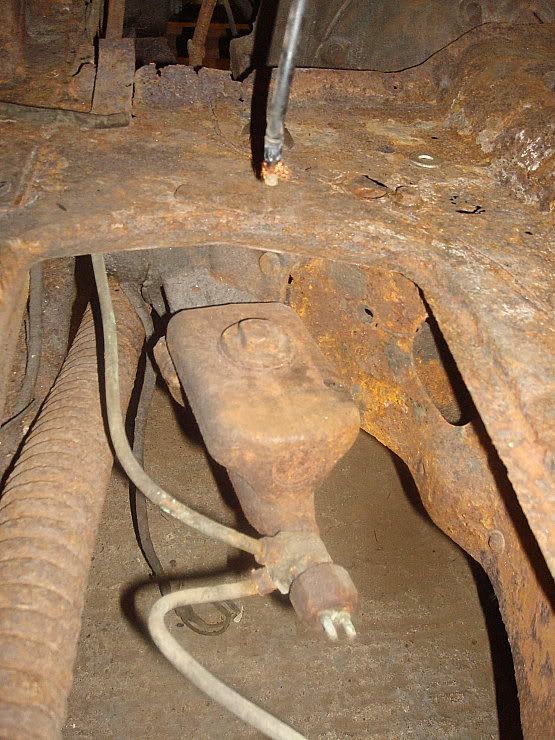 The floor cut a bit to allow the pedal to come up. 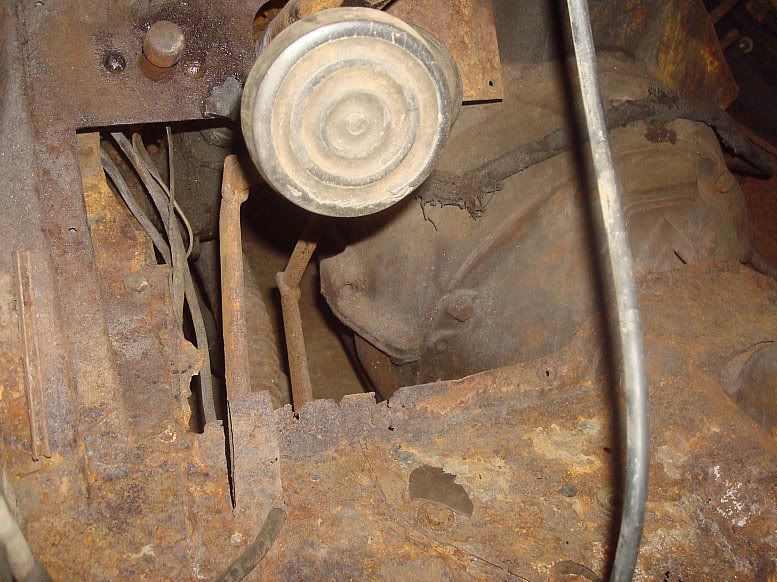 Pedal linkage, while not following btextbook geometry, does still work. 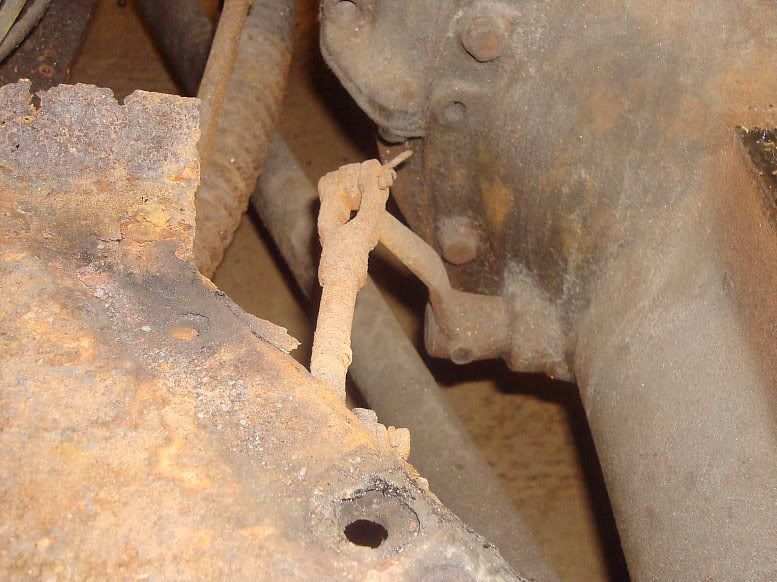 For some wierd reason a couple of relays are screwed to the floor under the seat.  I've seen engine mount spacers used in 33's before but but not a stack of 4 engine mounts per side!  Note the big square headed bolts. Bottom hoses are pretty neat: 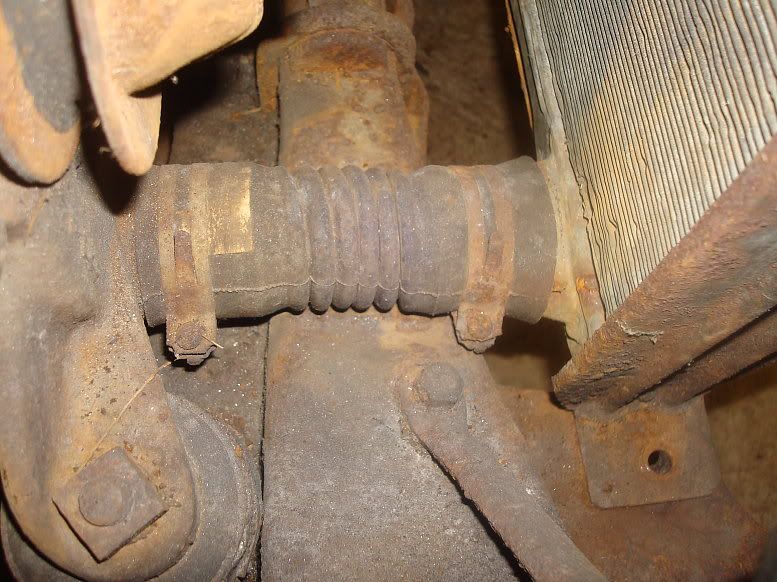 I removed the grille, and removed the two bolts holding the rad. I used the oxy acetalene kit to heat the bolts. They were a bit rusty. I managed to cut through the hose clips on the lower hoses, and got the rad out of there. Positioning of engine looks pretty good.  Removing the dizzy reinforced that the engine has serious issues: 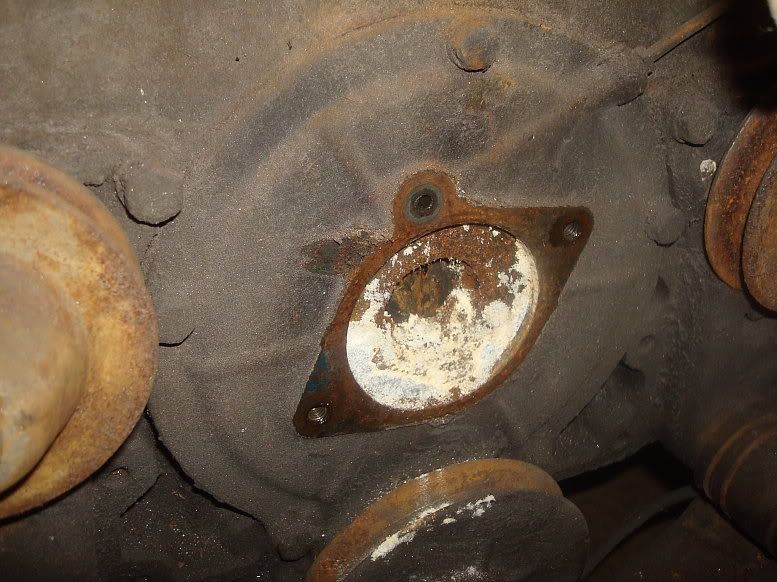 Manifold was stripped then removed. A lot of the bolts were non original and one snapped. 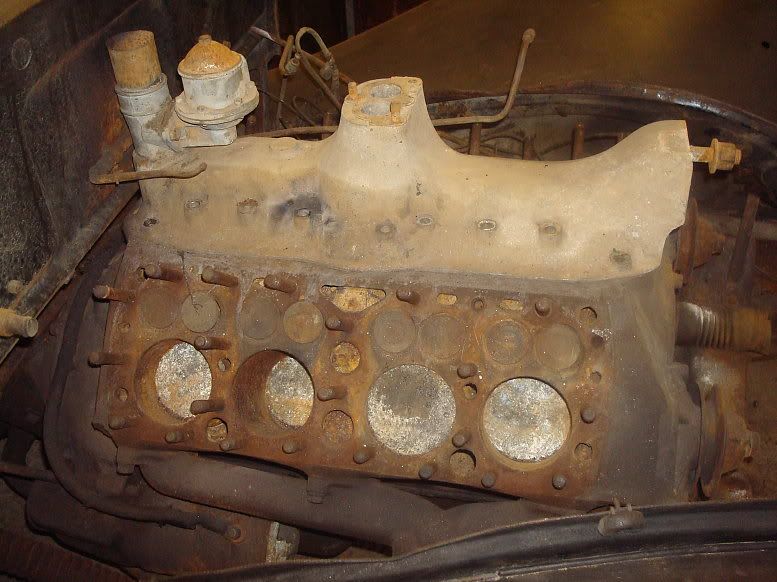 Removing the manifold revealed critter infestation. 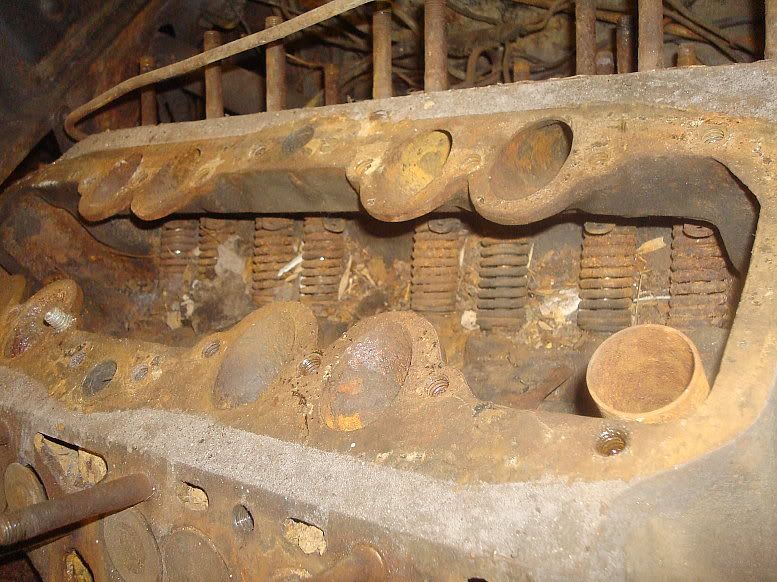 I broke out the oxy again and got the trans cover bolts out, and the cover wiggled off over the levers. 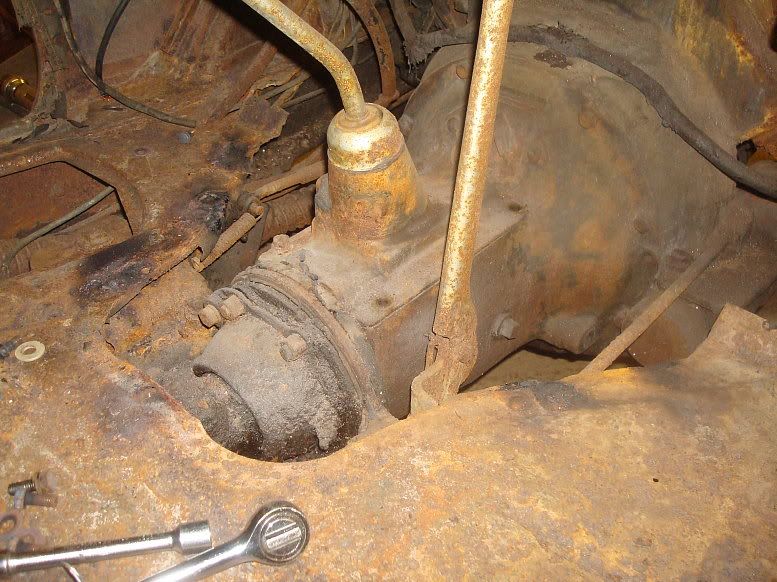 This was necessary to get at all the important bolts.  Couldn't resist pulling the trans top off: Tower looked pretty good: 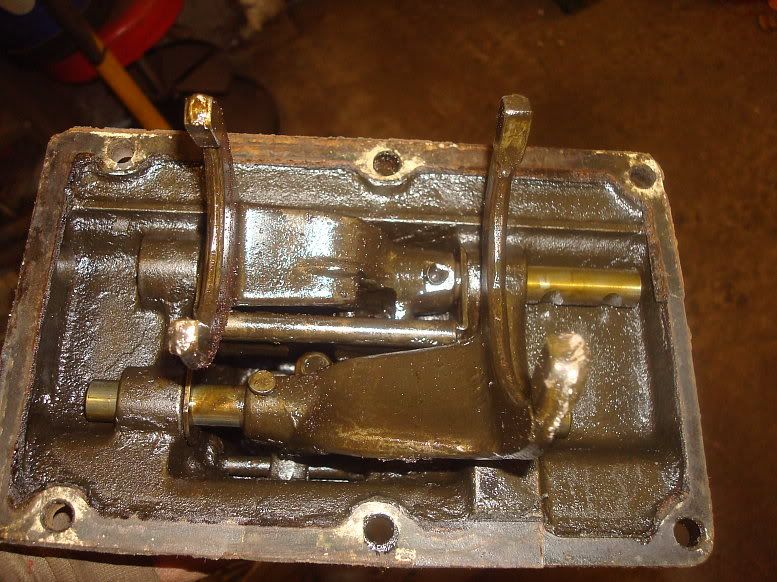 Inside the box some parts looked pretty good, but there was some corrosion and pitting on some of the teeth. 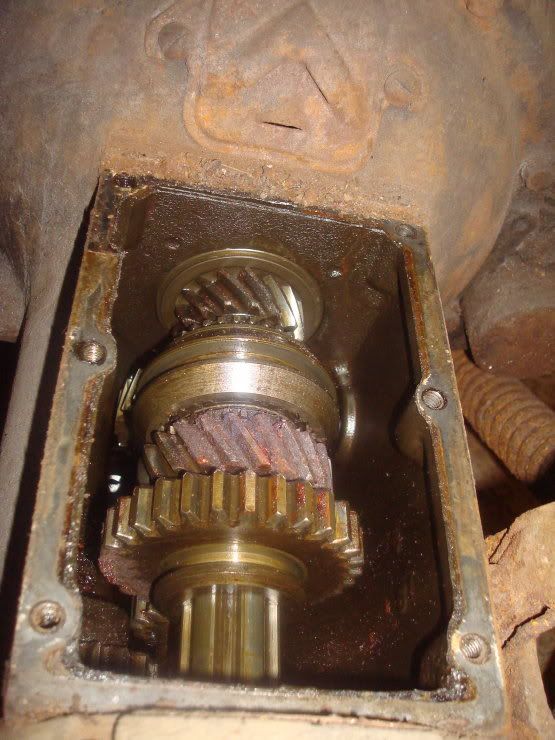 Must admit I've seen far worse though. I put it in a gear, pushed the clutch pedal down, and rocked the car. Amazingly, the input shaft turned, indicating the clutch is not stuck. And that was it for today. Don't get carried away looking at the knackered engine and the rusty bits, the car is pretty sound overall, and I am very very happy with it. Mart |
|
|
|
| Sponsored Links (Register now to hide all advertisements) |
|
|
|
07-16-2012, 04:04 PM
|
#3 |
|
Senior Member
Join Date: May 2010
Location: Solihull, England.
Posts: 8,744
|
4/24/12
Had a good sesh this evening. Last night got the rear of the trans undone, but had to finish early due to family stuff. Tonight I got the engine mounts undone and started to lift the engine out. Rigged up the chains and got the crane in position:  Bit tight at the front but a bit of wiggling got it through the opening 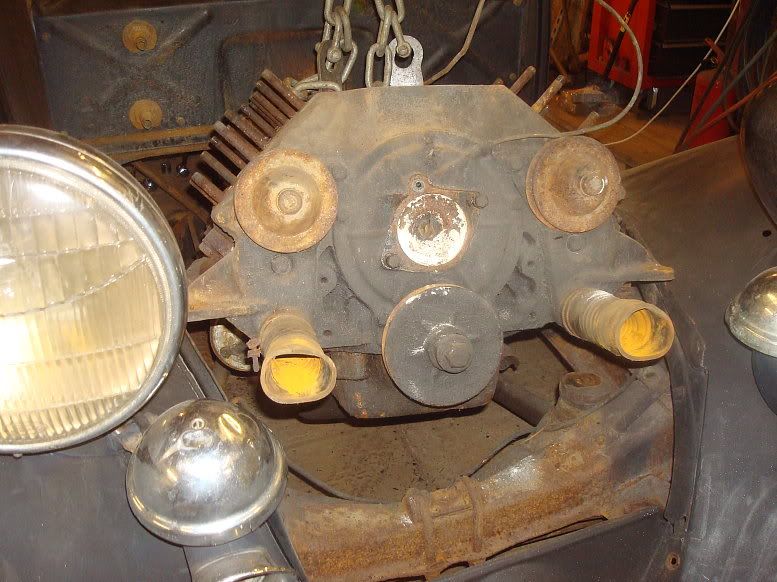 Left side manifold has been modified at the back to give better clearance with the steering box.(might need to get a better pic). 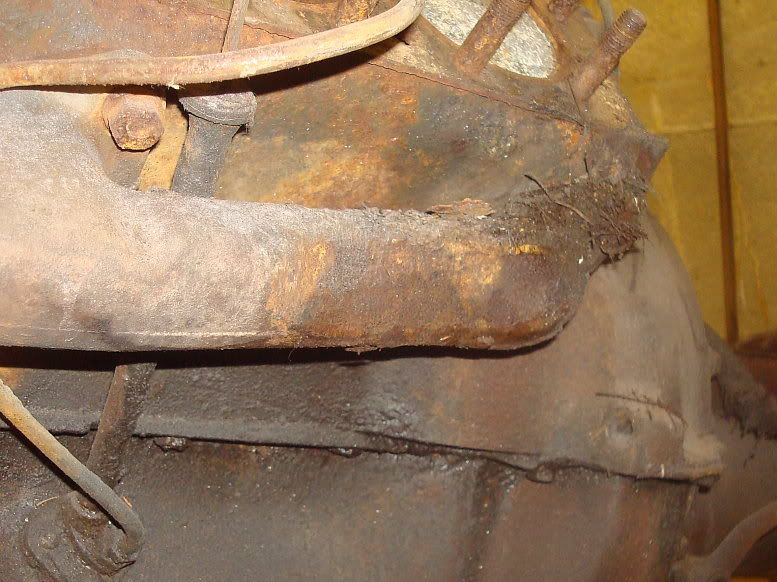 I started to strip off any useful stuff, water pumps, manifolds, clutch etc, and decided to drop the sump. I was curious to look inside. Oh my GOD! What a mess! 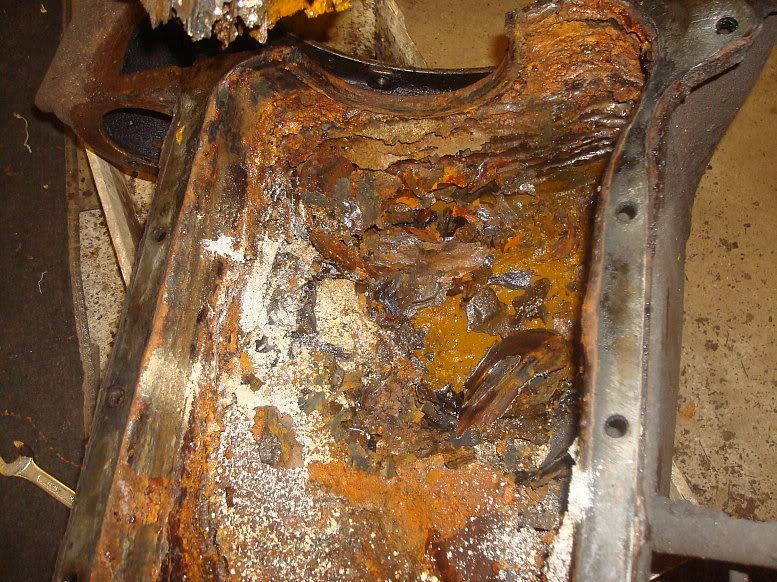 The photo's can't express it! 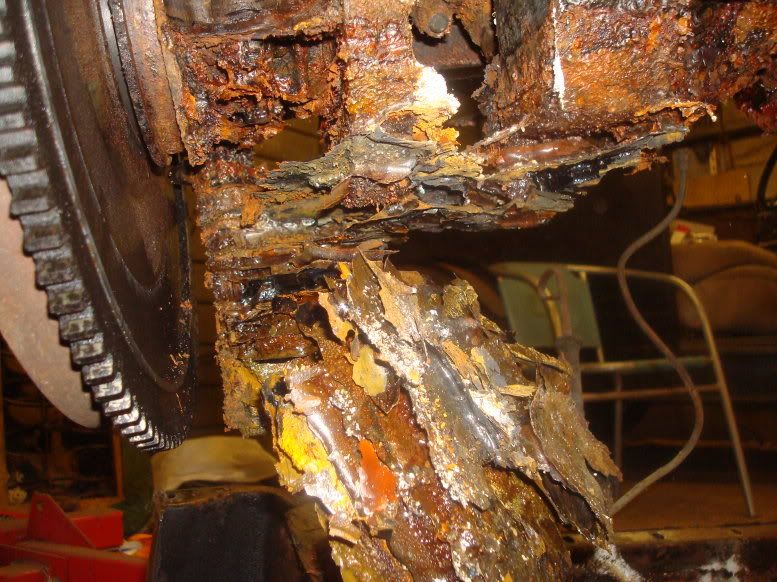 The bit hanging down is the remnant of the filter assembly. Water had got in and had left distinct tide marks, I'm guessing each year. 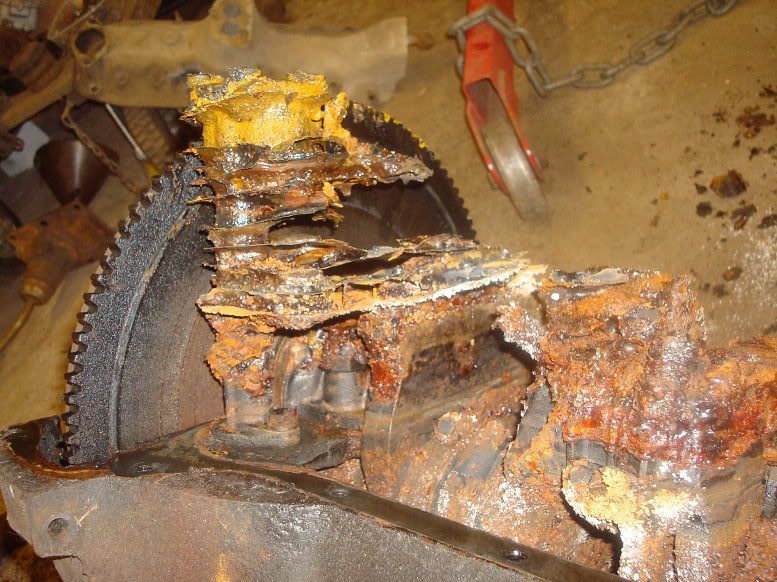 It's just the craziest thing - I've never seen anything like it before. But even the crustiest most fucked up flathead can yield up good useable parts. The water pumps are rebuildable (still turn) and the clutch and flywheel (10") are in excellent shape. 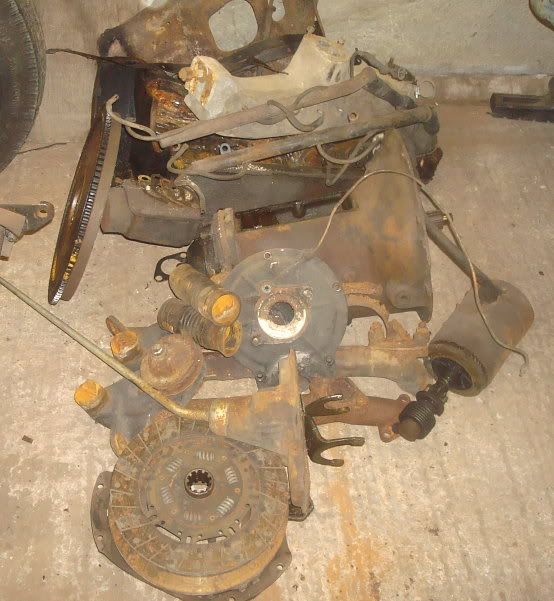 So that was it for the engine. While the engine is out I wanted to go through the front suspension. So up she went on stands: 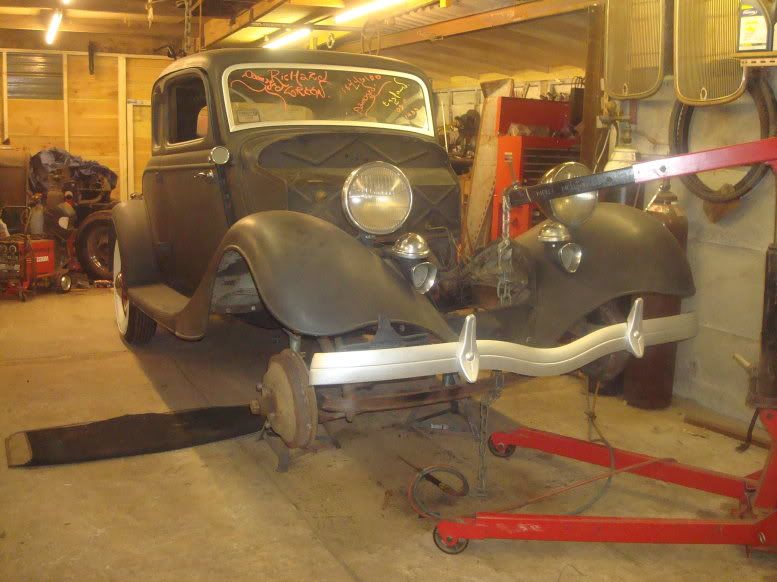 I used the engine hoist to pick the car up, and then lower the axle down. This worked well because I could roll the axle out on the base of the hoist. 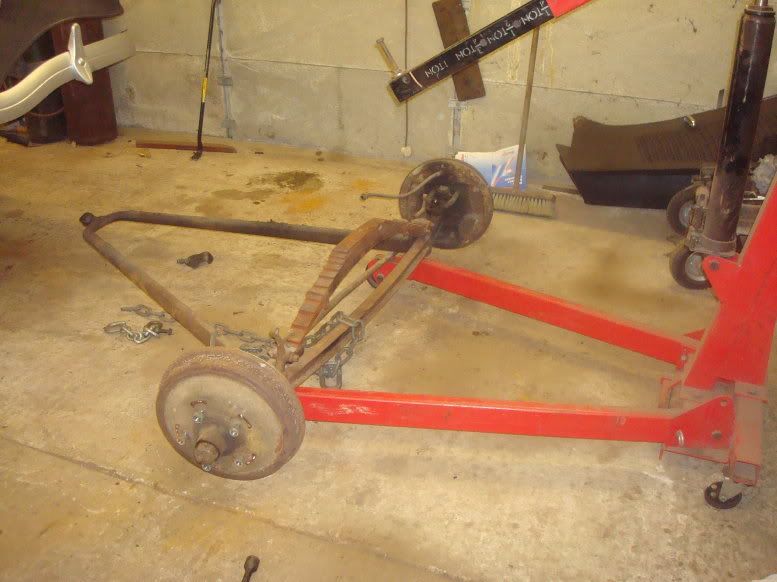 And then a parting shot of the car waiting for the front suspension and replacement engine to go back in. 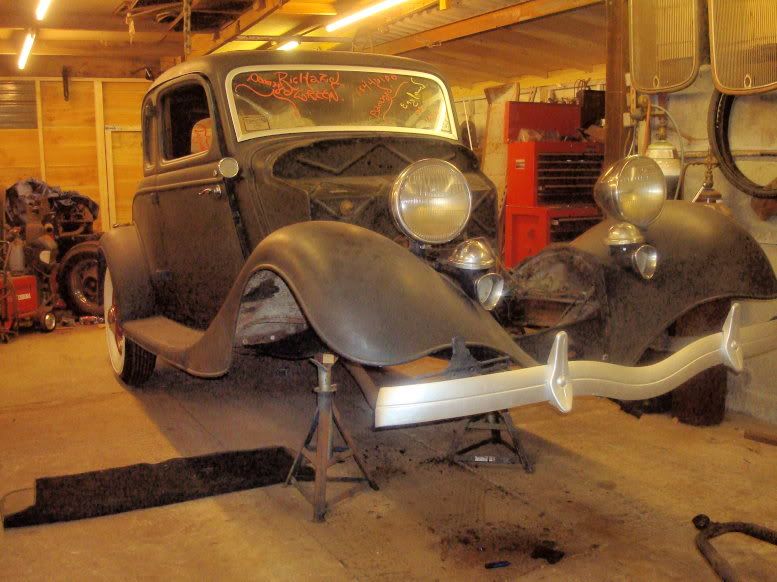 Mart. |
|
|
|
|
07-16-2012, 04:05 PM
|
#4 |
|
Senior Member
Join Date: May 2010
Location: Solihull, England.
Posts: 8,744
|
4/26/12
Pulled the front axle apart last night.All the hubs, brakes and kingpins came off ok. The person that put it together seems to have had an aversion to splitpins. One perch bolt showed signs of fretting, and I got both the nuts off and the fretted one came out easy. It was actually loose and showed a small amount of wear. I have a dropped axle (JD) that I might sling under it, and have a plan to get it all set up using parts I have immediately to hand. I think the front could use a subtle drop (1.5") that will overcome the raising effect of the new bushes I will be fitting, but the other benefit will be a slight decrease in track width bringing the tyres back under the fenders. You have to drop the steering arms down a long way with a 33 wishbone, so I may look at running the track rod above the bones or using two twin hole spindles (one LHD and one RHD) and using the second hole in each, the extra length compensating for the deep drop. Although I didn't intend to do it, I think it will make sense to throw a coat of paint on the parts as they are refurbed and put back on. I need to allocate an area to wirebrushing etc, to try and limit the mess made. Working on the truck absolutely covered everything else in thick brown rust dust, and I want to avoid that if I can. Tonight I looked at the damaged wishbone and set about making it serviceable. I got the tight perch bolt out using a combination of heat and a pneumatic chisel. The chisel did not quite get it started, but I managed to get it to twist and then the chisel managed to push it out. The result of this exercise was that I had: A pair of perches, one slightly worn. 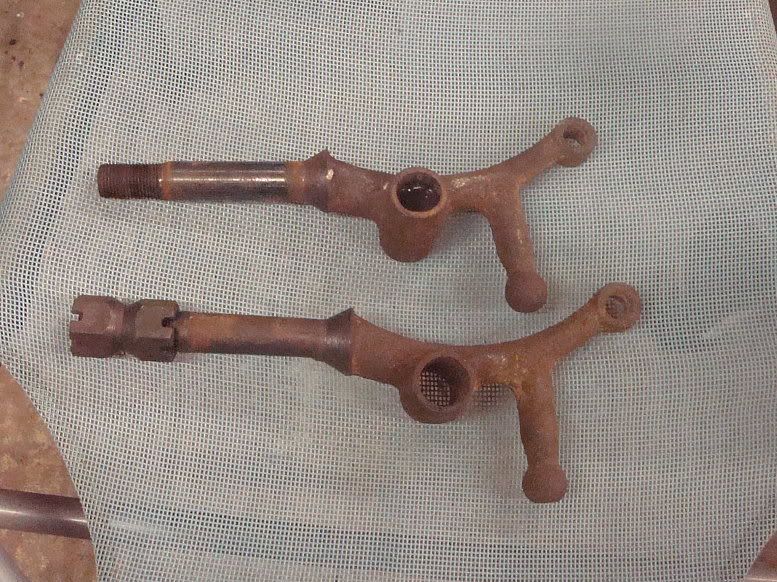 One slightly fucked axle - the hole is oval. (Note dropped axle next to it - I'm going to use that) 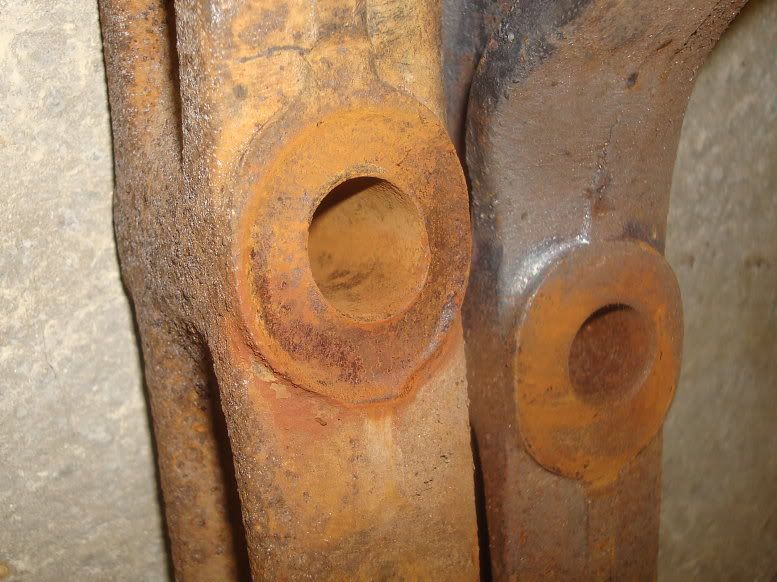 And a wishbone with a worn end. 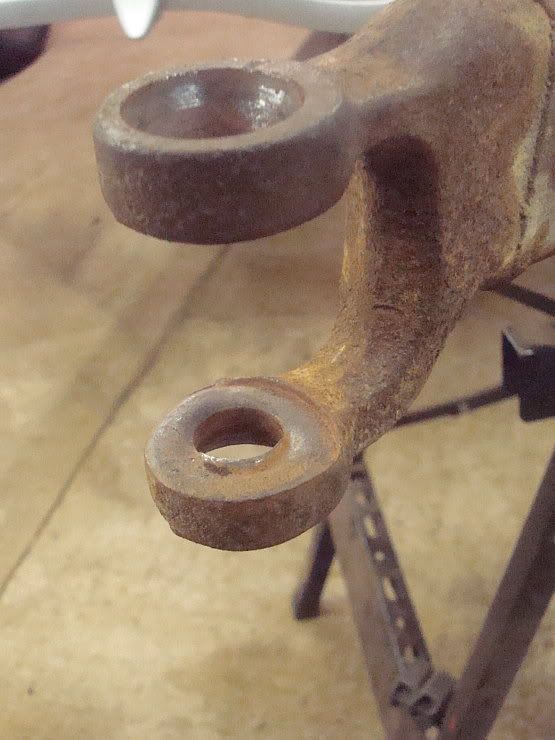 I decided the job stopper was the wishbone, so I tackled that first. I warmed the end with oxy acetalene and laid down a few good beads of mig on the surface. 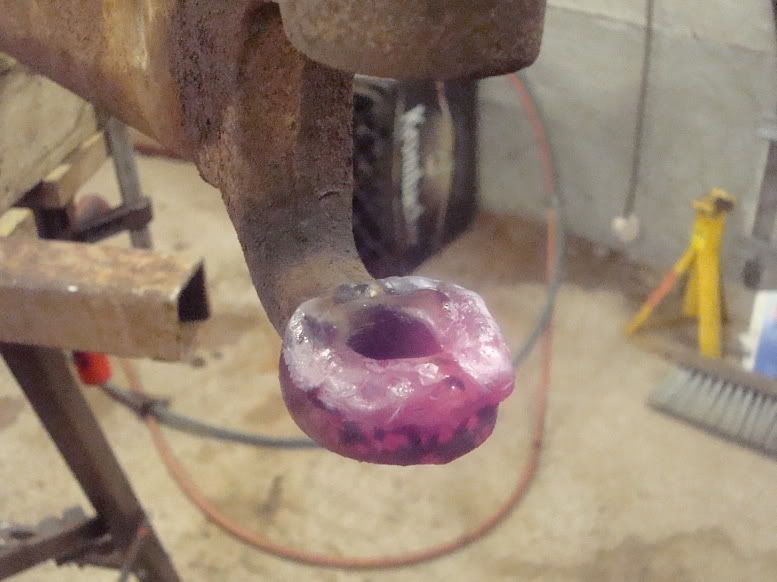 Then using an old fashioned pair of inside calipers I ground the weld down checking the gap with the calipers as I went. 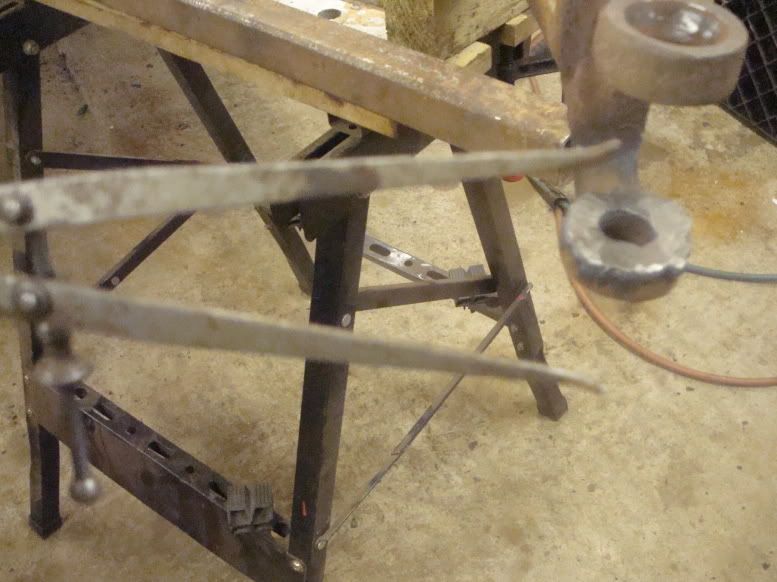 I finished it by hand filing until the fit was acceptable.  This weld booger on the taper: 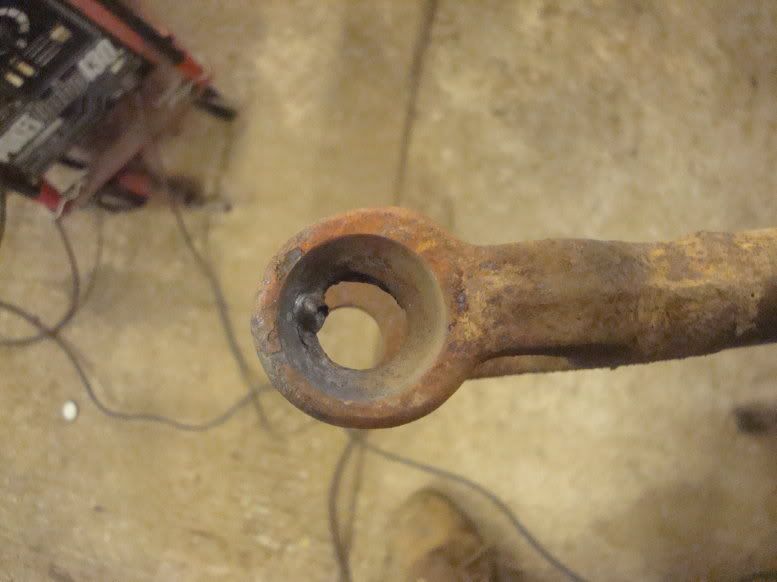 Was ground and then hand filed down until it looked ok. 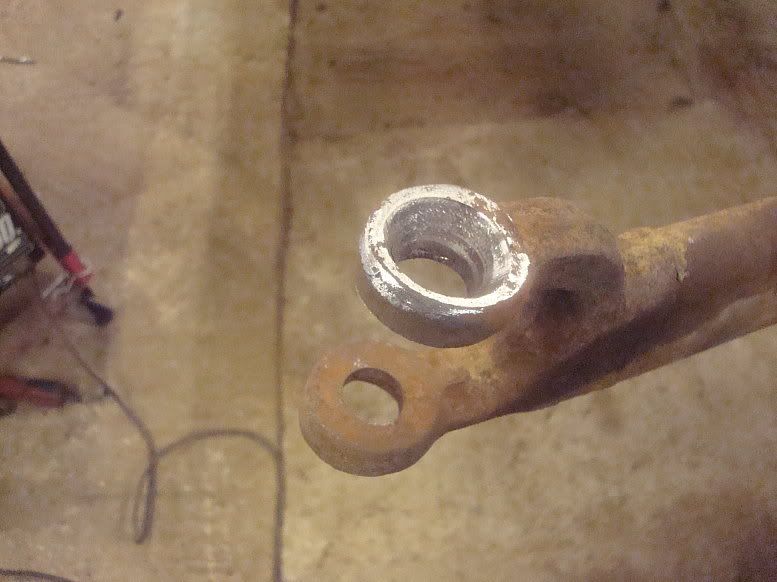 And the good pin test fitted in place. 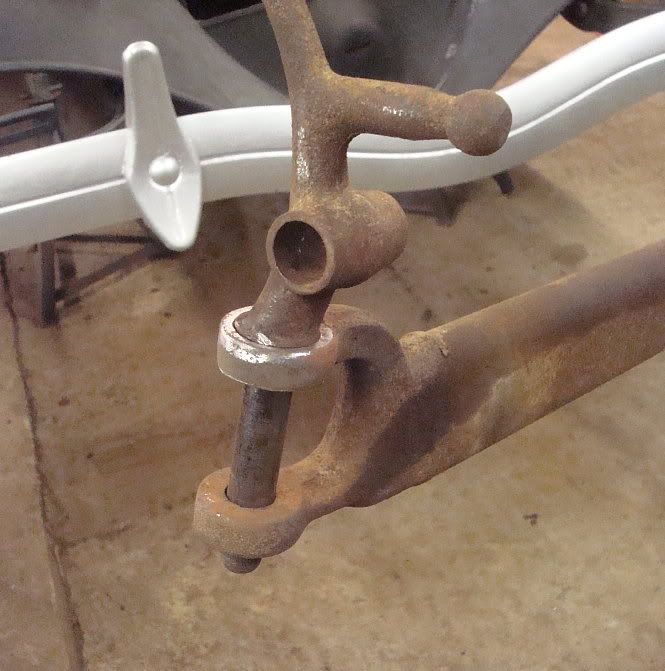 I have built up the worn pin with weld and will see if I can skim it down on the lathe. These are not normally moving parts, but should be a good tight fit. If I can't get it right I'll be looking for a replacement or I do have a pair of street rod ones but I prefer the look of the originals with the brake and shock brackets on them, even though they may be redundant. Mart. |
|
|
|
|
07-16-2012, 04:06 PM
|
#5 |
|
Senior Member
Join Date: May 2010
Location: Solihull, England.
Posts: 8,744
|
4/28/12
Here's a few snaps from the last bit of work. Here's my worn perch bolt built up with weld. 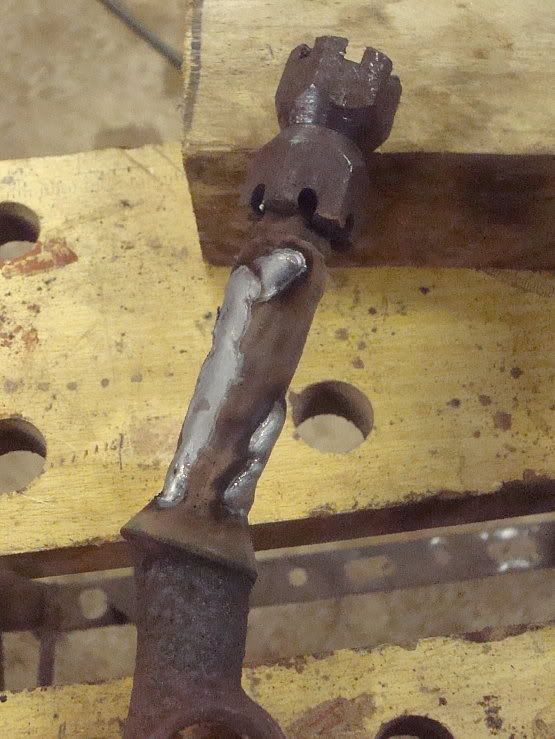 The perch was skimmed up in the lathe and finished to a true surface, the same diameter as the good one.. Then I fitted the shackle bushes. Here are the perches ready for refitting. 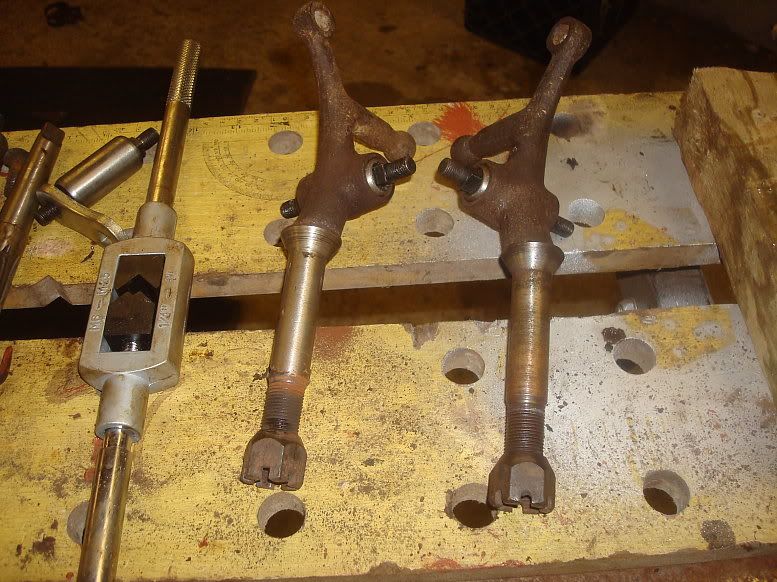 The wishbone was fitted to the axle: 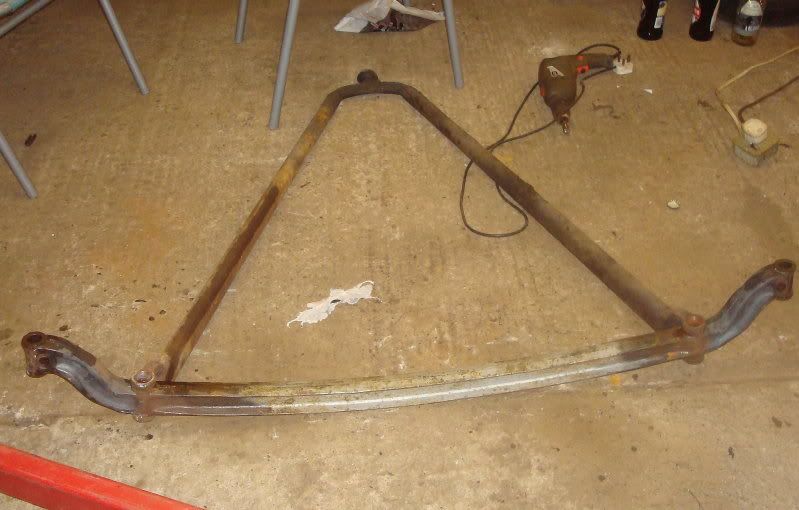 And the spring fitted with new bushes and then fitted to the axle. Was disappointed with the replacement bushes from Macs. There's a thread on Fordbarn on the subject, I'll report my experience on there. (will add link here) Here the axle assembly is ready to be slid under the car. 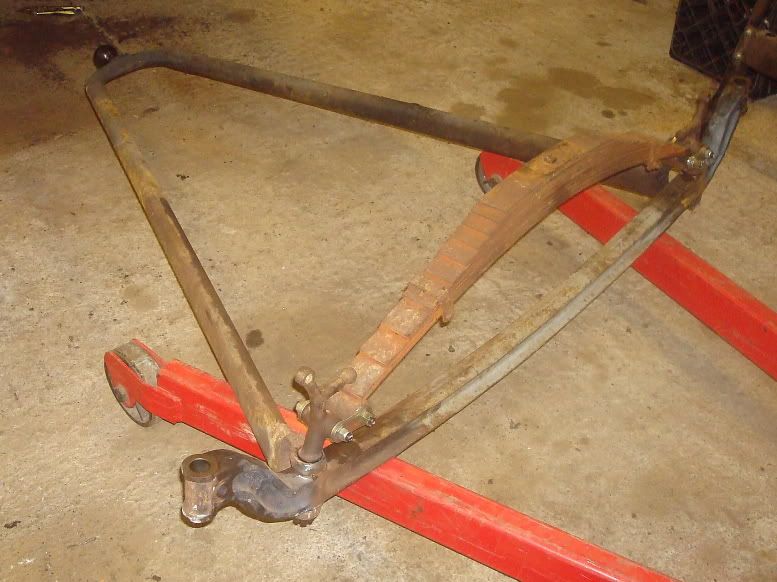 I cleaned up all the spring mounting hardware and after finding some better nuts, bolted the axle back in. I reset the axle stands under the wishbones in preparation for the next job: reshaping the steering arms. 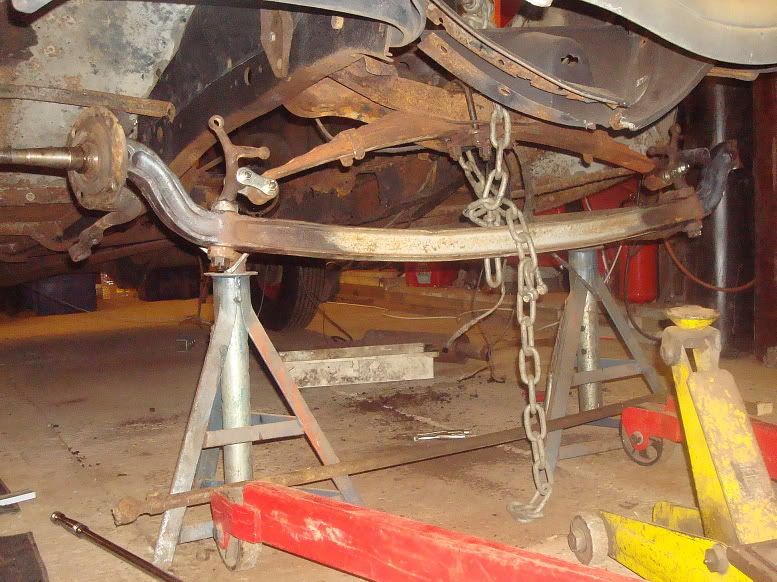 Going with a dropped axle necessitates bending the steering arms. That will be the subject of the next thrilling instalment. Watch this space. Mart. ================================================== = 4/29/12 Little mini update from today's efforts. I decided I was going to run lhd and rhd passenger side spindles, so they both the long steering arms with the two holes. I'm using the end holes normally used for the drag link for the track rod. I couldn't document the mods to the steering arms due to having to wield the oxy kit and big levers, but here is the problem in a nutshell: 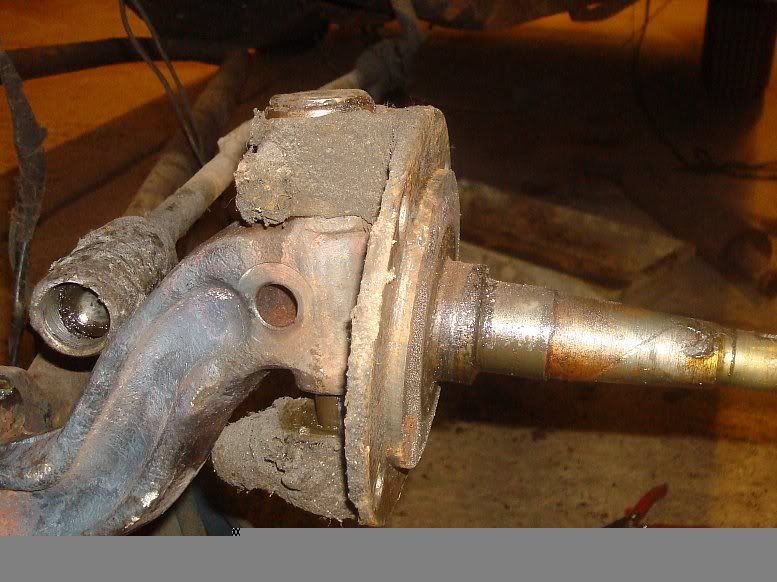 The stock arm fouls the drop in the axle. this one will not turn past the straight ahead. Here are the stock left spindle and the modified rhd left spindle. 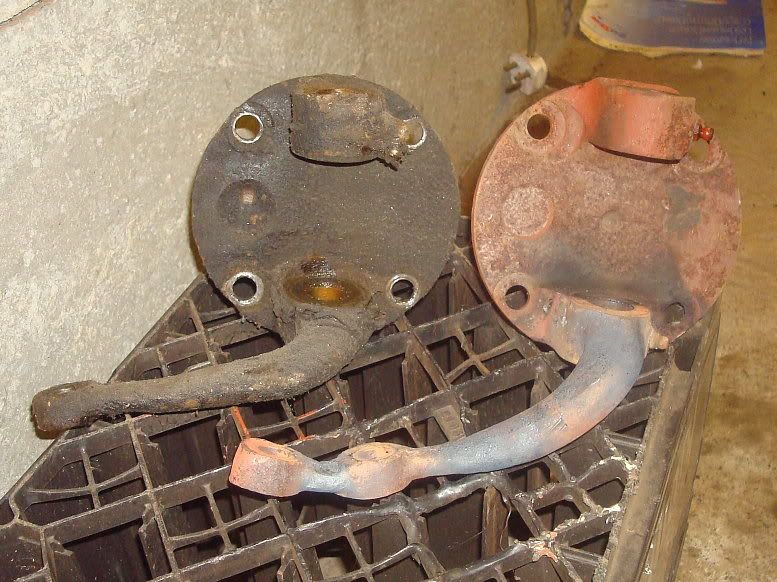 It is bent down considerably. I don't like the streetrod bolt on arms, I rather torture some of Henry's stuff into shape. Here you can see the spindle turning and the arm clearing at the tightest point. 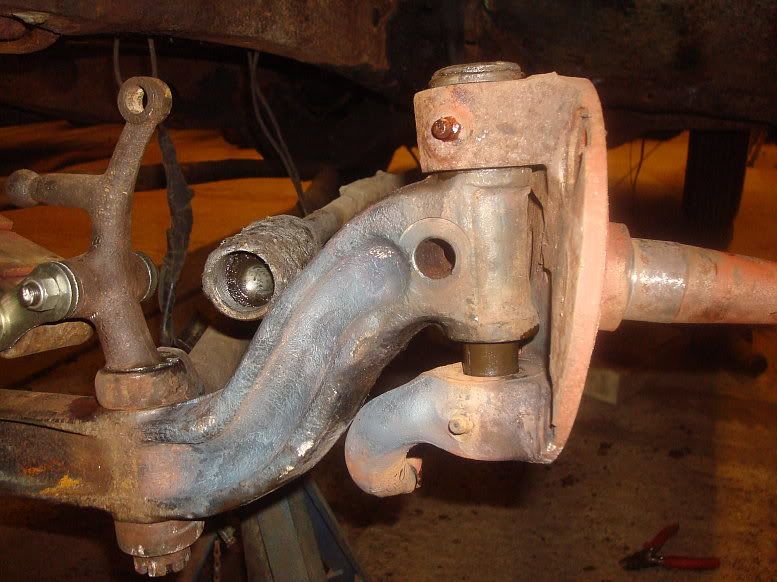 And because it is bent down the arm clears the axle completely all the way to full lock and beyond. 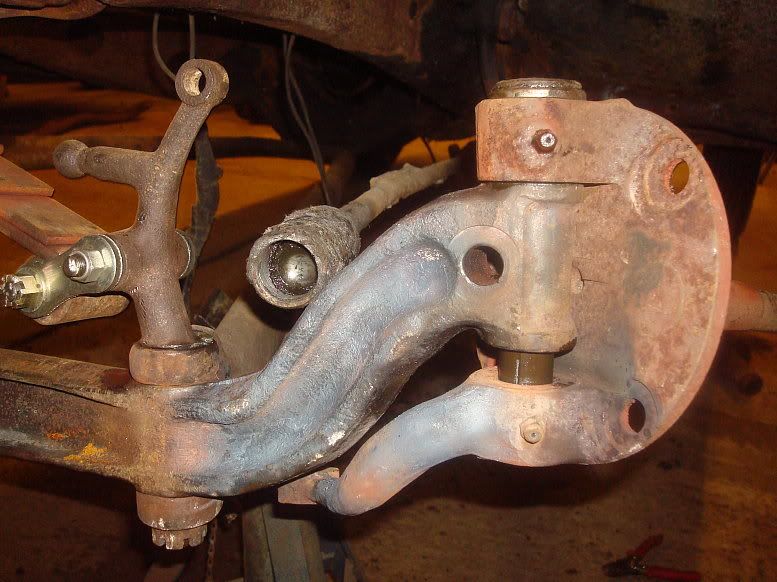 And a shot showing the spindle in situ, showing the advantage of the long arms.. You can get them low enough to clear the 32-34 wishbone. 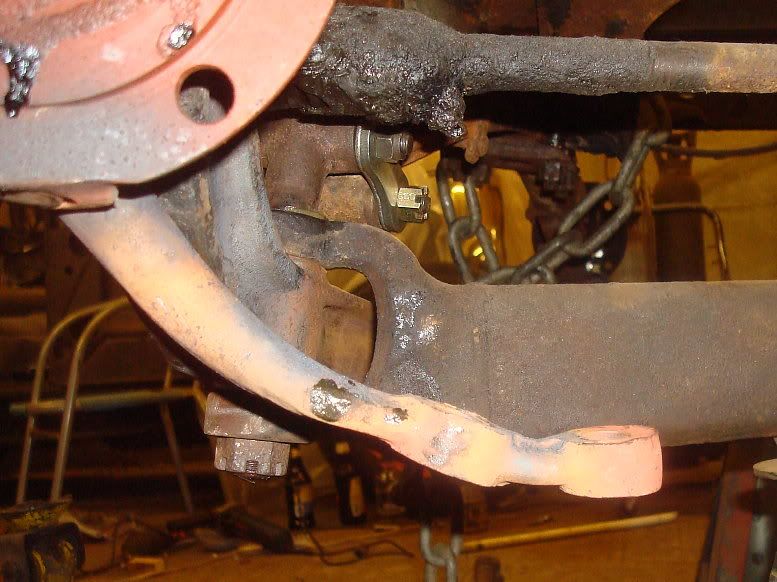 These wishbones were designed to have the track rod above, so the bones are low relative to the axle. Later bones are designed to have the track rod below, so they sit higher relative to the axle. I shortened the track rod (1940??) just a little bit (1/4") and cut a bit off the end of one of the track rod ends to get the toe in close. I was going to do both ends but just doing one was enough. I fitted a new set of kingpins and new bushes. I use a standard reamer and do them one at a time, using the best old bush as a guide for reaming the first bush, then ream the second new one using the first new one as a guide. If you need to do spindles never knock the old bushes out until you know how you are going to ream them. So at close of play tonight I had both spindles fitted with new kingpins and bushes, the arms modified to clear and the trackrod shortened to fit. Quite a good bit of progress I'd say. Mart. ================================================== === 5/1/12 More down n dirty progress at Mart's Garage. While the engine and box are out, I wanted to sort out the pedal box. It's a 39 unit, and was fitted a bit poorly to a hacked x member leg. Here's some pics showing the as fitted condition. The master cylinder fits at a wonky angle and the clutch pedal comes up through the floor. Now the next shot, amazingly enough represents a whole evenings work in the garage.  The rear of the bracket is supported on a spacer bracket, which picks up on the holes in the pedal bracket and the holes drilled in the x member. The front part is bolted direct to the x member but the x member leg was heated locally and the part where the bolt goes through bent to match the angle of the pedal bracket. The bracket took ages, and it was very difficult to get all the holes to align. All this would have been easy working in just a chassis, but doing all working up from underneath just makes it all that much harder. Anyway, It did get done, and this is how I left it last night. 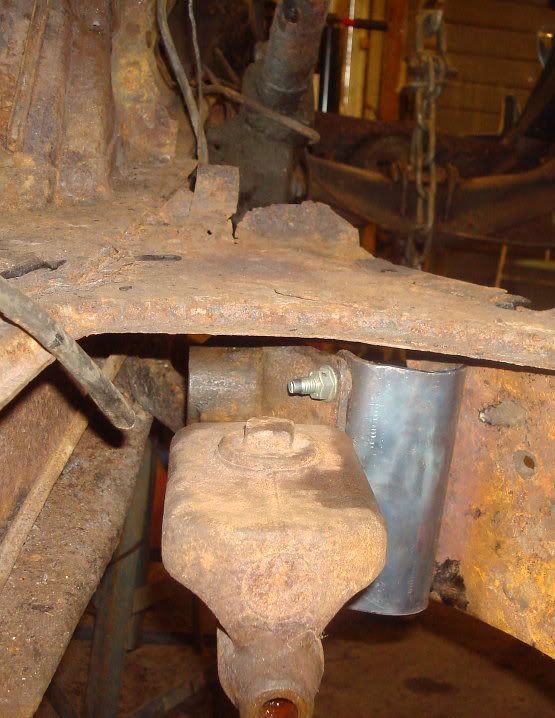 Tonight, I was able to build on the foundation of the properly mounted bracket and heated and bent the pedals to fit better. Didn't take photo's, but while the brake pedal just required a sideways joggle, the clutch required substantial bending to avoid it coming up through the floor like before. Now this is a warts and all report so the next thing to do was to tidy up the hackery to the chassis leg. I intend to do a full body off job on this car sometime down the line, but for now I want to just fix what needs fixing and drive it. Here's the x member leg.  Bit nasty ain't it, but very typical of a job done in the 50's, when this one was done. I cleaned up and ground the edges. 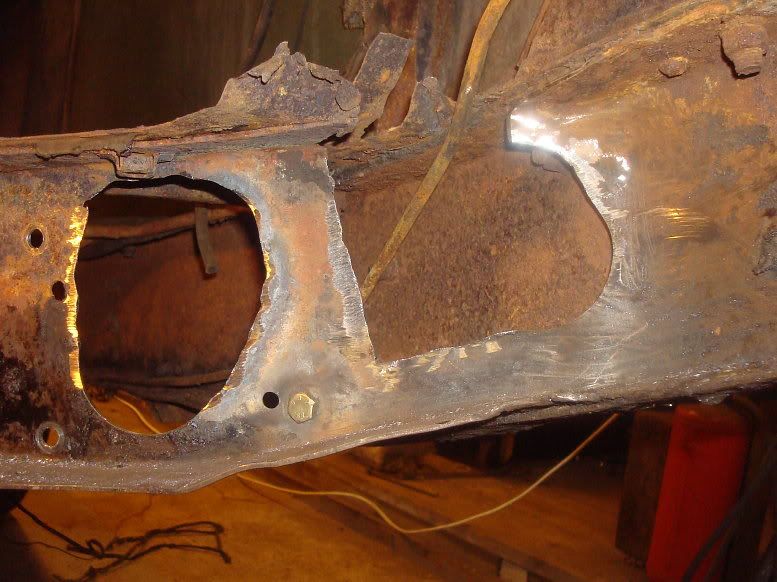 And made up a strengthener from 1/4" plate. I made it bolt in, because I will rework this area sometime in the future. I sort of had in mind doing how it could have been done years ago if they had a mind to do it better. 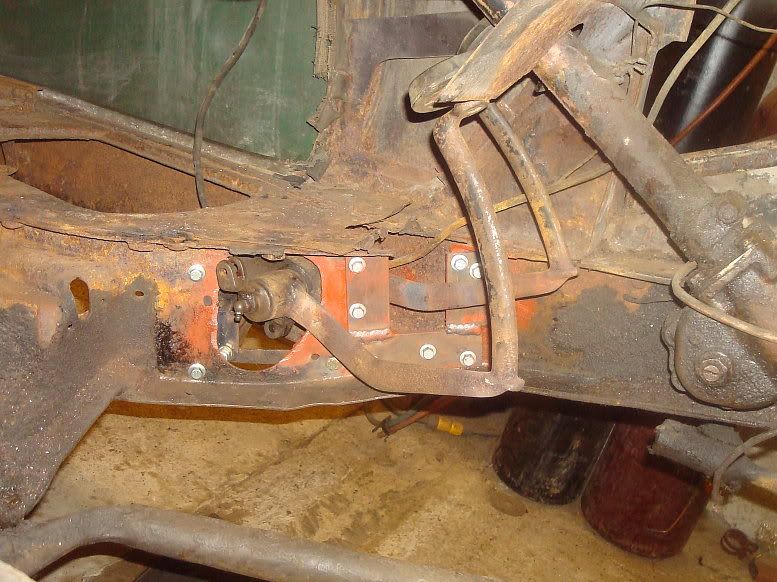 It's not pretty but should add a bit of strength. Here's a shot of the whole shebang with the pedals in place. 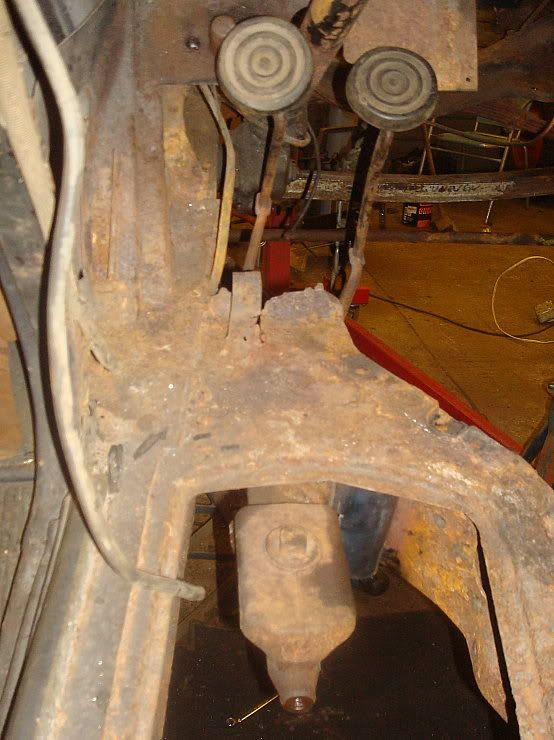 Here's how the car looks as I left the garage tonight. 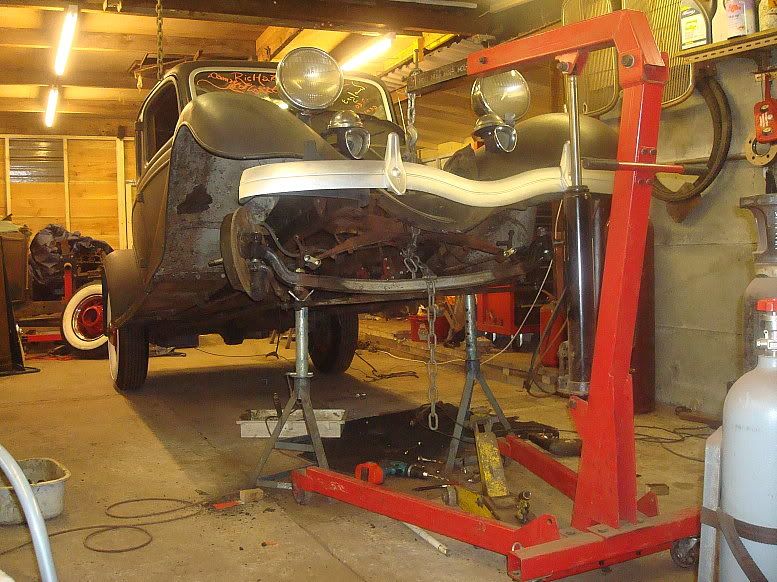 Using the engine hoist as a jack can get it a lot higher than normal, and while I have my biggest and best axle stands in place, having the hoist on there as well adds a little security. Mart. |
|
|
|
|
07-16-2012, 04:09 PM
|
#6 |
|
Senior Member
Join Date: May 2010
Location: Solihull, England.
Posts: 8,744
|
Sponsored Links (Register now to hide all advertisements)
Ok, after getting the master cylinder in place, I could look at what was next best to do. While the front was up nice and high, I went through the front brakes, cleaned the worst of the muck off and replaced the cylinders and shoes as necessary. I cleaned the drums up, cleaned and regreased the bearings and assembled them all up. Here's a couple of shots: 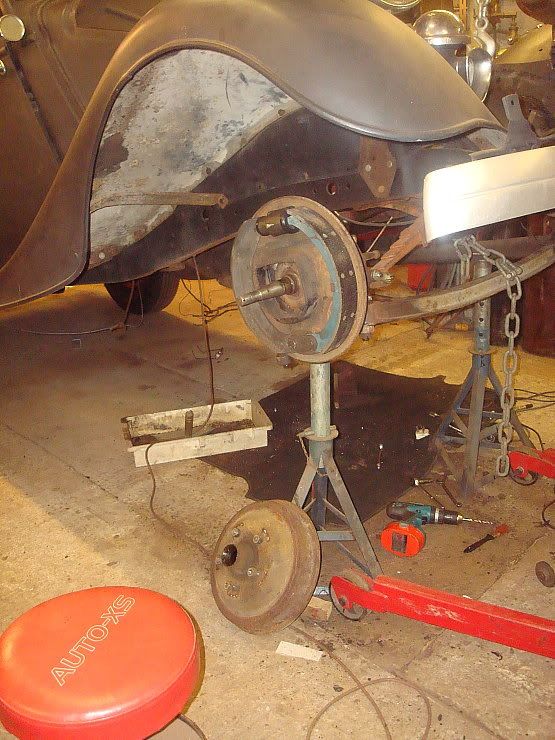 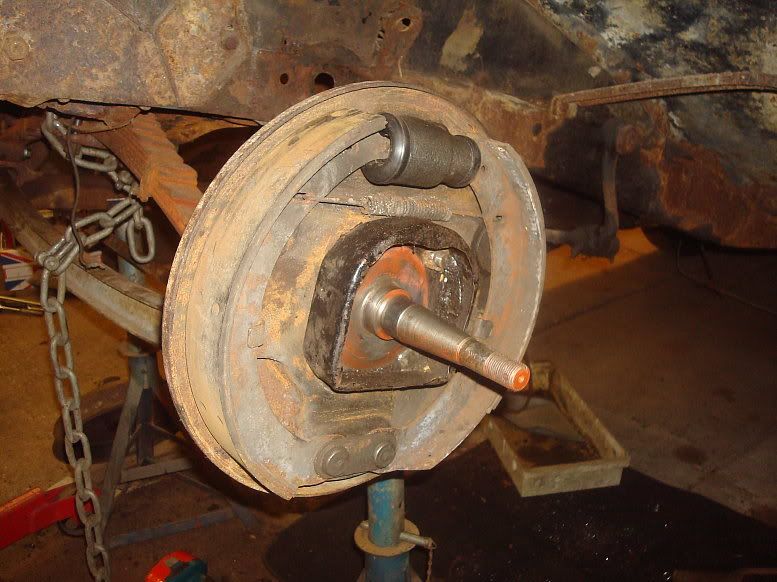 Yes, the grease shield is on upside down, to allow better access to the nuts on the slingshot steering arm. 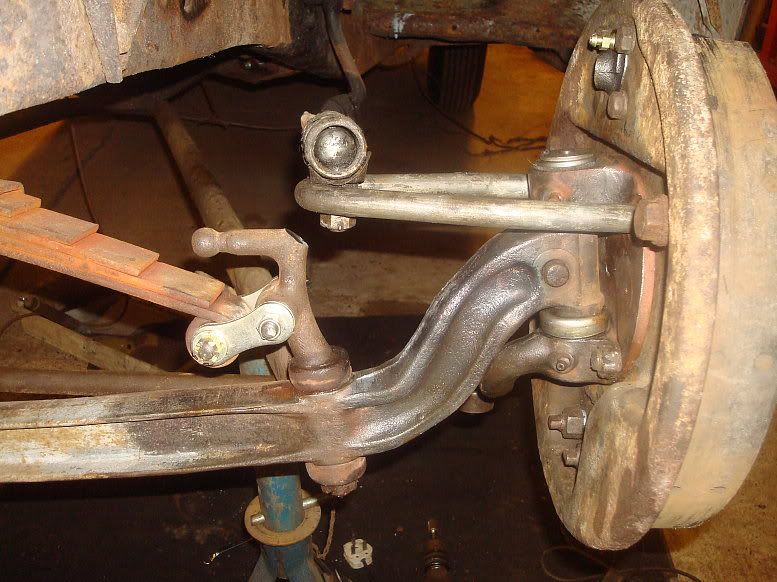 The drag link still needs sorting out, but that can wait a bit. I put the wheels back on with the spacers I got from the swap meet, and dropped the car back on the ground. 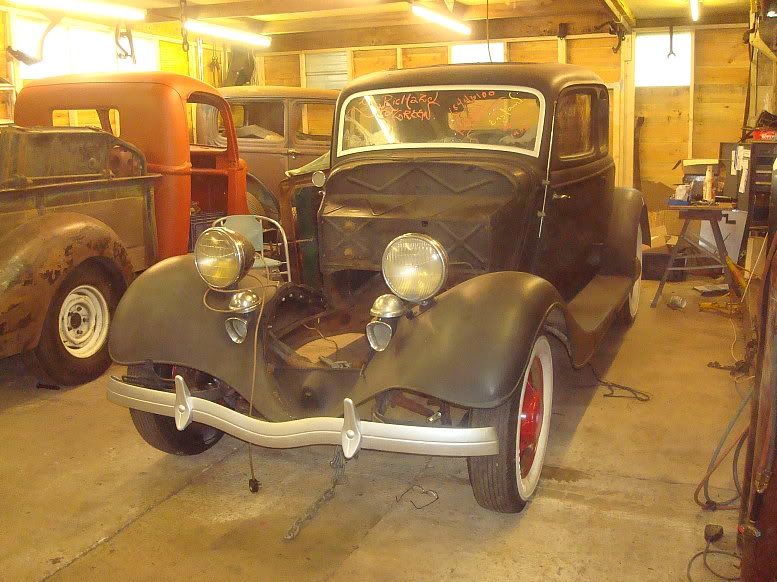 You can see it's a bit lower, even without the engine, rad and sheetmetal on the front. 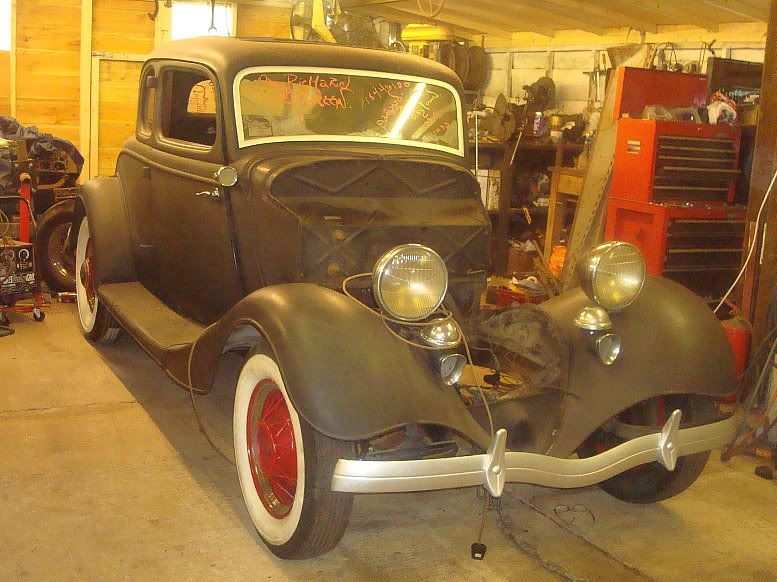 I didn't want to put the engine and box back in yet because the back axle needed to be removed. Easier to do the axle first, so that's what I did. Had a good look underneath, removed the spring u-bolt nuts and got the engine hoist fired up again. 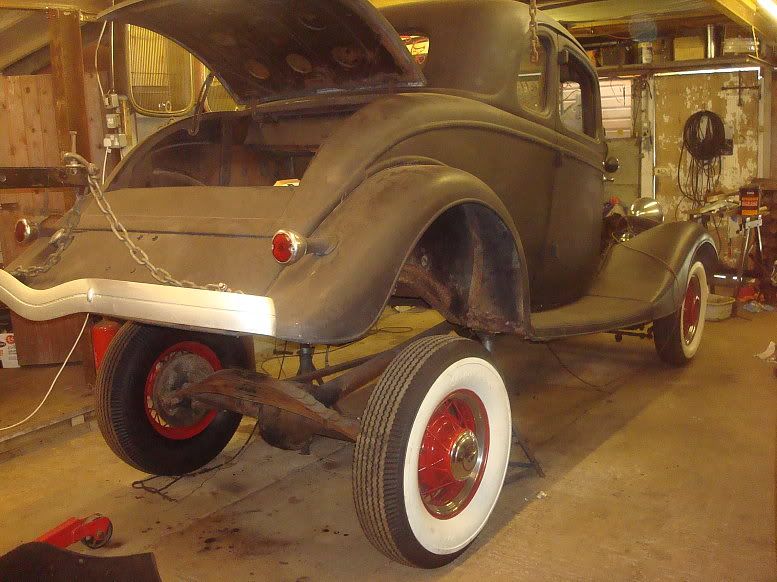 I lifted it up on the bumper brackets. I only lifted the body and frame, remember, the axle remained on the ground. This axle busted my ass at every stage. Nothing went easily on it. 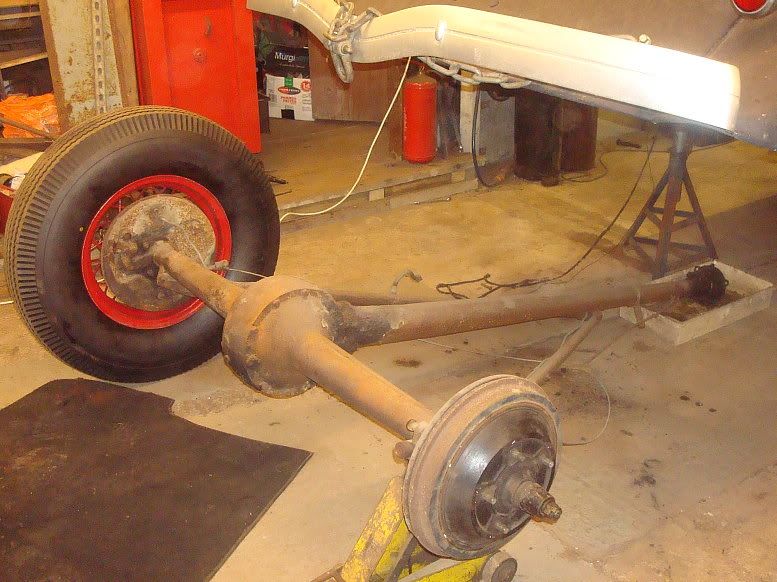 Note the 33 rear drums, these were used with 40 brakes, which I didn't think you could do, but it was done successfully here. 40's backing plates and brakes looking very grungy after a lifetime of neglect. Shoes were down to the rivets, but the drums were good luckily enough. 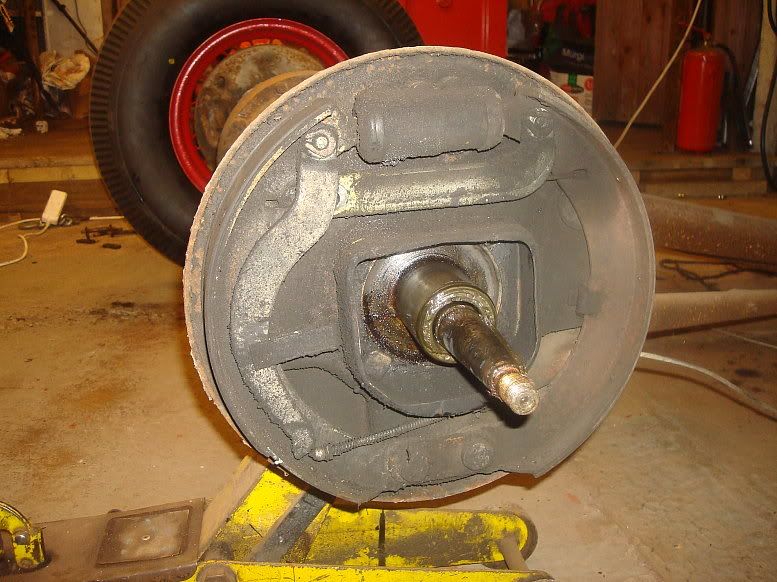 If you look carefully you can see a raised lip on the inside edge, due to the drum not being quite wide enough. When I re-shoe these, I'll put a slight chamfer on the inside edge. When I was trying to remove the backplates, I had a problem with the square head bolts turning. I made up a special spanner from a cheapo 19mm combo spanner, suitable bent and ground to fit. 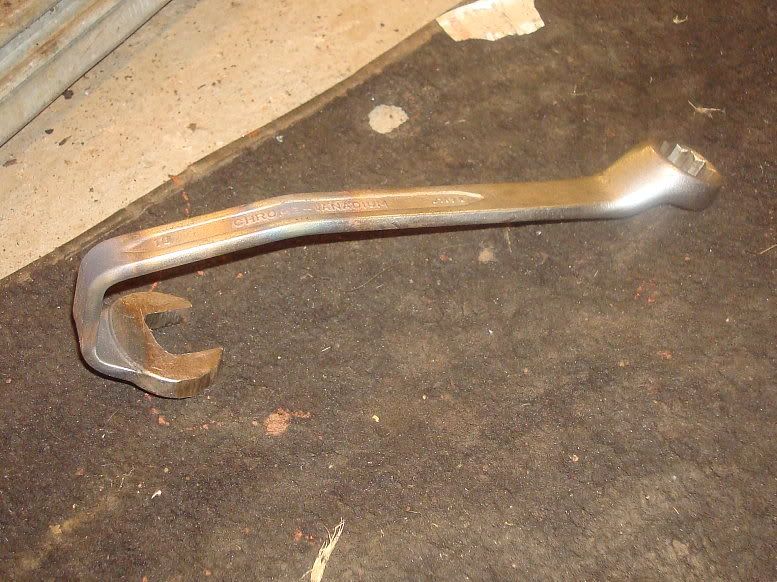 And in situ: 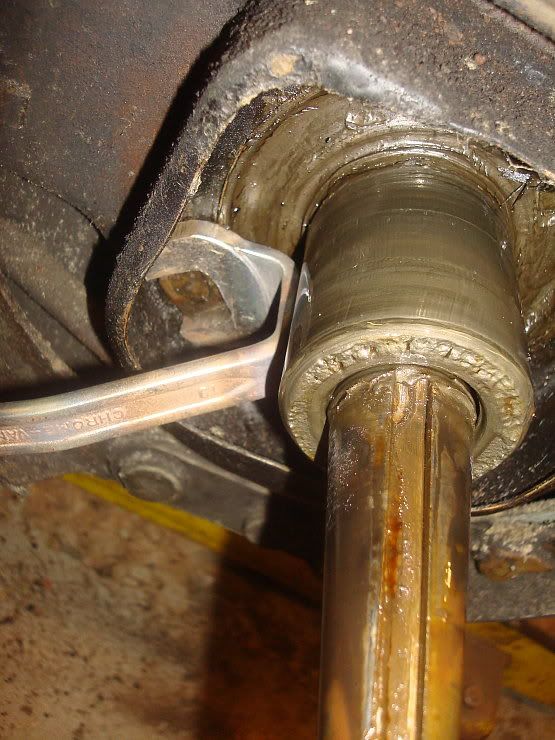 I still had to heat the nuts up, but this new spanner allowed me to get that initial movement on the nut, and then they came off quite easily. Anyone who has messed with early ford shackle bushes knows they are a bastard to get the remnants out. I struggled like fuck to get these out, but did eventually, after carefully sawing through the wall and chiselling the bits out. Getting the new bushes in was no easier. I started hammering the first one in, but it got stuck half way. It's very easy to mushroom the bushes and then it's virtually impossible to get them in. I have done them successfully in the vice, but I couldn't get the axle in the vice. No problem: bring the vice to the axle: 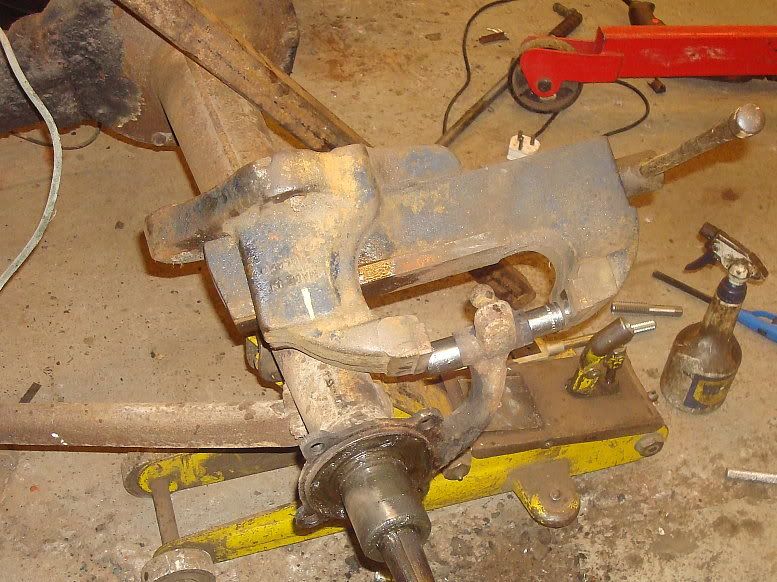 By using various sockets as pushers, I managed to get them in, but even then it was touch and go. Here's another tip. It's easier to get the spring on if the square on the shaft is orientated correctly. Here's a good way of turning it:  The square is 3/8" so just use a shackle plate and use your 3/8" ratchet in the other hole. Next thing about a hydraulic conversion on a 32/33/34 is the close proximity of the adjuster to the perch. 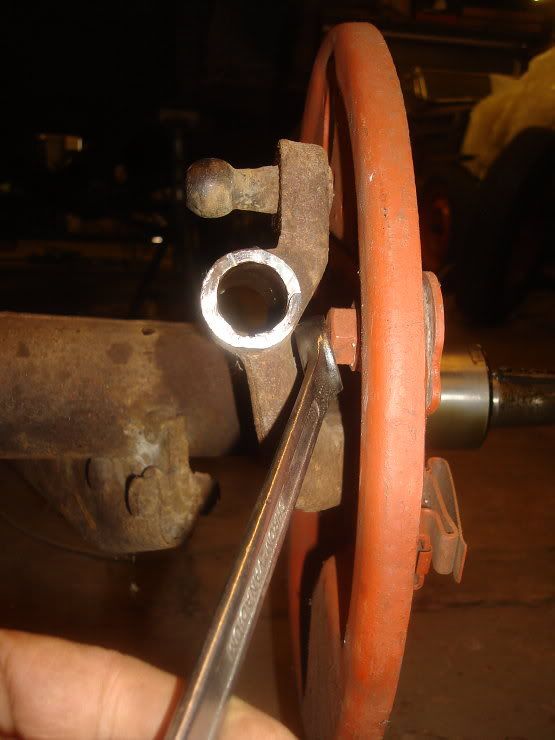 You can't get a ring spanner on it. I decided to pre-empt the situation by grinding the back of the perch a bit: 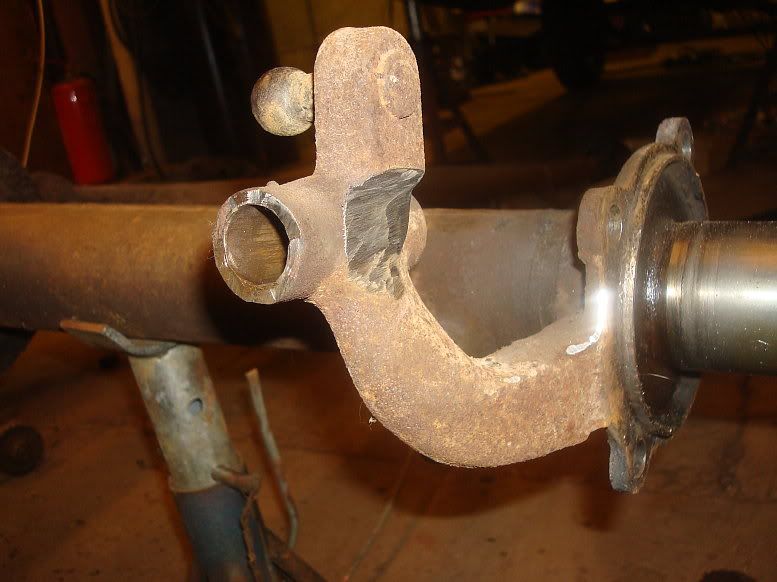 This allows a ring spanner to fit on ok. 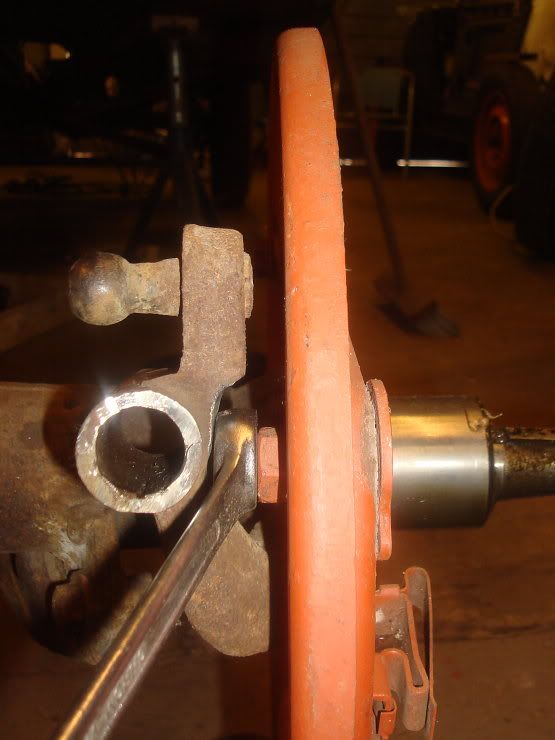 Now, the funny thing is, this didn't work as well on the other side, but I do have a thinned down spanner somewhere that will do the trick. Once all the shackles were sorted out, I reassembled the spring to the axle, using the old technique of just putting the main leaf on first, (even then it took a good pull with a G-Clamp to get it over far enough to get the shackles on), and then assembling the rest of the leaves. 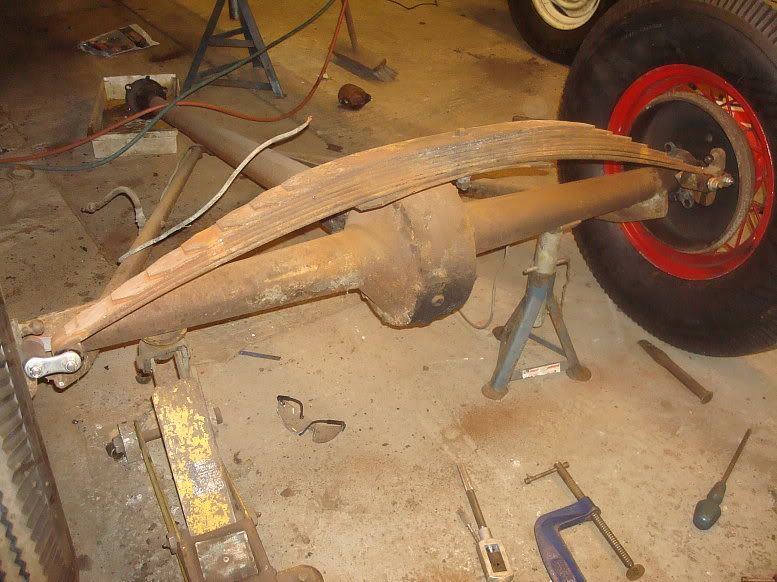 I left two leaves out (short ones that had been fitted under the spring as spacers) so the nuts would go further onto the u-bolts. While the axle was out I removed the rear shocks (siezed solid) and the last remnants of the exhaust. After putting the wheels back on, I slung the whole axle, less brakes under the car, dropped the car back down and bolted it up. ok, so the front suspension is back in place, the rear suspension is back in, and the pedal box has been remounted. No reason not to put the engine and box back in. Recovered this old trooper out of the shed: 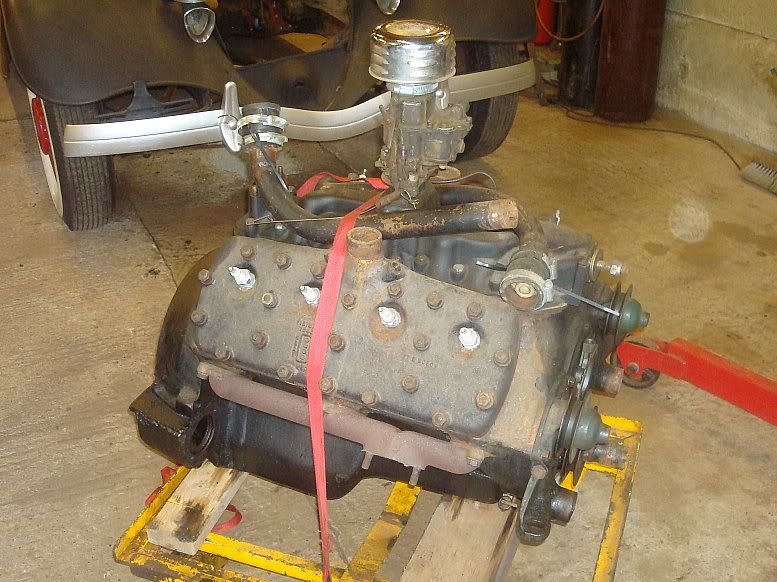 It's the 21stud out of Old Rusty, Prior to that is was in Phil Sparks' roadster and before that I believe it was in a Low Fliers car. I cleaned the rust off the gears in the gearbox that was in the 33. I decided to just run it, and see if it is any good. to be honest it turns very smoothly, and there are no chips on nthe teeth, so why not run it? Using the engine hoist made bolting it up nice and easy. 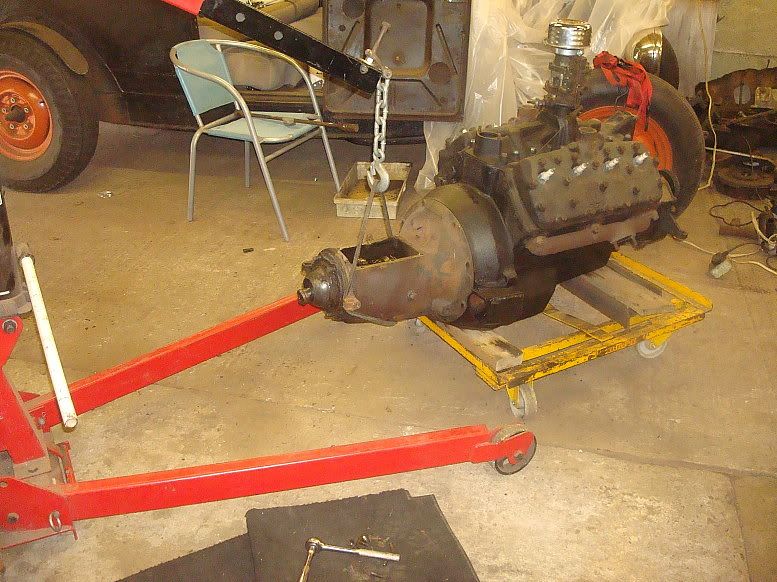 No photo's of the actual fitting, because it was a bit of a struggle, but in it went eventually: 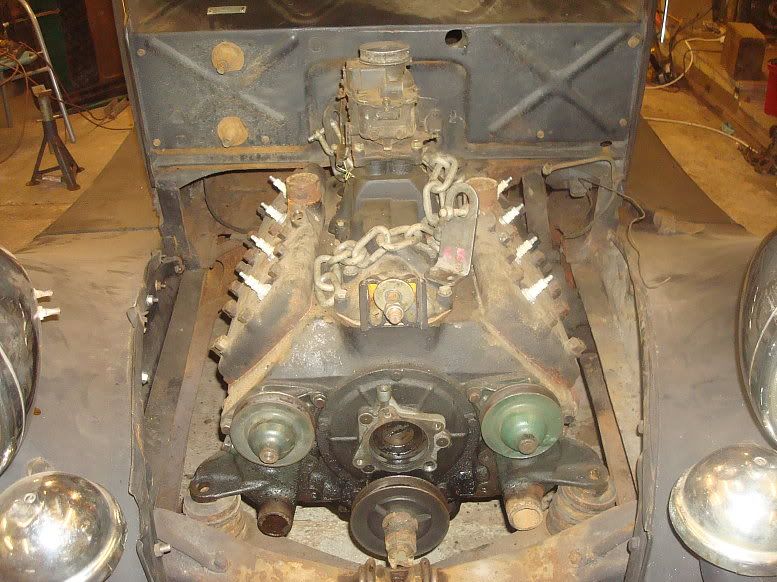 The engine is exactly as it was pulled from the roadster so it is suitably grimy and patinated and looks pretty well at home in the coupe: 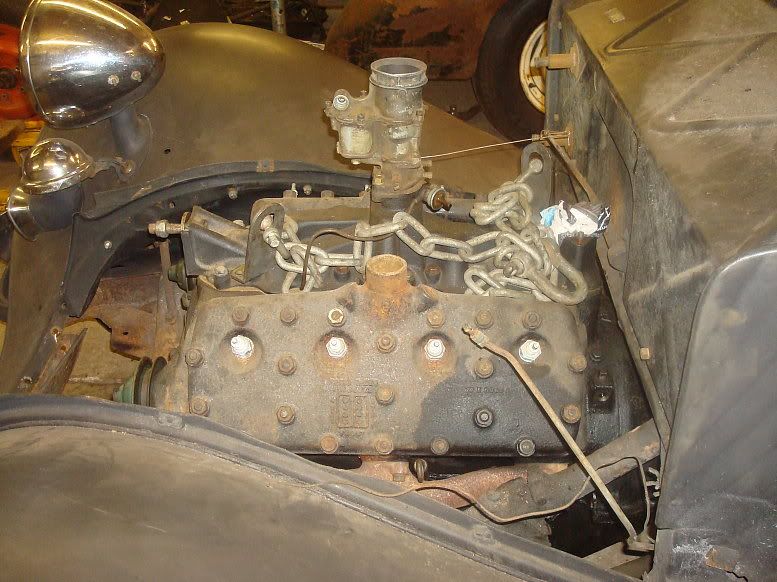
|
|
|
|
|
07-16-2012, 04:10 PM
|
#7 |
|
Senior Member
Join Date: May 2010
Location: Solihull, England.
Posts: 8,744
|
I need to sort out the engine mounts, I just dropped it onto the stack of four mounts the old engine was on. Sits in there nice, almost as if it was designed to go in there:
 And, as usual a parting shot: 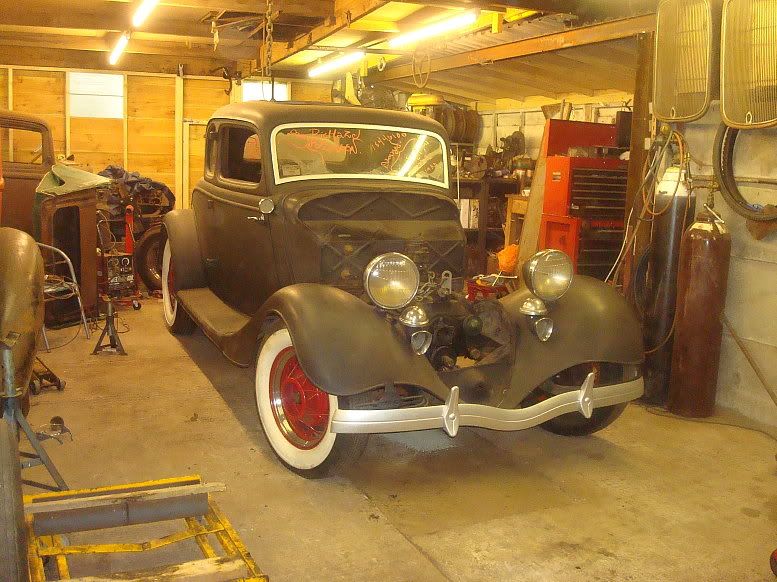 The front end has come down nicely with the extra weight in it, and should settle nicely when the rad and other things are fitted. Quite an epic, and some really hard work in there, but I'm still enjoying it. Mart. ================================================== ========= 5/13/12 This is my Sunday evening update of recent work. I have been doing a bit, so might as well bring the thread up to date. It's all pretty nitty gritty stuff now, nothing that changes the appearance, just all the stuff that's necessary to get something running and driving. After dropping the engine and box in, I cleaned up all the bolts and the captive nuts and bolted the rear mount in place. I took some careful measurements and made up some engine mount spacers. The chassis is on 19" centres, and the engine is on 20" centres, so each raiser has a 1/2" offset built in. 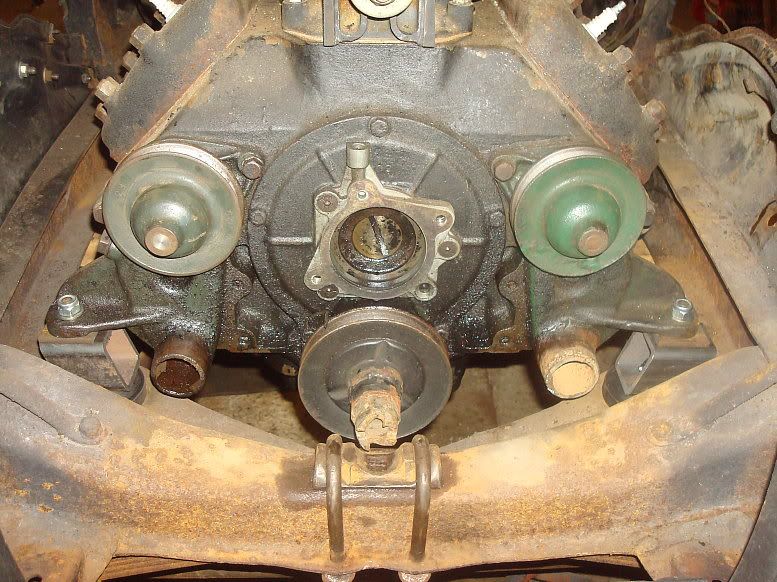 There is enough room to tighten the nut up and get the split pin in. Then the engine drops onto the studs. I jacked the car back up again so I could concentrate on the brakes. I cleaned up and fitted the rear brakes along with a good set of shoes. The ones on this car were very worn and contaminated. Back plates were bolted on and the hubs refitted after greasing the wheel bearings. Axle surfaces were excellent. 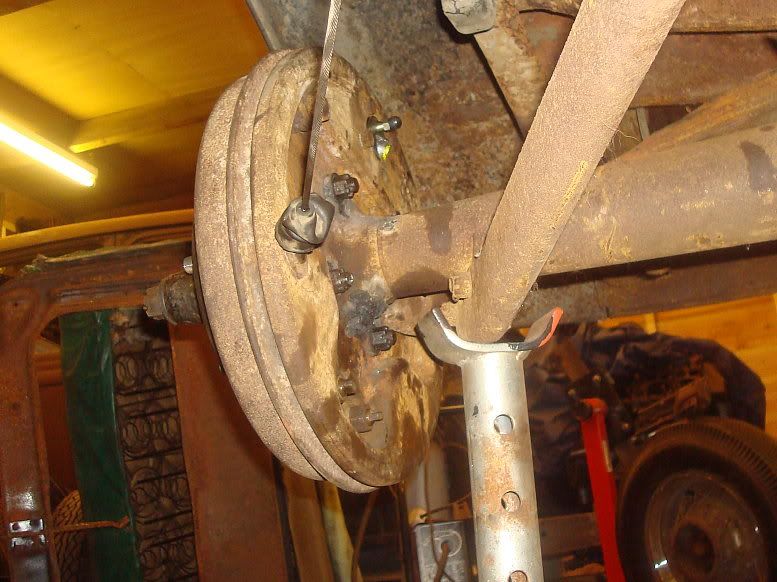 Somewhat unusual, this car did have a fully functioning handbrake. This feature is often missing on some cars. The lever was totally siezed up, but 5 minutes in the vice with wd40 and oil got it freed up nicely. Cleaned up the hardware and bolted it on. I freed off the adjuster and reassembled the linkage as I had taken it off. On this car I'm fixing what needs fixing and this works so it's going back on as it is. 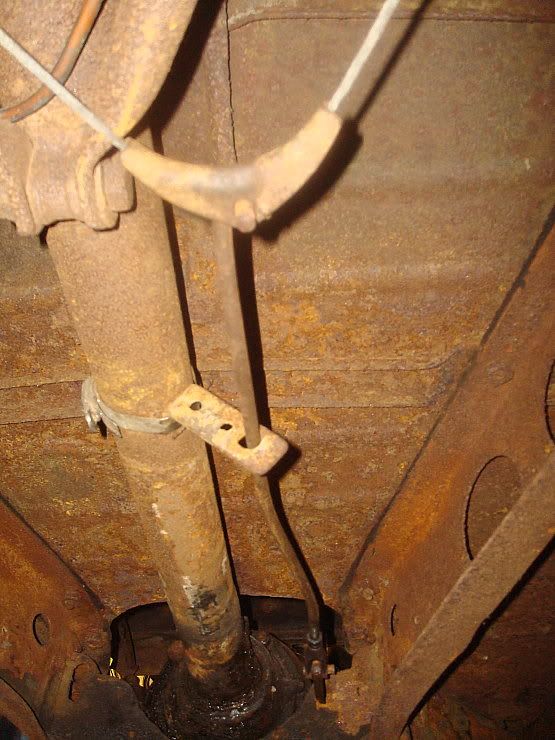 It pulls from a bit off centre, but the brakes don't seem to mind. But can you spot the mistake?? 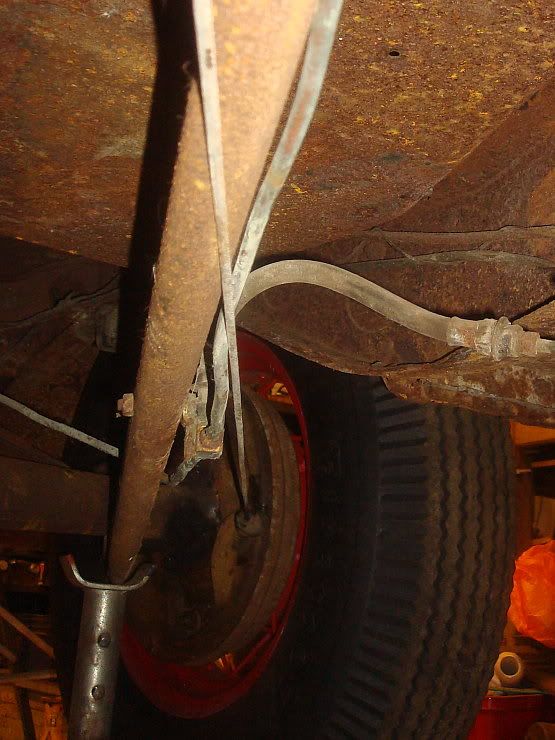 That's right, the cable pulls straight across the brake lines. Brake lines are copper by the way and are still very soft and flexible after all this time. I had already decided to rerun all the lines and replace all the hoses, so off they all came. The pipe ran across the front crossmember, under the rear, right by the pulley so I made a new pipe. Here it is just laid in place. 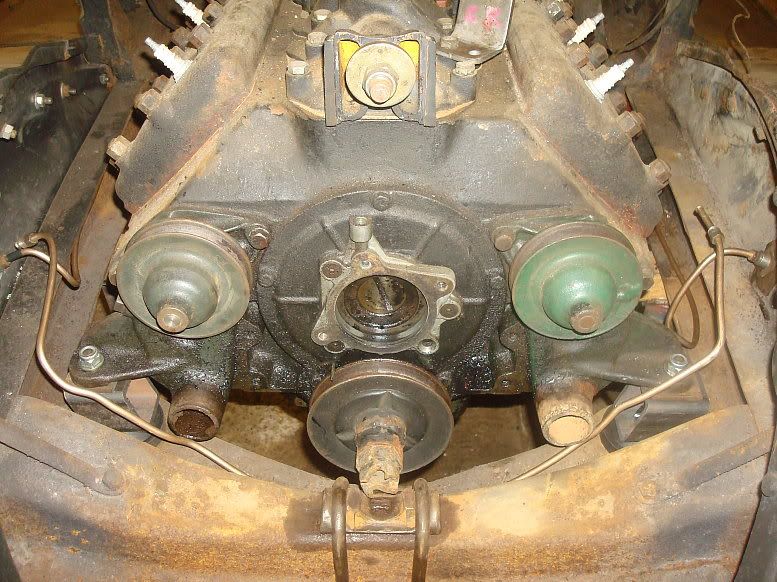 I decided this was a crap idea, the 34 is very cramped around this area, so after a lot of lying under the car I came up with a better idea. (Note old repair to water pump pulley in this pic -not by me, I hasten to add) Left side comes up inside the rail  As does the right side. 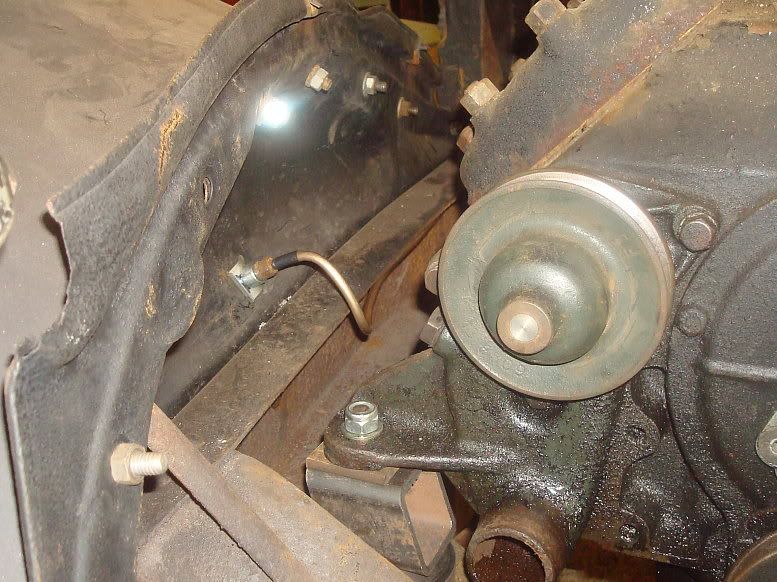 Here's a pic of the master cylinder and the fittings. 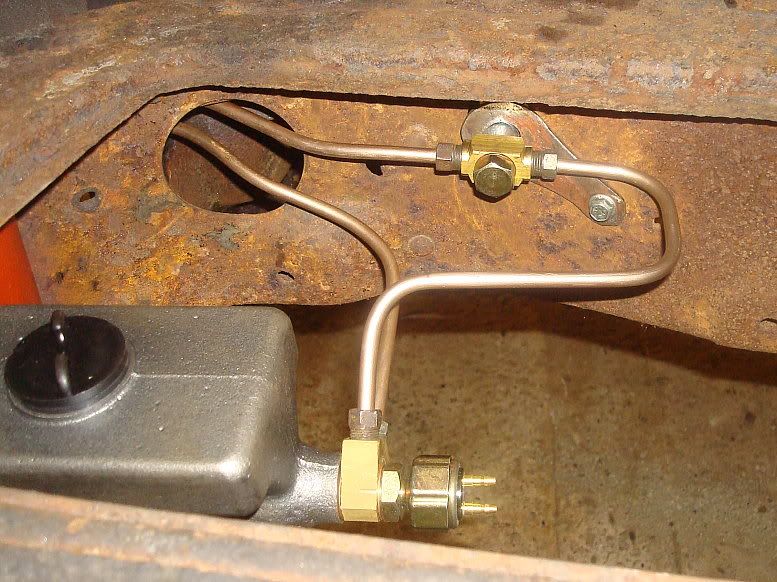 From the junction block on the master cylinder, the front pipes shoot through the round hole in the x-member. One line goes through a t-fitting which feeds the flexy hose going to the back axle. Here are the two front lines coming through the hole that would be used by the handbrake on a rhd model. 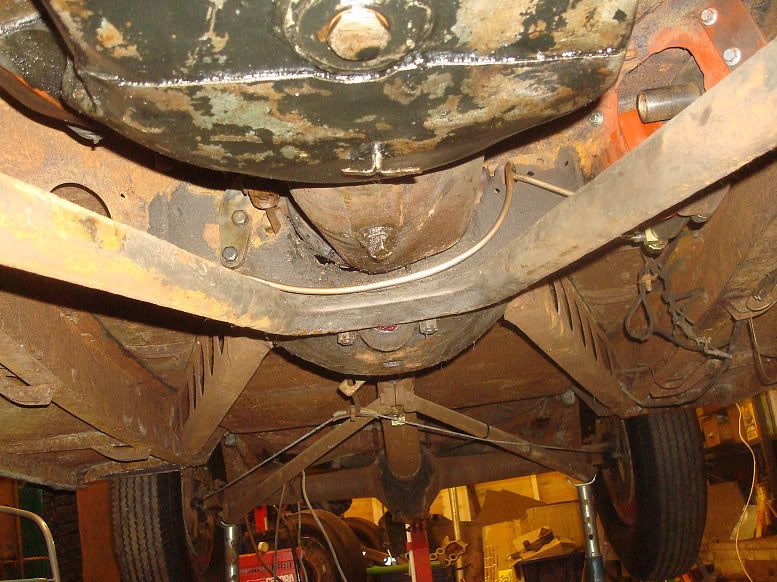 Ok, obviously I need to add a few clips yet. This routing is ideal because the lines are the right side of the x member legs and can run naturally up the inside of each rail. At this point I needed to finalise the design for the rear shocks, so the brake lines, which will run along the radius rods won't clash with the shocks. I have only gone as far as deciding how I'm going to do it and pulling one radius rod off. Here's the first mount roughed into place: 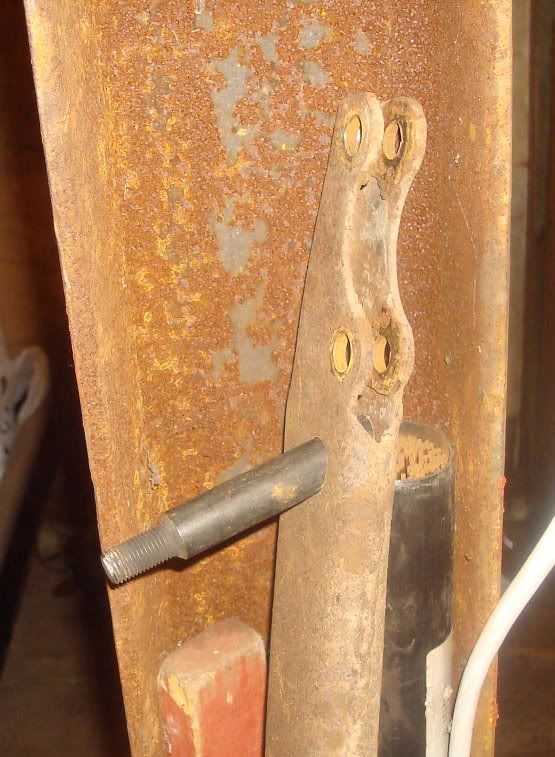 The rod is 5/8" diameter with a 7/16" thread. They are off the old jag independant rears. Once the design for the shocks was settled I could lay the rear pipes in. 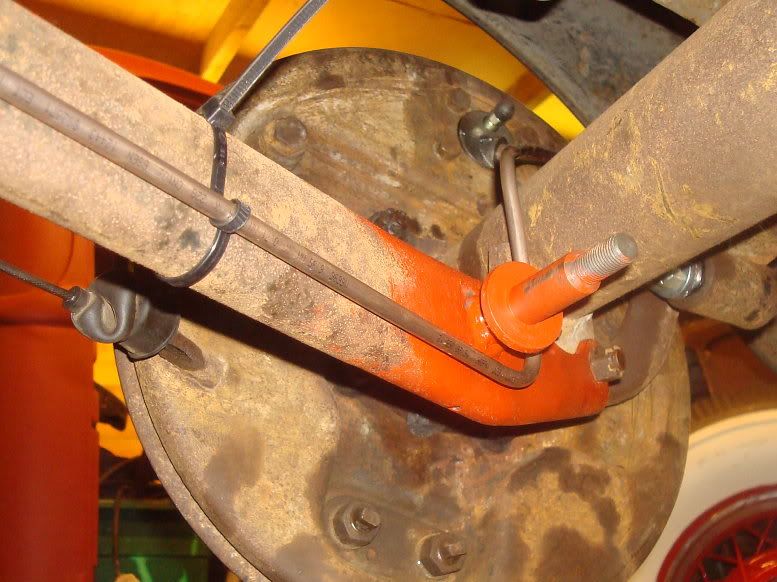 Above you can see why it was important to do the shocks first. The pipe run is nice and simple, and lays in place easily with a minimum of bends. The shocks can be removed and the radius arm bolts accessed without disturbing the pipes. You will also see in the pic above a cable tie holding the brake pipe, I am happy to use these, but a handy tip is to take an extra turn around the pipe, as seen above, this holds the pipe off the surface by the thickness of the tie, reducing chafing and debris buildup between the pipe and surface. I'll deal with the pipes first then come back to the shox. The pipes run up the inside of the radius rods and join into a Tee: 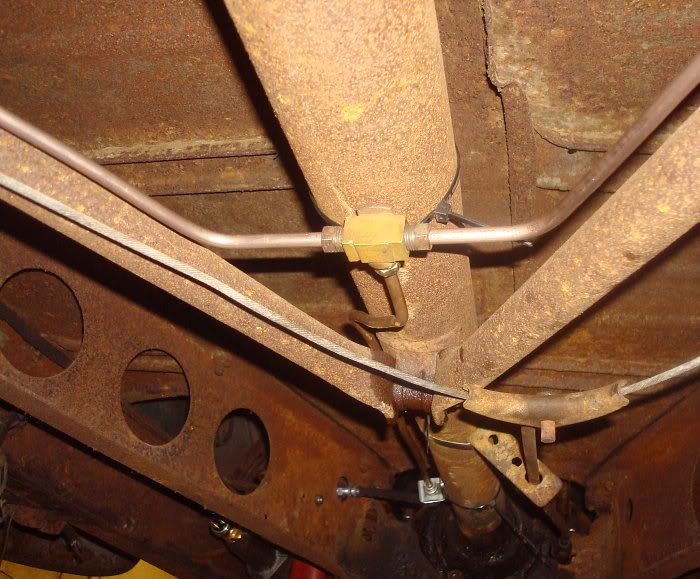 And in this shot you can see the nice simple setup with the short hose going from the frame to an intermediate pipe and then feeding the Tee. 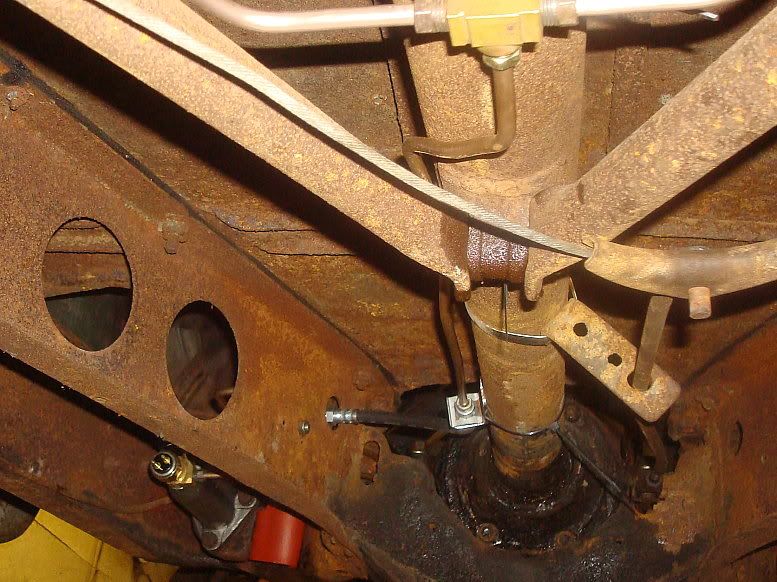 That's it for the brakes, they're all plumbed up, copper washers fitted and everything tightened as necessary. I won't fill the system with fluid and bleed it until I've decided how to do the front shox in case I need to pull the front end again. Right. Back to the rear shox. Upper bracket was fashioned from box section and the other end of the 5/8" shaft. Here you can see the finished left hand bracket and the raw materials that will make up the right hand bracket. 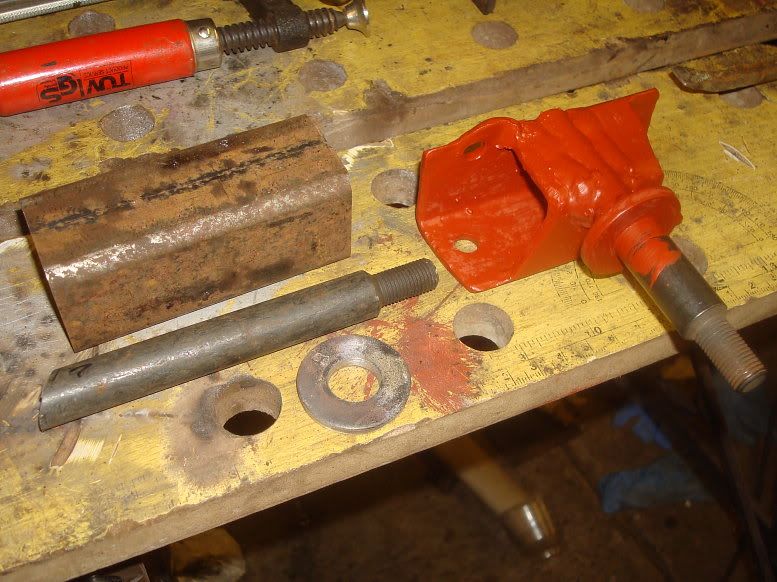 Here's the right hand bracket bolted in place. 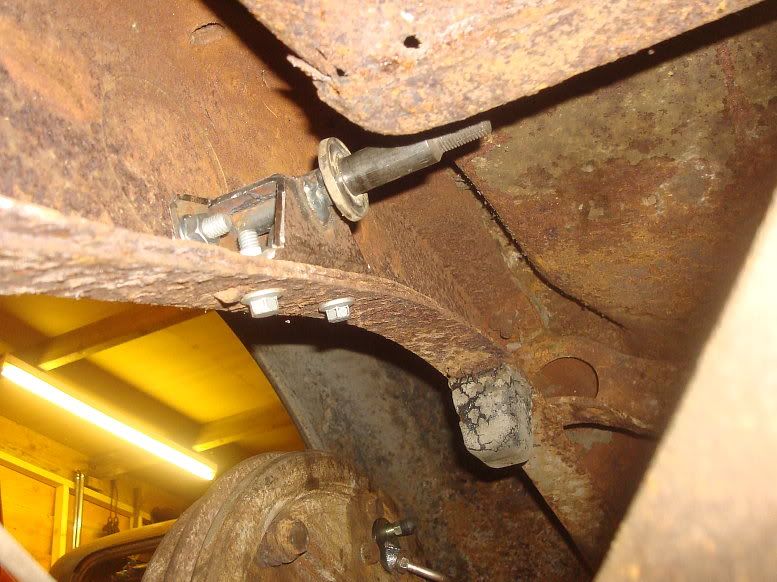 And how the bolts look from the outside on the left.  The upper left hole in this pic is an existing hole in the frame. I had to cheat a bit of extra metal into the side of the tube by building up with weld to give full purchase for the nut. (you can see the extra metal in the pic with the raw material by the side of the finished bracket. If you look right through you can see the shock installed on the opposite side. And here is the shock in place. 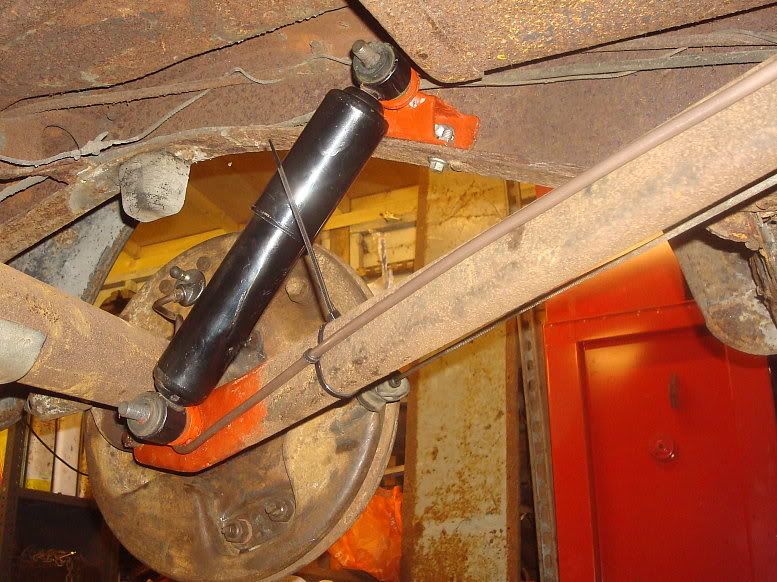 Ok, I know the angle is a bit shallow, but that's what I did to save pushing the shock through the floor. It also means you can use a very short shock, as the travel at an angle is less than vertical. I think they'll be ok, if no good, it's only metal at the end of the day, anything can be reworked. Actually the angle looks shallower than it really is in this pic, due to the angle of the radius arm. The true angle can be seen in the previous pic. That's it for now, feeling one or two steps closer now. Mart. ================================================== ============== And that was the first months work. You can achieve a lot when in that first rush of enthusiasm. Look out for part 2 coming to this forum real soon. Mart. |
|
|
|
|
07-16-2012, 04:43 PM
|
#8 |
|
Senior Member

Join Date: May 2010
Location: Chester Vt
Posts: 8,855
|
Thanks I needed that, God bless.
Ol' Ron |
|
|
|
|
07-16-2012, 05:17 PM
|
#9 |
|
Member

Join Date: Nov 2011
Location: Sacto, Ca
Posts: 85
|
 WOW, some inspiring "can do " attitude with your project here. WOW, some inspiring "can do " attitude with your project here.the xclnt quality photos alone are great , along with some inovated use of modified tools & off the bench engineering. met a clever Kiwi - New Zealander Guy, some time ago who does all this sorta stuff , he calls it, '' making a silk purse out of a sows ear". Great work , have fun on your travels. 
|
|
|
|
|
07-16-2012, 05:34 PM
|
#10 |
|
Senior Member

Join Date: May 2010
Location: Qld, Australia
Posts: 4,212
|
I,m nearly burned out just looking at the pics,
I thought I had a big job painting my 33. Lawrie |
|
|
|
|
07-16-2012, 06:42 PM
|
#11 |
|
Senior Member
Join Date: Jun 2010
Posts: 228
|
I enjoyed your 3month pictorial ! THANKS Dave p.s. Almost forgot nice car!!
|
|
|
|
|
07-16-2012, 07:19 PM
|
#12 |
|
Senior Member

Join Date: May 2010
Location: Irving, Texas
Posts: 598
|
Like your engineering on an interesting project Really enjoyed your project build pics. Ed
|
|
|
|
|
07-16-2012, 07:47 PM
|
#13 |
|
Senior Member

Join Date: May 2010
Location: ⓉⒺXⒶⓈ
Posts: 2,047
|
Love your posts Mart. Congrats on the new ride!!
__________________
-------------- Drive it like you know how to fix it! DMAFC / OILERS CC-MC |
|
|
|
|
07-16-2012, 07:59 PM
|
#14 |
|
Senior Member

Join Date: May 2010
Location: Louisiana
Posts: 866
|
Overcoming adversity with ingenuity at it's best. Good Job.
|
|
|
|
|
07-16-2012, 08:22 PM
|
#15 |
|
Senior Member

Join Date: May 2010
Location: Napier, New Zealand
Posts: 2,001
|
Perfect!
|
|
|
|
|
07-16-2012, 08:40 PM
|
#16 |
|
Senior Member
Join Date: May 2010
Location: Colorado
Posts: 553
|
What a great tutorial. What a great mechanic. Very clever and inventive. Nice car, great job!
|
|
|
|
|
07-16-2012, 09:05 PM
|
#17 |
|
Senior Member

Join Date: May 2010
Location: Above the gnat line in Georgia
Posts: 7,009
|
I can certainly appreciate the work you have done. Great job. Nice car.
|
|
|
|
|
07-16-2012, 09:40 PM
|
#18 |
|
Senior Member

Join Date: May 2010
Location: MN
Posts: 7,053
|
Spot on mart. Every step of the way. Very refreshing in a throw away world.
|
|
|
|
|
07-17-2012, 05:00 AM
|
#19 |
|
Senior Member

Join Date: May 2010
Location: Smithfield, Va
Posts: 822
|
Good work.
Keep workin' Al PS You're making the rest of us feel lazy!
__________________
36 Fords Rule! Visit at www.36fords.com. |
|
|
|
|
07-17-2012, 05:33 AM
|
#20 |
|
Senior Member

Join Date: May 2010
Location: Suth'N Maine
Posts: 1,996
|
Started reading this great little thread this morning, had to make a second cup of coffee and enjoyed it.
Mart it gave me a little more motivation to do some work on my 39 even with this heat/humidity sucking the life outa you  . Scott . Scott
|
|
|
|
|
07-17-2012, 05:39 AM
|
#21 |
|
Member

Join Date: Jul 2010
Location: NETHERLANDS
Posts: 67
|
Mart, love your work methods. Did i miss something or is OldRusty now without an engine ? BTW, those '32 grille shells on the wall, are they the same ones ..........? ?
|
|
|
|
|
07-17-2012, 06:00 AM
|
#22 |
|
Senior Member
Join Date: May 2010
Location: Solihull, England.
Posts: 8,744
|
Hi Henry. I fitted a French motor to Old Rusty last year, so this one was sitting idle. Ideal for this job as it's a known running engine.
One of those grille shells is from the original haul. It is being saved for Old Rusty. The other one is the one from/for my 32 sedan. Thanks for all the other comments fellas. Mart. |
|
|
|
| Sponsored Links (Register now to hide all advertisements) |
|
|
|
07-17-2012, 07:22 AM
|
#23 |
|
Senior Member

Join Date: Dec 2011
Location: Houston Texas
Posts: 170
|
Thanks for sharing keep sending progress pics
|
|
|
|
|
07-17-2012, 07:55 AM
|
#24 |
|
Senior Member

Join Date: May 2010
Location: ManchVegas, New Hampshah
Posts: 1,589
|
Nice save. I like your engineering on the chassis fixes. The condition of the original engine looks like it was in a few floods. Again, great work.
|
|
|
|
|
07-17-2012, 08:00 AM
|
#25 |
|
Senior Member

Join Date: May 2010
Location: Kokomo, Indiana
Posts: 1,731
|
Very impressive!! I like your approach. Good luck and continued success.
|
|
|
|
|
07-17-2012, 09:04 AM
|
#26 |
|
Senior Member

Join Date: Feb 2011
Location: Candiac, Qc.
Posts: 483
|
Sponsored Links (Register now to hide all advertisements)
Robert |
|
|
|
|
07-17-2012, 09:52 AM
|
#27 |
|
Senior Member

Join Date: May 2010
Location: new britain,ct 06052
Posts: 9,389
|
This is an amazing thread. And it shows a lot of how thing s were done back before the i/net and 1-800 order partd.
Thanks for posting! ! Paul in CT |
|
|
|
|
07-17-2012, 11:31 AM
|
#28 |
|
Senior Member

Join Date: Jun 2010
Location: St Croix Falls WI
Posts: 2,080
|
Congrats on the nice 33 , IF you have the patience you can take the primer off by color sanding . This 33 5w sat for a loooong time in that little metal roofed garage . The pic of it coming out is from DEC 2010 . The spare grille in the first pic was just put on for a photo op . I got it painted red . As you can see it is really quite nice after a couple hours with paint stripper . May wanna try this on yours . If pitted bad or whatever you can just paint it again . Bumpers also . On the body as you can see mine had the primer thing done to it also . Quite a few hours CAREFULLY color sanding [ used steel wool , 1000 , 600 & 1200 to remove the primer . No idea whats under yours but I found most of the gennie paint - some striping & NO OLD BODYWORK . Car isn't real pretty but it goes down the road fine & gets a lot of phones pointed at it . The last pic is how it looked about halfway done . The steel wool worked best in the thinner primer areas with the sandpaper working the best on thicker areas . I only used the sandpaper until the gennie paint started peeking through & finished with the steel wool . Easier to control the removal with it as it is not as agressive . If you want to buff it leave just a trace of primer & buff it off . I just left mine dull as the paint is missing in some areas etc . You may or may not be interested but it does work with patience . GOOD LUCK
Last edited by David J; 07-18-2012 at 03:03 AM. Reason: ADD PIC |
|
|
|
|
07-17-2012, 11:59 AM
|
#29 |
|
Senior Member

Join Date: May 2010
Location: Kansas
Posts: 334
|
Love your car, Get that baby running and drive the thunder out of it...
__________________
[QUO[/QUOTE]no matter where you are,or where you're at, there you are...
|
|
|
|
|
07-17-2012, 12:18 PM
|
#30 |
|
Senior Member

Join Date: May 2010
Location: Coral Springs FL
Posts: 10,921
|
Great work. Please don't use 3 legged jack stands. They just don't have the stability of 4 legged stands. Google '3 legged jack stand safety" and info. like this appears. http://www.aa1car.com/library/floor_jacks.htm
Last edited by 19Fordy; 07-17-2012 at 12:36 PM. |
|
|
|
|
07-17-2012, 01:54 PM
|
#31 |
|
Senior Member

Join Date: May 2010
Location: Sf bay area
Posts: 1,464
|
Mart--thankyou for sharing enjoyed your post and learned some front end stuff....gump
|
|
|
|
|
07-17-2012, 02:04 PM
|
#32 |
|
Senior Member
Join Date: May 2010
Location: Alameda, California
Posts: 335
|
Well, I'm blown away......If you had been on the Titanic it would have made it to New York!...Verrrry impressive.... I don't think I would have recovered from looking in the oil pan.........Matt in Alameda
|
|
|
|
|
07-17-2012, 02:28 PM
|
#33 |
|
Senior Member

Join Date: Jul 2010
Location: Quebec, Canada
Posts: 415
|
VERY impressive Mart. Thanks for sharing.
|
|
|
|
|
07-17-2012, 02:35 PM
|
#34 |
|
Senior Member
Join Date: May 2010
Location: Solihull, England.
Posts: 8,744
|
Ok, Boys. lets have a look at what happened next.
The next few posts will cover mid May to Mid June. ========================================= 5/15/12 Have done a little more, namely the front shocks. I find that deciding how to do it takes longer than the actual doing. And once the first side is done, copying it for the other side is quicker still. I decided on a similar method to the rear. Started by drilling a hole straight through the radius arm. 1/2" first, then opened the outer to 5/8". 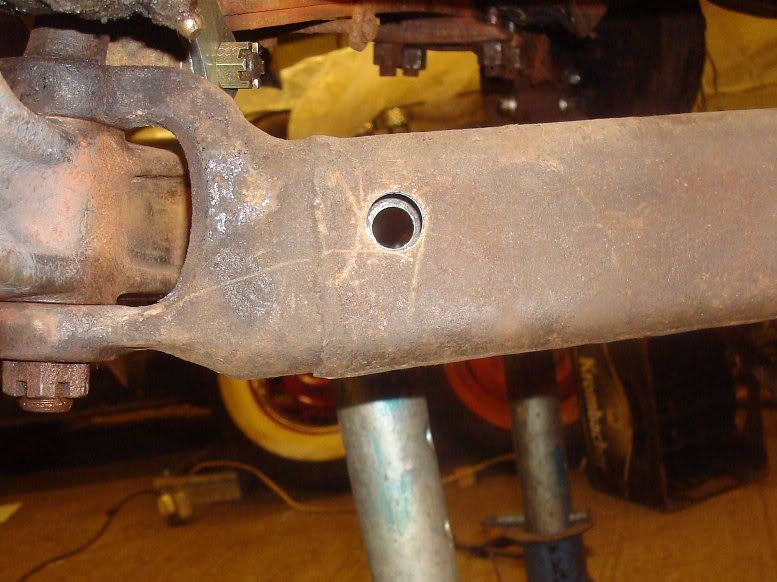 I then turned one of the 5/8" shafts down to 1/2" to suit the bushes in the shocks I had decided to use, and knocked it through the arm as a test.  Once happy that this was to be a going concern, I cut down the pin, tidied the end and knocked it in again. It's a good tight fit. 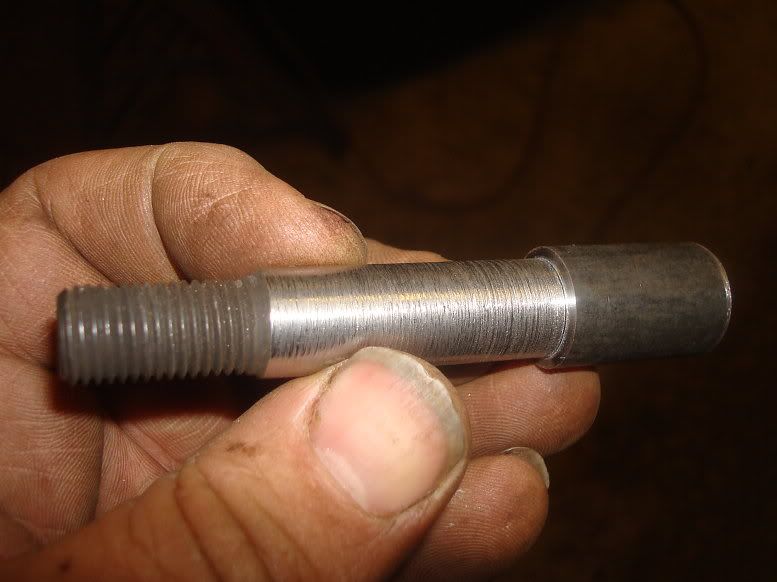 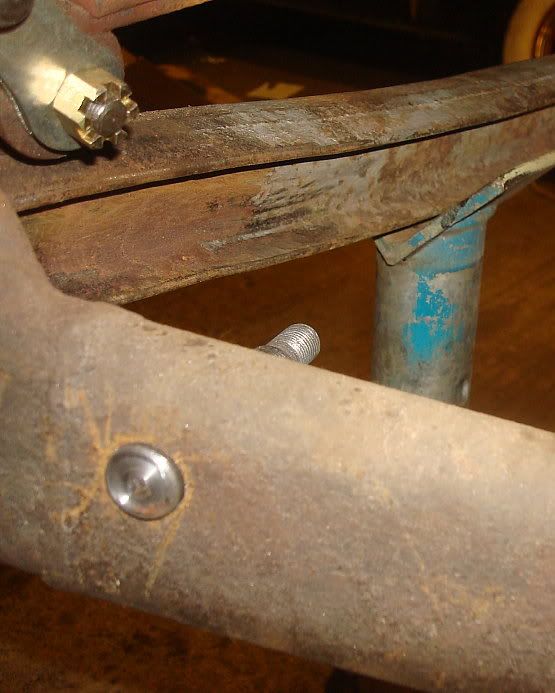 I thought about welding it in, but with the stepped diameters, it will be held solid by the nut so I will leave it just as it is. It did occur to me after doing the job that this location for the shox would not suit a setup where the track rod is above the radius rods. No problem for me, as mine runs below, but could be a problem if not taken into account. The location I chose for the lower mount puts the shock in alignment with the rear edge of the fender brace. On the 33/34 the brace is a substantial affair, and has an extra brace running through the inner fender panel to the front crossmember. I decided to simply mount the upper part of the shock to the brace using a bolt on mount similar to that used at the rear. Here's the brace: 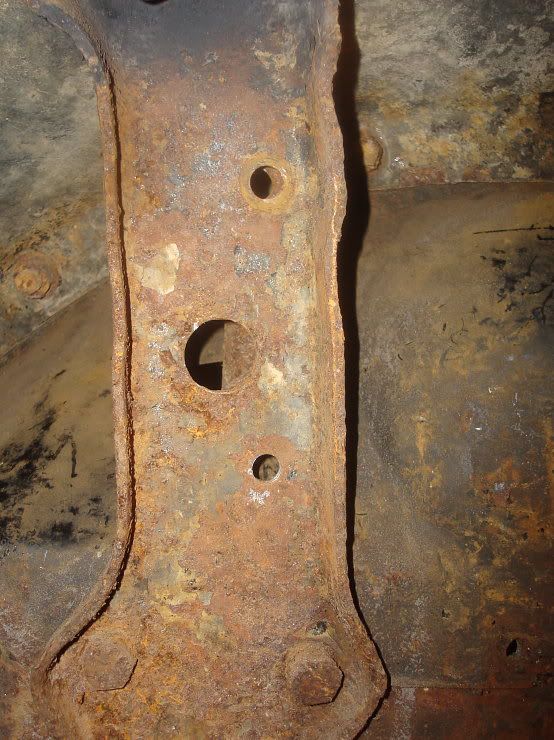 The top and large holes are stock, I drilled a new hole lower down. Here's the raw materials for the upper mount: 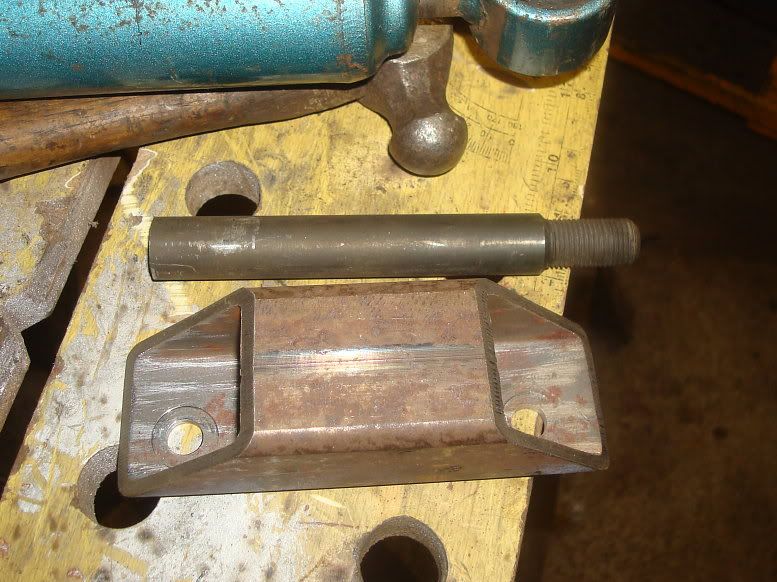 And welded up into a mount: 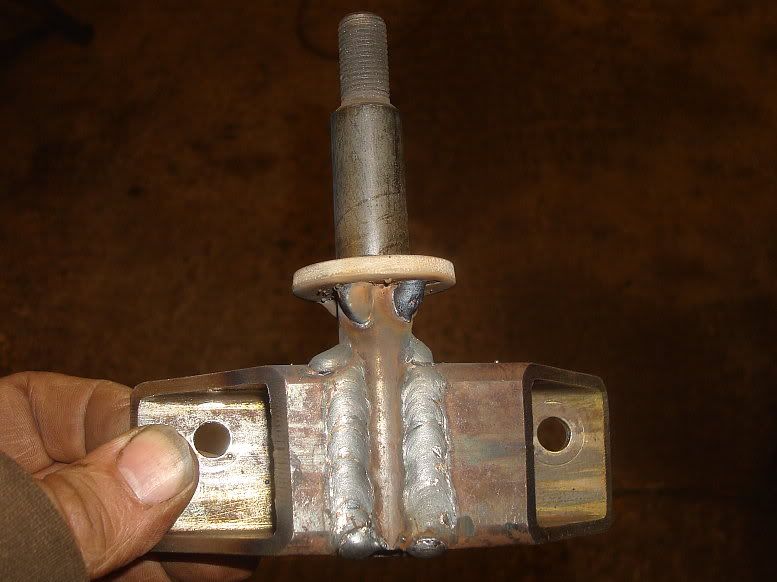 And a couple of shots with the shock bolted up: 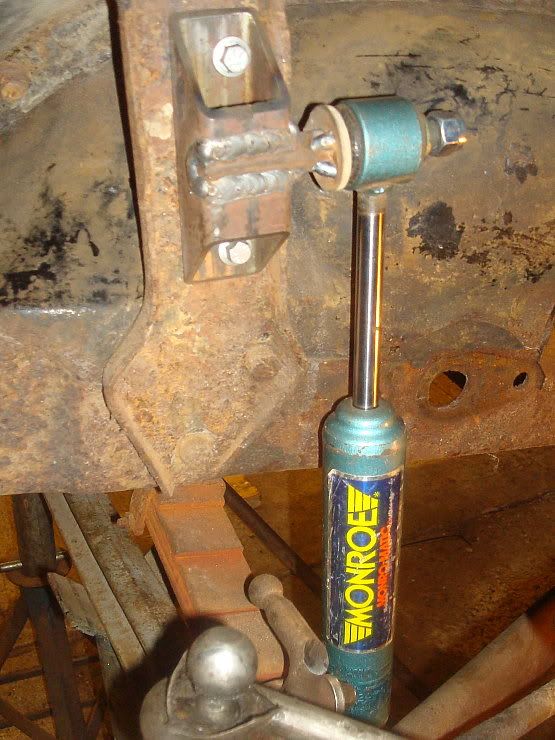 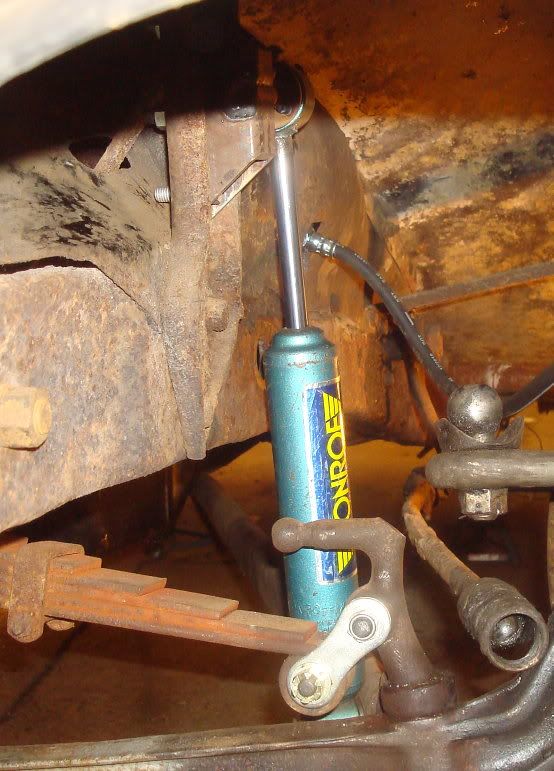 Not the prettiest of installations, but it will do the job and it's just another job that needed to be sorted, because without it, the car cannot go for test. As I have said before, it's only metal, anything you do can be undone. Looking at that last pic, I'm thinking the drag link ought to be the next thing to get some attention! Personally, I'm pleased with it, particularly the aspect that it has all been done with stuff I had around me. Just found an extra pic showing both ends at once: 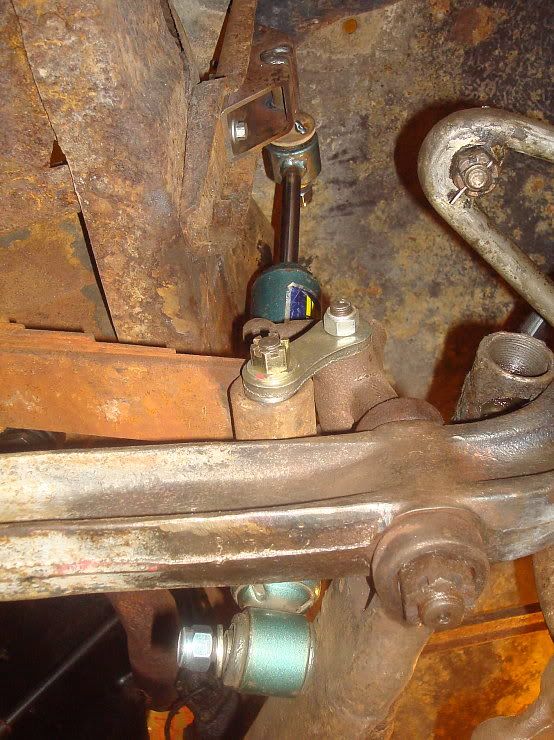 Mart. ============================================ 5/19/12 Here's a mini-update to log the work done over the last few days. Just little stuff. I made up the parts for the right hand front shock absorber, and it came out ok, except that when I welded the parts up I managed to weld them up the wrong way around so I had one that was more like a left hand one than a right hand one. Whoops. I welded up the bolt holes and redrilled them the other way round. So with the shocks sorted, I turned my attention to the drag link. This was a mess, it had been cut and welded to shorten it, (right in the middle which is the worst place to do it,) and bent and had something welded to it. Before I got the car, I saw an A drag link for sale (one out of Tony Cardy's stash), and having saw a pic of the 33 drag link and seeing it was messed up, I bought it just in case it may be useful. Here's the pic I saw: 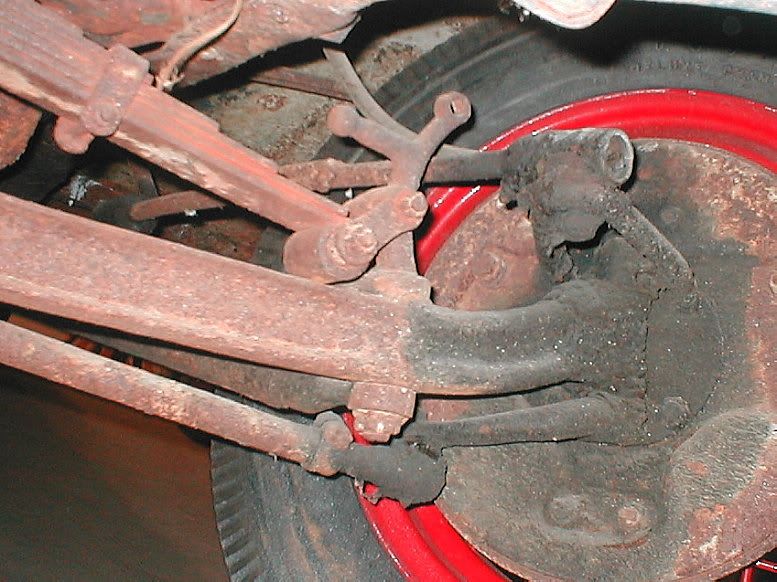 And a close up of the dodgy bit: 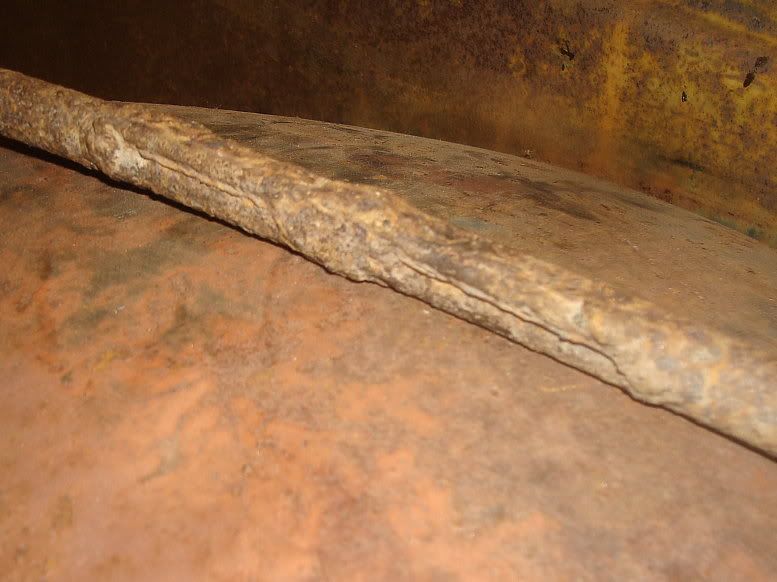 I got the 33 one off, and put it next to the A. 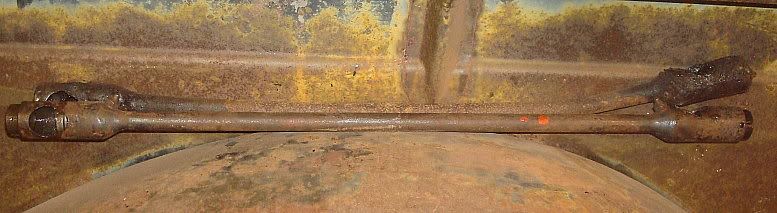 The length was very similar, the A one less than 1/8" shorter than nthe cobbled up 33. So I had something I could use - that's good, I don't like messing with the drag link. The other thing that wasn't right was the pitman arm. It had been bent. God knows why, but it had. I heated it and bent it straight again. 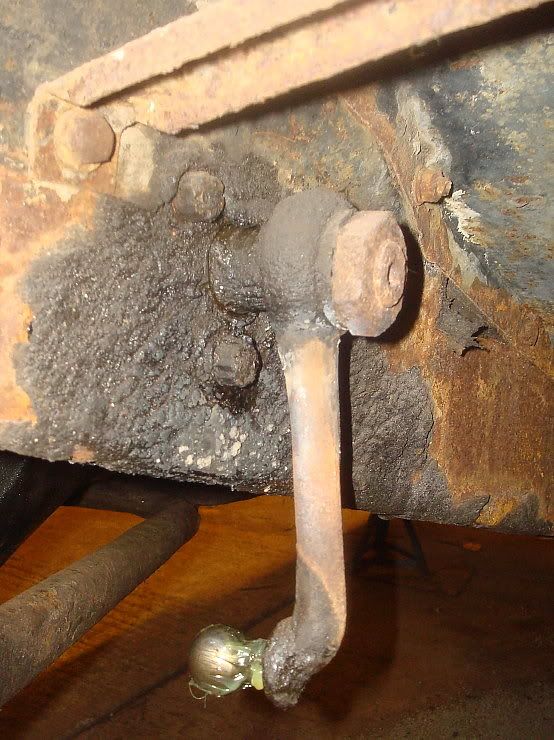 I said earlier the guy that had this back in the day was not afraid to grease stuff, so to my relief, I could see the ball on the pitman arm was in good condition. I could feel some play in the steering box, so without too much drama, adjusted it until it felt ok in the mid point. 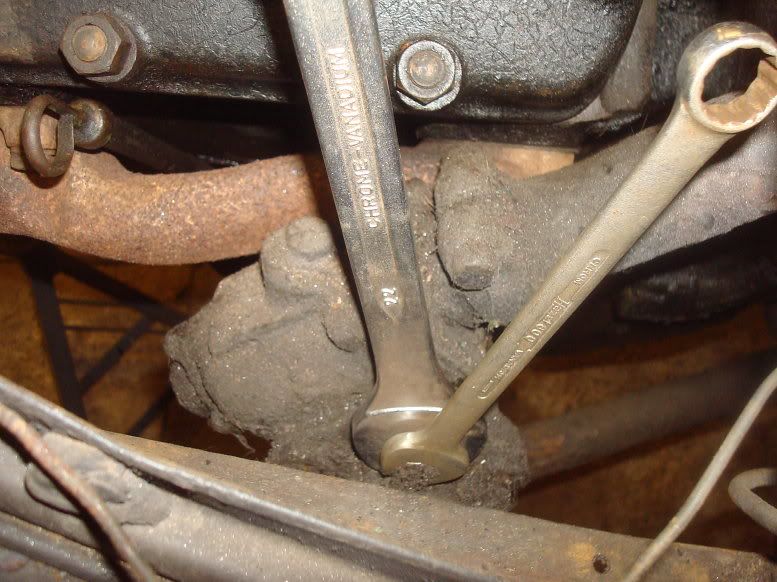 The big spanner is on an eccentric that you turn to alter the relationship between the worm and sector. I just slackened the four nuts, turned the eccentric while feeling if the play was increasing or decreasing, and set it at the minimum, but not binding. Do the 4 nuts up and job done. I dismantled the A and 33 drag links, and a 32 track rod and salvaged the best parts from the 3. I had a set of repro parts to rebuild, but they were not good. It was as if they had been copied off worn parts, not NOS stuff. The radii of the cups did not match the balls, so what's that all about? I assembled it up with good original parts, fitted new rubber seals at each end and assembled the A drag link onto the car. 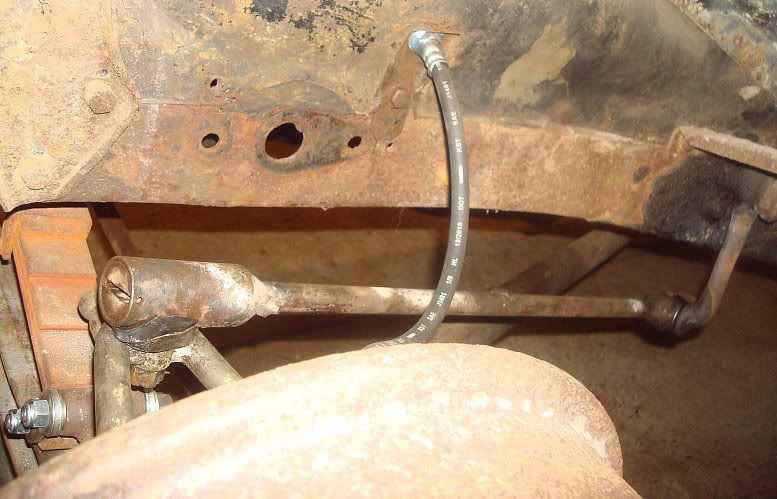 And while I was in the area I put new rubber boots on the track rod ends. 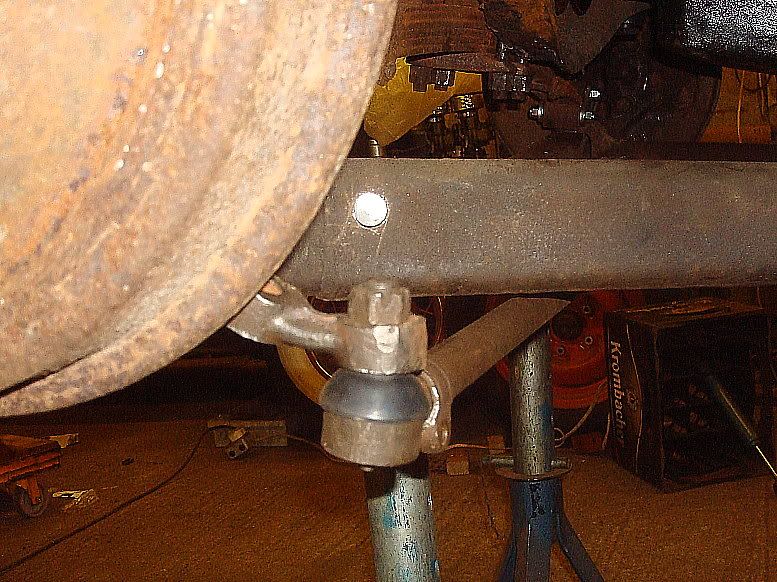 I tested the steering through full lock to lock operation, and it now turns smoothly through the whole range. When I got it, it bound up terribly towards the ends of each lock. Track rod rubbing the radius arms, conflicting arcs on the drag link and bent pitman arm all made for a very badly engineered setup. I have a theory why the drag link was shortened. The spindles were swapped out for 37-41 roundbacks when the brakes were switched to hydraulic. The 32-34 spindles have an integral steering arm which is correctly aligned to be at 90 deg to the drag link, which means the end is forward of the axle centre line. when switching to a bolt on aftermarket slingshot arm, the arm is at 90 deg to the spindle, and the end is on the axle centre line, not forward of it. Hence the need for a shorter drag link. I reckon the A link is slightly short, but closer to the ideal length than a stock 33. An adjustable one is do-able, but if trying to retain the simplistic beauty of Henry's original design, I prefer the one piece original style unit. I still need to go around and fit lots of split pins, which would make sense to do while the car is up in the air, but that's the finishing touches, I'm still tackling big job-stoppers, stuff that is preventing it being driven. Still lots to do, but good solid progress made. Mart. |
|
|
|
|
07-17-2012, 02:37 PM
|
#35 |
|
Senior Member
Join Date: May 2010
Location: Solihull, England.
Posts: 8,744
|
Next I looked at the fuel tank.
======================================== 5/22/12 447 I just came in from a good sesh so I'll bring things up to date. I finished messing with the shocks, fitting the painted front shox and brackets, and putting washers and nylock nuts on. I started thinking about what is the next job stopper. The fuel tank. When I was under the back end I noticed the underseal was shiny and gooey on the one corner of the tank. I looked up with a torch and had a poke around with a chisel. Sure enough I found a couple of pinholes. 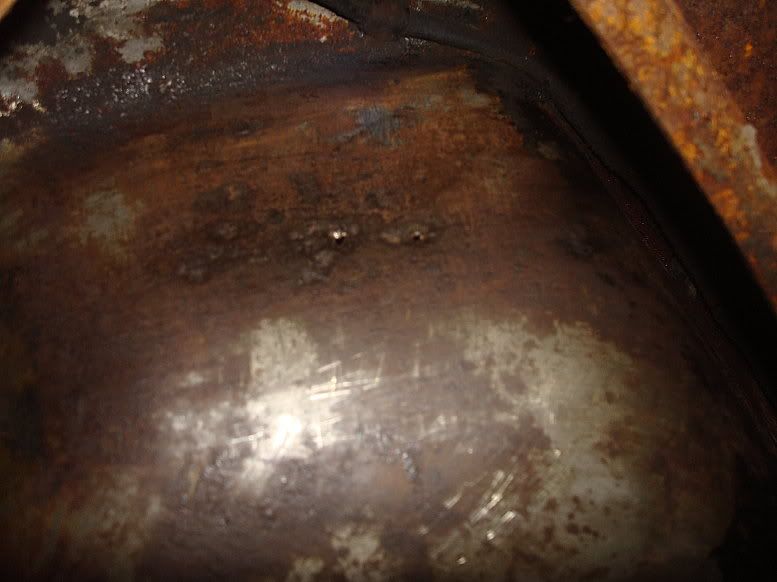 This is after cleaning some of the underseal off. I looked and realised getting the tank out is quite a job. But out it had to come. Quick check on the internet: "take the bumper off. remove the rear panel. Remove the spreader bar, undo the tank, slide it out." Piece of piss. Had to get the big breaker bar out on the bumper bolts, but got the bumper off. I drilled the 4 screws out that held the rear panel on and removed the fender to rear panel bolts. Some of these are into cage nuts so I was pleased when they came out ok. Here's the rear end with the bumper and rear panel removed: 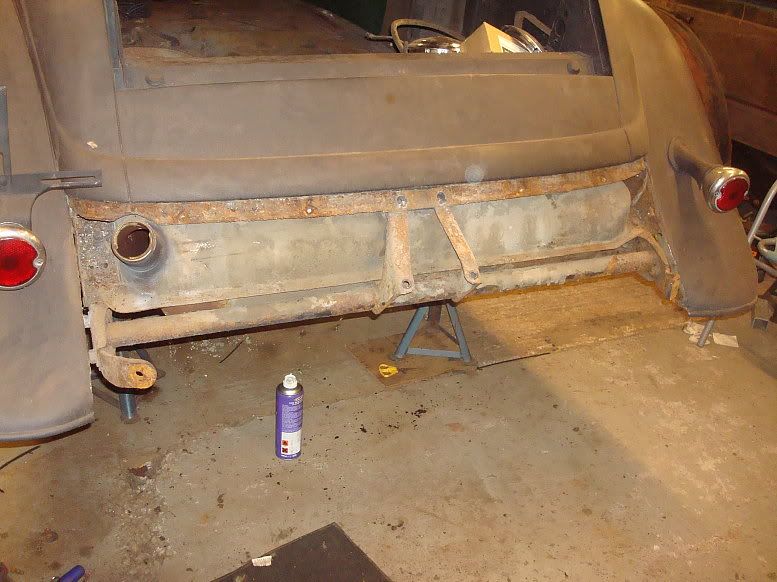 Spreader bar came off ok, and revealed the bolts holding the tank in: Right hand: 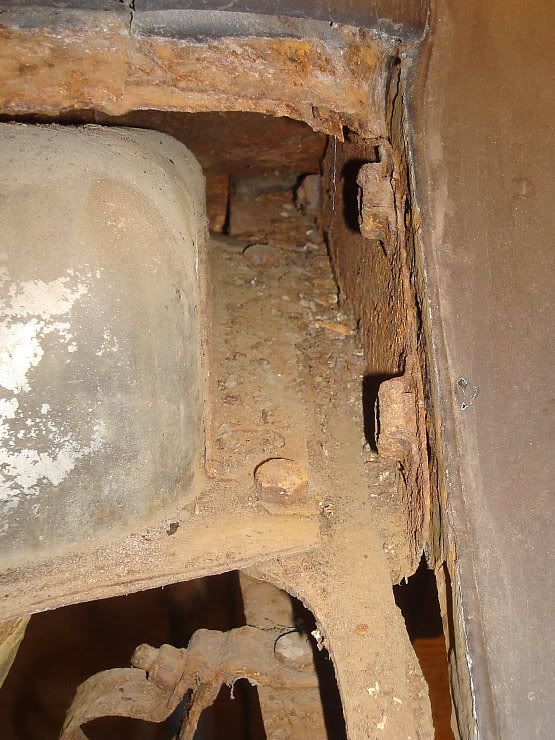 And left: 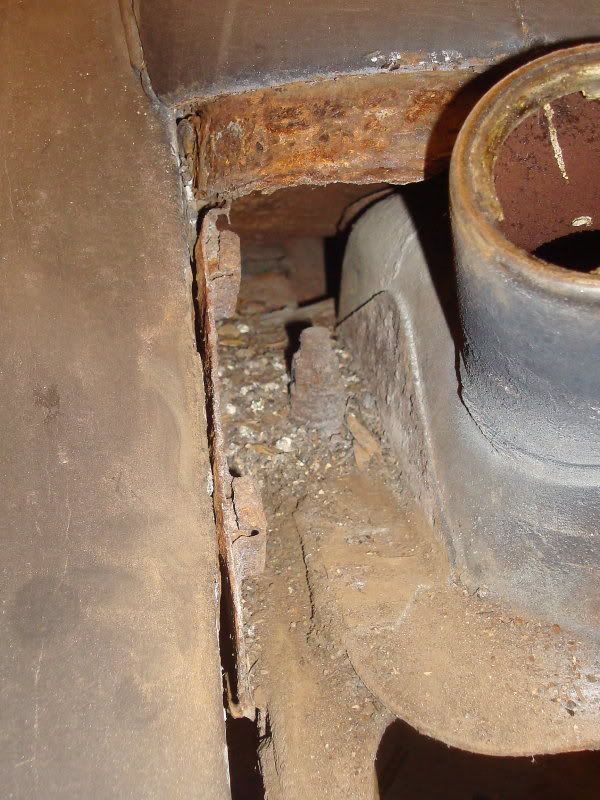 I could see the left mount was wound down tighter than it should be, so I knew the tank must have been removed at some time in the past. I couldn't undo the nuts so I removed the filler panels on each side to get better access. Once I did that I could undo the nuts and bolts. 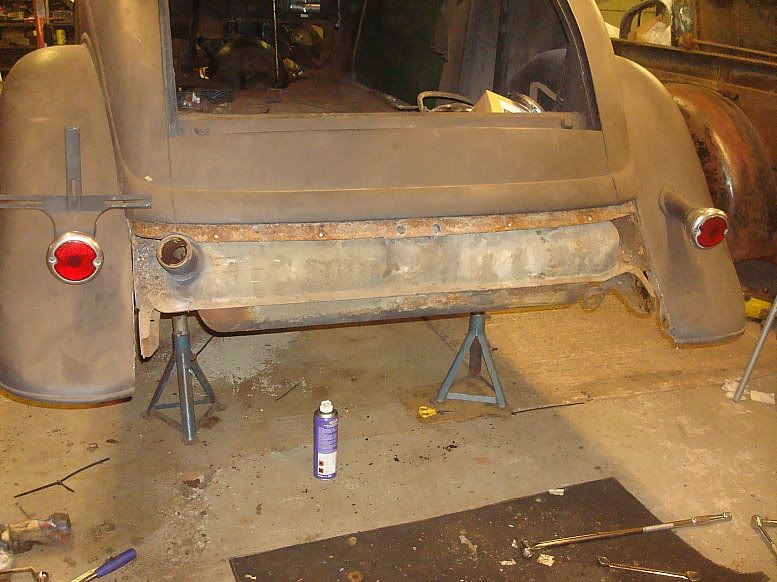 When it was half way out I could see then that a second sender unit had been added. 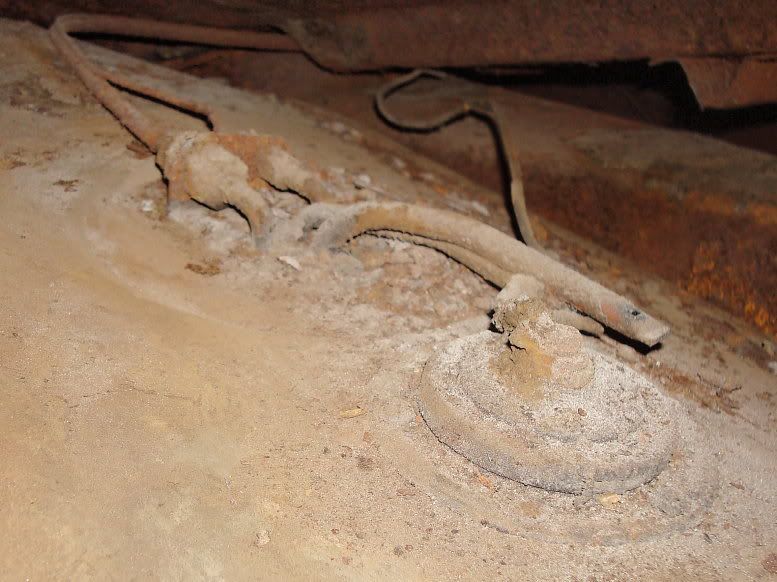 So that is why the tank had been disturbed previously. I removed the fuel pipe and capillary (still the originals). And out it came: 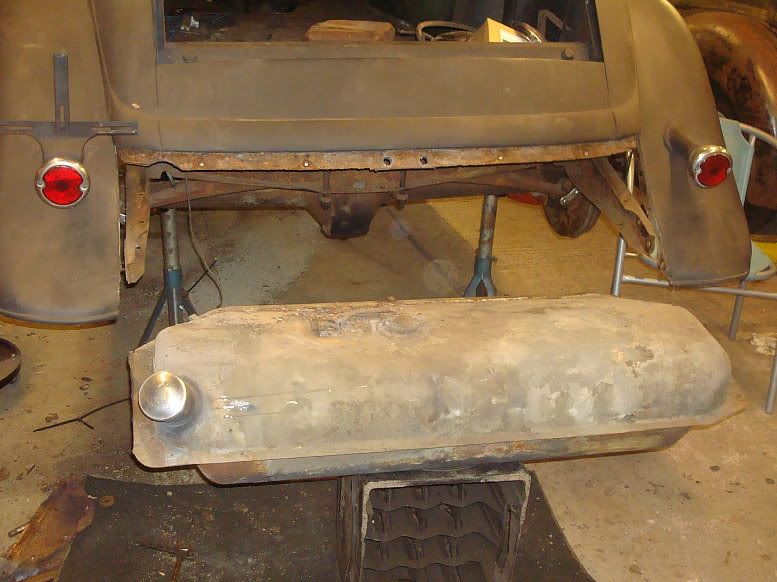 I could then see the holes that needed repairing: 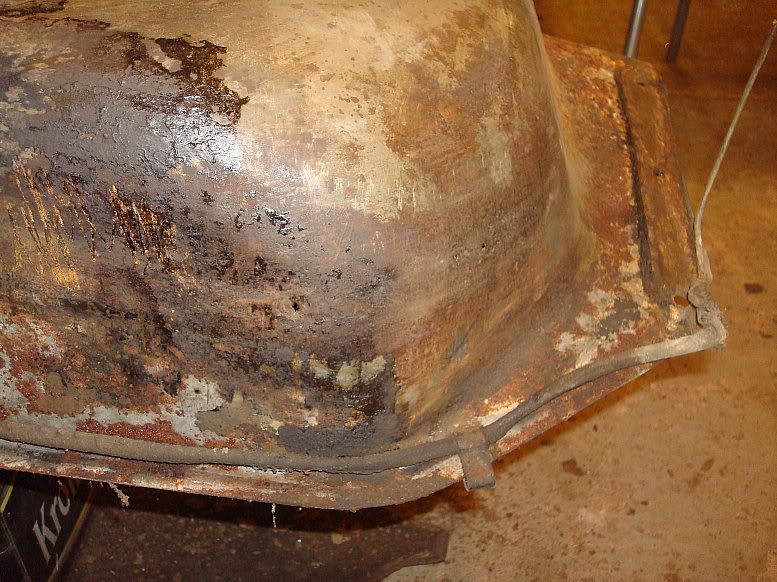 Not too bad really, I thought. I cleaned it all up with a wire brush (on the angle grinder) 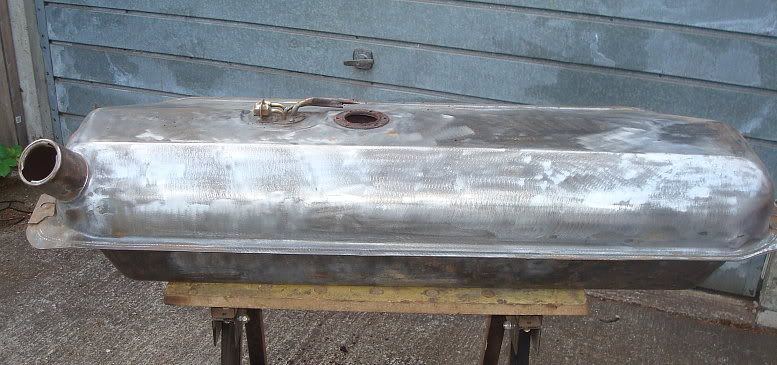 And tipped it on end and all this crap came out of it: 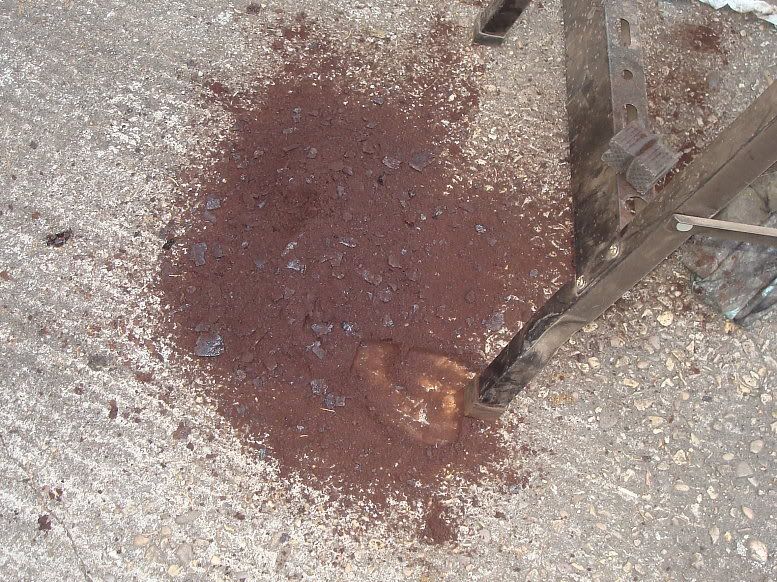 I was torn between repair techniques. Glassfibre? Solder? Self tappers and solder? I dragged it back in the garage and said Fuck it. I'll gas it. 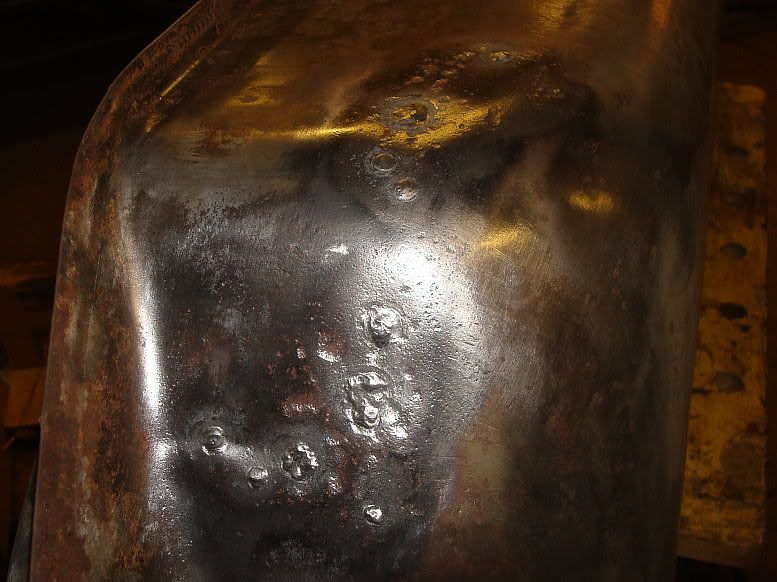 Didn't kill myself, so it was a good choice. I gave it a coat of red oxide with the roller and left it in the sun to dry out (I had flushed it through with water). 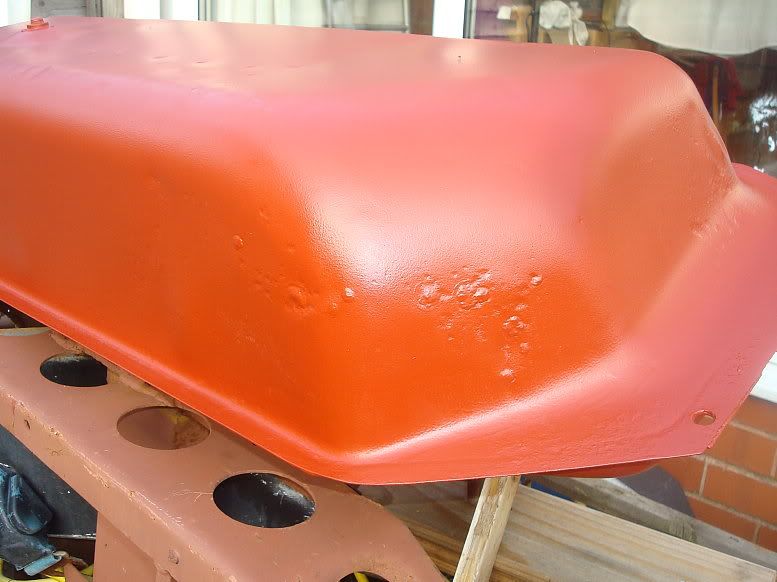 I just happened to take a shot of the back of the car with the arse end hanging out: 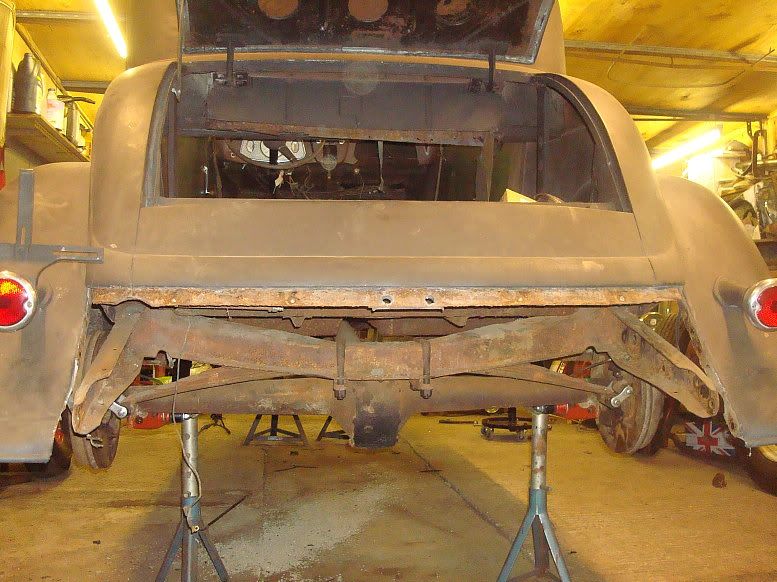 I looked at the sender units I had and decided to use a Pilot unit I had around. This neat unit fits the 33 6 bolt pattern. 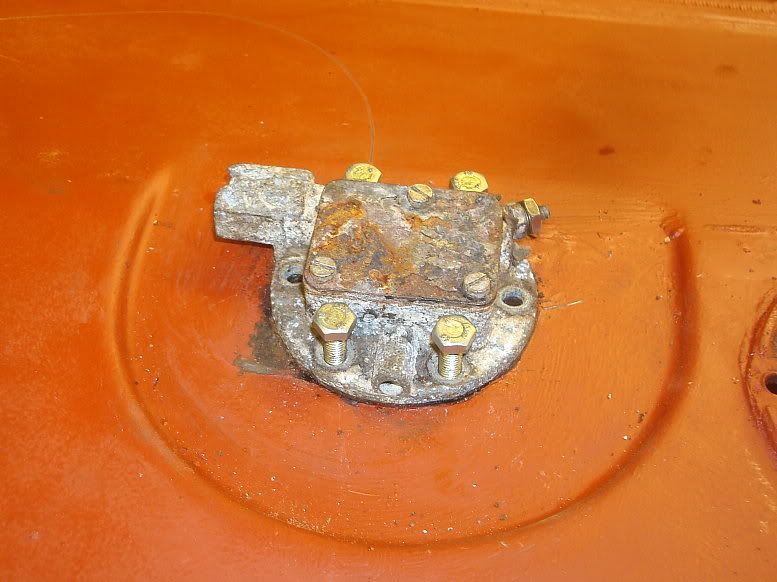 That was last night. I couldn't go any further because I hadn't got any new screws to fit the sender. The old ones were a bit knackered after being removed. |
|
|
|
|
07-17-2012, 02:37 PM
|
#36 |
|
Senior Member
Join Date: May 2010
Location: Solihull, England.
Posts: 8,744
|
Fuel tank continued
Mart. =========================================== I got up this morning and there was a thought nagging at me. When fitting the sender I could see there was some clag in the bottom of the tank. I remembered Lars Brandow's 33 build and he got drastic with his tank, and that is what I decided to do too. Marked the top of the tank: 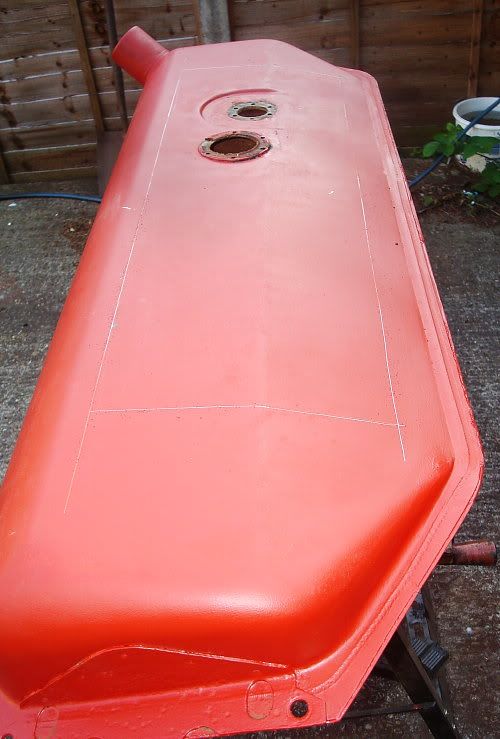 And cut it out with a thin disc. 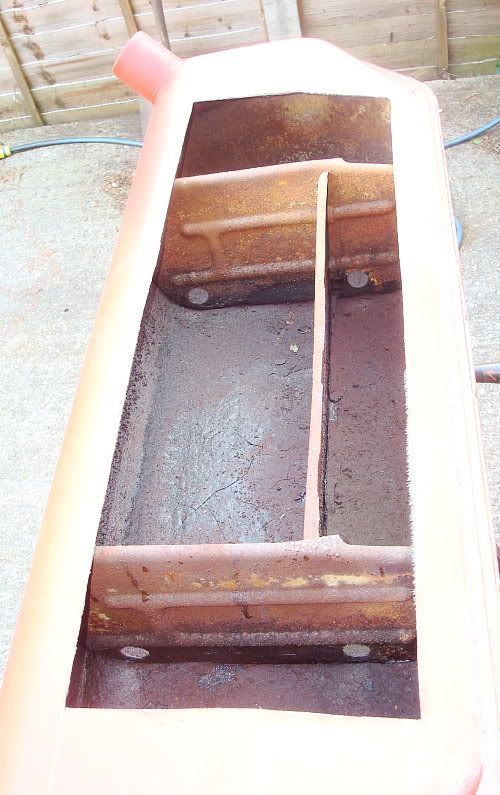 You can see the yucky mess. Yuck- 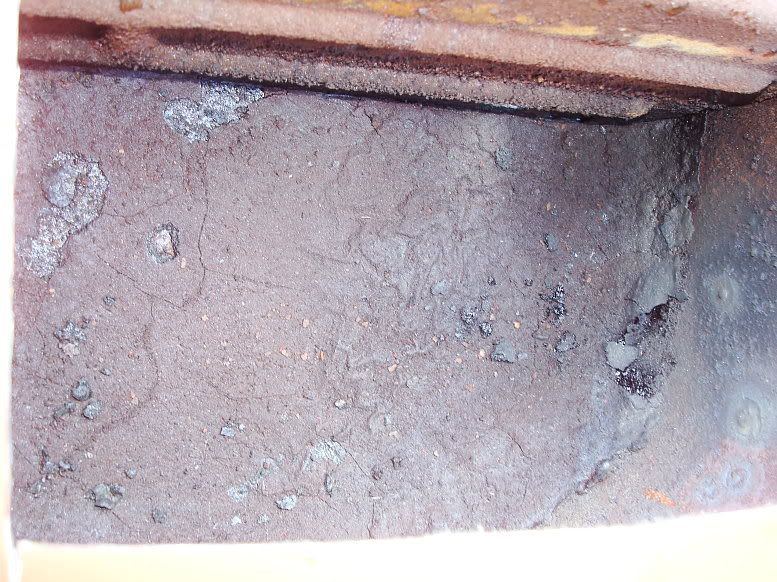 ee- 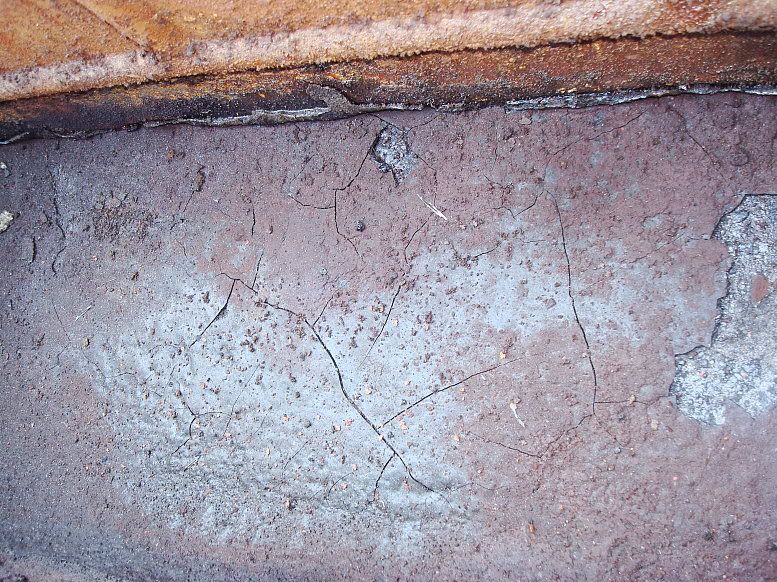 Mess: 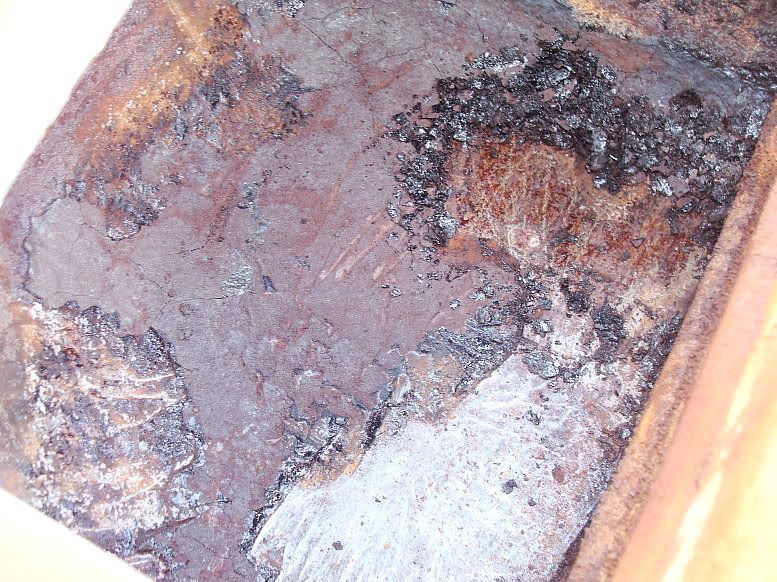 This is half way through scraping it out. I didn't want to use any solvents because I wanted to be able to weld it back up. I got it all out: 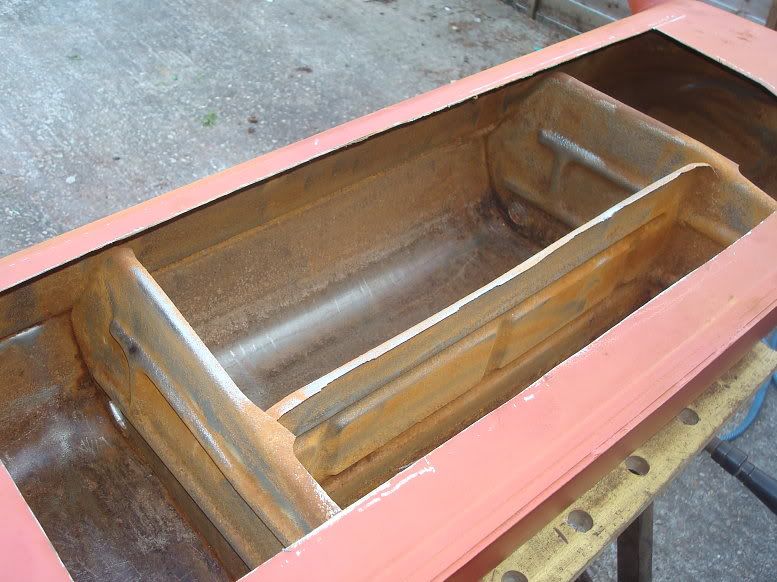 And after welding up the extra sender hole, I put the top back on:  And after a quick run round with a wire brush: 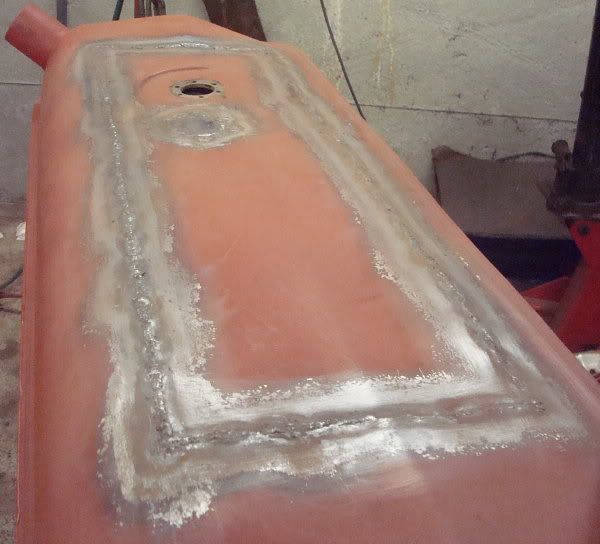 Slapped another coat of paint on with the trusty roller. (Wrapped in cling film and ready to go at a moments notice) 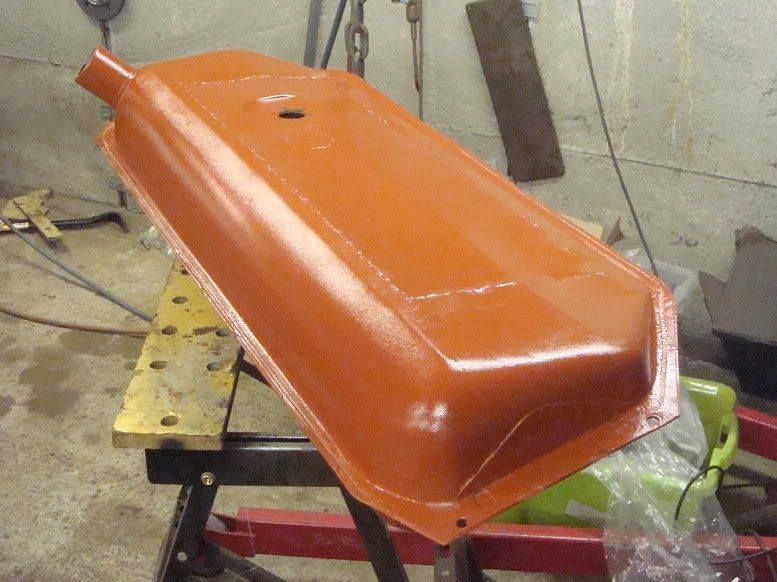 I migged it at intervals (down to 20mm) and gas welded it. I got a little distortion, but not too bad. As it is a closed section, I couldn't hammer and dolly it, so it was just a case of skipping around and keeping the heat to a minimum. I would have liked it better, but it won't be on show, and functionally should be fine. It'll certainly be better than if I'd left it with all that shite in there. So that's how it stands as I left the garage this evening. Feeling pretty pleased I went the extra mile on the tank. Mart. |
|
|
|
|
07-17-2012, 02:41 PM
|
#37 |
|
Senior Member
Join Date: May 2010
Location: Solihull, England.
Posts: 8,744
|
5/29/12
Been plugging away at it and have another little bit of progress to report. I ran a new fuel pipe. The one in the car was the original, and had then capillary tube brazed to it as orig. But it was badly pitted, unfortunately, and I don't need the capillary as I'm going electric, so out it came. I fitted the sender with a new gasket and hooked up the pipe and got the tank in place. 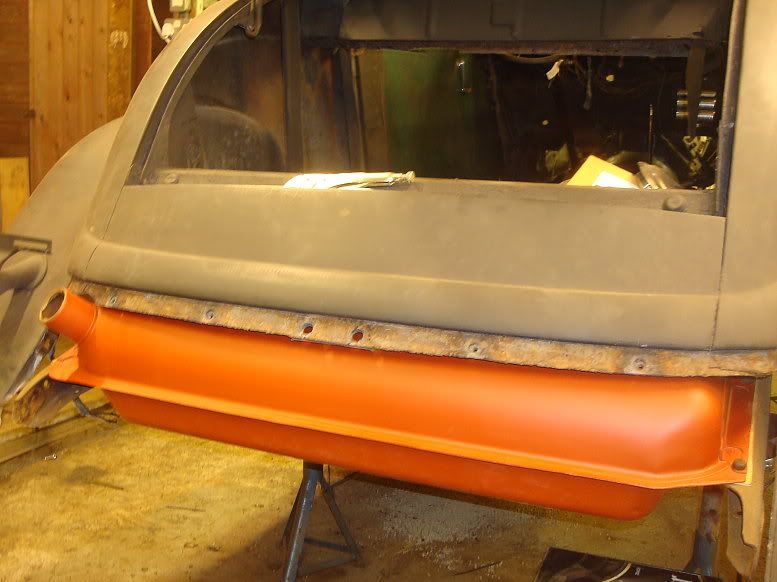 I then refitted all the rear end sheet metal and spent ages trying to find some suitable bolts for the rear panel. Refitted the spreader bar and the rear bumper. Used new bolts as I sheared one getting it off. Why I didn't free it with Oxy I don't know. Had a day out last Friday and went to Enfield with some mates. Trawled the swap meet and picked up a few nik-naks. One of the things I got was this Pilot oil filler/fuel pump stand for a tenner. It looks like new, but is lightly used. Best thing is, it is long, and the base is nice and flat (almost). 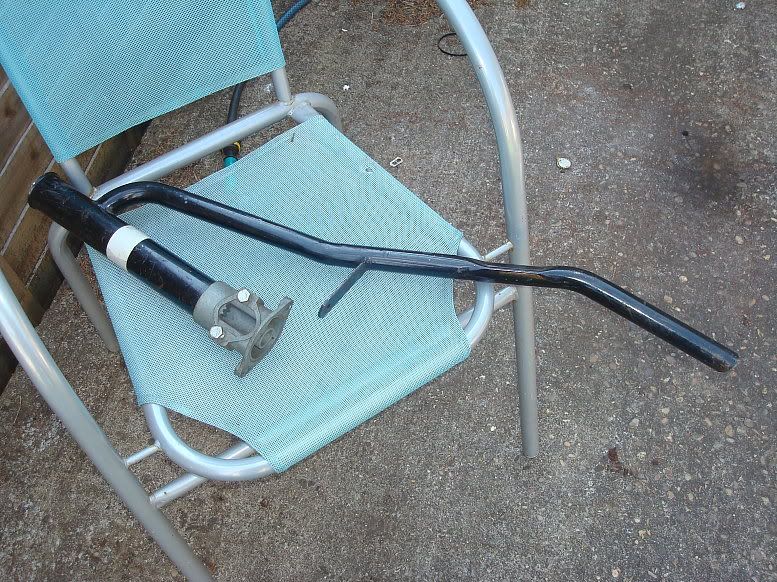 I cut it down to a suitable height and set it in place. I don't know quite what the crack is, but the filler tube is just fouling the firewall:  I didn't want to pie cut it, so tried to bend it a bit by heating and quenching on the front side.  I did this quite a few times, and while it did move a bit, that was it and it wouldn't go any more. I ran a file over the base as it wasn't quite flat, and sort of favoured the front side, i9f you know what I mean.  This was enough to just get it to clear, but it should really have more clearance than this. 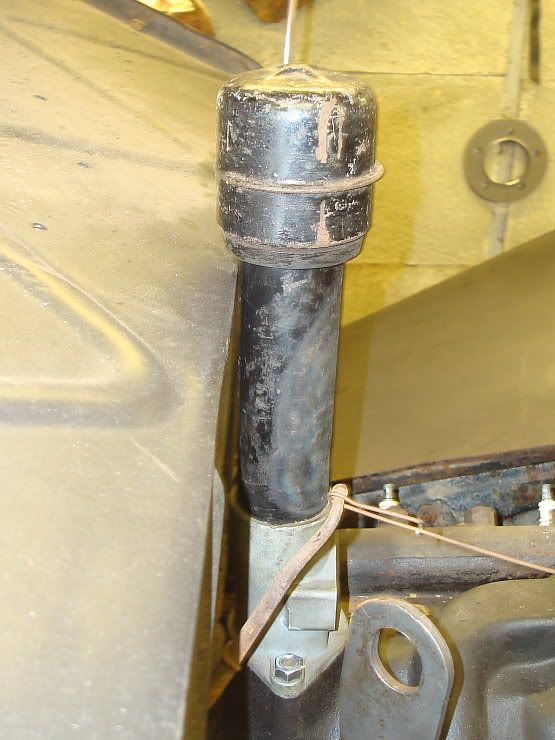 If I have the firewall insulation out at any time I might just heat up the firewall locally and put a little dent in it to give more clearance. That was a little bit of a diversion, due to getting the filler tube last Friday. As you will be aware, I tend to tackle the big job stoppers first, because without those things fixed, the project has no chance. Next job stopper was the radiator. It must have have frozen up with some water in the bottom, because the lower tank was all swollen up and the seam was split. 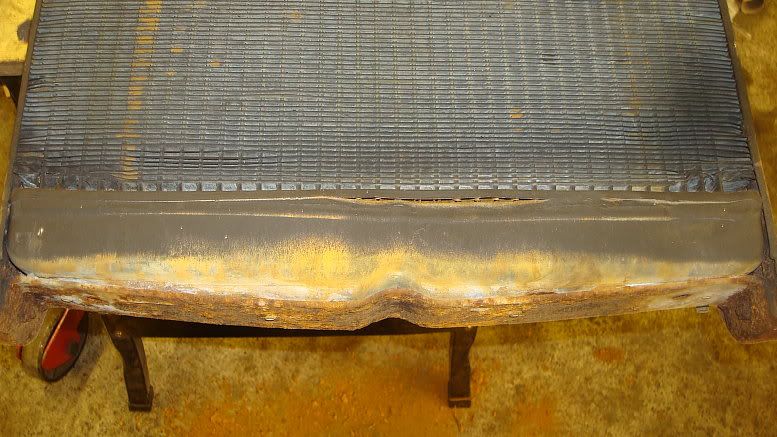 I started to dismantle it, and saw some copper rivets holding the bottom plate to the lower tank. I ground the heads off, and removed the plate. I had to cut through some screws at the side.  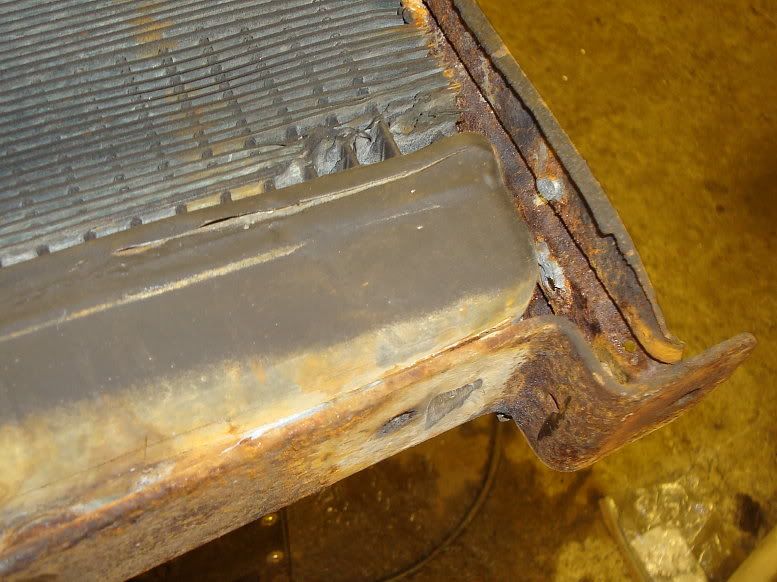 I set up a piece of 2x4 in the vice and knocked the tank into better shape. In this pic the left side has been bashed into shape, the right side is still bulging out. 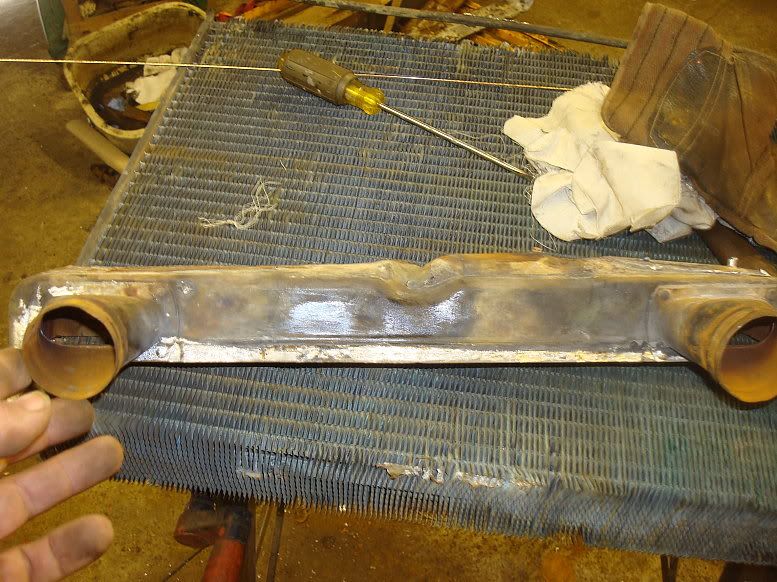 I then carried on straightening and cleaning and getting the parts ready for reassembly. I stopped taking pics at this point because it was difficult, and I had my hands full. Anyway, for now, here are the parts ready for final cleanup and reassembly. 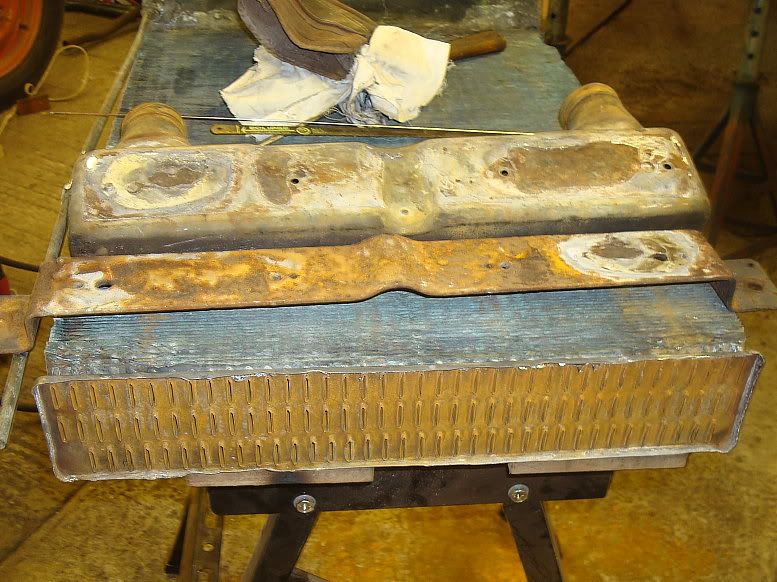 And as if it was in the blink of an eye, the bottom end all back together: 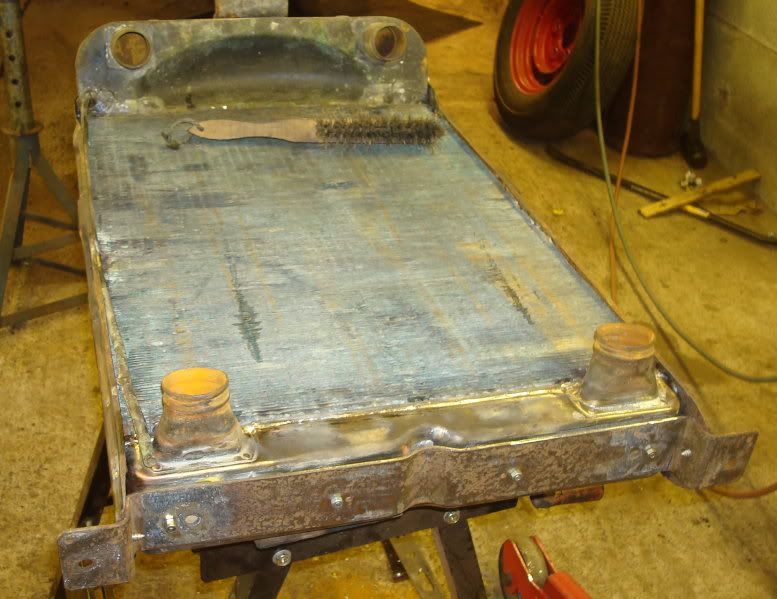 The side plates soldered bottom: 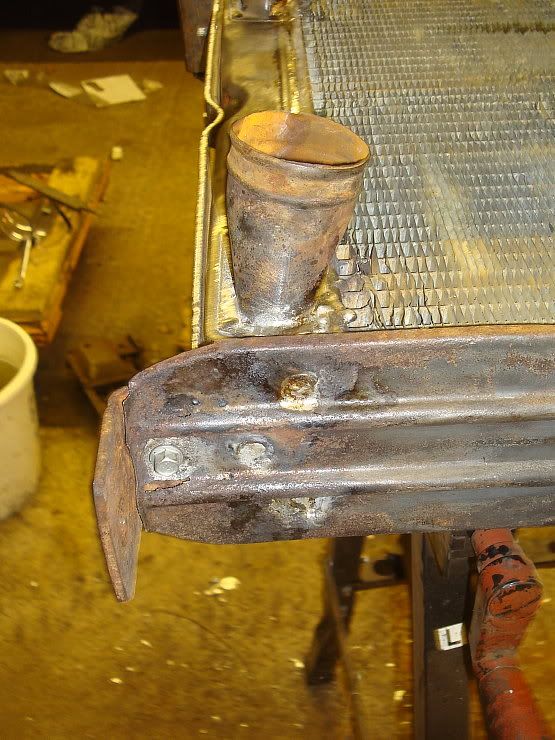 And top: 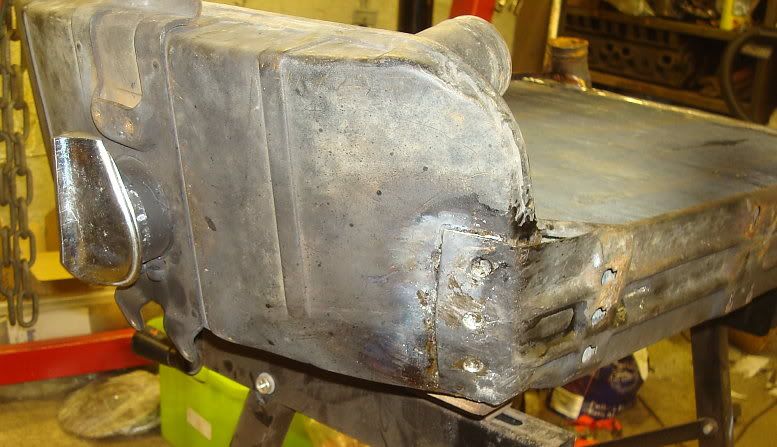 And the rad set back in place: 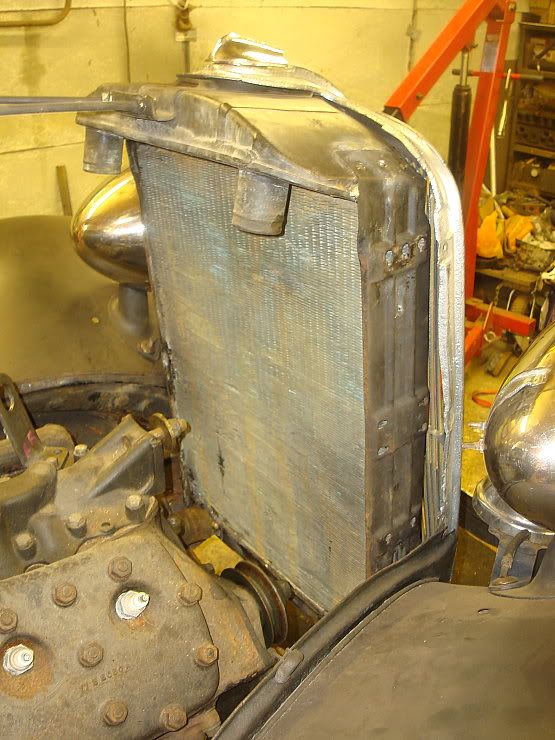 I reused the bottom hoses that were on it. They seem in good shape, nice and flexible, but not too soft, so I'll give them a go. Once the rad was back in I could drop the grille back in place. I seem to have some anomalies at the front end. The brackets on the rad do not fit very well to the grille. Some internet sleuthing tells me the brackets (well more like remnants of brackets) on the rad are 34 brackets. I don't have an answer to this, maybe the rad was replaced with a 34 rad at some point. (maybe recently). Other stuff going on on the side is I have ordered some reels of cable to do the wiring. and I don't know if it will work out but my scrappy is going to save me some exhaust systems and I'll cut them up to make an exhaust system. The guy I used to get all my pipe from has left the area so I'm sort of out on a limb now. And as usual, a parting shot showing the car as it sat last night: 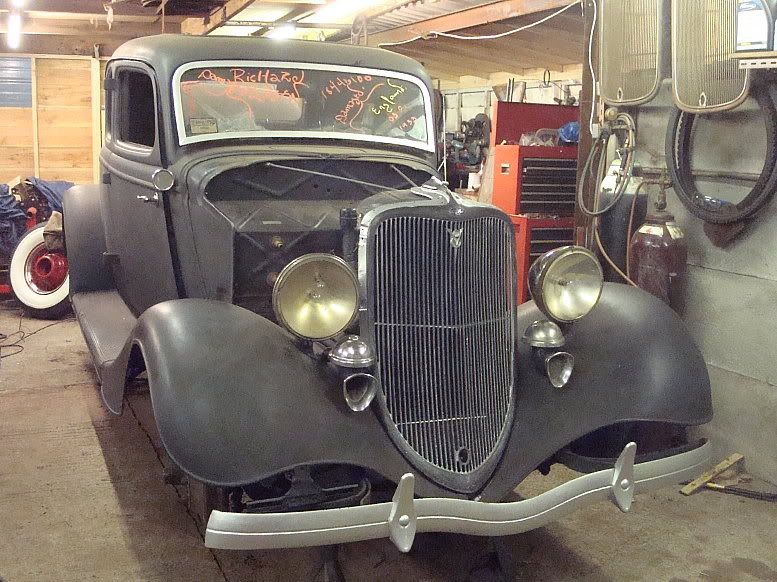 Sharp eyed ones will see a difference in the headlamps. The one on the drivers side has one bulb. the one on the pass side has two. I'm not sure, but I think the two bulb one is for a car without cowl lights, the extra bulb is the sidelight. The one with a single bulb is for a car with cowl lights. The cowl light is the side light. Funny thing is, my car has one cowl light, but that side has the lamp for a non cowl light car. Nothing adds up. Lots done, lots to do. Oh yeah, all the paperwork arrived today, import docs, US title, Customs duty paid form, etc. so that's another little loose end cleared up. Mart. |
|
|
|
|
07-17-2012, 02:43 PM
|
#38 |
|
Senior Member
Join Date: May 2010
Location: Solihull, England.
Posts: 8,744
|
6/4/12
Just some little bits and bobs to report. One problem I had was the unavailability of the brake pedal bush. This is a large thinwall bush, 1-3/16" bore and 1-1/4" od. Bob hadn't got one, and as far as I could tell no-one in the states had them either. As the bush was worn at either end, sort of on opposite sides, I decided to just bodge it up. I mixed up some two part epoxy and let it set in the worn areas. After letting it set for a day I carefully filed it out until the pedal slipped over the shaft. Not ideal, but hopefully should protect the pedal from further wear until the bushes become available again, if ever. When I heated and bent the pedals, I didn't have the engine and box in place. I soon realised a little bit of rework would be in order. 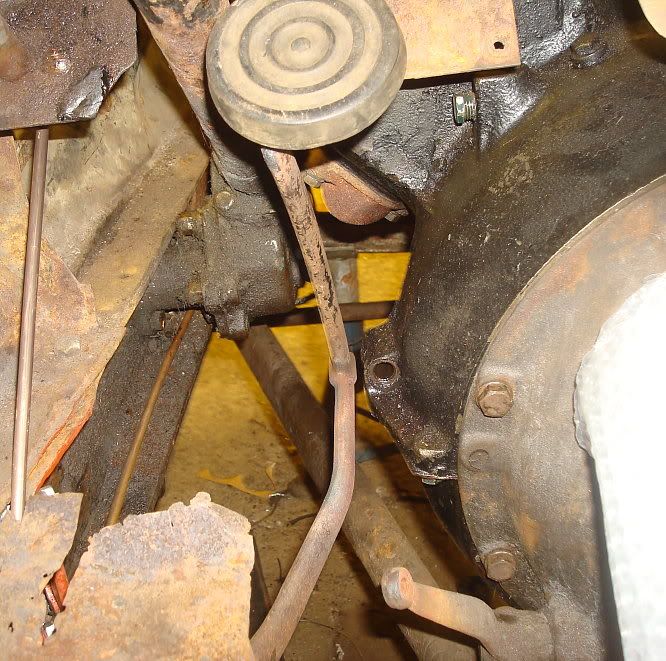 Had to heat the brake pedal to clear the bellhousing area at full stroke. Then had to get the arc running true and then bend the pedal mount bit to the right to clear the column. My oxy acetylene kit has proven absolutely invaluable on this whole build. Cleaned up and fitted the push rod parts with a new eyelet piece and found a problem. Couldn't get the cotter pin in. Here's the problem: 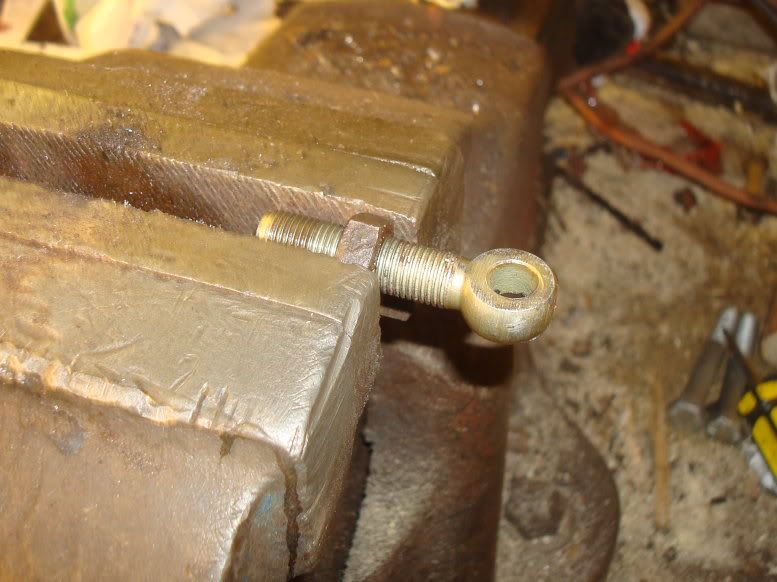 The threads go too far up towards the eye. Here's the fix: 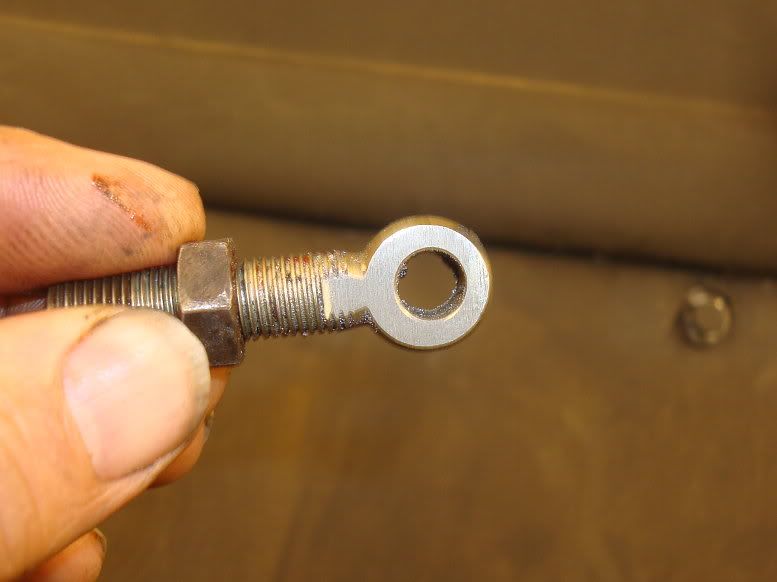 File the threads back to the same thickness as the eye. Here it is in situ: (a bit hard to get a good shot) 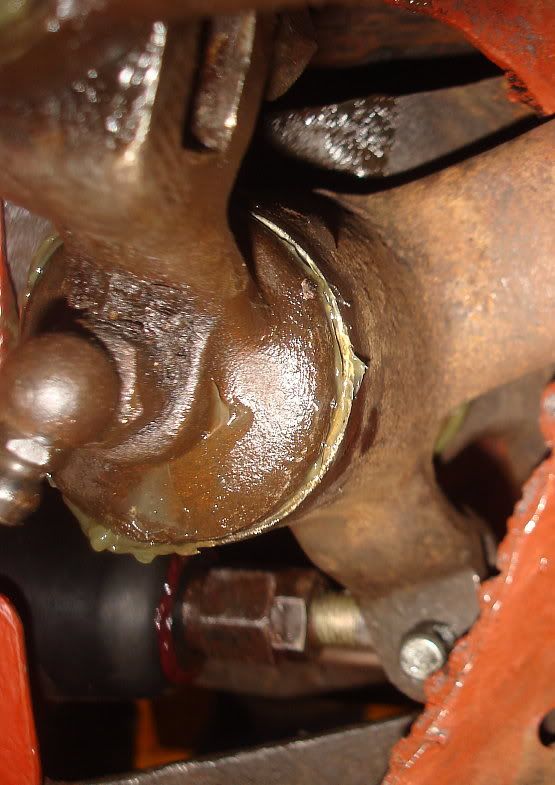 Just another example of the repro parts not quite working right. Put the clutch pedal and shaft in. This had been heated and bent to clear the floor and give good clearance to the fuel pipe.  Heated and bent the clutch release lever to allow slightly better alignment, freed off the pushrod parts and straightened them, they had been quite severely bent. As I don't have a 39 release lever, there is still a compromise. I mounted the pedal end outboard of the fork part on the pedal shaft, instead of between. I used a long bolt with plain shank running right through all 3 parts. 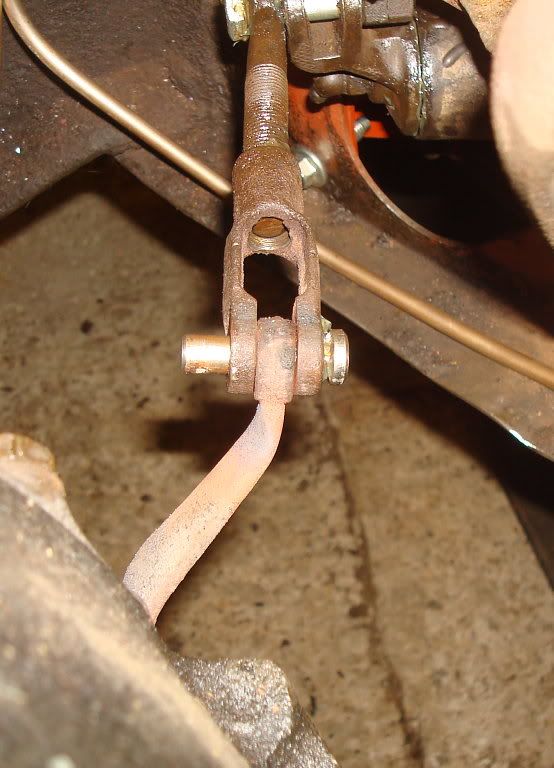 I sort of missed with the camera the bit I'm talking about is half off the top of the pic. So other than fitting some return springs and splitpins, the pedals are done and useable. In parallel to this I was starting to sort out the electrical side, trying to work out what I have, and what I need. I sourced some headlamp bulbs here in the UK thanks to Fil, and Lars has come up trumps with some usable reflectors for the headlamps. Thanks Lars. I ordered a load of wire, far more than I need, because at some time, I will need to wire the truck and the sedan too. Havn't started wiring yet, but hope to soon. Other than the pedals, I have been looking at the fuel pump and stand. I found a usable pushrod and tubular baffle and a fuel pump. I retrieved the inner tubular part from the 59A and after firstly trying a push rod from a French motor (was too long) I used the one out of the 59A. I had to straighten it as I had bent it when rolling the motor over. Ok, so how do you tell if your push rod is long enough and not too long? You mount the pump on the stand and leave the stand nuts loose. you turn the motor over until the fuel pump push rod at at it's maximum height. If the stand rises about 6mm off the manifold then the push rod will work ok. If it goes higher then keep pushing the stand down. if it meets the manifild ok then the length is also ok. If the stand won't meet the manifold then the rod is too long. You can tune the length of the rod for maximum if you use the mech fuel pump for racing. I looked on the internet for pictures showing the fuel pipe routing into the engine bay and layed my pipe in as best as I could, and hooked it up with the standard flexy pipe. I connected the fuel pump to the carb using a pipe I had used the last time I used this motor in Old Rusty. I put a little npt plug in the oil return hole in the fuel pump stand. Returning the oil in here is a problem if you have a lot of blow-by. Here's a pic: 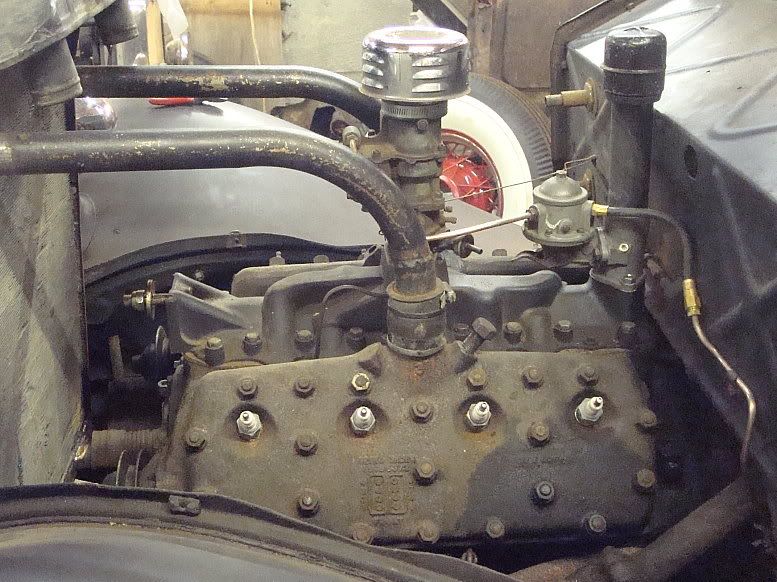 The pipes to the rad are the ones from Old Rusty, I just put them in there to get an idea of how I want to do the job. Anyway, a little step forward, and a few loose ends tied up. Have the rest of the week booked off, so I hope to keep knocking a few more little items off the list. Mart. |
|
|
|
|
07-17-2012, 02:45 PM
|
#39 |
|
Senior Member
Join Date: May 2010
Location: Solihull, England.
Posts: 8,744
|
6/8/12
Ok, this update will be a bit disjointed, because that's the way it has been. While not in real time, it will follow the order I did stuff. I booked the week off work so although I havn't been on it full time, I have managed to do more than normal. I started looking at the wiring. In a sort of ass backwards way. I knew I had the parts lined up for the headlights, so ran some wires to the headlights, and connected them to the old sockets. Luckily all the sockets were usable. The reflectors from Lars are on their way, and I have the bulbs now, so the headlights are "done" in my book, meaning I can stop worrying about them. 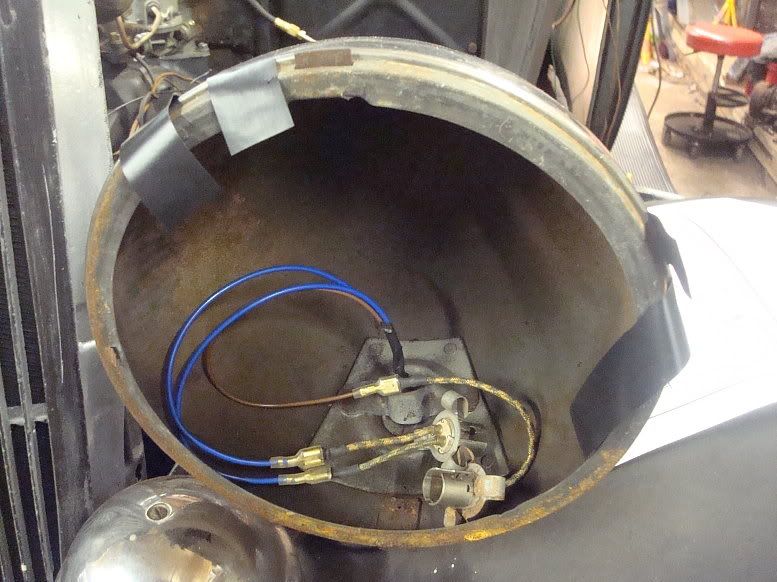 I ran some wires back along the car and up behind the dash, but didn't really have a proper route set out so I just left them long so I could work it out later. I did the same for the taillights. Removed them, replaced the socket in one of them, and spliced in new wires, ran up behind the dash like the headlights. 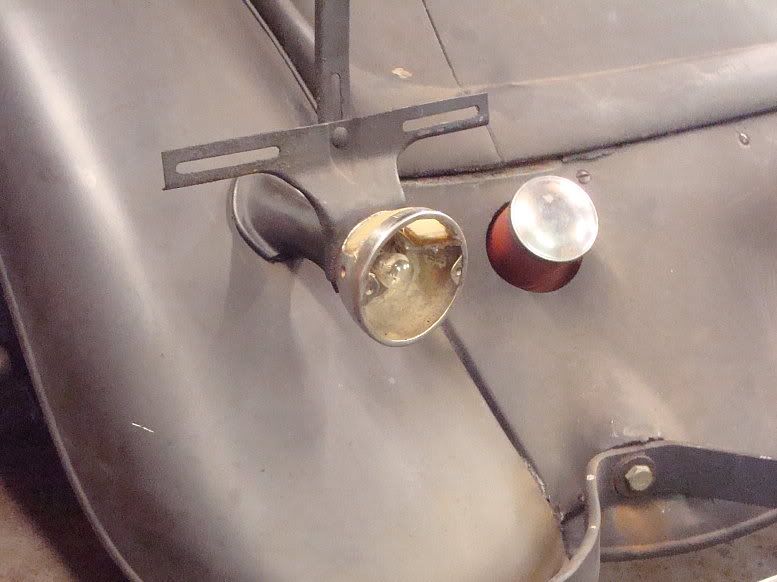 I ran the wires to the rear so I could use the brakes as indicators, and laid a wire in for the tank sender too. I removed the dip switch, cleaned it up and refitted it after checking the operation. I assumed it was stock but I now believe 33's didn't have a dip switch, the main / dip action was part of the light switch. I did the same for the headlamp switch (again not stock 33), and cleaned it all inside and reassembled it ready to go. I had to locate a couple of components. I saw that the regulator had been on the firewall, because there were three holes that matched it: 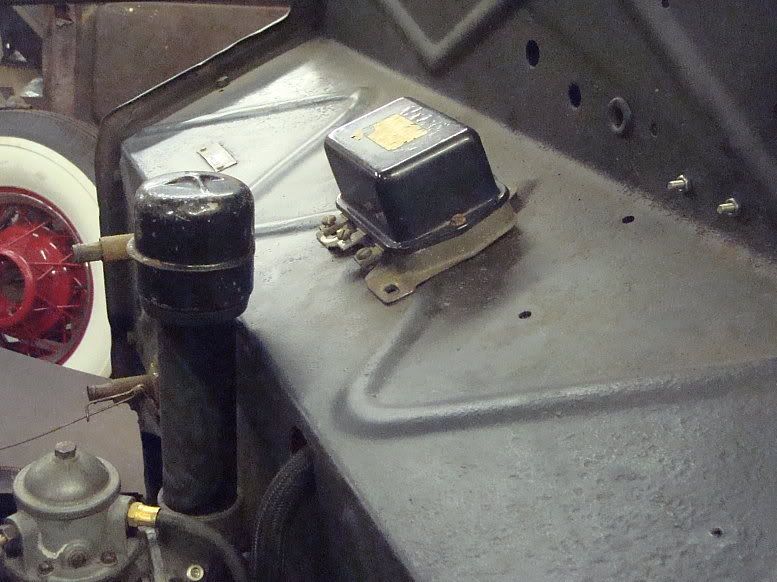 But I decide that looked a bit crap, and it was right by the oily breather so I located it inside the car, high up on the firewall, on the driver's side. 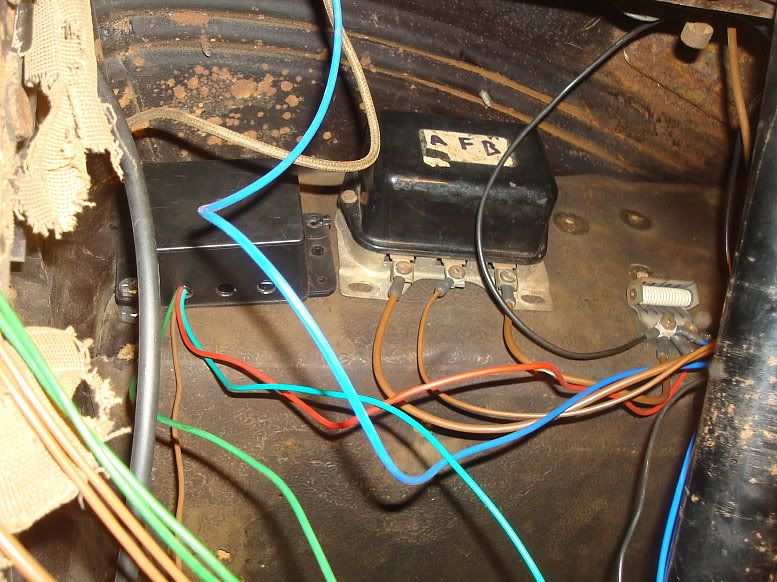 I also cleaned up the solenoid that was in a box in the car. I looked for a good place to mount it and decided to fit it down on the little floorboard extension, part of the stock 33 floor. 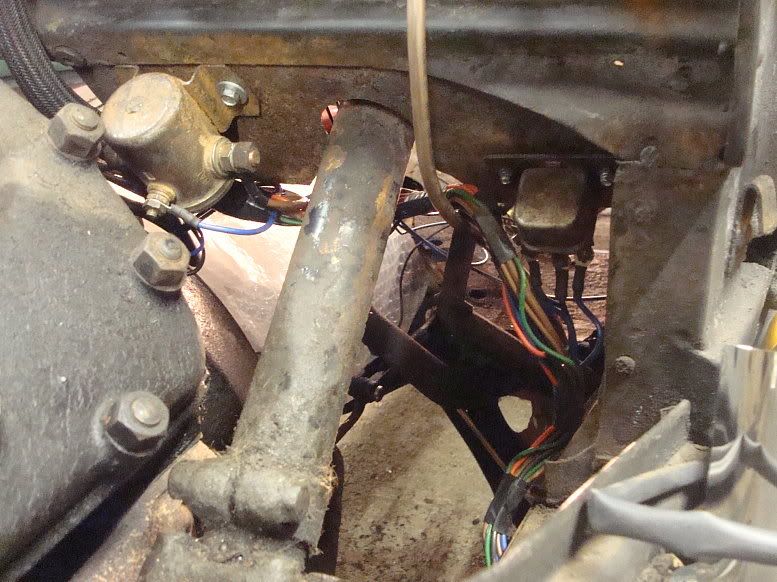 I put it down here, because it is a little out of sight, and the original 33 used a starter switch, foot operated, just a little further over. You can see the dipswitch also in this pic. I had looked online to see how the stockers are wired, and saw how the wiring went through a hole in the firewall. I decided to route all my wiring in the same way. I had looked at bringing it up the a-panel but discarded that for the more stock type setup. I had a short length of expanding braid type shielding so I threaded all the wires through that and fed everything through the hole in the bulkhead. 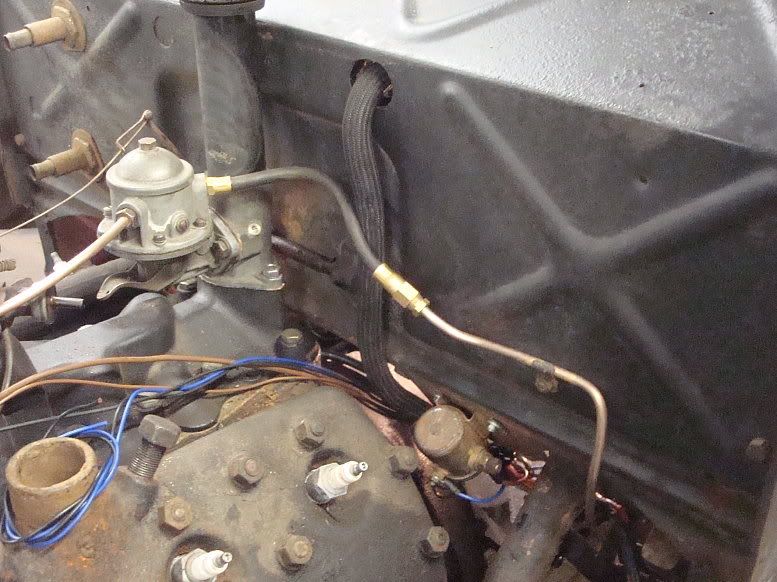 It's nice and low-key. I must admit I had to undo it about 5 times and keep rethreading more and more wires through it, as I remembered other stuff that needed a wire. While all this wiring was going on I had a little diversion. I wanted to get the windscreen out, and was pleasantly surprised that the regulator worked, and it wound out fully. 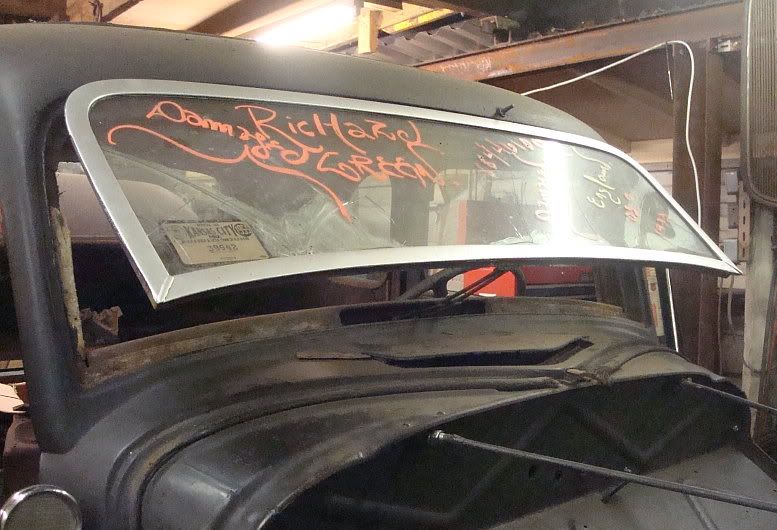 I decided to indo the top hinges, so I set about removing the header panel inside the car. I removed the panel, and hello, what's this? 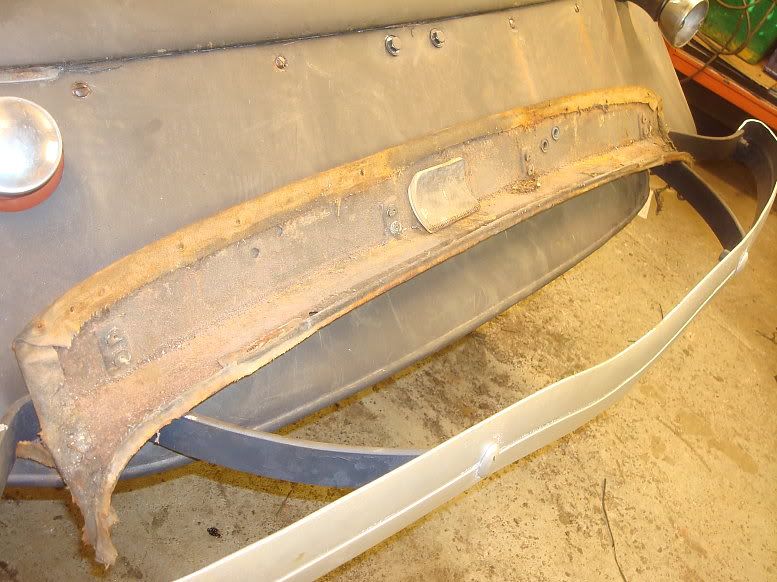 There was something tucked behind the header, must have been tucked in and then fell right in at some time. It was a little address book, you know, a "little black book":  There are 10 or 12 pages filled with names and addresses, mostly female names, as it happens: 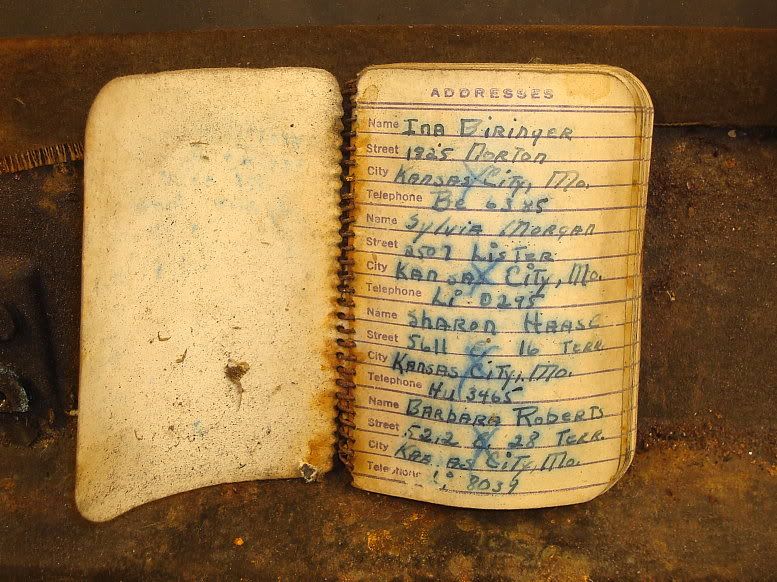 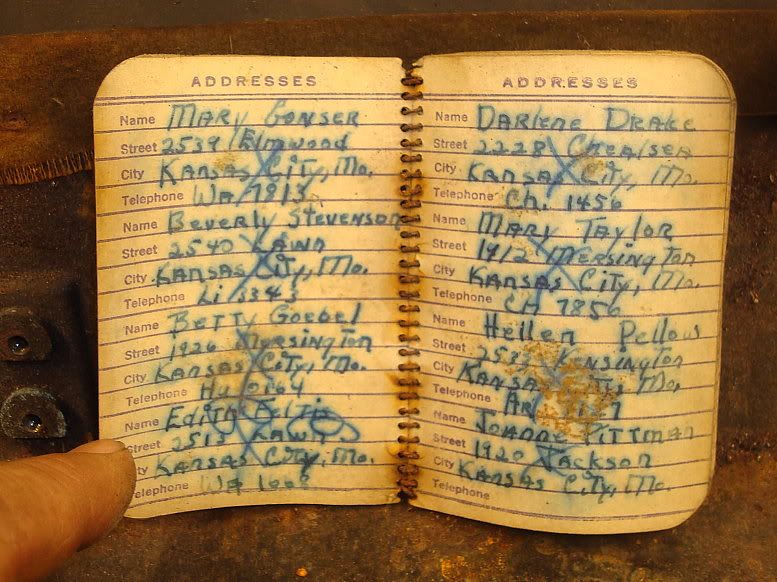 And so on and so on. A lot of the names have a big X through them, quite what the significance of that is, I'm not sure. A lot of these people may still be very much alive although getting on in years now, but this is a closed board, right? So I hope I'm not compromising anyones privacy. Still fascinating, though. Anyway, back to the sparky stuff. Once the major components were in place, it's quite easy to start laying in and connecting up the wires. I like wiring, but don't do it often enough to get it looking really tidy. It normally works ok though. To run flashing brake lights you need a special relay setup. This uses two double pole relays. I used to make up these units and sell them, but I did this one a bit different as I could do it specific for this car and not sort of universal as the others. Two relays, taped together, with a flasher unit taped on top: 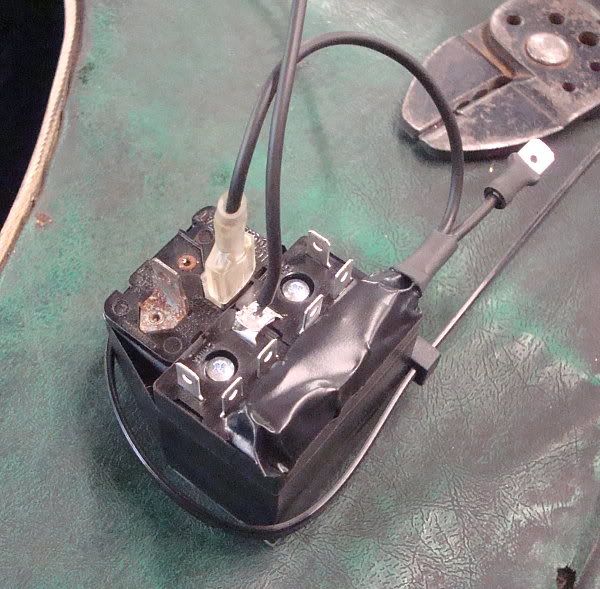 The bank of 4 connectors are for the 4 indicators, the two others are for the left and roght input. I am using a simple on-off-on toggle switch, nice and simple. And here it is with wires all connected, just cable tied to the (unused) ballast on the original fuse/ballast unit. 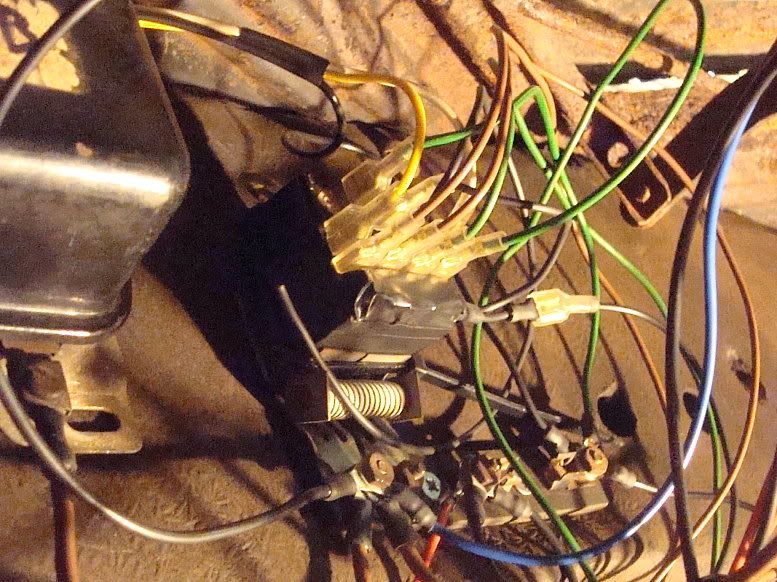 It's still a bit messy, but there are now a lot of wires under the dash. I used the posts on the fuse board to provide three feeds. First is a Bat post, wired straight from the bat terminal on the solenoid This feed passes through the ammeter as it should show whether the juice is flowing from or to the battery. This feeds anything that needs a direct supply.. Lights, ignition switch, regulator bat post etc. Second is an unfused ignition live terminal. This feeds the ignition, or in my case the ignition module, because I'm running an electronic amplifier on this one. (I used to make these too, funny enough). Third is a fused ignition on terminal, for brake switch, indicators, etc. Nice and simple. Keep it simple. It's the only way. Couple more things. I bought a 6V flathead generator and a 12V Y block generator last year, and had put together a 12V flathead unit from the parts. I bolted this in place, and was able to run the wires to it. 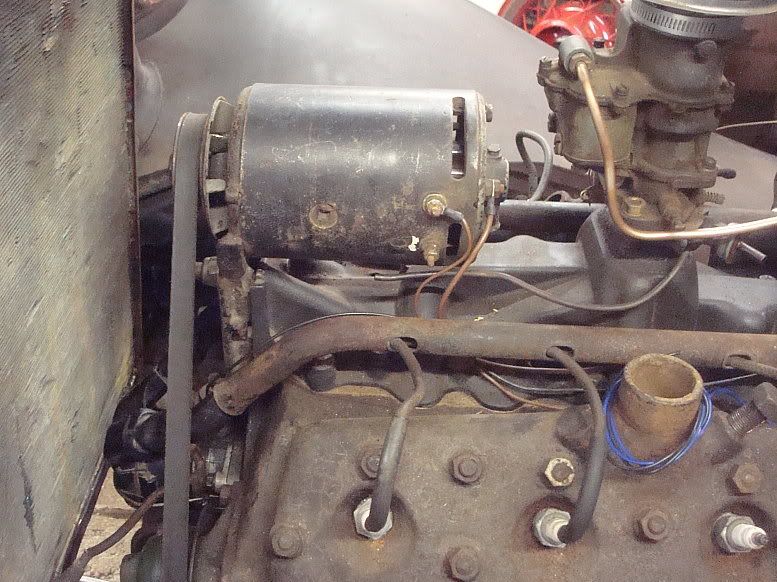 I still needed a distributor, so looked at the one that came on the car. It was a bit crusty: 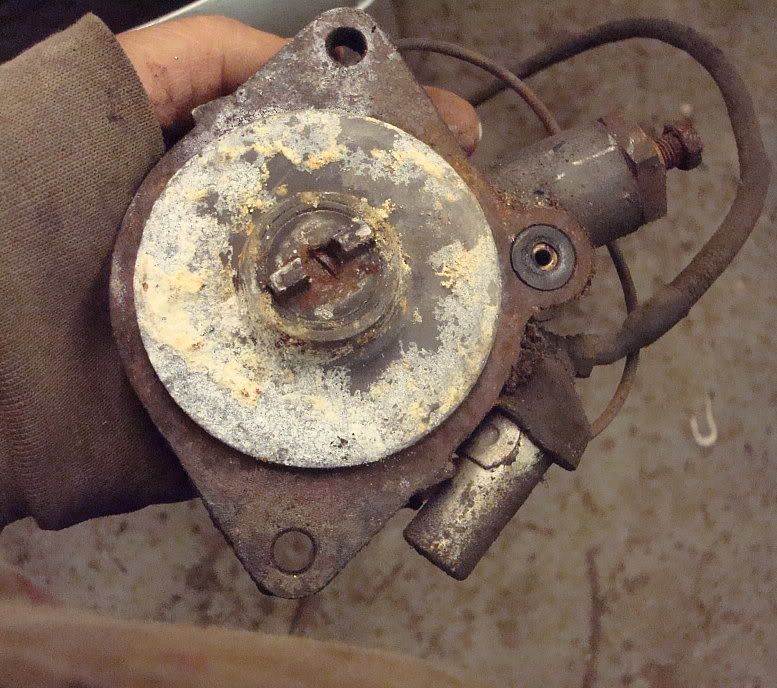 Interesting to see the original feed wire, with it's cloth braid protector and the original capacitor with a rubber shield on the live bit. It was crusty, but when I gave it a quick wire brush it cleaned up easy. I popped the cap and it looked ok inside: 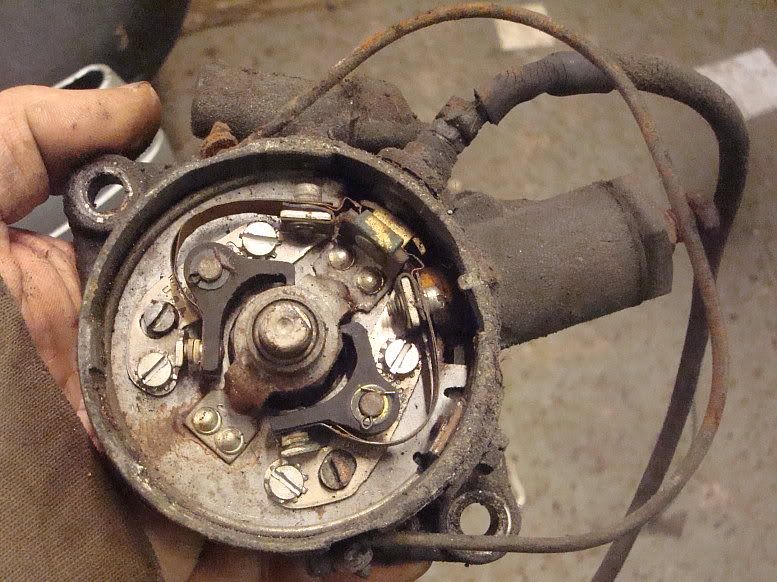 I decided to use it. I stripped it down and the advance mechanism was free, but the cam was tight on the shaft. I oiled it and got it freed off. I cleaned it up and greased it and put the unit back together. I cleaned the points and they looked to be in good condition, and as they were original Ford parts I thought they would probably work better than the modern repo stuff. 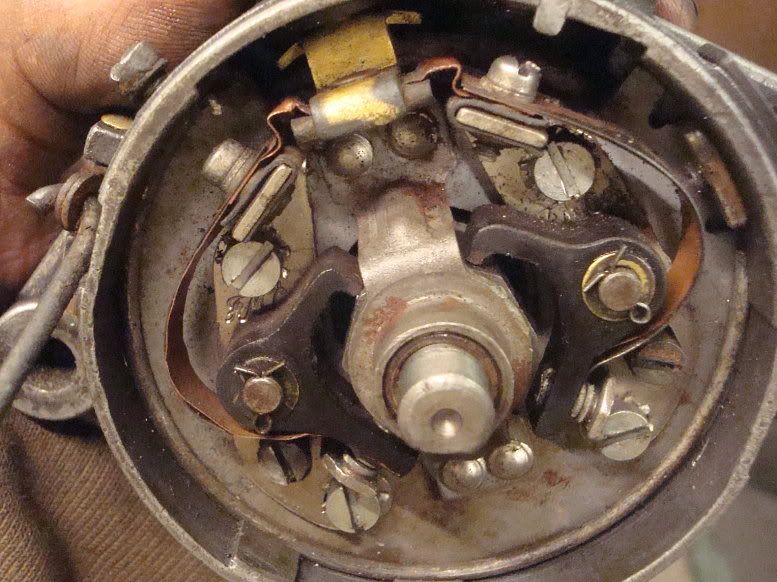 You can just make the F M Co script on the base plates. 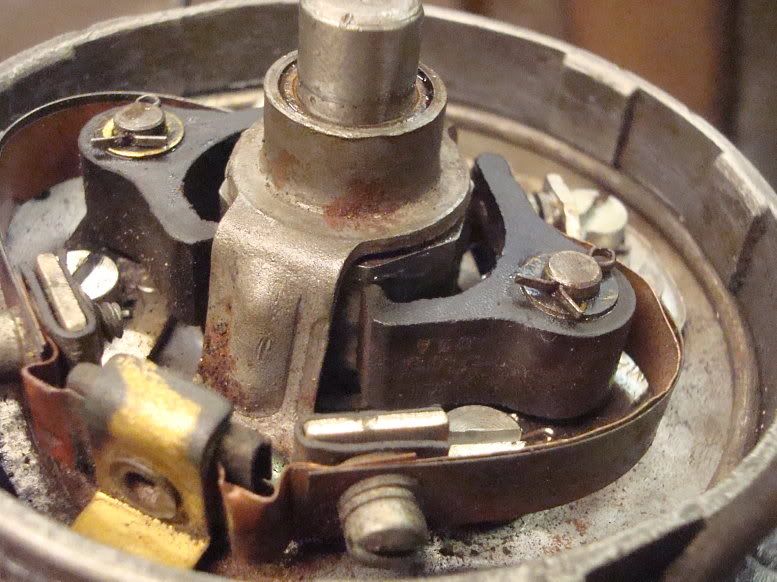 and the Ford USA on the points. Now, heres where I may have overstepped the mark on the "use the old stuff" idea. I cleaned up the cap and leads and put them on as well, with the plug wire tubes exactly as removed from the 59A. It may work, it may not. I'm sort of curious to see if it will work, so I'll give the old stuff a go first. The distributor in place: 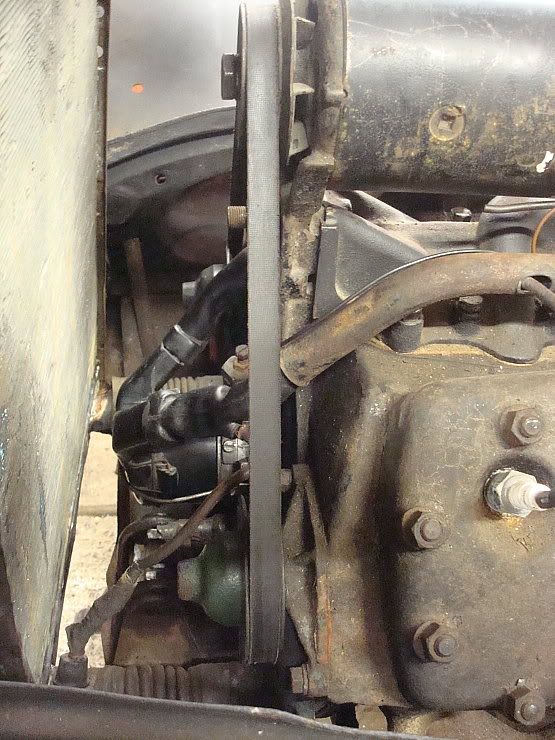 And the leads of dodginess: 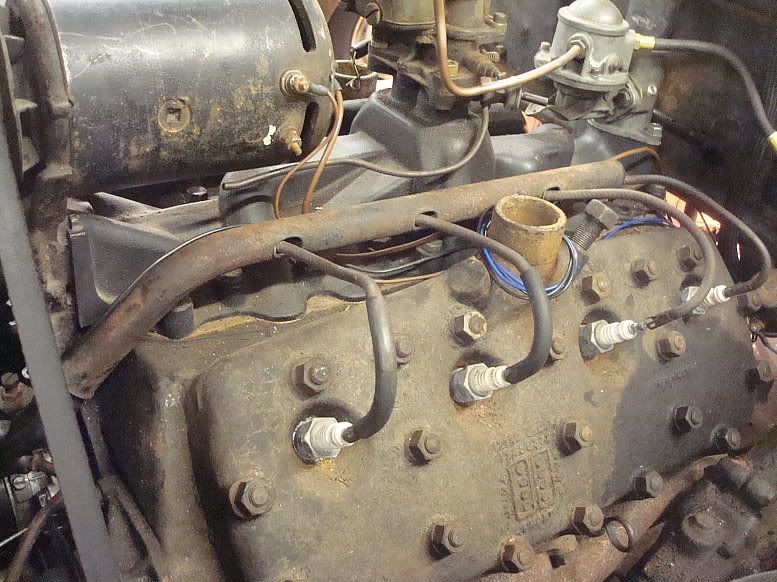 You may have noticed the fan belt has also appeared as if by magic. I couldn't fit it with the engine sitting where it is. I believe the cranks were shorter on the earlier motors. I found it was easier to undo the u-bolts than jacking up the engine. With the u-bolts out of the way the belt went on no problem. Well that's it all up to date for now. Still a bit of wiring to do, and a lot of tidying of the wiring to do. Sort of need to take stock now, and start knocking off all the other little jobs that need doing. Mart. |
|
|
|
|
07-17-2012, 02:52 PM
|
#40 |
|
Senior Member
Join Date: May 2010
Location: Solihull, England.
Posts: 8,744
|
I decided to push right on through - not that many posts left..
Mid June to Mid July.. Mart. ================================================== == 6/14/12 Blinkin' Lights! I had a problem. I want to run flashing indicator lights. I had some little Butlers sidelights and was going to use those as my flashers. I set them up down low behind the bumper, but wasn't that keen, then set one up on the cowl and couldn't decide. I asked in a thread on the Meltdown forum in the UK what people preferred, and the answers sort of told me what I was thinking but didn't want to admit: They both were a bit crap. But one suggestion, "Make the side lights flash and avoid both" set me thinking, and sparked an idea. The reflectors had arrived from Sweden (Thanks Lars) so I had the headlamps all wired up. He also sent the sockets for the bulbs, so I had a spare pair of twin filament sockets, which bayonet into the same holes as the single filament sidelight sockets in the reflectors. So the idea is to use twin filament bulbs as sidelight / indicator within the headlamp. this gives a 5Watt side light and a 21Watt flasher. I rigged it up and tried it and I think it works pretty well, and is a better, cleaner solution than either of the first proposals. Here's a piccy show and tell: Sidelight brackets made from chunks cut from the Mercury frame: 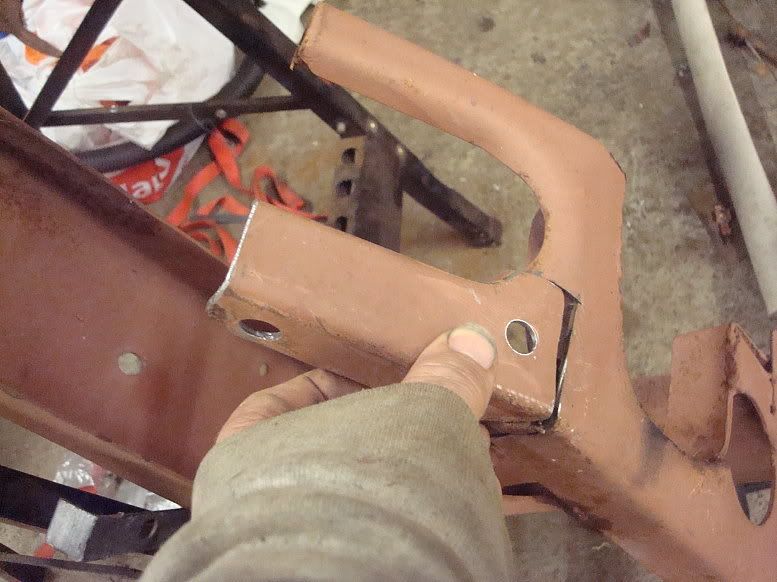 Both Butler sidelamps fitted: 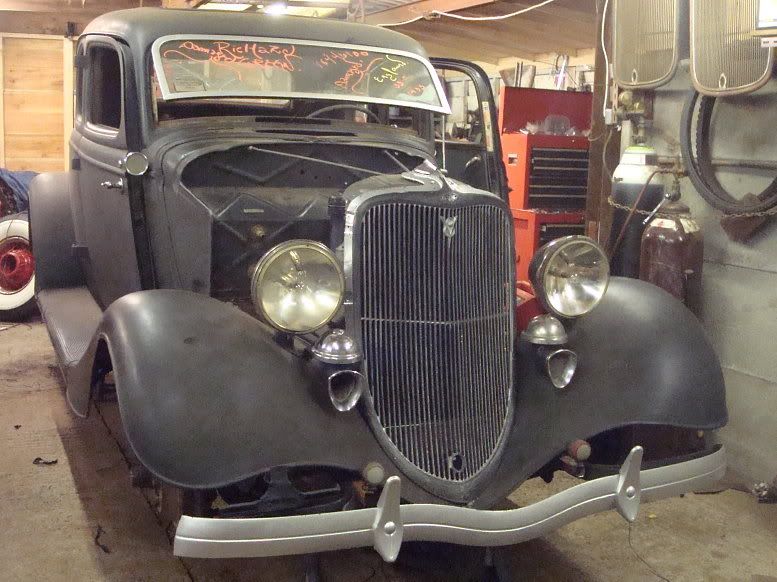 Wasn't too convinced, as the front is already a bit cluttered with the twin horns, and the lamps are partially obscured by the overriders. Tried one on the cowl (My car had one incorrect cowl lamp one side and an aeriel that doesn't work on the other):  Then tried to decide between either one, and asked on the Meltdown forum. 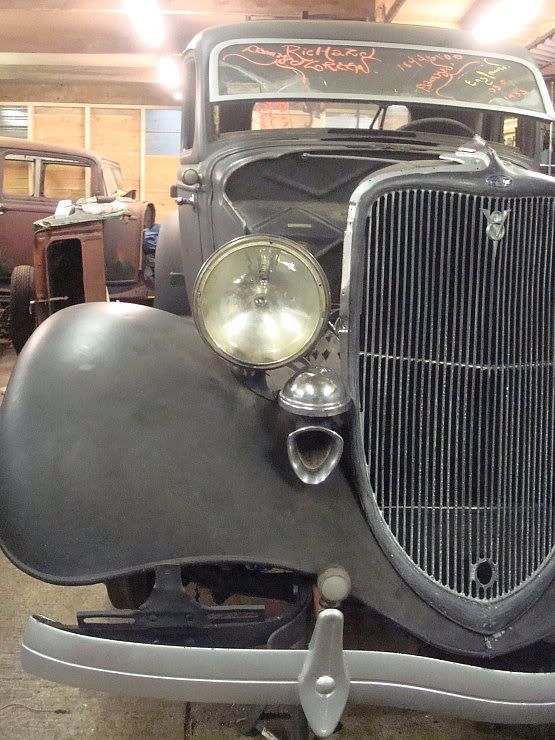 You can see both in this picture. And here is what I went with: Standard reflector with single pin holder for the sidelight. 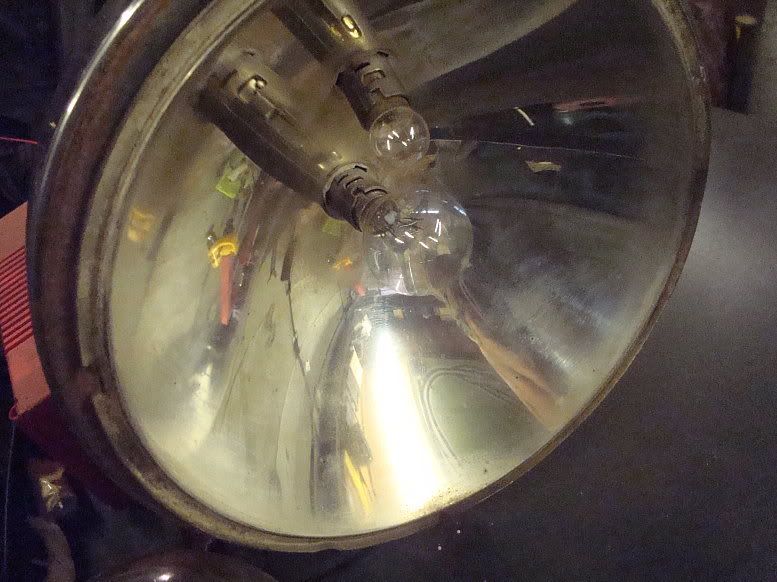 Fitted with a second twin filament bulb holder, same as the headlamp. 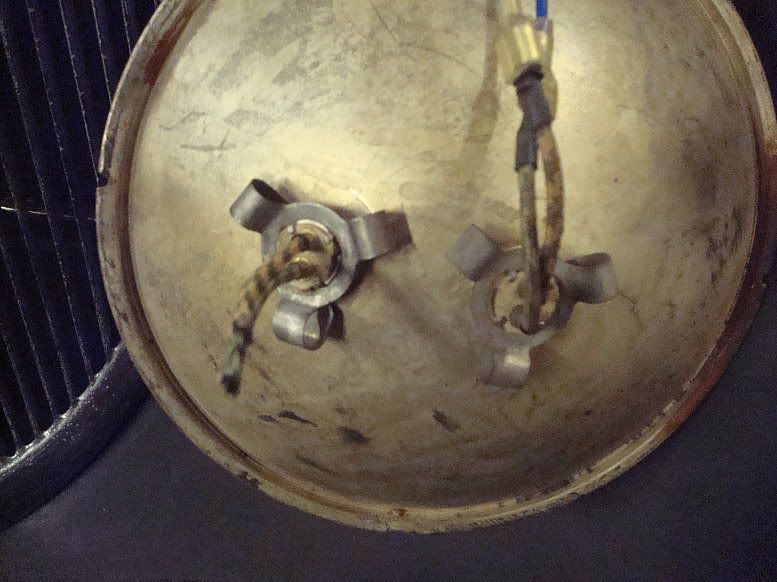 And the 5W / 21W bulb in place - it just clears the headlamp bulb. 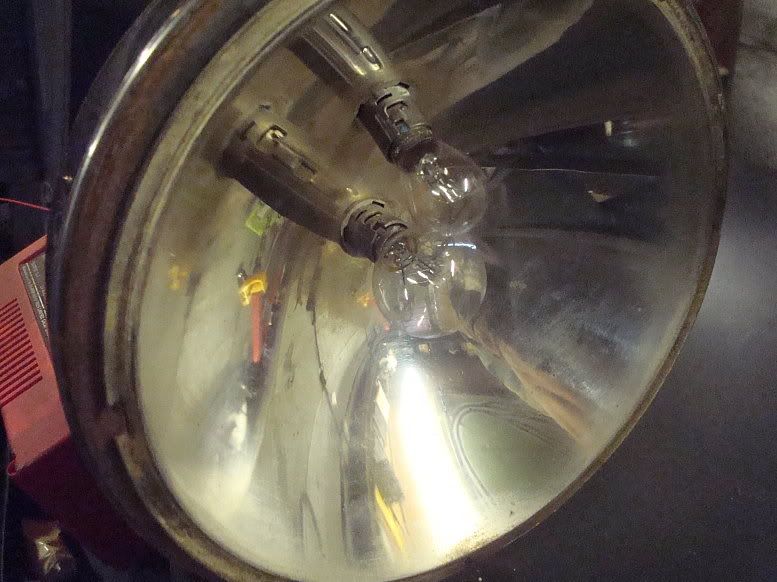 I had to unwrap the wires and put in a 4th wire: 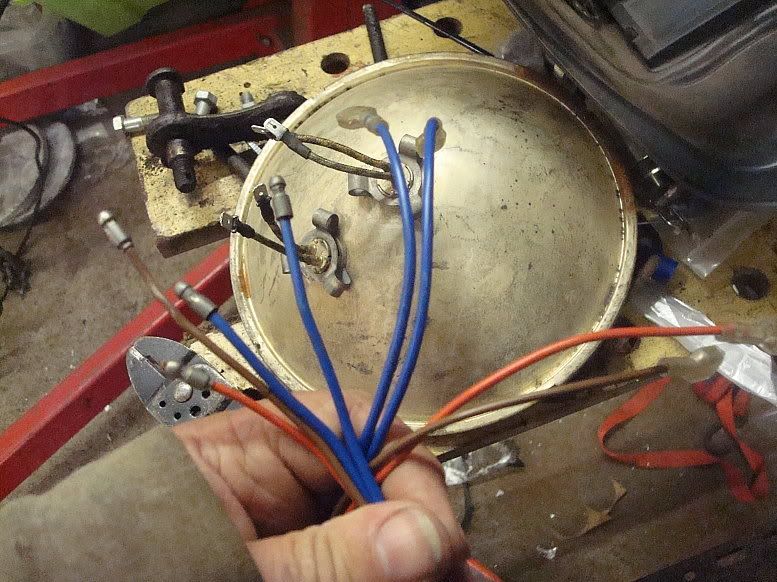 And a tip: If you want to thread 4 bullet connectors down a tube you have to stagger them. (You can see where I mis-crimped one of the bullets in this shot) 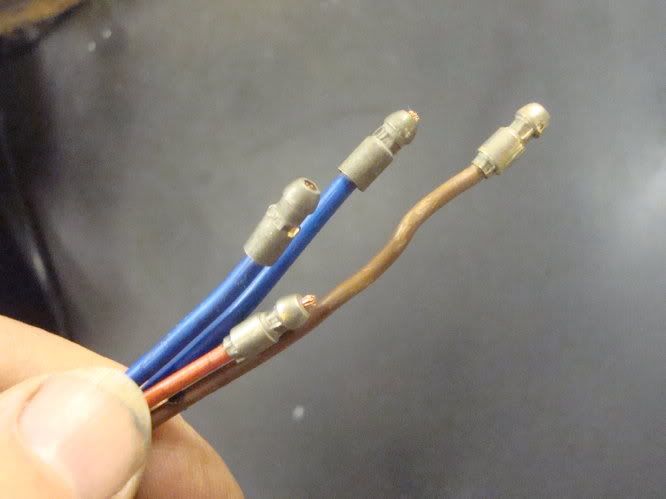 I learnt this from a 100E indicator switch, which has the wires down the centre of the column. I hastily made a few connections and: (Click on the picture)  So I can now ditch the Butlers, lose the cowl lamp and now move on to other stuff. Mart. ================================================== 6/16/12 Thanks again for all the feedback. I had another thinking session and came up with hopefully a final iteration. Ok, I had been browsing a lot of 33/34 pics and realised only the resto cars tend to run the horns. One of my horns was a bit out of alignment and missing the mesh so I pulled it. 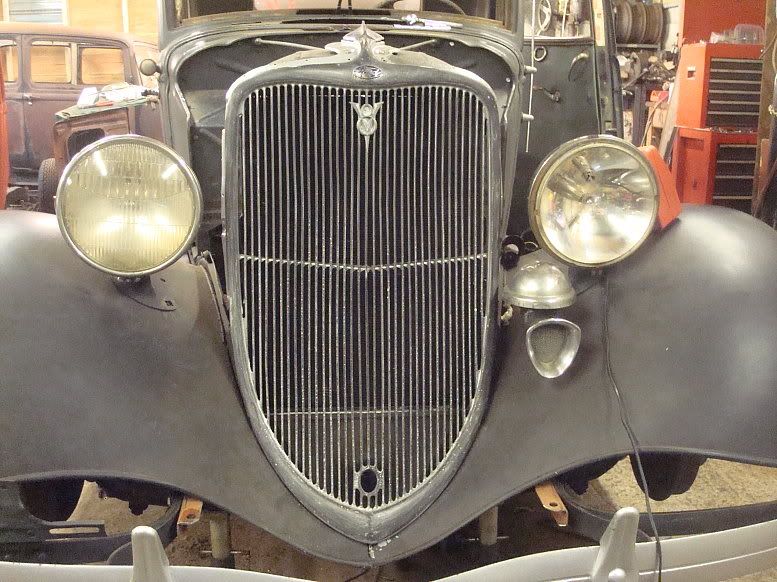 I made up a little bracket and bolted the butlers lamp on. 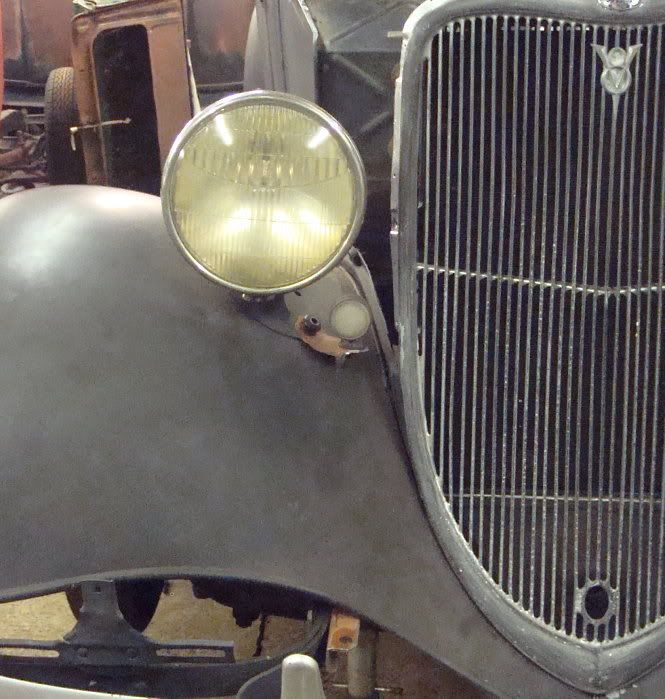 And: 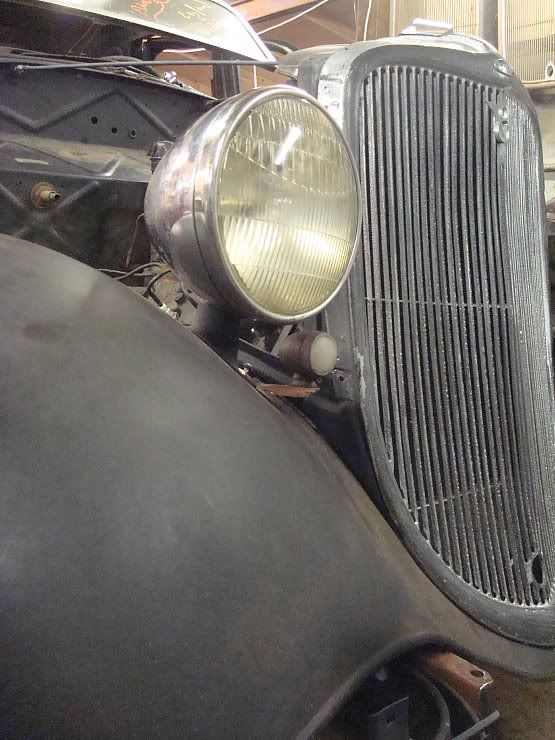 Of all the proposals, I like this the best. I can get a small 23W bulb in the butlers unit and I'm pretty sure there is an orange version available. Backstepping a little, With the previous setup I hooked up a battery to get enough oomph to power the lights and indicators at the same time, and as Lars had indicated (geddit?) it would be confusing. I could use an amber bulb, but then would be stuck for a sidelight, so I ended up rethinking it again. So I'm pretty sure I'm going to give this setup a go. With a little touching up with matt black paint thay will sort of blend in, but show up when illuminated. No Henry Ford sheetmetal has been harmed in this experiment. The brackets are made from metal cut from a Mercury frame. Hardcore! Mart. ================================================== = 6/16/12 Thanks Mike, I'm glad you're enjoying following along. I said right up front it will be warts and all, and it really is in real time, so the fubars and blind alleys are all there to see. 730 Had a couple of hours in the garage this evening, and finished off the indicator installation. The pics below are video's you click on 'em to make 'em run. Here's the result: Right: 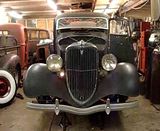 Left: 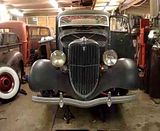 And right with the lights on. Please excuse the rambling. 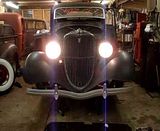 In reality the headlights are nowhere near as bright as the camera makes them out to be. I might try a different flasher unit to see if the light will stay on longer, and also might try some amber or orange bulbs. I thinks the car looks slightly more badass without the horns. A bit of matt blackery will visually diminish the new lights and bracketry. Here we can run white indicators at the front, and red on the back if the car is older than (something like) 1966. But legally the indicator is supposed to be within 400mm of the edge of the car, but hey ho you can't have everything, can you? We're not allowed to run amber sidelights, which causes some problems when importing later Amurrican cars into the UK. I also mounted the coil using the original 59A bracket. Wiring that in and making a new HT king lead will be the next jobs now the front indicators are finally settled. Mart. |
|
|
|
|
07-17-2012, 03:01 PM
|
#41 |
|
Senior Member
Join Date: May 2010
Location: Solihull, England.
Posts: 8,744
|
6/17/12
Time for a change. I needed some exhausts. I hoped to cull a few systems from the local scrappy, but that didn't work out so out of desperation I looked on ebay. I just wanted something I could bang on there to allow me to run it and get an MOT and have it on there for de-bugging. I decided I didn't want to buy lots of bends and stuff, so I wanted a system. I clicked buy it now and bought a couple of these: 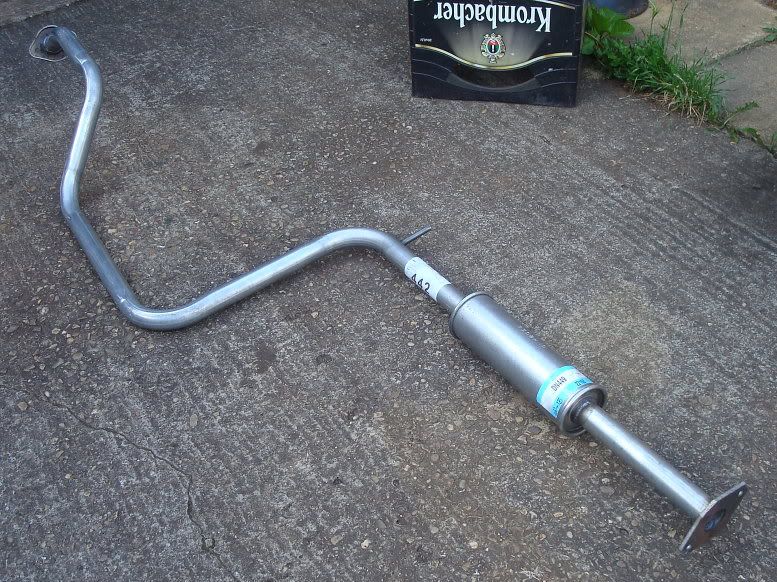 This is a mid section from a Nissan Primera. How un-hotroddy can you get. There has been a balls up and I've got one, whatever happened to the 2nd one hasn't been settled yet. But anyway, I got that one because it looked like it had some bends, some flanges, a silencer and some straight bits. I only had the image to go by, but it's for a 1600 engine, so shouldn't be too small. Turns out it's 41mm dia, which is 1-5/8", which should be ok for a nice stock flatty. Anyway, 10 minutes with the saw later: 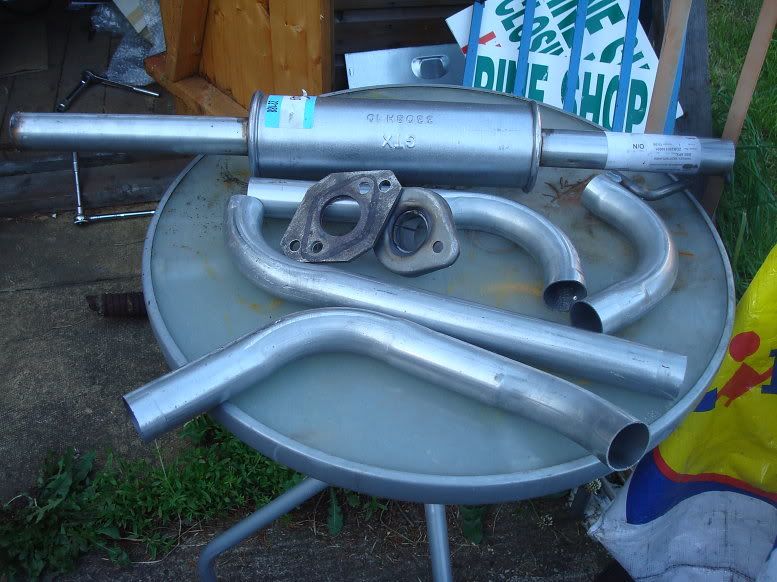 Cleaned up one of the flanges, and redrilled it to fit the flatty manifold, and started welding bits together. 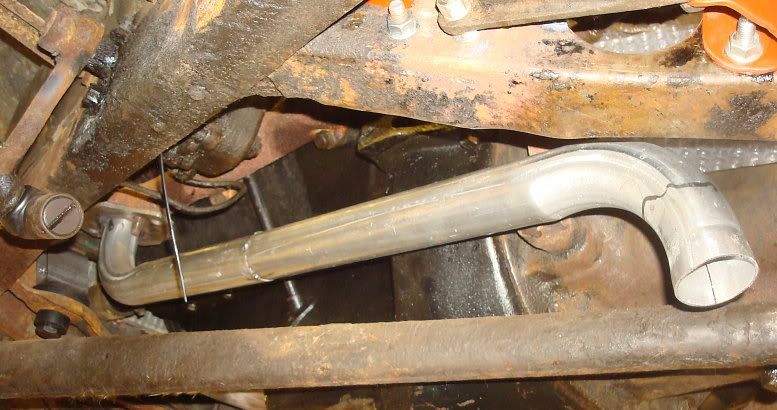 Hadn't really got enough tube, but did manage to come up with something that'll get 'er rolling. 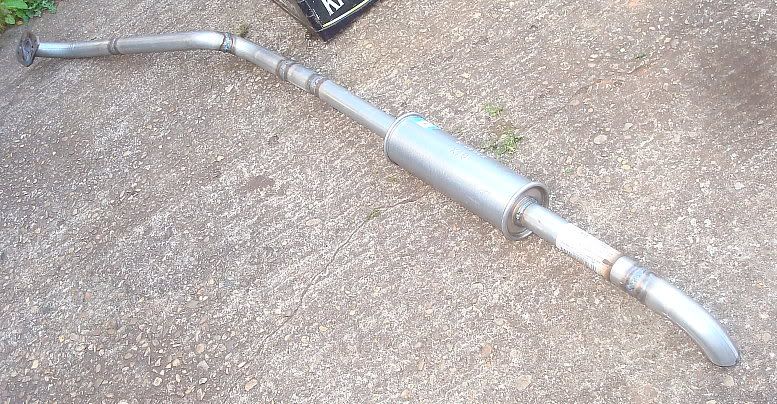 It runs just below the frame, rather than through it, but hogs the middle, where the x-member dips low. 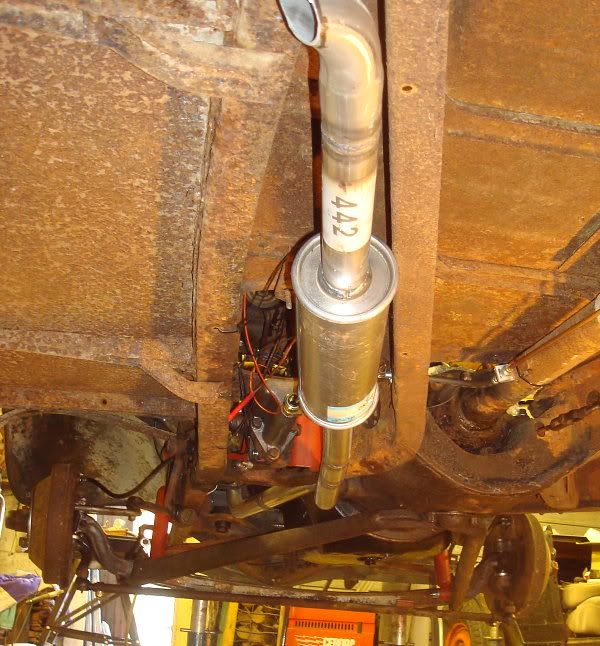 I just put little turnouts on because I was out of tube. I just need to but a little mount on the rear end. This will do for now, just need to sort out the other side, a mirror image of this side once I resolve the issue with the seller. I had also been looking at the top hoses and have ordered a pair of 180 degree silicon bends off the bay. I think I can use these with a bit of tubing in between. That'll be it for a few days as I'm off to Belgium for a long weekend at the European hotrod and custom show in Chimay. Can't wait. Mart. ============================================= 07/02/2012 830 Mini update just to cross the I's and dot the T's. Bloody exhausts! I ordered two exhausts from one seller on ebay. Long story short, one arrived, so I made up the left hand exhaust on the car. Bit of to-ing and froing with the seller and the second one arrived the Monday after Chimay. Problem was, it was completely different! Bollocks! But I liked the look of it better, the pipes were bigger, and the silencer a nicer (bullet) shape. I made up the right hand side, and as it was the second go around, it came out simpler and better. I was pleased with that one, so I just ordered another one from a different seller, making sure the manufacturer and part number matched. The re-do of the left side went quickly and easily and I'm pleased overall. 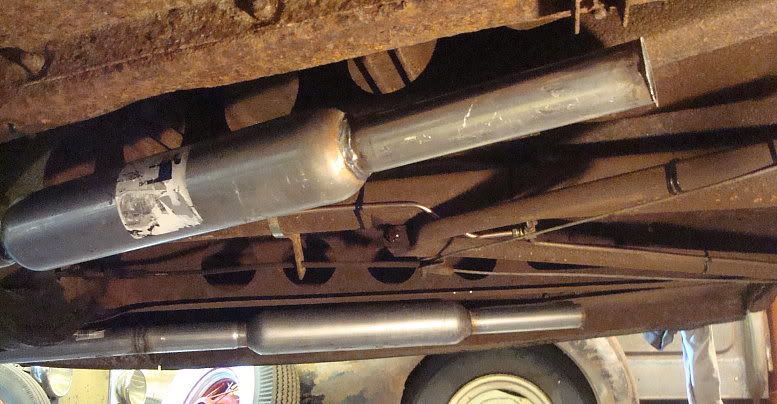 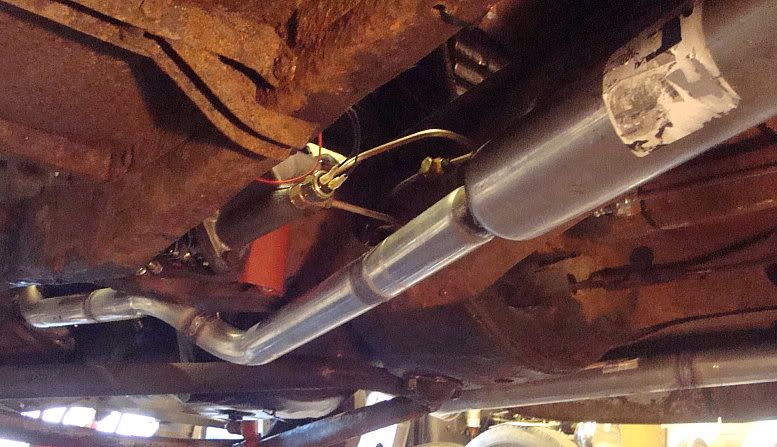 I still need to finish off the rear kickouts, and put a bobbin mount near the rear end but they are good enough for now, or at least to allow me to start the engine. Next: Top Hoses. I rifled through my old hoses and found nothing suitable. I looked at tractor hoses on ebay but couldn't tell what would be the right size. I was looking for 45mm, or 1-3/4". In the end I ordered two 180 degree bends in black silicone. I got the 180's because I could get two bends out of each one. I had two bits of 1-3/4" tubing, so trimmed them down to length and trimmed the hoses into 4 suitable pieces. They are a bit shiny and have a cheesy logo, but I'm going for functionality over beauty at the moment. 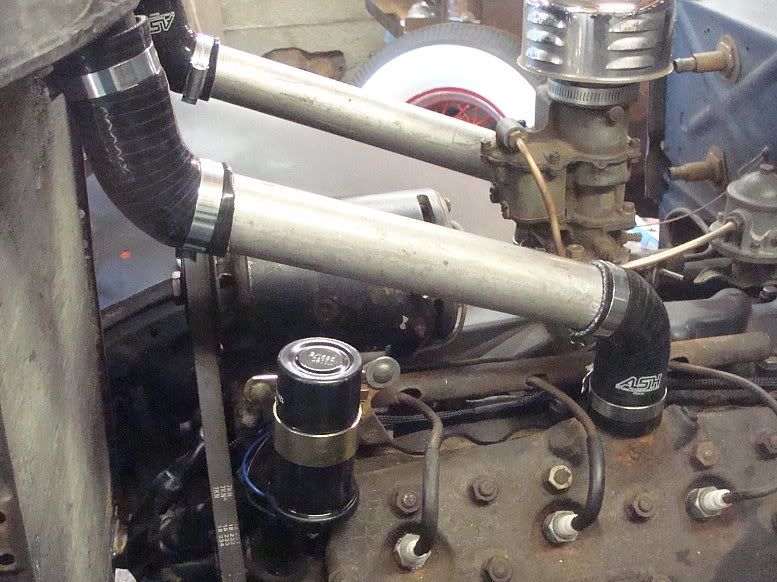 I finished wiring in the ignition module. Same as on Old Rusty, keeps the points but does away with the condenser. With all the problems associated with duff condensers lately, I thought it a good way to go. I fitted the new coil I got from AES. Looked good, old fashioned terminals and all. Checked the timing was not 180 degrees out, (always worth the bother) but couldn't do any more as I hadn't got a battery cable. Sourced a cable, but had to put one terminal on. Cleaned everything up, used the vice to crimp it as tight as I could, and then used the oxy acetalene with a very light flame to quickly heat it up and flow some solder into it. I managed to do it quick enough that I did not damage the insulation on the cable. I got sidetracked a bit on another car, but on Sunday got back on the coupe. With the battery in place and the engine able to be cranked, it was time for the startup. First preliminary check was the ignition - was it sparking? No. I tried this and that, and only with another coil fitted could I get a reliable spark out of it. I ended up with a 100E Lucas LA12 coil date coded 1958. I filled the rad with water and put a couple of gallons of fuel in the tank. I primed the pump and it lit up pretty well straight away. Yay! Then it stopped. Obviously the ignition is the prime suspect, but no, a good healthy spark was available. Tried the primer on the pump and it pumped fuel. That's odd. If the pump were working, the primer would do nothing once primed. I pulled the pump and housing, and the push rod was being held in by the baffle tube thingy. I grabbed the rod with some grips and made a discovery: 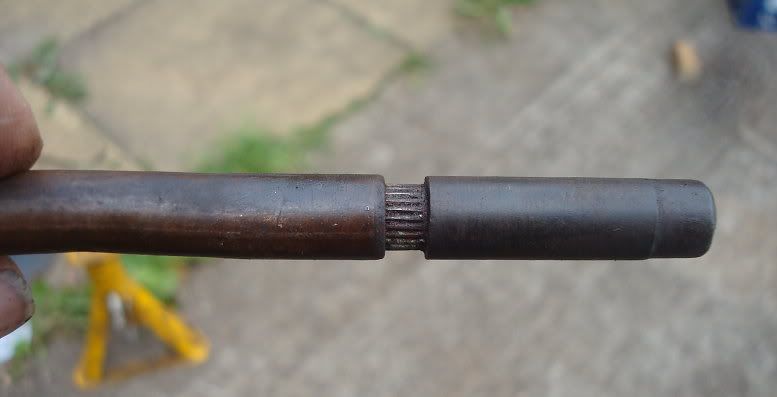 The ends are splined and pressed into the tubular centre part. That's handy. I drilled out some 6mm washers to 7.5mm and put two over the splined part and pressed it back together. I licked the od of the washers down on a grinder and here's how it looked: 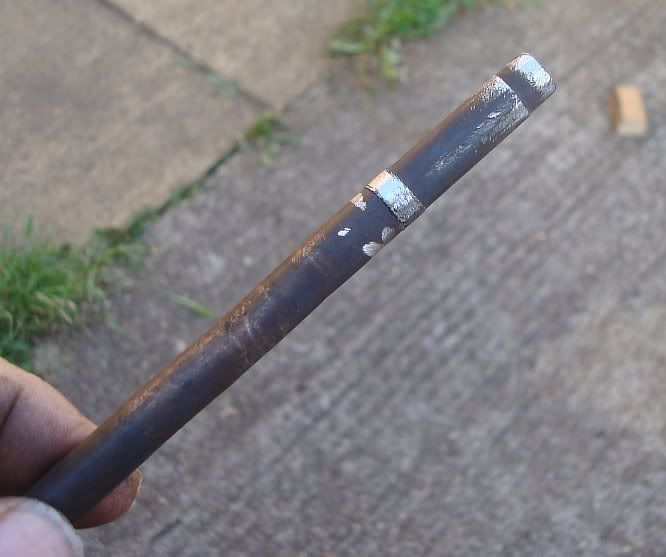 I put it in and tried it, but it was still no good, so I pulled it apart again and put two more washers in. Success! I ran it long enough to realise it was getting too hot due to having no fan. So a pretty lack lustre update, but with a great result! Here's the video of the startup, for any that have not seen it in the other post. http://youtu.be/BEshHF63hck Mart. ================================================== = OK folks: here's the biggie.. Mart ================================================== = 7/14/12 Ok, lets get the build thread up to date. I already posted the first drive thread, when I took the car for the MOT test. Getting the MOT is the first step in the process for getting the car registered. The details get entered onto the computerised system, all based on the chassis (vin) number. The tester verifies the vin number is correct to the vehicle and logs it all in. When the registration application is made, the details are already in the system. Once the engine was running, there only remained a few things to do to get the car driving. First was to bleed the brakes. This is where I had a problem. I had bought new wheel cylinders from Macs. But they don't make them, and many other vendors get their cylinders from the same source. The fronts are all right, but the rears are machined wrong. Here are a couple of pics. First is an old lockheed cylinder, see how the feed and bleed holes enter the bore at the root of the larger bore. 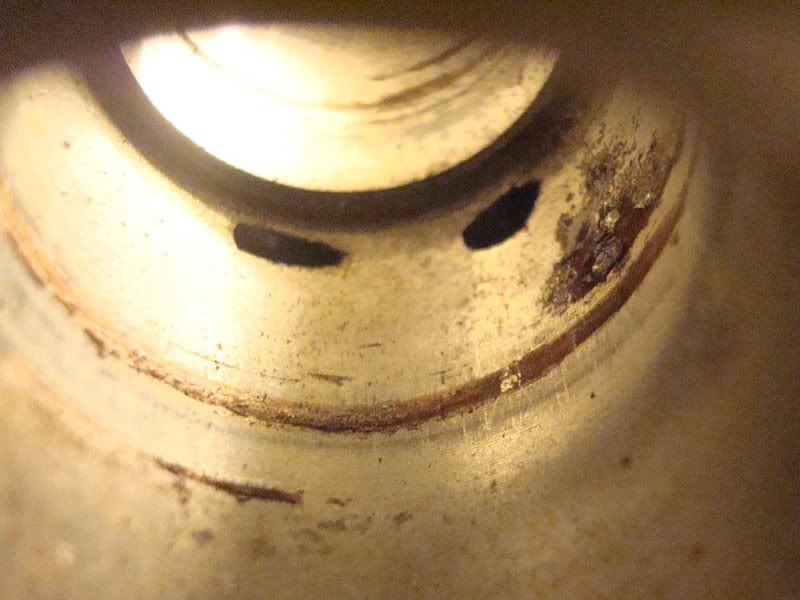 And here is a pic of the new part:  Note how the bleed hole is positioned correctly, but the feed hole is a lot further up the bore than it should be. This caused a problem for me. I have decent shoes and good drums, so the pistons sit well down the bore. With the hole misdrilled, this put the seal lip over the hole and the fluid just leaked straight out. I contacted Macs about it, and while it seems they will be prepared to refund my money, I don't think they will be troubling the supplier to see what's going on. hopefully they will, you never know. I stripped, cleaned and rebuilt some older cylinders and fitted them. I then had trouble bleeding the system, but once I got out my old pressure bleed system, that soon came good. There was loads of air in the system, pump bleeding didn't get it out, but the pressure bottle did the trick. So then it was a last round of checking things over, fitting splitpins and making sure the engine started and ran on demand. I had to rig up a horn, as it was a legal requirement, and refit little things like light lenses and the mirror. The night before the planned test day I started it up and revved it a bit and it was misfiring and banging. So at the last minute I stripped the distributor, cap and leads off Old Rusty, and put them on the coupe. One of the last jobs was to refit the seat. When I bought it, the seat back had slipped out of position, which meant you couldn't really sit on the seat. I cleaned up the runners, wrestled the seat back in and got the seat back back properly into position. The base slipped into place easily and I was finally able to sit in it. The first time I drove it was probably only the second or third time I had sat in it. And it felt good. I like the size of the 33. It fits me. Everything falls nicely to hand, and the visibility is better than on the 40. I also found it much easier to reverse than the 40. The access up the side of my house is quite tight and the 40 was a real struggle to get in and out. The 33 seems much easier. I have already posted about the trip to the test station, but I'll post some pics here just to round off the build thread. 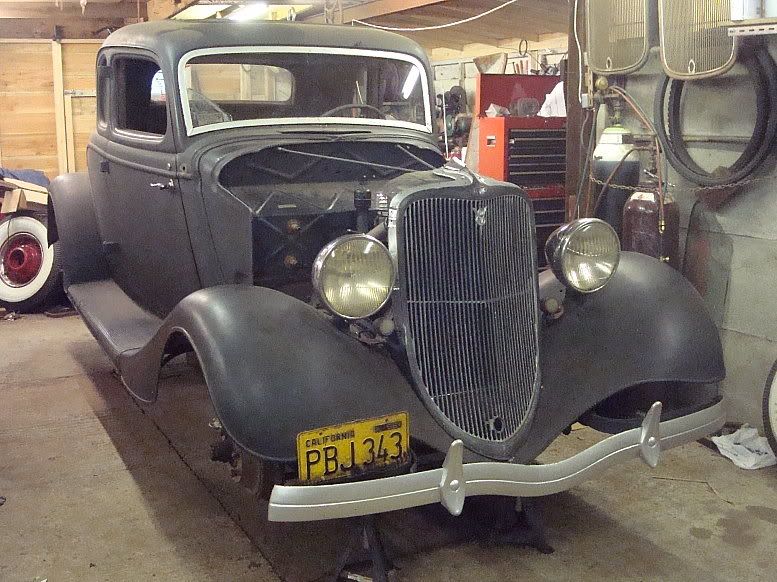 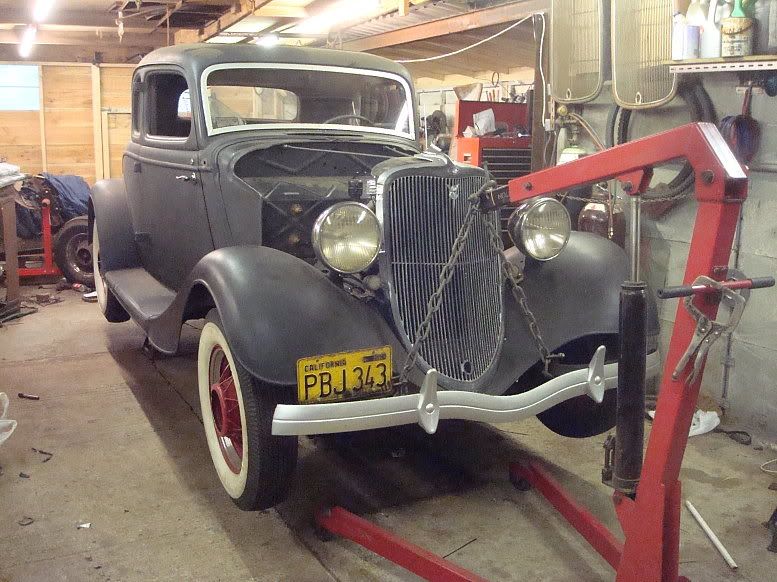 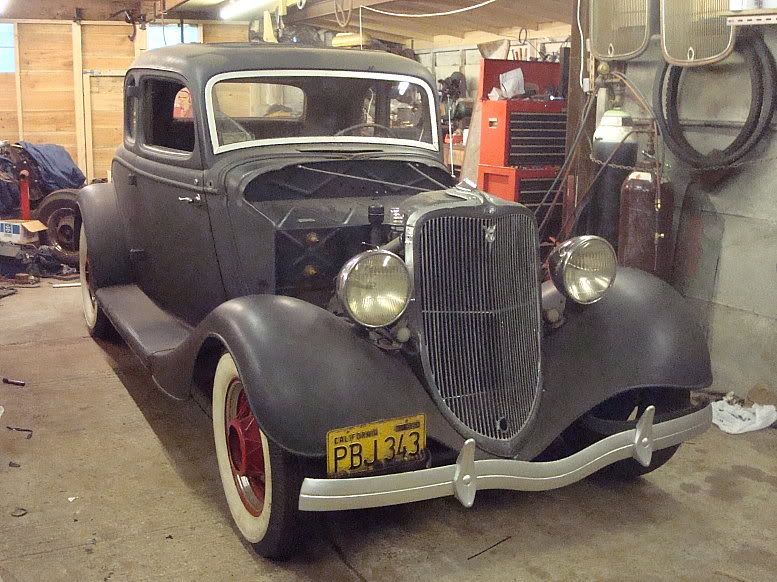 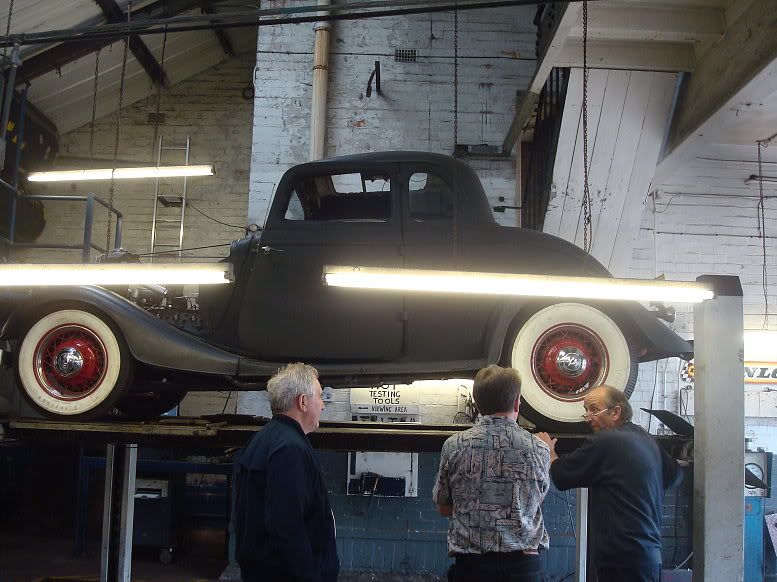 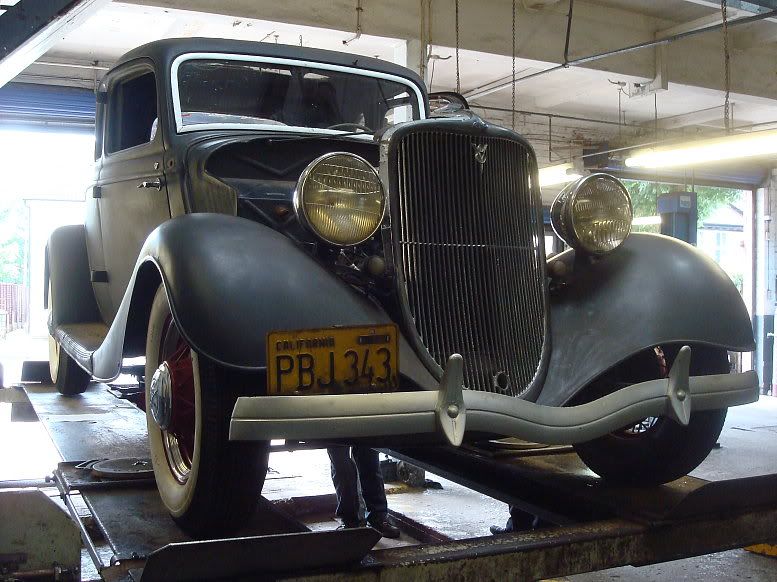 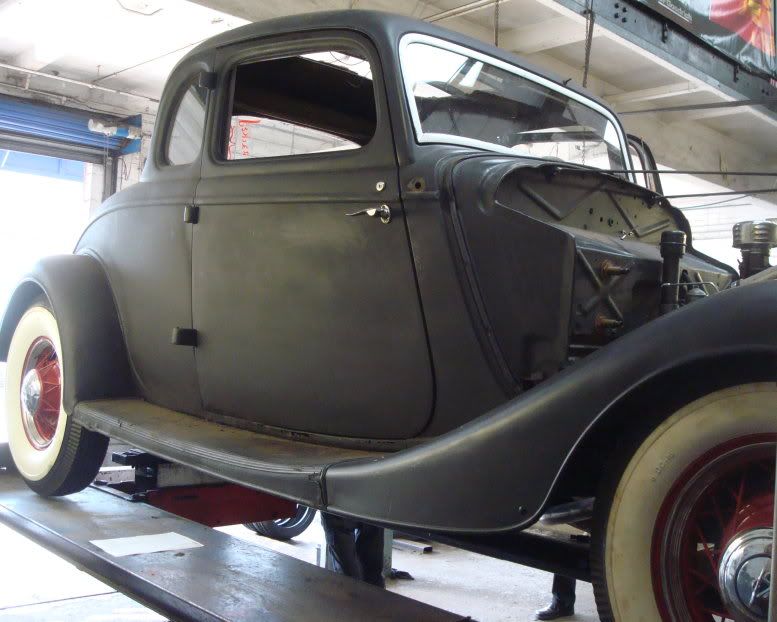 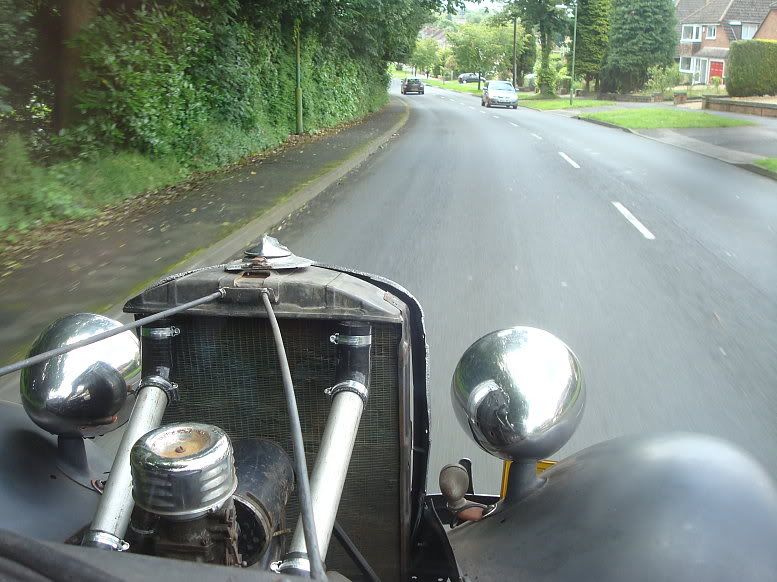 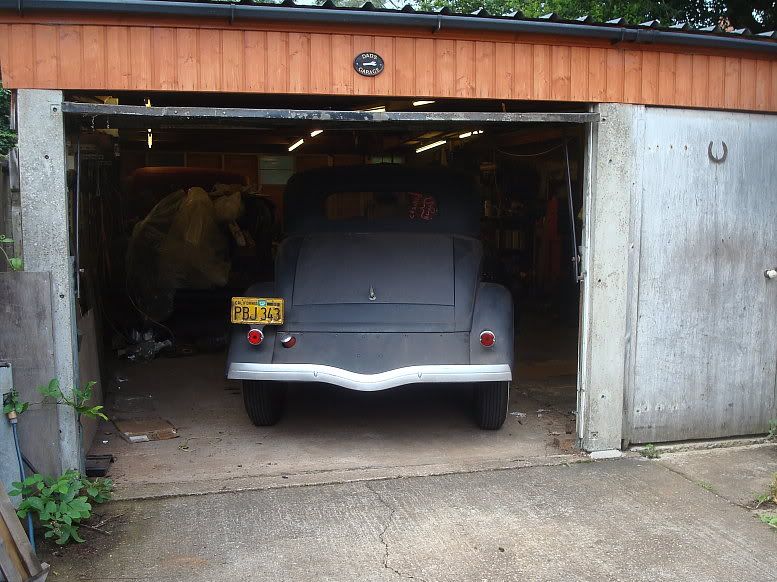 The journey there and back went really well. The car drove great. having a known engine "from carb to pan" was a great advantage. It takes a lot of the uncertainty out of it. So how did the rest of it go? Clutch: Smooth and light. Also no chatter. The car has only one anti chatter bar, the one on the right, so I didn't know what to expect, but it was spot on. Trans: I ran the trans exactly as removed from the car. I just whizzed a wire brush over the rusty gear teeth and buttoned it up with new oil and a new top gasket. It's a later bcase (41 pu I think) with early gears and shifter. Amazingly it ran smooth and quiet, just a little noise from the straight cut gears as can be expected. The synchro's are good if unhurried, again as can be expected from the earlier constant load synchro's, and amazingly it didn't jump out of gear in 2nd when going on/off the pedal. It does leak a bit, but I can put up with that at least for a while, overall I'm very pleased with the trans. Axle: The bearing surfaces and wheel bearings were good, I didn't open the diff to have a look, I prefer blissful ignorance, but it drove nice. No unpleasant noises or clonks, Ok, it's got 4:11 gears, so soon leaves you trying to shift into another gear you don't have, but as far as I can tell it's all in good shape. Brakes. Not fantastic. Light application results in a little pull to the right which had to be corrected by a little turn to the left on the steering. harder application seemed to be ok. I need to investigate further. Handbrake was very good. it all got tested properly on the machines at the test station and while the imbalance would be a problem for joe public in a daily the tester knows I will sort it out so wasn't concerned. So that's it.Just less than three months from collection to first drive, and it's been a great journey for me, with a few blind alleys and mistakes, and curve balls thrown in, but triumphs too, and overall a great sense of achievement. I started off rounding off my plan by saying I wanted to see what it would be like to drive an UNRESTORED 33 ford coupe, and now I know the answer: It feels GREAT!. Mart. Edit: For anyone that't's not seen the first drive video, here's a link: http://youtu.be/vExN5UrJ6mE And the shocks: They work pretty well. I was worried about the low angle on the rears, but the car felt very stable on the roads even around the lanes, so I guess they must be working well. M. |
|
|
|
|
07-17-2012, 04:12 PM
|
#42 |
|
Senior Member

Join Date: May 2010
Location: Rogersville, TN
Posts: 797
|
Sweet!! Your builds always inspire me. Thanks for sharing your efforts. Time to get to work on mine.
|
|
|
|
| Sponsored Links (Register now to hide all advertisements) |
|
|
|
07-17-2012, 09:38 PM
|
#43 |
|
Senior Member

Join Date: Jun 2010
Location: Redwood City, CA
Posts: 1,591
|
Thanks for sharing and posting so many clear detailed photos. You are really a talented craftsman. Best of luck!!
|
|
|
|
|
07-18-2012, 10:41 AM
|
#44 |
|
Junior Member

Join Date: Sep 2011
Posts: 18
|
Enjoyed the post very much. Can't wait for part 2. Really nice car.
|
|
|
|
|
07-18-2012, 12:31 PM
|
#45 |
|
Senior Member

Join Date: May 2010
Location: Union Pier MI
Posts: 392
 |
Thanks for sharing, great post. I myself was wondering about the shock angle, good to hear they work. Love the car.
__________________
Still smokin tires and cigars |
|
|
|
|
07-18-2012, 01:16 PM
|
#46 | |
|
Senior Member

Join Date: May 2010
Location: Daytona Beach, Fl & Spencer, W. Va,
Posts: 4,442
|
Sponsored Links (Register now to hide all advertisements)
Quote:
OMG ! Who in the world has that kind of patience ? I know what you mean though. I did the steel wool thing to an early (1929) Coca-Cola commercial cooler. But a whole car ! WOW ! When are you going to rub that thing down with some GIBBS OIL ? MIKE
|
|
|
|
|

|
07-18-2012, 01:45 PM
|
#47 | |
|
Senior Member
Join Date: May 2010
Location: Solihull, England.
Posts: 8,744
|
Quote:
Mart. |
|
|
|
|
|
07-18-2012, 02:28 PM
|
#48 |
|
Junior Member
Join Date: Sep 2011
Posts: 18
|
Yeah I am still getting used to this forum. I missed pages 2 and 3 the first time. I am very impressed with your talent. Enjoyed the journey.
|
|
|
|
|
07-18-2012, 04:58 PM
|
#49 | |
|
Senior Member
Join Date: Jun 2010
Location: St Croix Falls WI
Posts: 2,080
|
Hey Mikey , It really wasn't that bad . It looked to me that the scuffing prior to the primer job was real light or not done atall . Definately nothing more than steel wool was used so adhesion was not real good . I got the car home in late Dec 2010 & it was in my basement all winter so a bit here & a bit there and by spring it was cleaned off . Mart's car looks to be pretty darn straight & I just wanted to show this can be done . If you do a small spot & find heavy sanding marks the project is real short . On the red grille I took a chance that it was just painted-not sanded as it was shiny where the paint was chipped . My $ 600 grille doesn't even need to be plated
. Simple to do & again Marts grille looks real straight and he may get lucky . No gibbs oil for mr dull as it goes on dirt roads some & that makes a mess . Did the drool spots clean up on ole blue ? THANKZ David J Quote:
|
|
|
|
|
|
07-18-2012, 05:17 PM
|
#50 |
|
Member

Join Date: May 2010
Location: Chapel Hill, NC
Posts: 94
|
Yikes, brings back memories! Thanks again.
|
|
|
|
|
07-18-2012, 06:23 PM
|
#51 |
|
Senior Member

Join Date: Sep 2010
Location: South of I-40
Posts: 379
|
Wow, thread of 2012. Excellent photo documentation, well done is about all I can say at this point.
|
|
|
|
|
07-18-2012, 06:59 PM
|
#52 |
|
Senior Member

Join Date: May 2010
Location: toledo ohio
Posts: 393
|
Great Work,Nice Presentation,That Was Fun!!
|
|
|
|
|
07-18-2012, 07:24 PM
|
#53 |
|
Senior Member
Join Date: May 2010
Posts: 2,871
|
Excellent example of making a survivor functional, without destroying it's life's experiences. You see it at shows & cruise nights, folks are real intersted in this type of car because of it's originality. There are lots of restored cars out there, so this is unique, warts & all. Very nice work.
|
|
|
|
|
07-18-2012, 11:04 PM
|
#54 | |
|
Senior Member
Join Date: May 2010
Location: Daytona Beach, Fl & Spencer, W. Va,
Posts: 4,442
|
Quote:
Thought I would pass on another story about the cleaning of one layer of paint. I had a 70s Harley Davidson dirt bike (Italian made). It had been painted with a spray can. One day, while cleaning it a bit, I ACCIDENTLY discovered that carburetor cleaner would disolve the paint. I proceeded to clean off the new paint job, to get down to the intact, but worn, original paint, with nothing but a couple cans of carburetor cleaner and a couple of rags. SO, that's what was all over my '34 ! MIKE |
|
|
|
|
|
07-19-2012, 05:20 AM
|
#55 |
|
Senior Member

Join Date: May 2010
Location: Auckland
Posts: 4,700
 |
Thanks for the thred ,Ted
|
|
|
|
|
07-19-2012, 07:38 AM
|
#56 |
|
Senior Member
Join Date: May 2010
Location: FRANKLIN GEORGIA
Posts: 158
|
thanks i needed that , good job
|
|
|
|
|
07-20-2012, 12:52 PM
|
#57 |
|
Senior Member

Join Date: Dec 2011
Posts: 248
|
Educational thread.
I have a question on the tail lights. You have break lights and when the blinker is on that light will flash leaving the other side to illuminate steady. what about night time lights for the rear? are these double filament bulbs?
__________________
Mechanically Inclined but not Auto Familiar |
|
|
|
|
07-20-2012, 05:23 PM
|
#58 |
|
Senior Member

Join Date: Sep 2010
Location: Merrimac Mass
Posts: 161
|
great thread and pictures thanks
|
|
|
|
|
07-20-2012, 06:05 PM
|
#59 |
|
Senior Member
Join Date: May 2010
Location: Solihull, England.
Posts: 8,744
|
Bug, the rear lights are set up like most USA type cars from the 50's and 60's - dual filament bulbs, rear light filaments work normally, brake filaments work as brake, overridden on either side when using the flashers.
The switching is normally handled with a dedicated switch, but I use a normal switch and the relays shown to achieve the same. Mart. |
|
|
|
|
07-20-2012, 07:23 PM
|
#60 |
|
Senior Member

Join Date: May 2010
Location: Kaufman, TX
Posts: 822
|
Great job, thanks for taking the time to share with all of us out here in old car land!!
I've got a 5 window 34 that has been sitting too long. Got to get it going before I get so old I can't enjoy it. |
|
|
|
|
07-20-2012, 11:04 PM
|
#61 |
|
Senior Member

Join Date: May 2010
Location: Ft Mohave,Az
Posts: 1,987
|
You sir have done good .The photos & workmanship & resolving some problems along the way was just great. Hope you can enjoy many miles of smiles to payback all your efforts. Thanks for the thread.
B-O-B |
|
|
|
|
07-21-2012, 08:45 AM
|
#62 |
|
Senior Member

Join Date: May 2010
Location: Salado, TX.
Posts: 733
|
Great job Mart.
I must admit I've only skimmed the other posts so maybe missed any previous commentary, but it seems that this car should be named the "Peanut butter and jelly coupe" (that front license plate inspires...)
__________________
Luck occurs when preparation and opportunity converge. |
|
|
|
| Sponsored Links (Register now to hide all advertisements) |
|
|
|
07-23-2012, 07:10 AM
|
#63 |
|
Senior Member
Join Date: May 2010
Location: Powell, TN
Posts: 2,508
|
Great work! I would advise one slight change. Cut up another hairpin steering piece and weld one of the legs from it to the one you have going into one of the bottom backing plate bolt holes. Just turn the steering wheel with weight on the front and watch the stock hairpin flex and you will see the need for this mod.
|
|
|
|
|
07-23-2012, 09:53 PM
|
#64 |
|
Senior Member
Join Date: May 2011
Location: North Alabama
Posts: 159
|
Mart:
While I do not at all care for your occasional rough and unnecessary vocabulary, uncivilized and unbecoming of a person raised by quality parents with class, I want you to know that I love your posts from a technical sense. They are an inspiration to us all who dread getting "down and under" to tackle issues with our Ford V-8's. I'd wager that little '33 of yours is in good hands..... Mike
__________________
"There is no 'normal life'; there's just life." - Doc Holliday from the film Tombstone Last edited by Rebel Sympathy; 07-23-2012 at 10:21 PM. |
|
|
|
|
07-24-2012, 12:10 PM
|
#65 | |
|
Senior Member
Join Date: May 2010
Location: Solihull, England.
Posts: 8,744
|
Quote:
I don't quite know what my parents have to do with your opinion, I'll give you the benefit of the doubt and think it's me you have a problem with, not them. Mart. |
|
|
|
|
|
07-24-2012, 03:21 PM
|
#66 |
|
Senior Member
Join Date: May 2011
Location: North Alabama
Posts: 159
|
Sponsored Links (Register now to hide all advertisements)
Thanks for a great series of articles. Very informative. Very inspiring to us lazy V-8'ers. Mike
__________________
"There is no 'normal life'; there's just life." - Doc Holliday from the film Tombstone |
|
|
|
|
07-24-2012, 06:22 PM
|
#67 |
|
Senior Member

Join Date: May 2010
Location: South California
Posts: 6,188
|
Hey Mart,
Whew..read the whole thread ,just now, and learned a LOT about how to tackle some of my 'similar problems'...with your innovation and use of basic tools (that's all I possess,eh)! I sure could use youse right about now to tackle the f@#@#@#d up mess that I just got! You are my inspiration to get her done..thanks! |
|
|
|
|
08-12-2012, 02:39 PM
|
#68 |
|
Senior Member
Join Date: May 2010
Location: Solihull, England.
Posts: 8,744
|
Cheers Lads.
Here's a little update - when I say "Bonnet" you guys say "hood"  Ok, so I've been away for a couple of weeks, and still havn't completed the registration process. I have to take the car for inspection next Tues, so after that things should move along better. A couple of things to update: I finally managed to get a 2nd ignition set together. I had to keep borrowing the good ignition setup off Old Rusty. In the end I used the dizzy off the 59A, set up with a single set of NORS points, NOS genuine flatty wires and a crab cap. I did set it up with a really pretty red crab cap, but it wouldn't fire and run. It was popping and banging and trying to run backwards. Careful inspection of the cap showed a crack internally between the king lead input and the No.5 terminal. Substitution of another cap fixed it. Not driven it properly on the road yet, but it sounds all right in the garage. Next job was to work out how to fill the hole in the roof. At Chimay I inspected Simon's 34. He filled the roof with a vinyl covered steel insert, sikaflexed in. He said he used some instructions from Kev Elliot in Custom Car, which said use a mk1 Astra bonnet, turned front to back. He said he couldn't find a used one so bought a new replacement panel and it worked a treat. So using that basic idea as a guide I thought I'd give it a go, but start from first principles. Here's the roof opening with the wooden bows still intact. These are worth keeping because you tack the headlining to them.  I wanted to make a template to show the curvature of the roof. I had a brainwave - 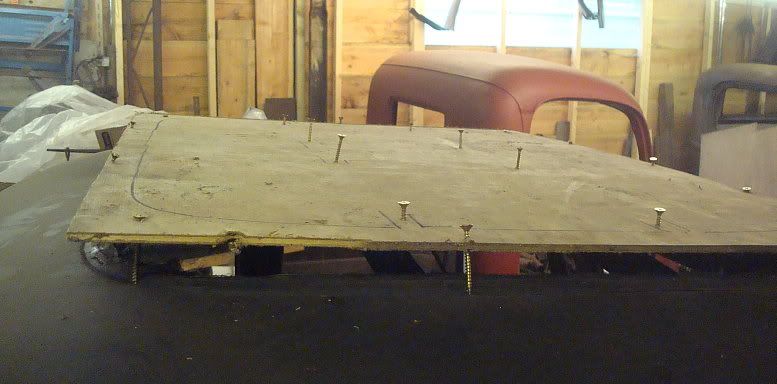 That's it - use a piece of ply with screws screwed through until they just touch the metal surface, or the wooden bows. This worked really well, because each screw is finely adjustable, plus it was cheap and quick to make. I took it to the local scrappy (Mick Merrill for anyone local) and tried it on various bonnets. Why bonnets, I hear you say, and not roofs?? Well, two reasons, if a bonnet will do it, it's easily removed and transported, plus the cars are stacked two high so the lower roofs are inaccessible and the upper level too high. Bonnets are easy. So around I went, trying this and that, and there were only a few with an area big enough, without flutes or ridges, and only really one, that came close to the profile as dictated by my super accurate template. Mondeo. Not the early one, the later one styled more like a focus. The bonnet was a bit damaged at the front so he let me have it for nothing. (top bloke Mick). Here's the bonnet at home  And with the template in place, though it's hard to show how well it fits. 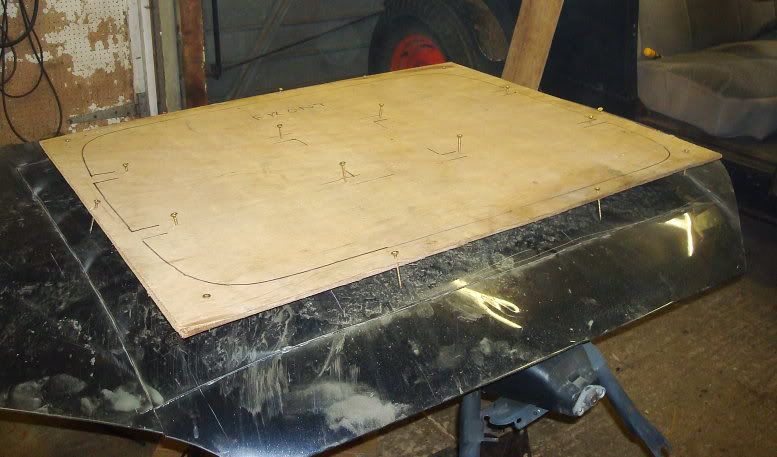 Like Kev found, it fits better back to front. I cut through the outer skin and chopped out the inner panels. I had to carefully trim the inner panels so I could break the gluey blobs holding inner and outer together. A few pics: 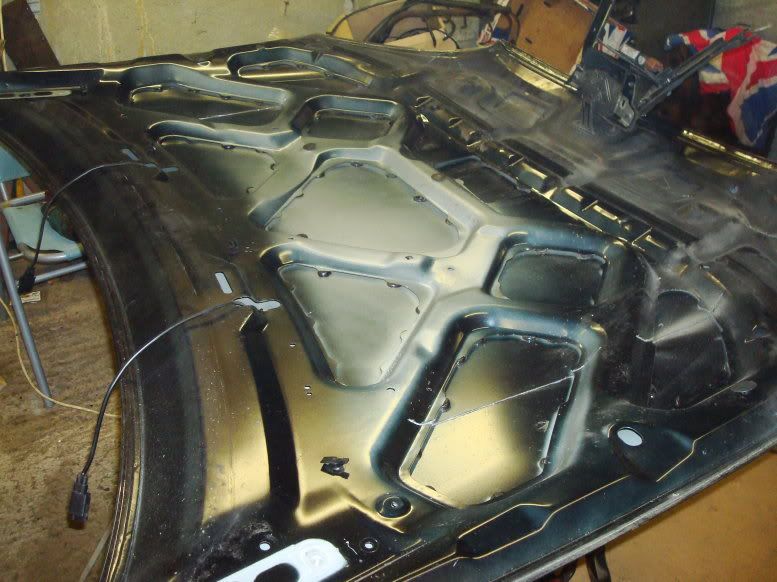 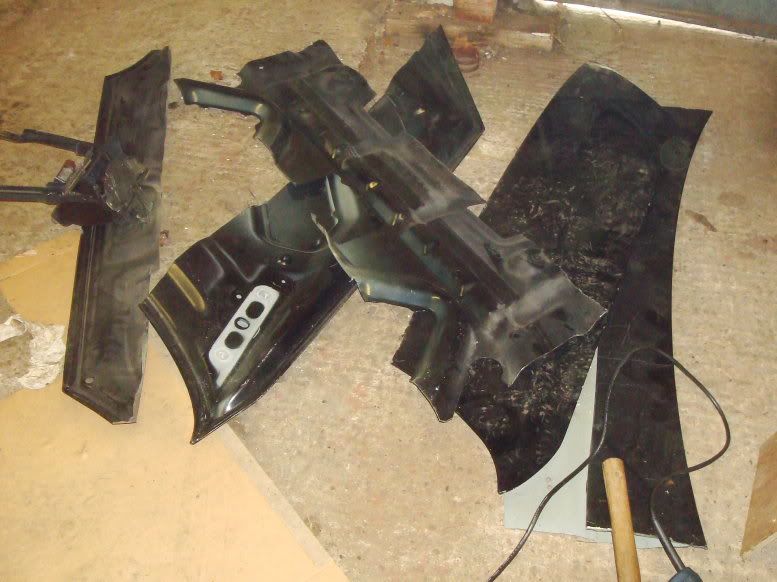 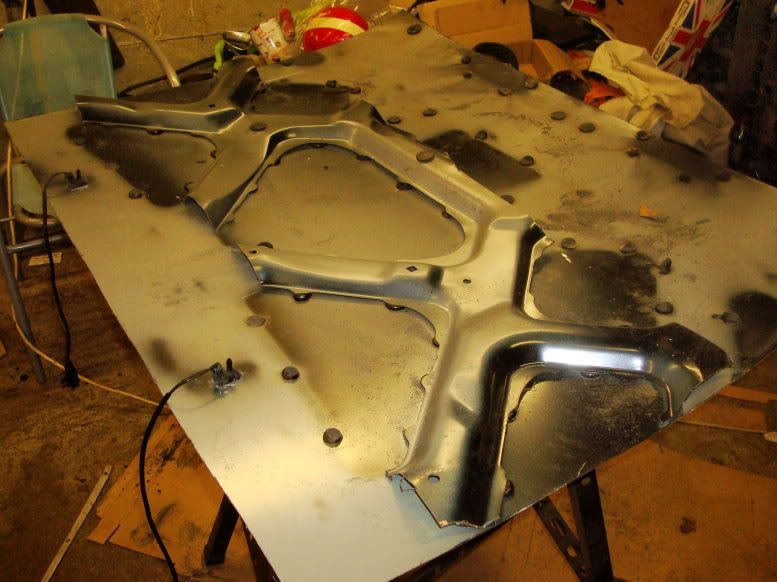 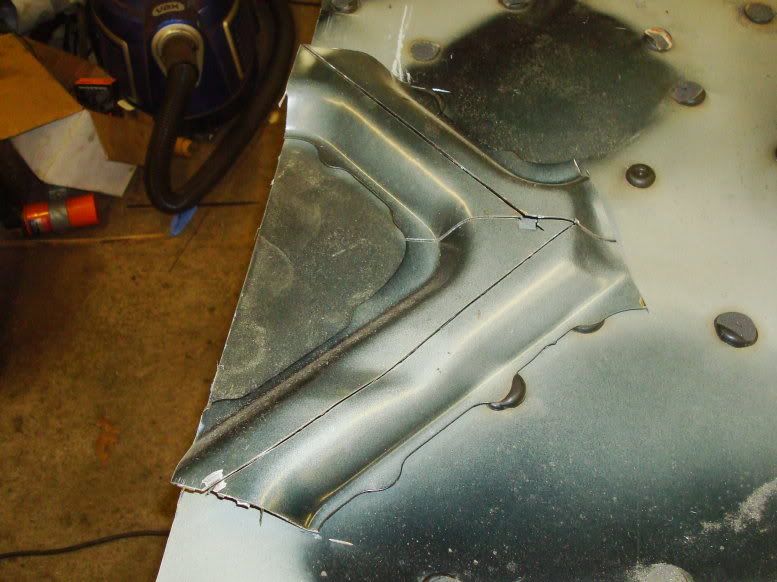 I then removed the gluey lumps with a chisel and reduced the residue with a scraper. Then I slung the panel on for a test fit. 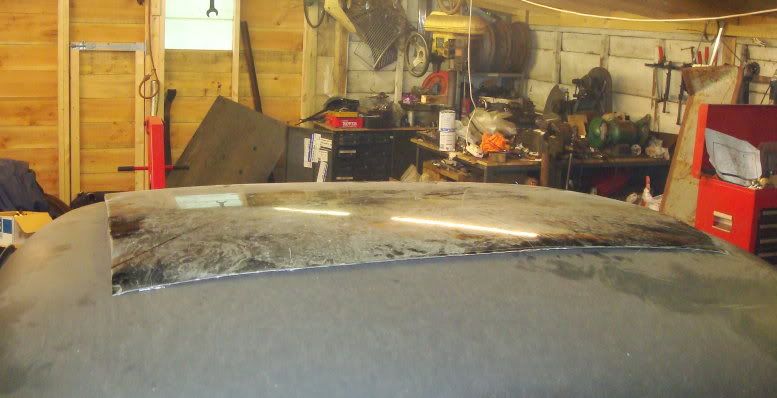 Not bad, not bad at all. Pretty good really. I drew around the opening from the inside and then trimmed around with a generous allowance, leaving room for a final trim.  I then really studied the roof opening and worked out what I had. There is a hidem type metal band around the opening, with two screws and nuts at each corner. I removed the nuts and pried the banding out. It comes out in three parts. I removed the remnants of the canvas top material. The opening is in pretty good shape, the tacking strip seems to be ok. This is as far as I have got, for now, I have to decide exactly how to attach the panel, whether to make it temporary or permanent, and I need some vinyl to cover it. But here is a parting shot with the new lid resting in place. 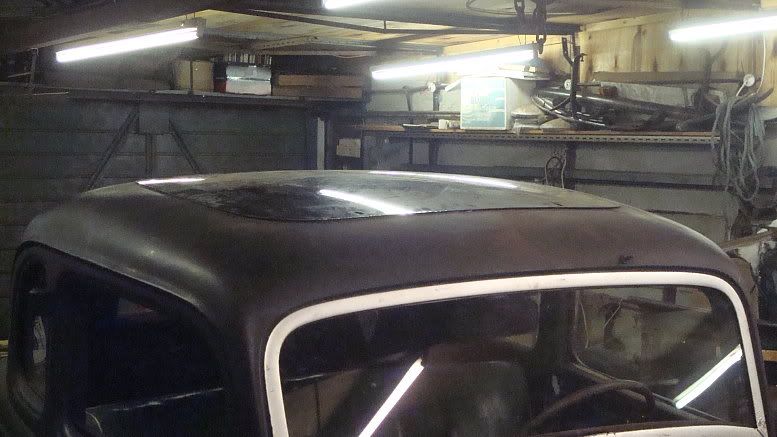 I don't think I could have got a better profile if I had wheeled one up from scratch. Mart. |
|
|
|
|
08-12-2012, 04:18 PM
|
#69 |
|
Senior Member
Join Date: Jul 2012
Posts: 586
|
Great pictures, great work and great discriptions-keep them comming.
|
|
|
|
|
08-12-2012, 04:48 PM
|
#70 |
|
Senior Member
Join Date: May 2010
Location: Sf bay area
Posts: 1,464
|
very nice bonnet as if it were made at the factory...nice fit you've got a good eye Mart!
|
|
|
|
|
08-12-2012, 05:33 PM
|
#71 |
|
Senior Member
Join Date: Dec 2011
Location: Houston Texas
Posts: 170
|
Thanks for posting very nice job.
|
|
|
|
|
08-18-2012, 02:47 PM
|
#72 |
|
Senior Member
Join Date: May 2010
Location: Solihull, England.
Posts: 8,744
|
Quick roundup as good news to report.
Last Tuesday got the old GMC fired up and pressed into towing duty again. 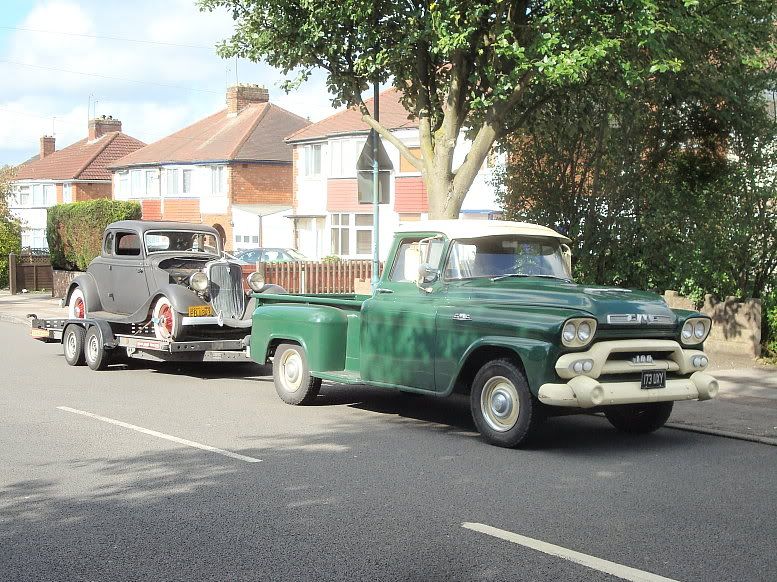 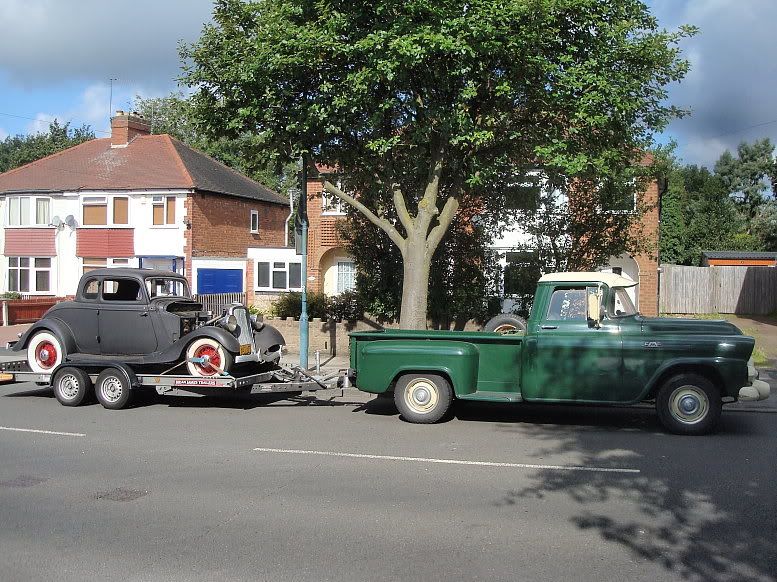 Took the 33 down to the local DVLA (UK DMV) for the requested inspection. I knew this was going to be a formality but it was a hoop I had to jump through to progress the registration. All was well and got back safe and sound, tucked everything away and started waiting for the letter. THE letter. This morning, normal Saturday routine, took my Mum shopping and when I got back THE letter had arrived. It contained the form I need to buy the number plates and a tax disc. I never unpacked the shopping so quick. Straight to a local shop to get some plates - I just got what was available over the counter - something smart will have to wait. And off for a road test. I drove all around, first round the short block then round the longer block, then round the 8 mile block, and so on, going further afield each time. Pleased to report no issues. I waited what seemed like an eternity for today, and was so pleased to at last be able to drive it. So pleased, I didn't even snatch a video. All I got was a couple of crappy pics in Tesco's car park. 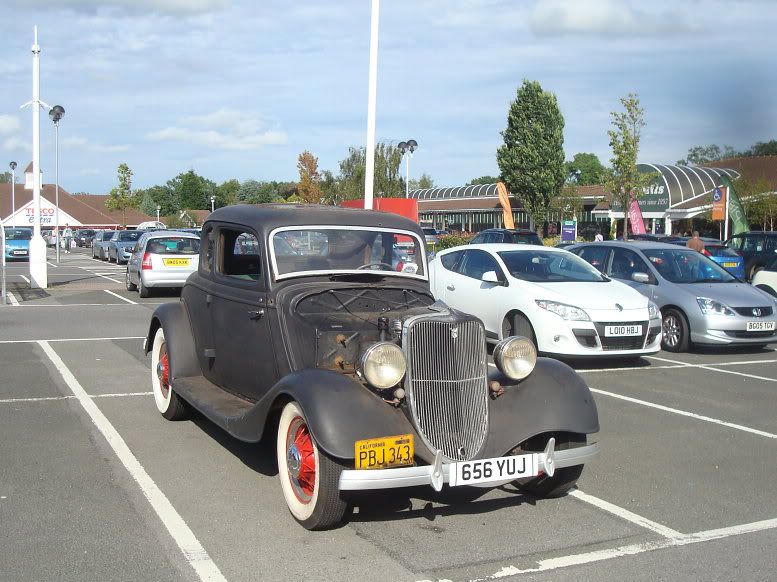 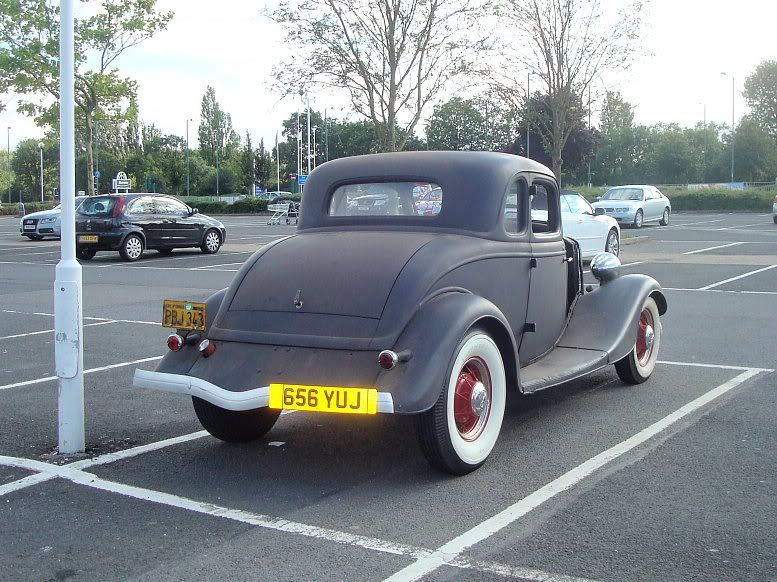 But that's the whole point, they were taken in Tesco's car park. Not in my back garden. And that makes a big difference! Mart. |
|
|
|
|
08-19-2012, 04:56 PM
|
#73 |
|
Senior Member
Join Date: May 2010
Location: Sf bay area
Posts: 1,464
|
Mart-
you earned the drive for all the hard work, thankyou for your posts and future posts,,,, gump |
|
|
|
|
08-19-2012, 07:53 PM
|
#74 |
|
Senior Member

Join Date: Jul 2010
Posts: 243
|
Mart, Thanks for this thread and all the good information. I have been reading your posts for years and you do good work.
The gas tank is going to continue to rust inside and will give you trouble. I have been using the gas tank sealer from POR15 for more than 20 years and recommend it highly. If you have never used it, you will be impressed, watching it coat and seal the tank. I had finished a tank years ago and had set it aside to finish draining the excess sealer, when my young son got excited and called me over. "Papa! Its sealing up the drain hole!" Thats a 5/8" hole it was beginning to seal! Good stuff |
|
|
|
|
08-20-2012, 08:12 AM
|
#75 |
|
Senior Member

Join Date: May 2010
Location: Oakmont, Pa (Longwood)
Posts: 297
|
Thanks, takes me back to 1952...could'nt do it now. Great job. Congrad's.
|
|
|
|
|
08-20-2012, 08:13 AM
|
#76 |
|
Junior Member

Join Date: May 2010
Location: Gilbert, Az
Posts: 8
|
If it were mine, I would scrap the copper lines and go to steel lines. Safety issue, just saying.....
|
|
|
|
|
08-20-2012, 10:00 AM
|
#77 |
|
Senior Member

Join Date: May 2010
Location: Deep DEEP South
Posts: 223
|
Well done MArt...loved this thread !!
|
|
|
|
|
10-21-2012, 07:59 PM
|
#78 |
|
Senior Member
Join Date: Sep 2010
Location: South of I-40
Posts: 379
|
What type of fan are you using? Didnt see it in the pics.
|
|
|
|
|
11-19-2012, 10:24 PM
|
#79 |
|
Member

Join Date: May 2010
Location: Cheney, WA
Posts: 79
|
Looks great...I have to agree with ridding yourself of the copper brake lines. Otherwise, very well done!
|
|
|
|
|
11-20-2012, 04:18 AM
|
#80 |
|
Senior Member

Join Date: Jun 2012
Location: Gaylord, Michigan
Posts: 1,599
 |
Ditto with 39portlander. That was a 2 cups of coffee read, but really interesting. Good stuff Mart. I love the look of that '33.
Mike42 |
|
|
|
|
11-20-2012, 08:07 AM
|
#81 |
|
Senior Member
Join Date: May 2010
Location: Solihull, England.
Posts: 8,744
|
Don't sweat the copper pipes, guys, they ain't the same copper you get over there, it's a special alloy made to a british standard especially for brake pipe usage, thanks for your concern.
I had the car in the classic car show here in the UK last weekend, a lot of people passed comment along the lines of it being nice to see one that hasn't been restored. I'll cutnpaste an update I just made on a UK forum. *********************************** Ok, this must rank as the lamest update ever, but I now have some rudimentary instrumentation. I looked on ebay for some gauges and bought a water temp and oil pressure gauge from a marine place. I got em because they had old fashioned needles and curved glass. They were not too expensive and for a change were made in India, not China. Both are electric rather than mechanical so I had to get adaptors for the senders 5/8" UNF to 1/8" NPT for the temp and 1/4" NPT to 1/8" NPT for the oil. I picked up a two gauge bracket from the autojumble at the NEC, which is a bit unusual in it's shape, but had a warning light built in, as well as one of those old fashioned plugs that people used in the 50's. A session in the garage had it mounted and the gauges wired. 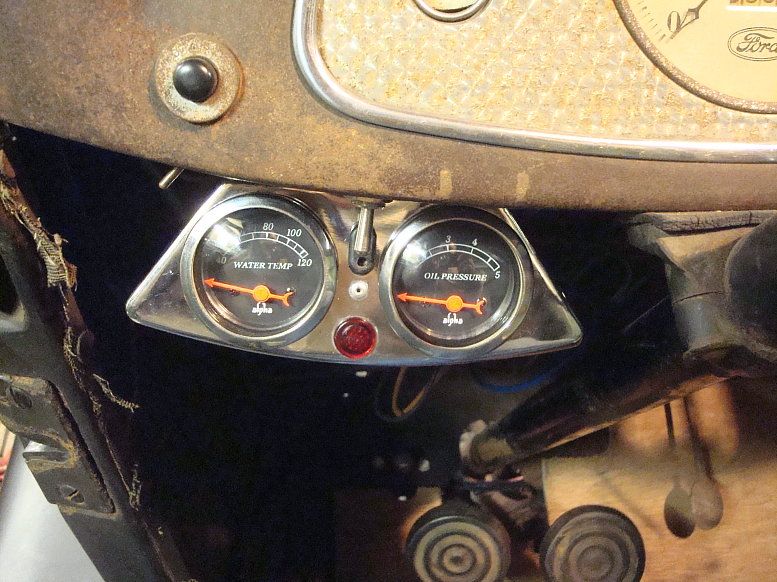 I fitted it without drilling any extra holes, the switch you can see is for the the indicators, the switch holds the bracket in place. I went the whole hog and even wired the illumination to the lights. I might drill the corners for a couple more tell tales for main beam and the indicators. Quite pleased with it, it fits in ok without looking too modern or over retro (like the magnolia Smiths stuff for instance). The other thing I did was order some silver on black plates, they should be here in a few days. Mart. |
|
|
|
|
12-17-2012, 12:22 PM
|
#82 |
|
Senior Member
Join Date: May 2010
Location: Solihull, England.
Posts: 8,744
|
7008
I have been bouncing the idea of improving the steering around for quite a while, It was the one big thing that was spoiling the enjoyment of driving for me. There have been many helpful discussions leading to lots of good info gathered from many sources. So thanks to those that took part in the discussions. I finally actually started cutting metal a couple of weeks ago and have been doing a bit as and when I can. I turned the place upside down trying to find an F100 box I'm sure I have somewhere. Anyway, can't find it so had to think of something else. I like the Hudson steering conversions for a few reasons.. Namely it's the improved type with the roller sector shaft, it's overslung like the original 33 box, and has the same spline for the pitman arm as the 33. Problem is, they are like rocking horse manure. So what's the next best thing? 37-48 passenger car. I had a couple of lhd boxes and a very crusty rhd box. To get the overslung arrangement, I needed a lhd box, turned 90 degrees and poked out through the rail. People have done this before, but it does have a drawback. It reverses the steering. You have to unreverse it by fitting the pitman arm sticking up instead of down. That's a bit rubbish in my view and a job stopper for me. I need the arm sticking down like stock. Triggered by a variety of conversations, it dawned on me that fitting the guts from the rhd box in the lhd casing would make a lhd box that steers correctly when fitted as push and pull rather than cross steer. Great, I have the lhd and rhd bits so the idea is a goer. So along with some sporadic photo's to help tell the story, follow along as I upgrade the steering on my 33 to the vastly improved 37 style. Here's a very grungy 37-48 style lhd box. 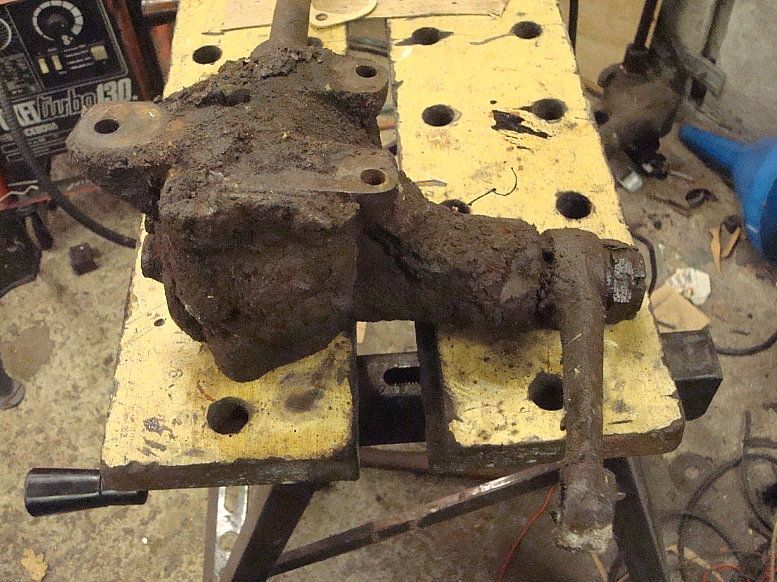 Note all the lugs that attach it to the steering bracket on the frame rail. These have to be cut off for this conversion. And here is the sad remnants of a rhd 37 box. The innards were still usable (just). 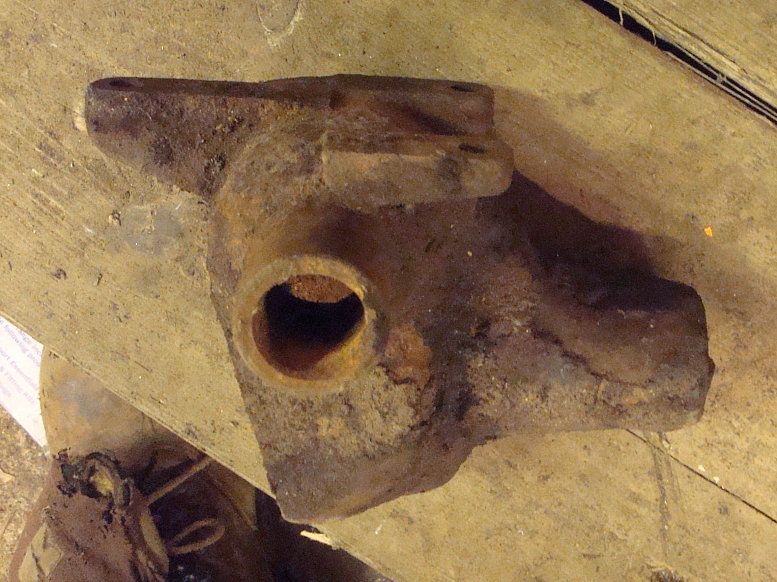 It is a direct mirror image of the lhd box. Heres the lhd box after cutting off the mounting lugs.. 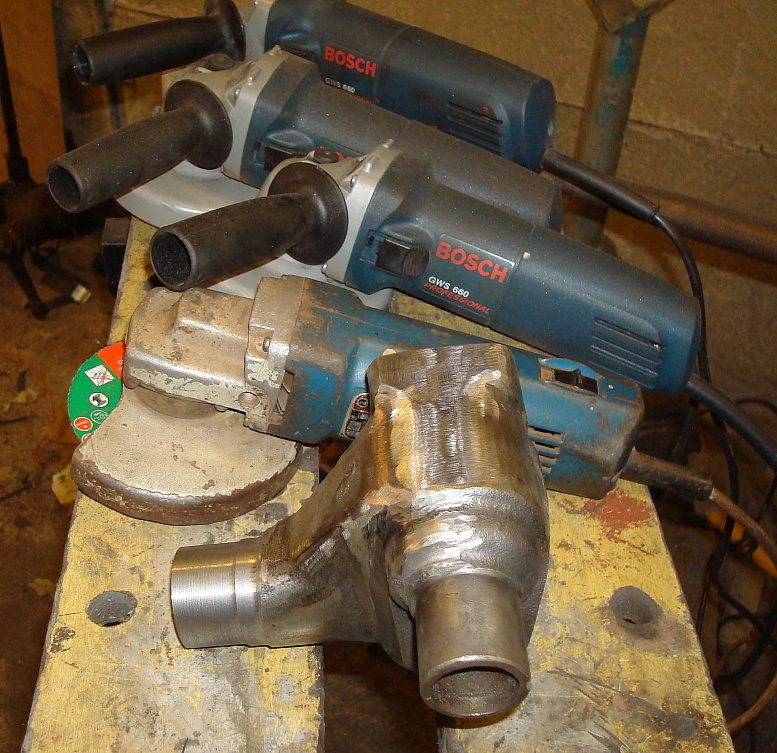 Note the selection of angle grinders - surely one of the most handy devices available to today's car nut. The box was chucked up in the hundred year old Hendey and the snout skimmed down to just big enough to keep the oil seal in place.  The sector shaft was kept in place so the end could be supported by the rotating centre. Having cut off the cross steer mounting lugs I needed a 33 style flange to bolt to the frame. This was cut from a piece of 10mm steel plate. I trimmed the end, cut the hole and then cut the flange from the plate. Easier to hold when still attached to the rest of the plate. 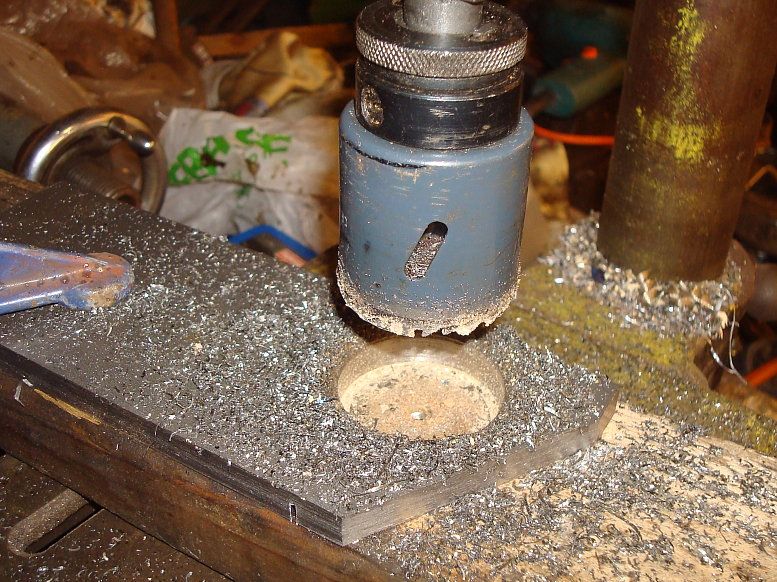 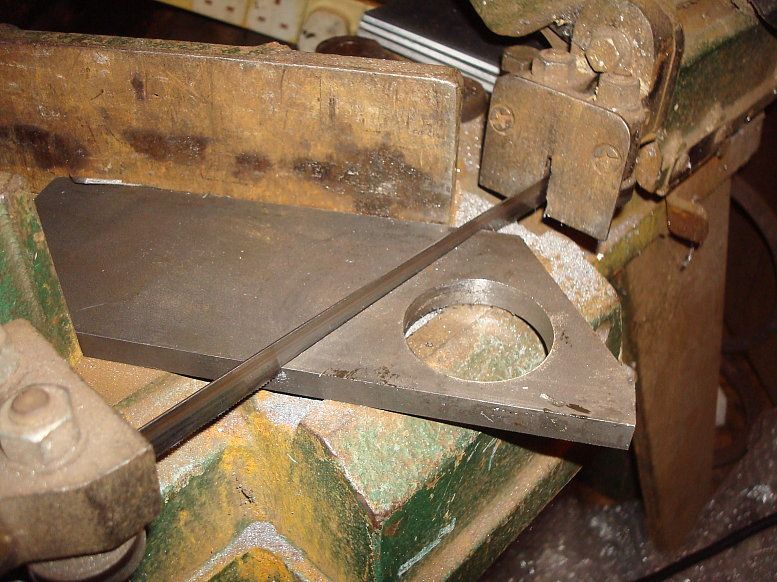 At this point I needed to trial fit the box in the car. The 33 steering was removed, I learned form the fordbarn that the engine did not need to be removed, as long as the exhaust manifold is removed, the steering will come out. I had to clean out the threads in the 40 wheel (5/16" UNF) and improvised a puller to get the wheel off. It was very tight. 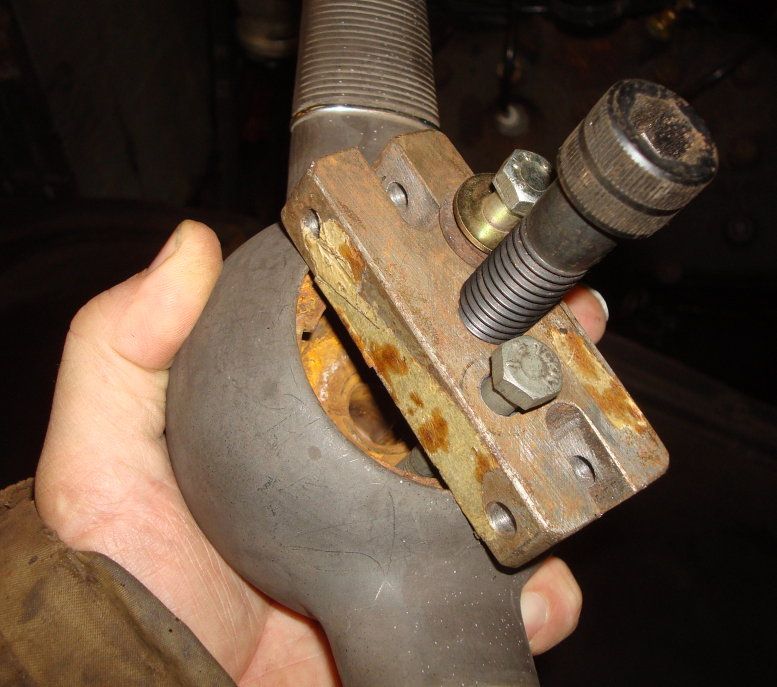 To even get the box in place you have to enlarge the hole in the frame. Only the 1-1/8" shaft sticks through on the 33, so to get the casing and oil seal through needs a bigger hole. Here's the original hole. 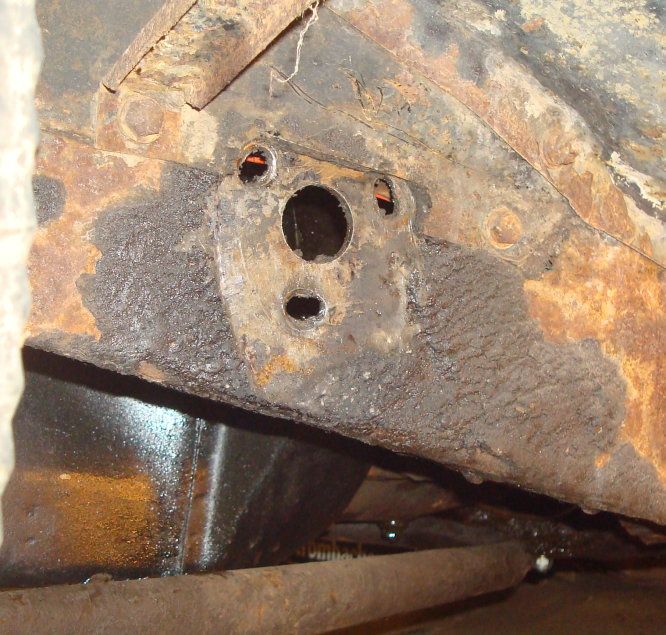 It's hard to enlarge the hole especially when the fenders are still in place so this is how I did it. This is the slug out of the flange when the hole saw was used to cut the hole. I skimmed it down so it was a light tap fit in the hole in the frame. 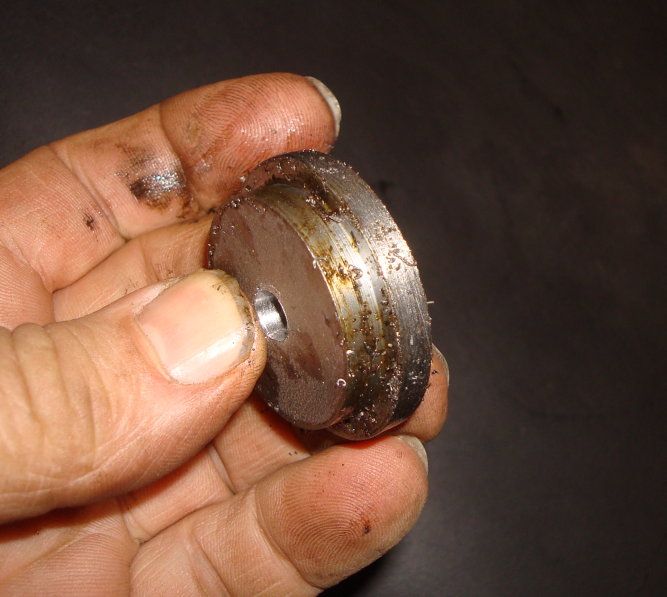 Here it is in place. 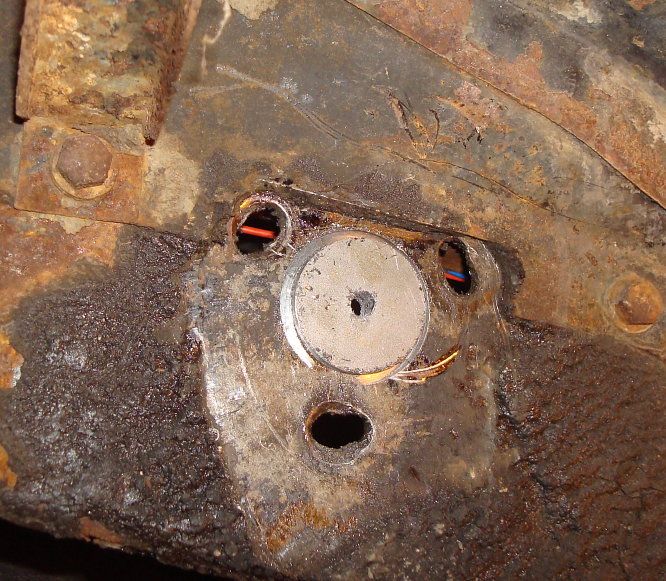 And here is the same hole saw being used to cut the hole in the frame. 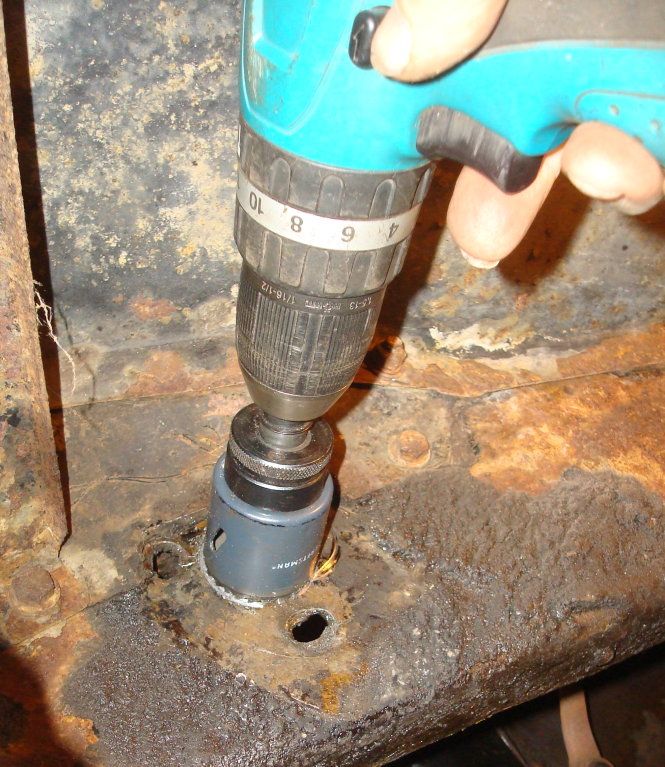 And the hole almost cut through. The frame is double thickness here, the x-member doubles the frame on a 33. 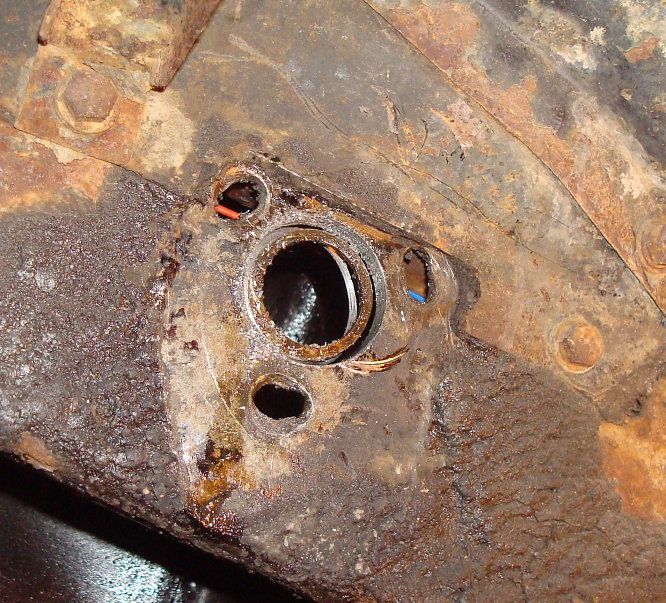 Once the hole was cut I could trial fit the box in the frame. 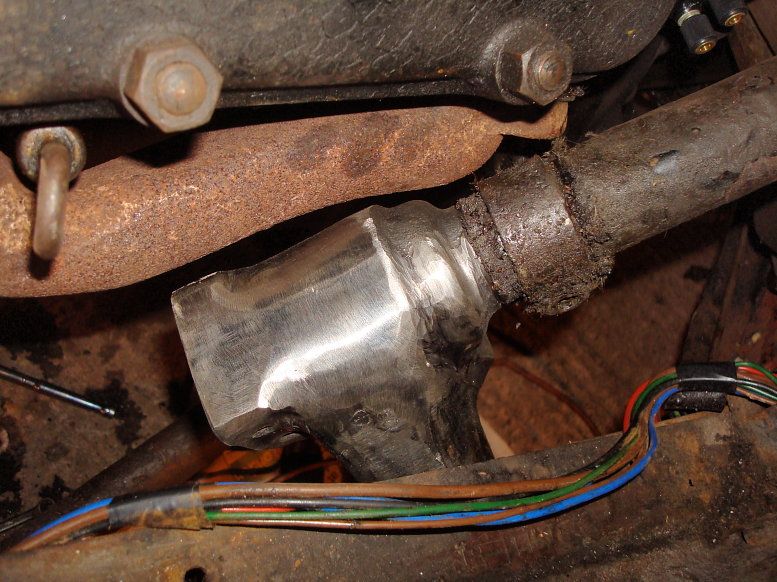 The column was attached and checked for alignment at top and bottom. 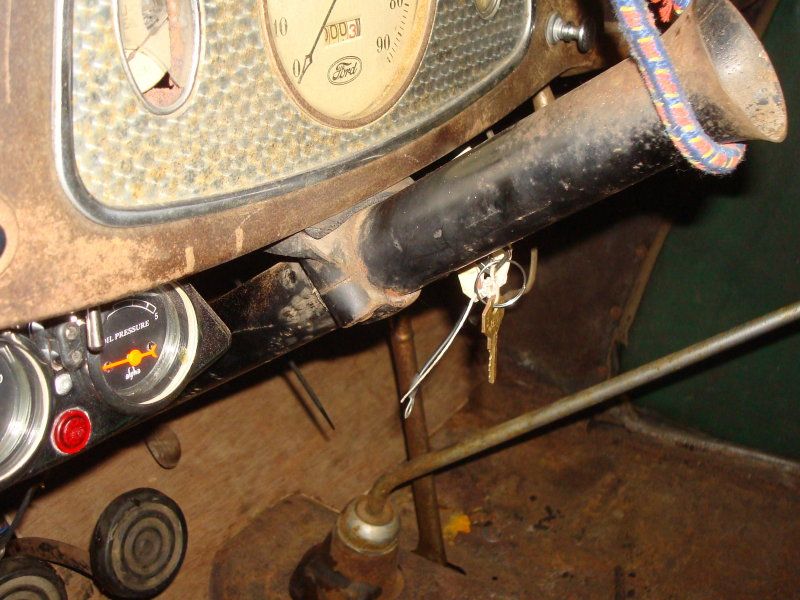 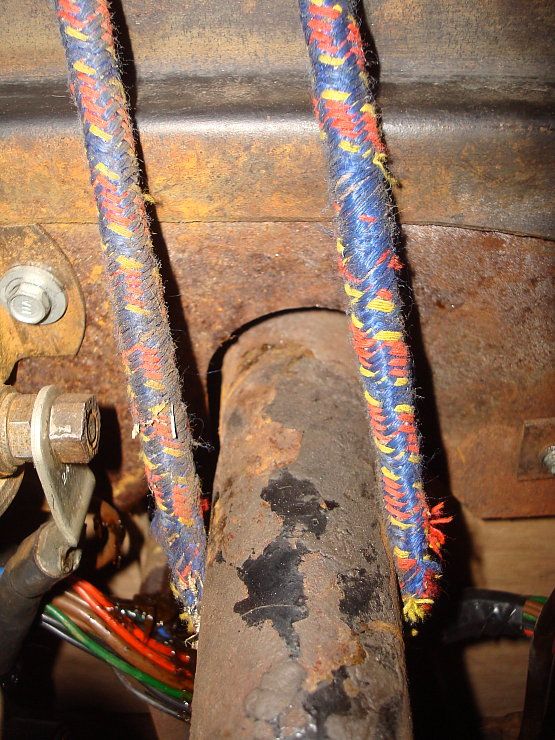 When all was looking good, it was assembled up with the flange in place (after lots of filing and grinding to take account of the angularity of the frame). The flange was tacked in place and then welded fully after pre heating with the gas axe. The 130 amp mig copes well as long as it's pre heated. Continued below. Mart. Last edited by Mart; 12-17-2012 at 01:01 PM. |
|
|
|
| Sponsored Links (Register now to hide all advertisements) |
|
|
|
12-17-2012, 12:23 PM
|
#83 |
|
Senior Member
Join Date: May 2010
Location: Solihull, England.
Posts: 8,744
|
The shaft was cut, bevelled, welded and ground down, but only to take off the high spots.
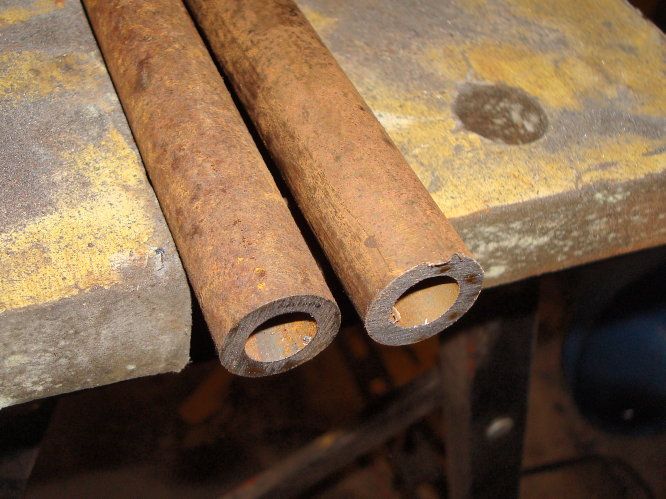 (no pics bevelled, sorry) 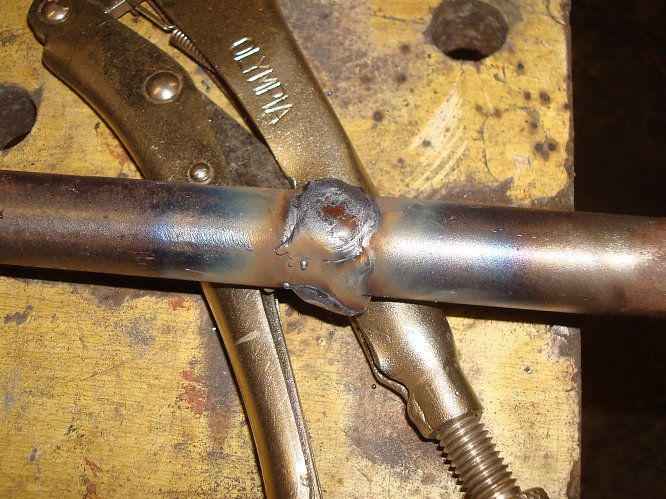  And the locking ring was refitted in the correct place. 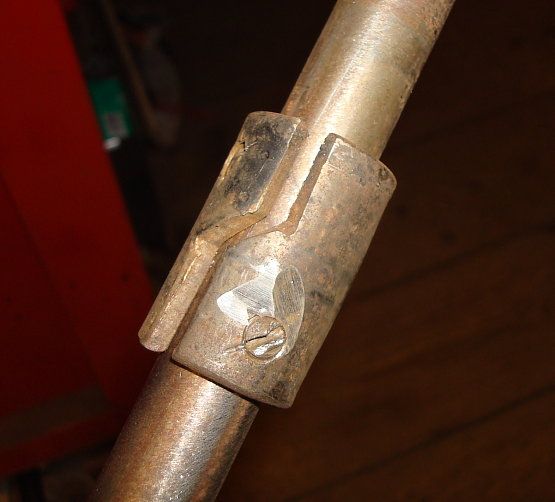 Make sure you have fitted the shaft to the box before fitting the lock ring. Ahem. Dont ask me how I know this. Here's the box assembled up ready for a quick coat of paint and refitting. In my experience it was easier to fit the mast after the box and shaft were fitted to the car. 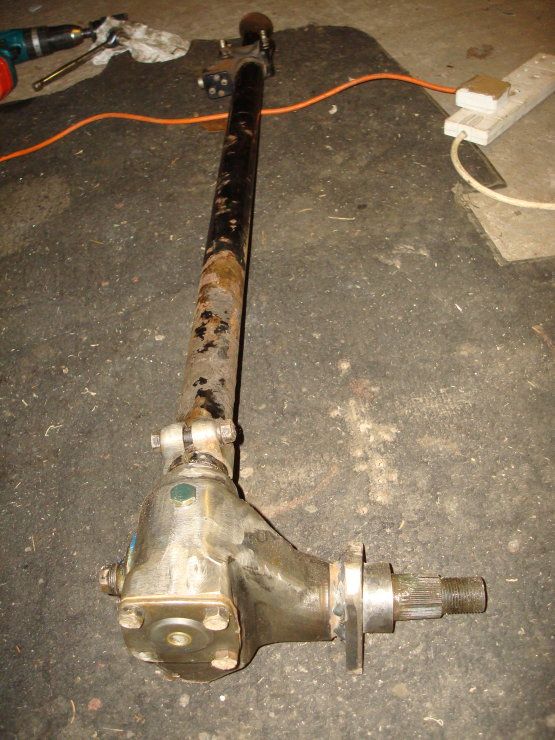 And the final trial fit. Note the filler plug. I drilled and tapped for a 1/4NPT taper plug. 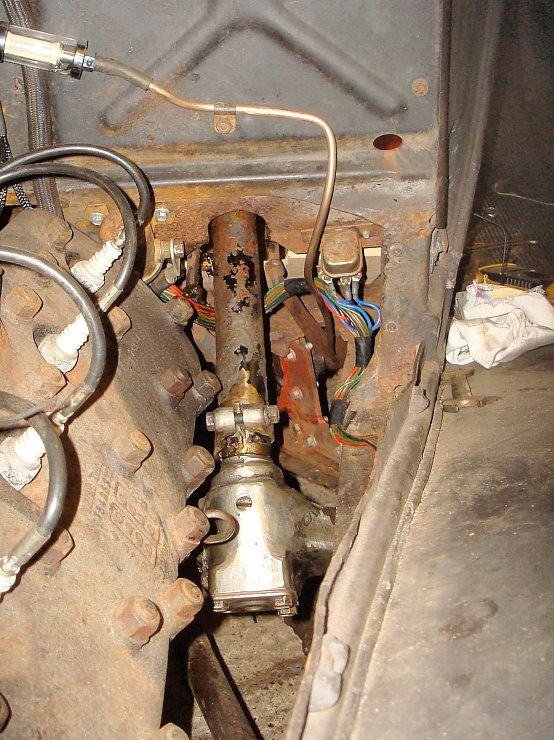 And the finished job in place. 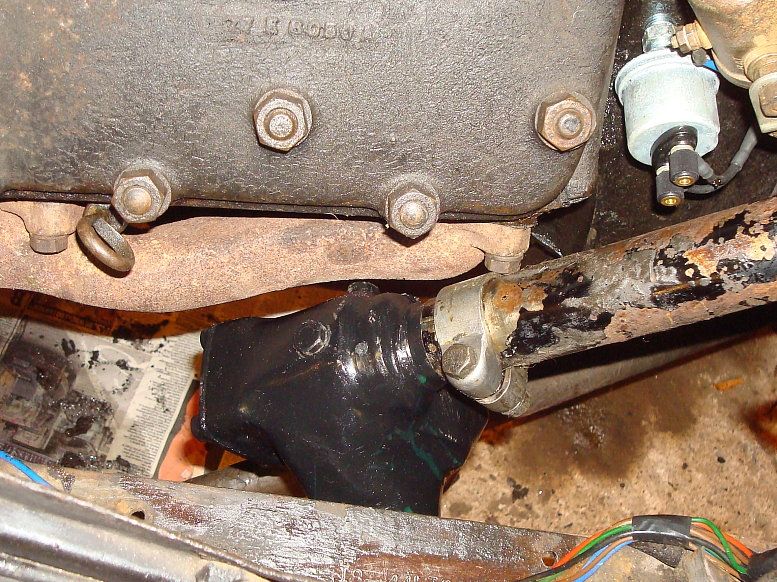 The sector shaft was fitted with a new seal. 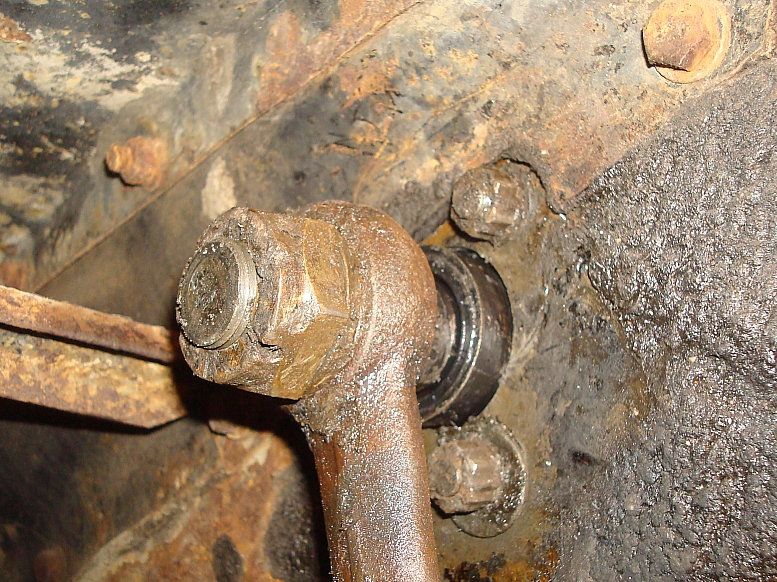 And a shot showing the flange from the inside. 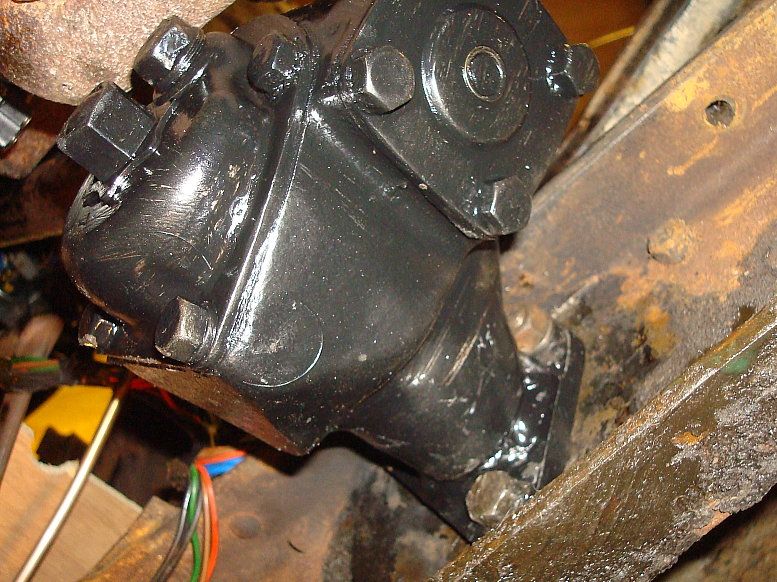 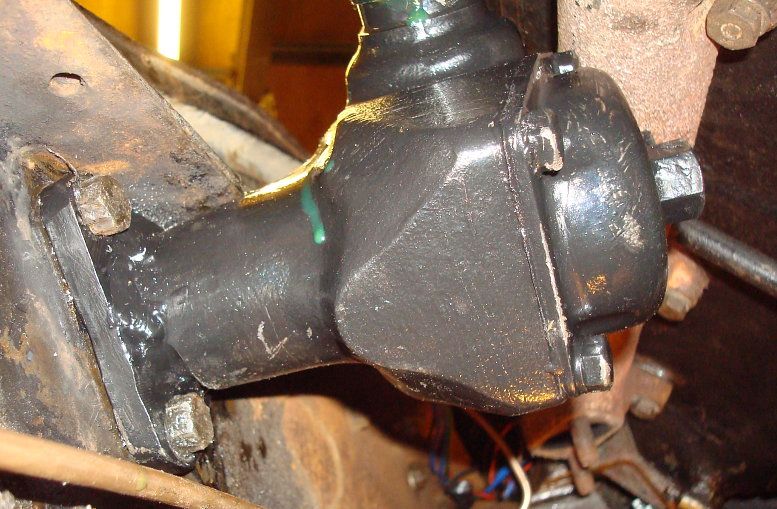 The box just fits and clears the exhaust. There was enough clearance to refit the manifold with the steering in place. 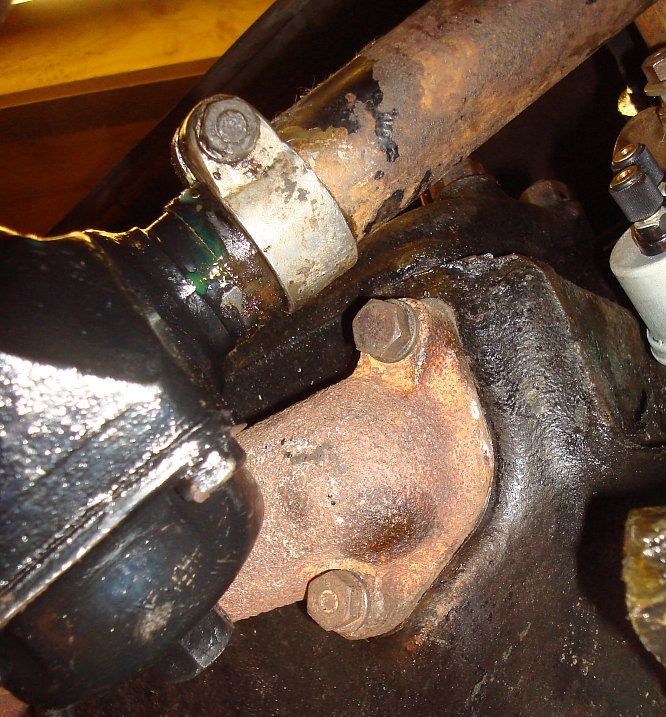 Last thing I did was fit a slightly smaller steering wheel. I think this was from a Ford Pop, not exactly sure, but it does have a nicely worn old cover on it. 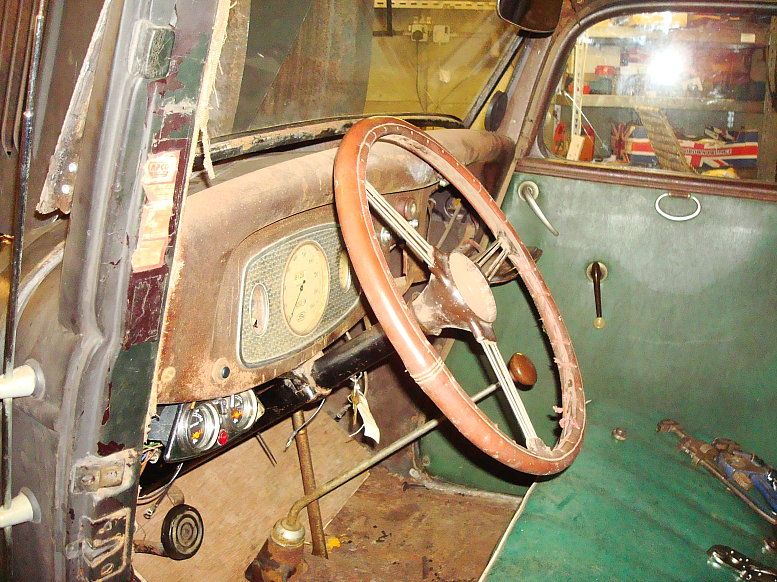 I Havn't done a proper road test, but I have reversed it up and down the drive and tried manouevring around a bit and I can tell straight away that it is much lighter and more direct, even with the borderline rhd parts I had to hand and the smaller steering wheel. Mart. |
|
|
|
|
12-17-2012, 03:00 PM
|
#84 |
|
Senior Member
Join Date: May 2010
Location: Auckland
Posts: 4,700
|
Nicely done .
|
|
|
|
|
12-17-2012, 03:13 PM
|
#85 |
|
Senior Member

Join Date: Aug 2012
Location: Leicester. UK
Posts: 404
|
Great work Mart, a true fettler!
|
|
|
|
|
12-17-2012, 08:01 PM
|
#86 |
|
Senior Member
Join Date: May 2010
Location: Kokomo, Indiana
Posts: 1,731
|
Sponsored Links (Register now to hide all advertisements)
|
|
|
|
|
12-17-2012, 08:07 PM
|
#87 |
|
Member

Join Date: May 2010
Location: St. Louis, MO
Posts: 89
|
Mart, really nice work, thanks for taking the time. I did not see where you sorted out the pedal bushings...... check out Dick's thread. if you don't have this size over there, send me a PM and I'll send you a couple.
https://www.fordbarn.com/forum/showth...=pedal+bushing |
|
|
|
|
12-17-2012, 09:09 PM
|
#88 |
|
Senior Member

Join Date: May 2010
Location: FP, NJ
Posts: 2,770
|
Are the RHD steering guts readily available across the pond (in the UK?) Or, here in the states?? Possibly Job Lot?
(I've been working at copying all of the pictures and text from this thread and putting it all into a Word Document. It's too precious to risk losing it.)
__________________
Don't never get rid of nuthin! |
|
|
|
|
12-17-2012, 09:52 PM
|
#89 |
|
Senior Member
Join Date: May 2010
Location: ManchVegas, New Hampshah
Posts: 1,589
|
Excellent work on keeping a survivor a survivor. I really like what you have done to keep this one alive.
|
|
|
|
|
12-17-2012, 11:01 PM
|
#90 |
|
Senior Member
Join Date: May 2010
Location: Napier, New Zealand
Posts: 2,001
|
Brilliant!
|
|
|
|
|
12-17-2012, 11:05 PM
|
#91 | |
|
Senior Member
Join Date: May 2010
Location: Auckland
Posts: 4,700
|
I JUST CHECKED MACS CATALOGE PAGE 24 # 783524RH WORM matched with a new roller 7Rc-575-x ,Now all you need is the RH Sector.could be some used ones here .
Quote:
|
|
|
|
|
|
12-17-2012, 11:25 PM
|
#92 |
|
Senior Member

Join Date: May 2010
Location: Plano, Texas
Posts: 840
|
Now that’s what I call, really doing something on your lunch hour.
|
|
|
|
|
12-18-2012, 04:00 AM
|
#93 |
|
Senior Member
Join Date: May 2010
Location: Solihull, England.
Posts: 8,744
|
Thanks fellas.
Unfortunately the rhd parts are pretty scarce. I picked the rhd box up quite a few years ago and only just used it. It's good that the worms are available, I believe the roller is the same lhd/rhd, and as Ted says, that just leaves the sector shaft, which has the top angled opposite to lhd. If a good reliable source of rhd sectors could be found there are a few people that would be glad to have that available. Unfortunately shipping would be a killer, as the parts are normally on the wrong side of the world to the people that want them. Mart. |
|
|
|
|
12-18-2012, 08:48 PM
|
#94 |
|
Senior Member
Join Date: May 2010
Location: Suth'N Maine
Posts: 1,996
|
Been keeping an eye on this thread for the last few month's. Giving me a little boost of motivation for my "survivor".
Gonna hit it hard after the first of the year Mart
|
|
|
|
|
12-18-2012, 10:17 PM
|
#95 |
|
Senior Member
Join Date: May 2010
Posts: 820
|
Thanks, Mart ,you are indeed talented .
|
|
|
|
|
12-19-2012, 07:21 AM
|
#96 |
|
Senior Member
Join Date: May 2010
Location: Solihull, England.
Posts: 8,744
|
Ok, an update on the steering conversion.
It's GREAT! I just took the car for a 10 mile drive on a mixture of roads and the improvement is fantastic! Well worth the effort an time taken to do the swap, and in reality it was fairly cheap. Shame there aint more rhd bits knocking about. Mart. |
|
|
|
|
12-19-2012, 05:02 PM
|
#97 |
|
Senior Member
Join Date: May 2010
Location: FP, NJ
Posts: 2,770
|
HELP!!!! All of the pictures from posts #6 and #7 (and more?) are missing!!!
OOOPSIES!! They're back! I kind of panicked when I saw all the little blue squares with question marks instead of pictures, but, a few minutes later, the pix are back.
__________________
Don't never get rid of nuthin! Last edited by PeteVS; 12-19-2012 at 05:17 PM. Reason: Pictures reappeared... |
|
|
|
|
12-23-2012, 05:35 PM
|
#98 |
|
Senior Member
Join Date: May 2010
Location: Auckland
Posts: 4,700
|
Heres a RH steering box,
http://www.trademe.co.nz/a.aspx?id=545991227 Last edited by FlatheadTed; 12-23-2012 at 07:39 PM. |
|
|
|
|
12-24-2012, 04:46 PM
|
#99 |
|
Senior Member
Join Date: May 2010
Location: Solihull, England.
Posts: 8,744
|
Thanks fellas.
I have been chipping away at some little jobs after doing the steering conversion. I removed the toeboard to do the steering and while it was out I wanted to tie up some loose ends in that area. Anyone that has sat in my car will remember the hole in the floor (actually the trans cover) where your heel goes. That was what I wanted to fix, so I removed the cover. I'd only put a couple of bolts in, so it came out easily. I had done the repair before taking any pics, but here's the repaired trans cover. 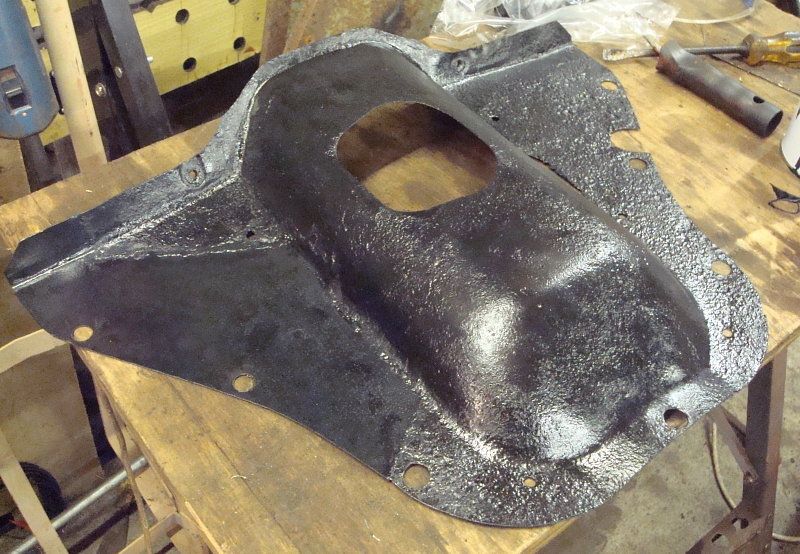 And here are the rusty parts cut out and replaced with sound metal. 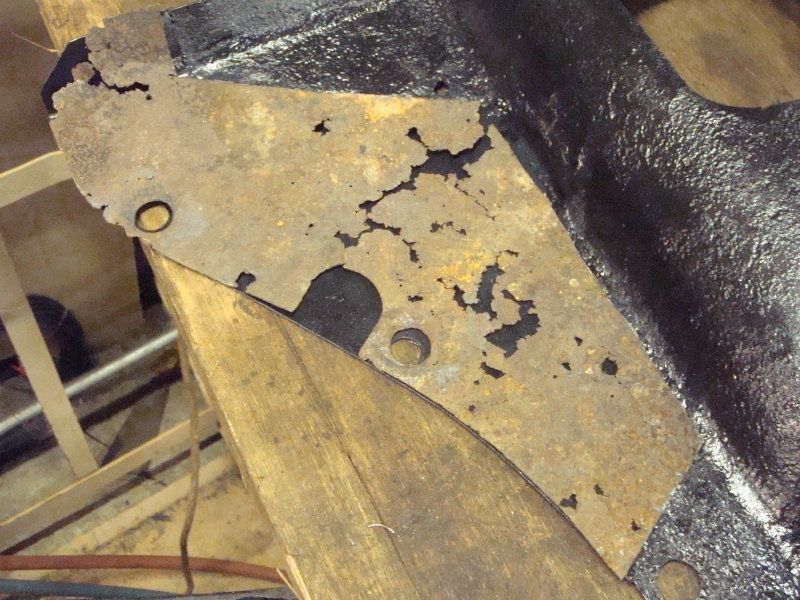 I didn't bother cutting out the steady rod bolt access notch, as I don't have one on the drivers side. I ran a tap through all the trans cover attachment holes and sorted out some original ford bolts and used washers to reattach it. But before that there was a couple of other little jobs. I removed the trans cover and drilled out the dowel hole to 7.5mm. I ground out the slot in the shifter until the shank of a 7.5mm drill just passed along the groove and made a new pin from a piece cut from the same drill, the part just above the flutes, which is harder than the end of the shank. Amazingly the cap unscrewed bu just grasping it with a cloth and turning it by hand. I was expecting all sorts of aggro getting it undone. 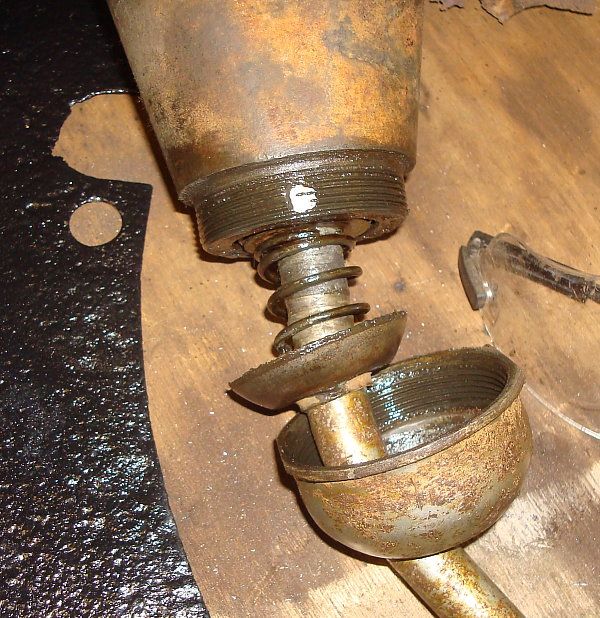 The reduction in side to side play of the gearstick was quite remarkable. It was pretty sloppy before. While the lid was off I drained the oil. The gears were quite rusty and a lot of the rust had come off and discoloured the oil. I refilled it through the open top which is by far the easiest way. I used sae 140 non ep. The gears looked pretty good, nice and shiny despite some slight pitting. 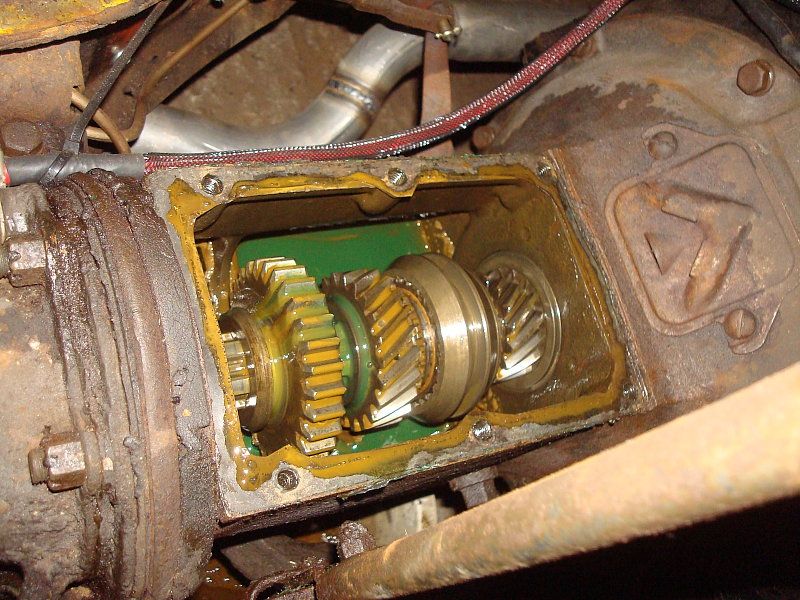 I'll probably give bit another flush through in the future. I put the lid back on and made a note of the trans number. Just because I could while the toe board was off and I wouldn't be able to do it after it was refitted. The case is later - 1941 - and I'm guessing it was from a pickup -(Passenger cars were side shift) so doesn't match the car. Why someone put early gears in a later case I do not know. 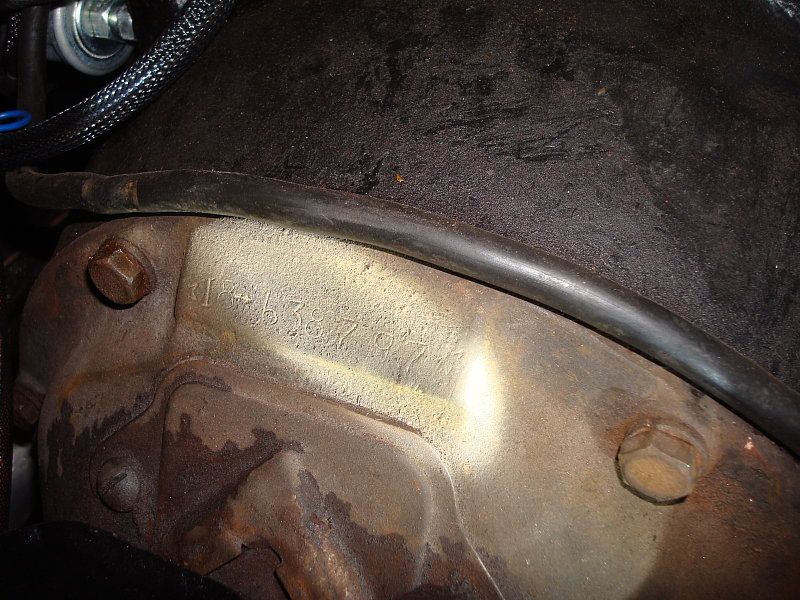 I then refitted the toeboard, temporarily for now. I got my son to sit in the car and press it down while I put some screws in from the engine bay side. Later I'll remove it, drill the holes out and screw it in from the inside. I had to do it this way round to locate the holes. You can see his footprints, because guess what? It was pouring with rain at the time. 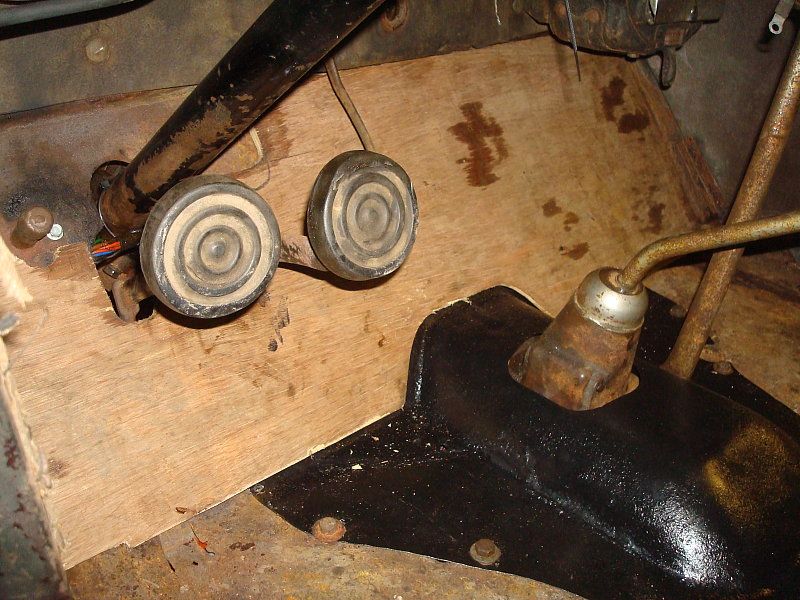 So little bit by bit, I'm fixing the little things that need doing. I'm enjoying myself. Mart. |
|
|
|
|
12-24-2012, 10:39 PM
|
#100 | |
|
Senior Member
Join Date: May 2010
Location: FP, NJ
Posts: 2,770
|
Quote:
__________________
Don't never get rid of nuthin! |
|
|
|
|
|
12-25-2012, 05:38 AM
|
#101 |
|
Senior Member
Join Date: May 2010
Location: Solihull, England.
Posts: 8,744
|
Yeah, probably, but that assembly was "new" in the 50's. There is hardly any clutch chatter so it's working well enough with just the one.
Mart. Last edited by Mart; 12-25-2012 at 06:34 AM. |
|
|
|
|
08-06-2013, 03:36 PM
|
#102 |
|
Senior Member
Join Date: May 2010
Location: Solihull, England.
Posts: 8,744
|
One thing that had been bugging me on my coupe was a slight tendency to bump steer, or even worse, "roll" steer. There are traffic calming measures on my road in the shape of raised junctions. The car would give a little kick to one side as it went up the bump and a slightly bigger kick the other way as it dropped off the other side of the bump. Also when trying to drive fast down a country lane as I wind some steering on and start to turn right, lets say, as the body rolls to the left, the steering pulls harder to the right. Not good. It was a bit of a handful on the twisty stuff, requiring constant attention and correction.
I had an idea what was causing the problem. Hers's a pic to illustrate. 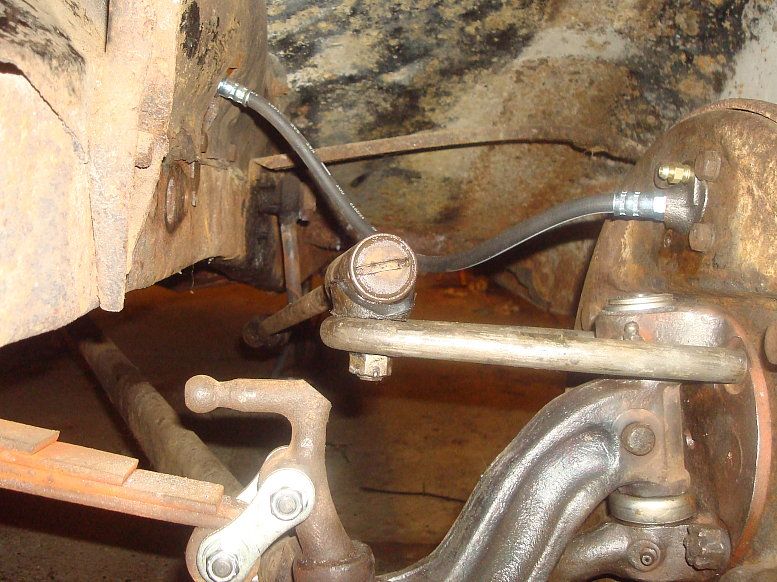 Ok, it would have been better taken from the side, but you can see that the drag link runs uphill from the pitman arm end to the steering arm ball. The steering arm is straight, and the ball is fitted sticking up, so the drag link attachment is quite high. All this is made worse, of course by the dropped axle. Fitting a dropped axle does cause a big list of knock-on effects. I decided to invert and drop the steering arm. That meant that the drag link would no longer fit, as the end would be the wrong way up. As I needed to modify the drag link I decided to make it adjustable using the end of a track rod. A drag link has two different ends, one the same as a track rod end, and the other one is the opposite way around. This means one end has the shock absorbing spring for compressive loads, the other end has a spring for tensile loads. So I used the otherwise scrap drag link that was on the coupe when I got it, and cut the end off that was the opposite of a track rod end, and took a bent track rod and straightened enough of it to give me enough to make a drag link. I drilled out the track rod tubing to about 12mm and turned down the drag link shaft so it pressed into the drilled out end of the track rod tube. I cleaned it thoroughly and welded it on full power with the mig. I then drilled and made a couple of rosette welds through the tube into the shaft of the drag link end. This is a highly critical weld so don't try this at home unless you are either confident of your own abilities or have a certified welder prepared to do it for you. Aussies would not be allowed to do this. So the steering arm was heated and bent to give a drop, a new ball was fitted and the drag link built up and fitted. Here's a shot from the front: 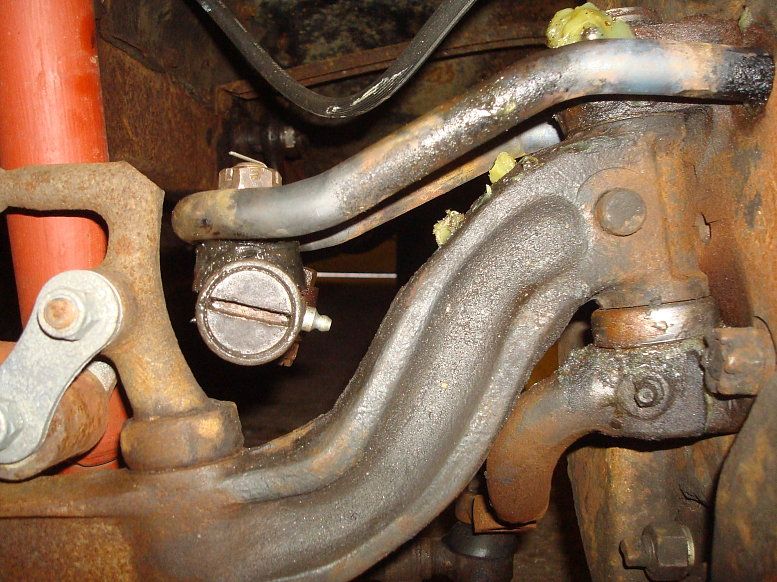 You can see the drag link end is about 4 inches (or more) lower than it was. What you can't see so easily is that the alignment is better, the drag link sits on the ball more readily, without binding. Everything travels through the full range from lock to lock without fouling or binding. And here's a shot from the side: 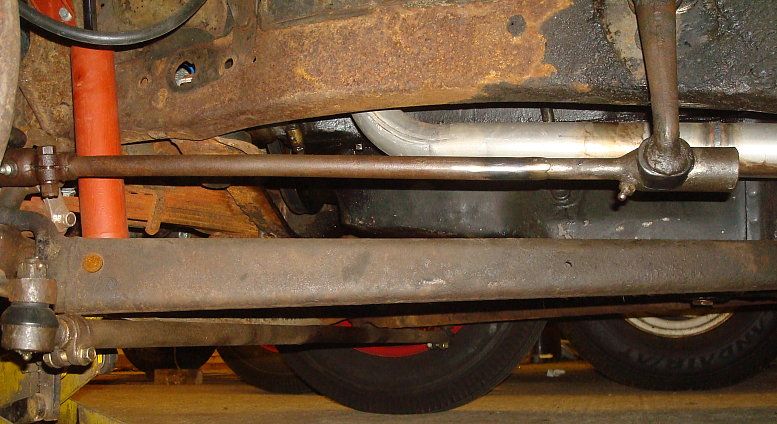 Although I do not have a "before" shot for comparison, you can see this angle is perfectly reasonable. I took it for a road test and I could feel straight away that the "edginess" had gone, and the tendency to dart to the side over the raised sections was gone too, I could ride the bumps hands off and it just goes straight. The first road test showed me that the drag link length needed adjusting as the steering wheel was not centred. A couple of iterations of adjustment followed by a quick run around the block got that dialed in. Having the sweet spot on the box properly aligned to straight ahead driving seems to make it that little bit better. So a good improvement for what amounted to a couple of afternoons worth of work. Now it's dialed in I can go around and fit the splitpins and regrease and go out and enjoy the improved driving experience. Mart. |
|
|
|
| Sponsored Links (Register now to hide all advertisements) |
|
|
|
08-06-2013, 05:51 PM
|
#103 |
|
Senior Member
Join Date: May 2010
Location: san antonio, texas
Posts: 461
|
you are a true caftsman.......
|
|
|
|
|
12-12-2013, 01:36 PM
|
#104 |
|
Senior Member
Join Date: May 2010
Location: Solihull, England.
Posts: 8,744
|
I left out the part where I got the roof insert a bit more finished:
Ok, time to add a little bit to the thread. I have been away working in the states for nearly 3 weeks so that halted progress for a while but did allow me to pick up a few little nik naks like wiper arm and blade, radiator to grille brackets, window channels and other sundry bits. I fitted the radiator brackets and that allowed me to refit the hood. It doesn't really align very well, but it'll do for now. I like a 33/34 with a hood. It looks classy. I had had some glass cut for the side windows. One was broken and one was really obscured in the plastic interlayer. Got the new glass fitted using the new lower channels and rubber I had bought. Didn't take any pics. Finally got around to doing a proper job and decided to tackle the roof insert. I had the section of Mondeo bonnet and had slowly contrived a plan on how to fit it. Neals hammer formed panels had stuck in my mind and with 3 weeks thinking time, an idea formed in my mind. Heres an overall pic of the task at hand. 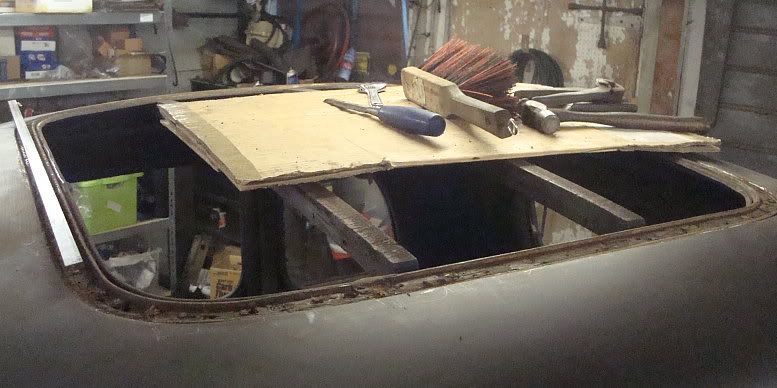 Firstly I removed all the remnants of cloth and tacks from the roof surround tack strip. The strip was in quite good condition, pretty sure it had only had one insert ever fitted.  Here's a strip of b&q's finest 15mm by 5mm steel bar, chosen as the best size to go around the opening. 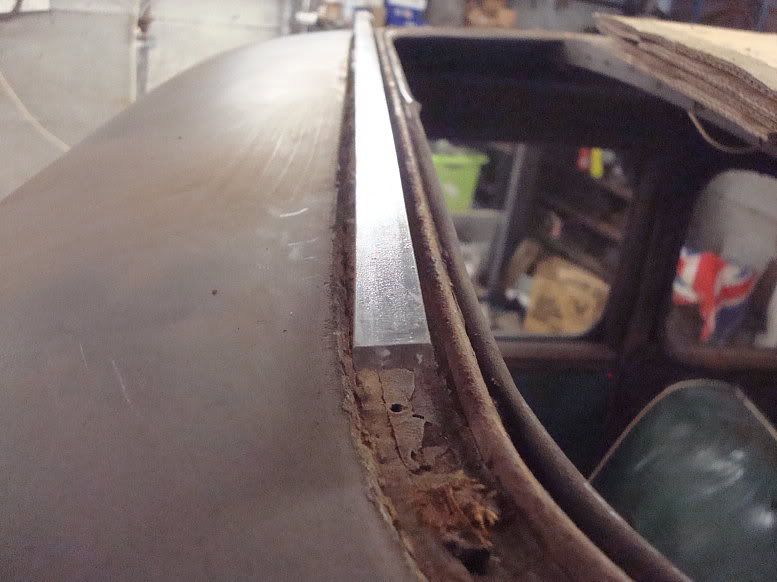 And using a Y-block pulley in the vice I proceeded to bend it to suit the shape of the roof opening. 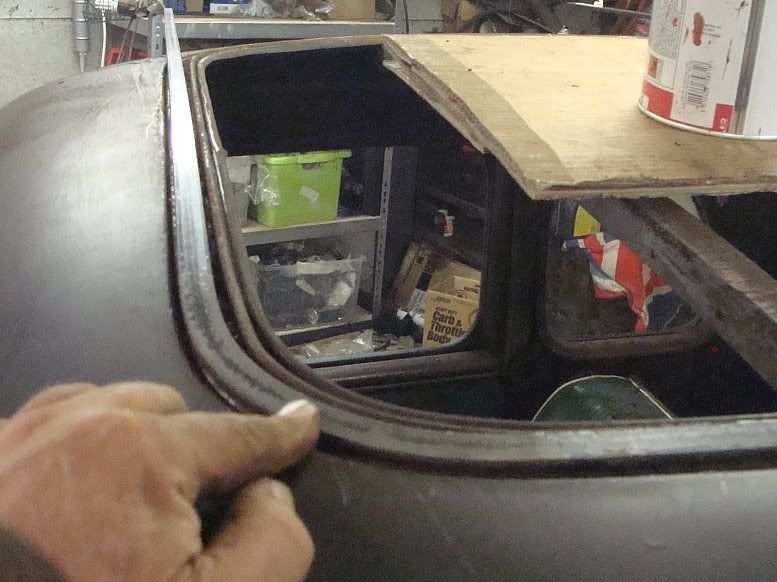 Keep going, all the way around. It'n not as easy as the pics suggest, lots of tweaking and rebending. 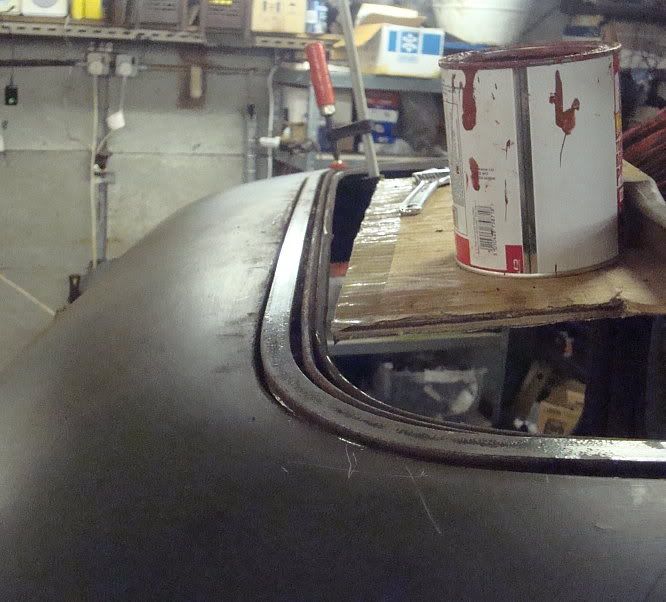 I had to weld three pieces together. The outer frame was then drilled in 20 places and the holes transferred to the tack strip and drilled through. 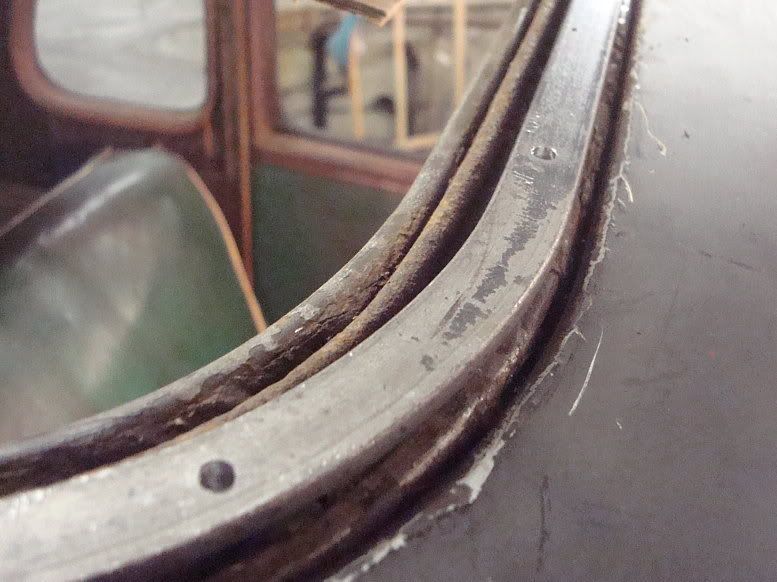 I then countersunk the holes, tapped them and after turning the heads down a bit, inserted 20 10-32 UNF screws into the holes. 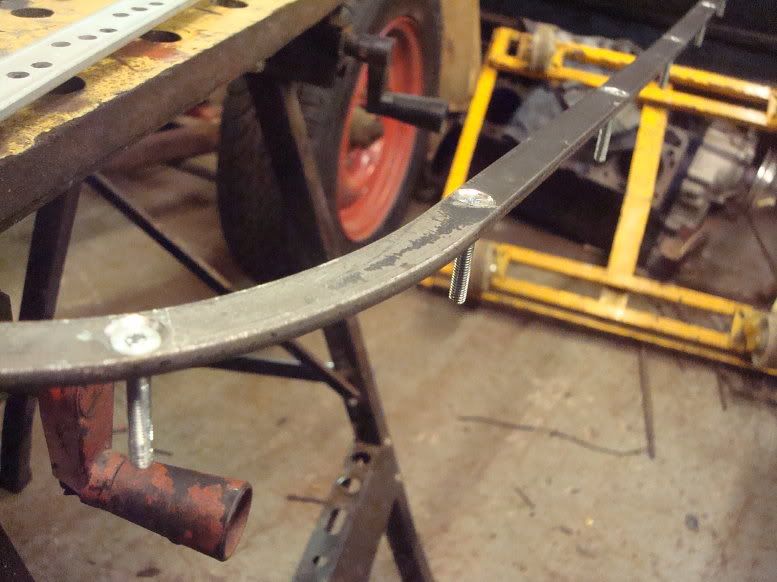 I secured each one in place with weld and then ground the welds flat. I was then able to lay the frame onto the upturned filler panel.  I then scribed a good clear line around it, and (after this pic) trimmed the panel to approx 6-7mm outside the line. 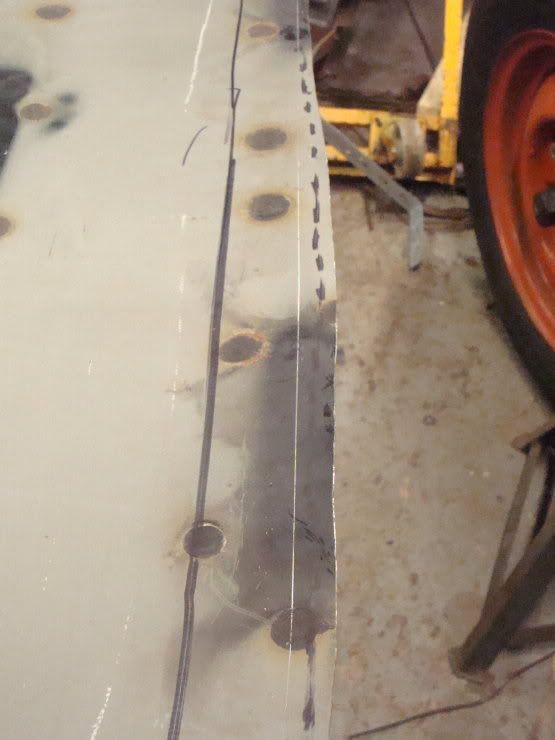 Then using a mallet and a lump hammer as a dolley I knocked the overlapping piece up around the edge of the frame, the frame acting as a hammer form. (no pic sorry) Once the outer lip was formed, I trimmed off any excess and welded the skin to the frame in a 3 stage process. 1, grind a little notch. 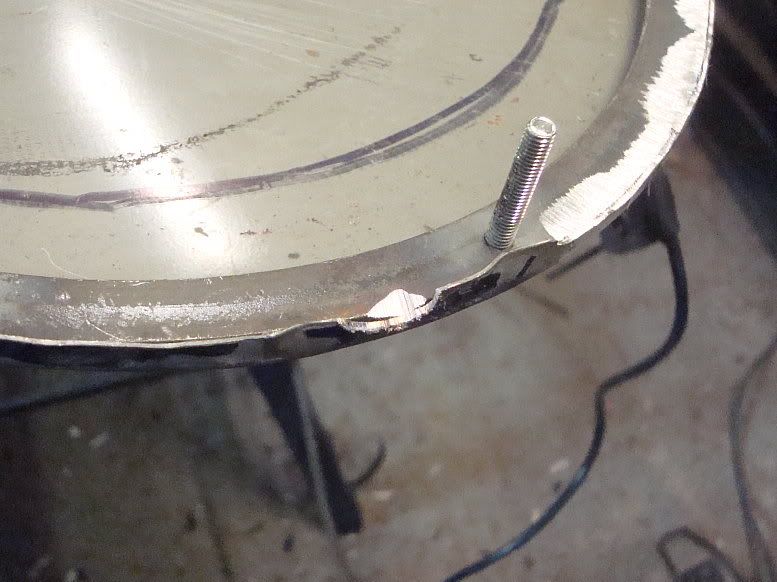 2, Run a little bead of weld into the notch. 3, Grind the weld down flush with the surrounding metal, taking the outer skin down flush at the same time. 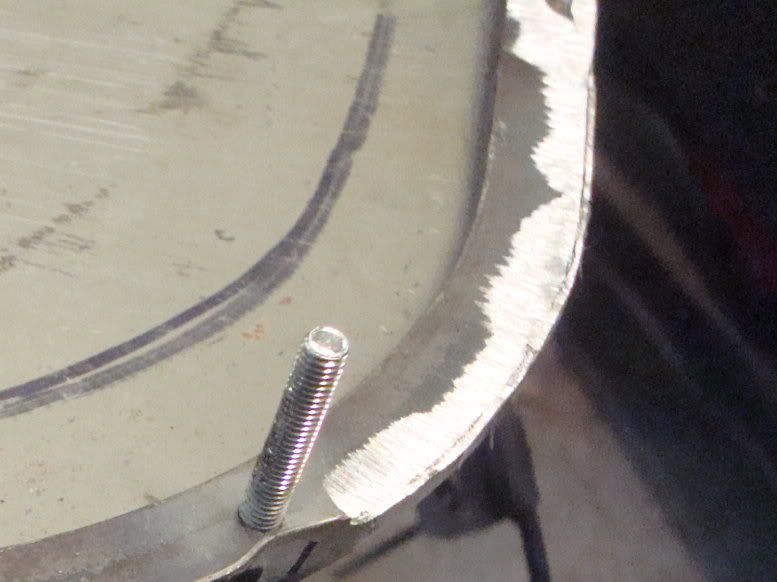 I trialled the frame in the roof and had to drill the holes along the side rails a little oversize, (7mm) as the frame had shrunk a bit with the hammering. I got it in place with just a little bumping with the palm of my hand, and put the nuts on below. The screws need trimming down, but will do for now. 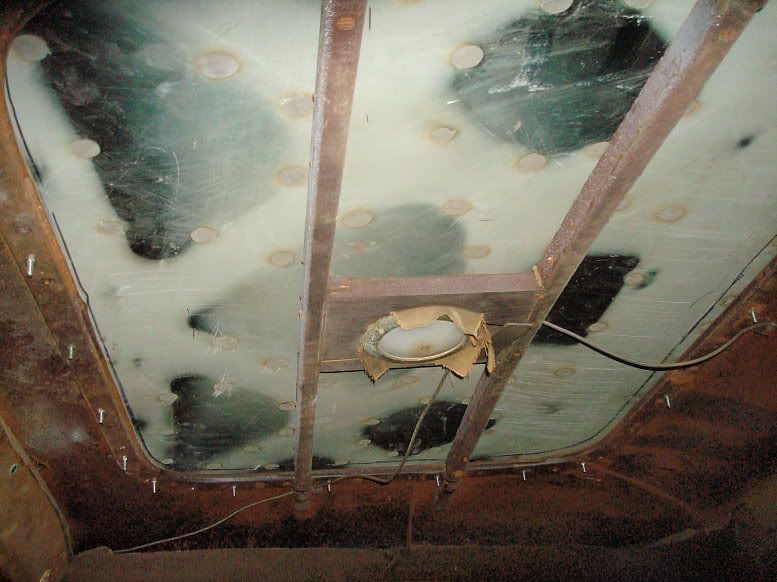 And here is a quick look at how it sits. Right side: 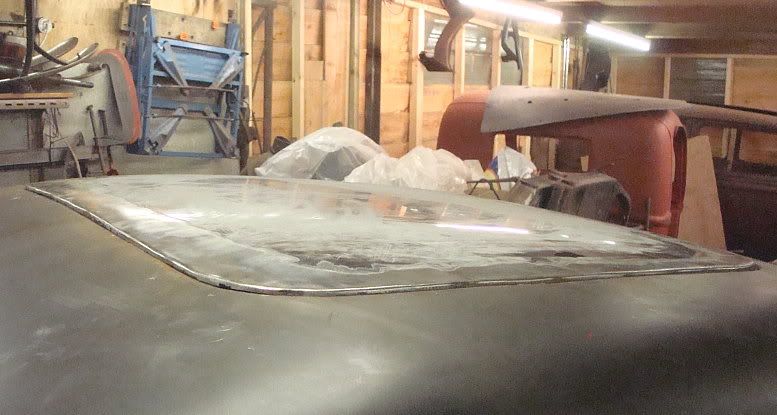 Rear: 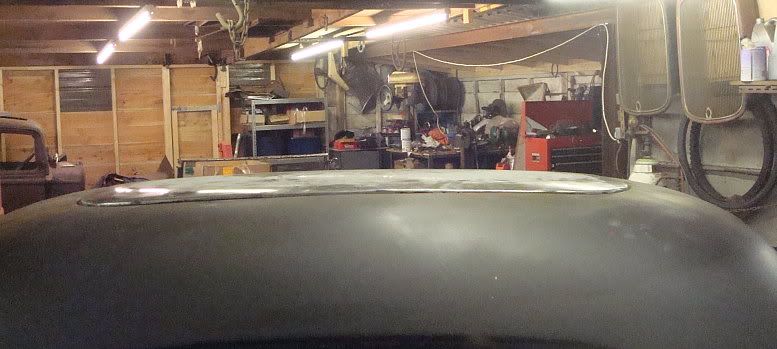 And left side: 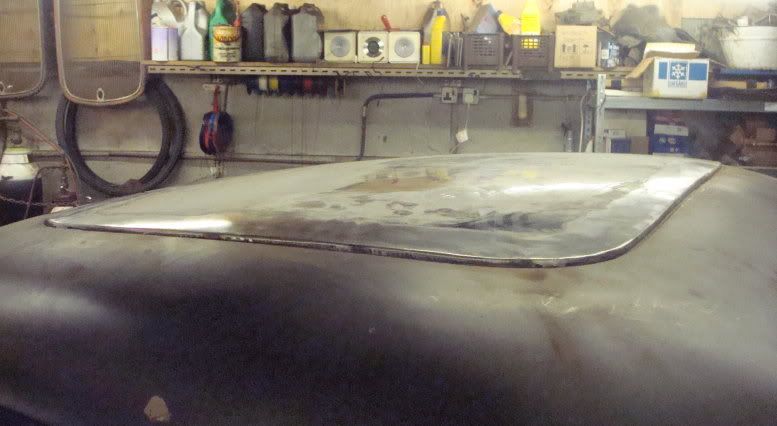 Obviously it will need to come off again for painting and to paint the tack strip area and apply some sealant, but I'm pretty pleased with it as it stands. Mart. |
|
|
|
|
12-12-2013, 01:38 PM
|
#105 |
|
Senior Member
Join Date: May 2010
Location: Solihull, England.
Posts: 8,744
|
Here's a bit more:
********** Did a bit more on the roof insert. Took it off and ran a wire brush around the roof aperture.  Stripped all the old paint off. 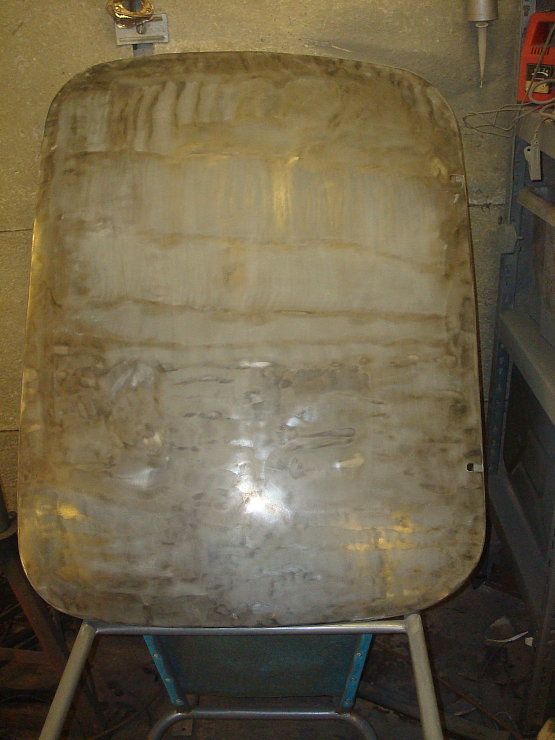 Remember this was a Mondeo bonnet? Those two holes on the right of the pic are the windscreen washer jet holes, they are at the back of the bonnet but on the front of my insert. Welded them up and just licked the welds down with the grinder. Didn't bother with any filler. 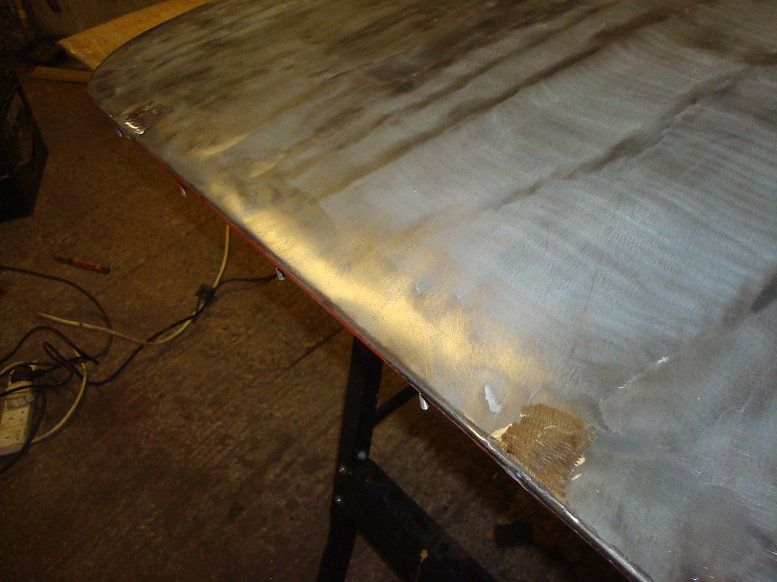 Two coats of screwfix red primer and one of hammerite satin black. Love the red primer, don't like the hammerite stuff. 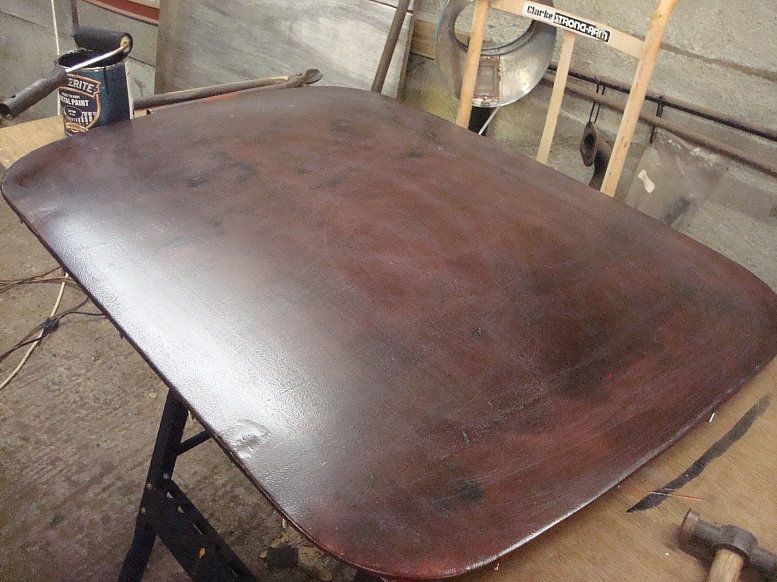 Didn't take pics at this stage, but put another coat of black on the top and the next day flipped it over and after cleaning the remnants of the glue nobules off with the wire brush, put a coat of red oxide on the underside. Cut a bicycle inner tube into long strips and made a rubber gasket to go around the perimeter. punched holes in it to fit over the studs and put little bits of tape on the corners to hold the gasket in position. I plonked the roof insert back in place and tightened it down. 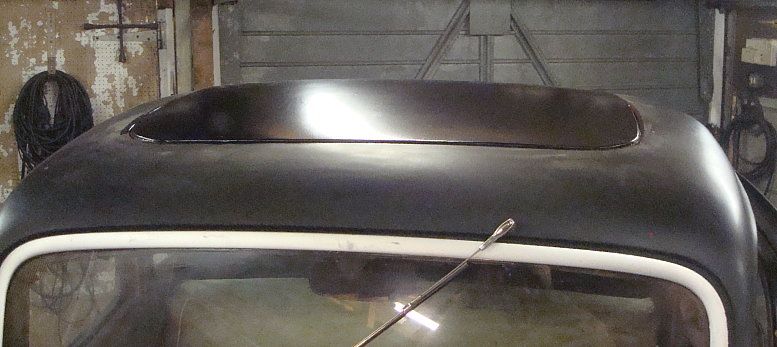 The rollered paint has a sort of mottled effect, and looks a little like stretched fabric. I'm quite pleased with it. It looks well made in a rough and ready way, (if you know what I mean). 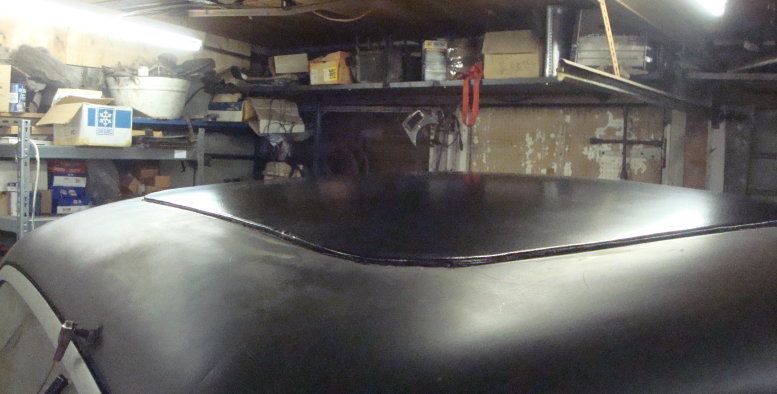 It looks ok from the inside too, with the coat of red paint. 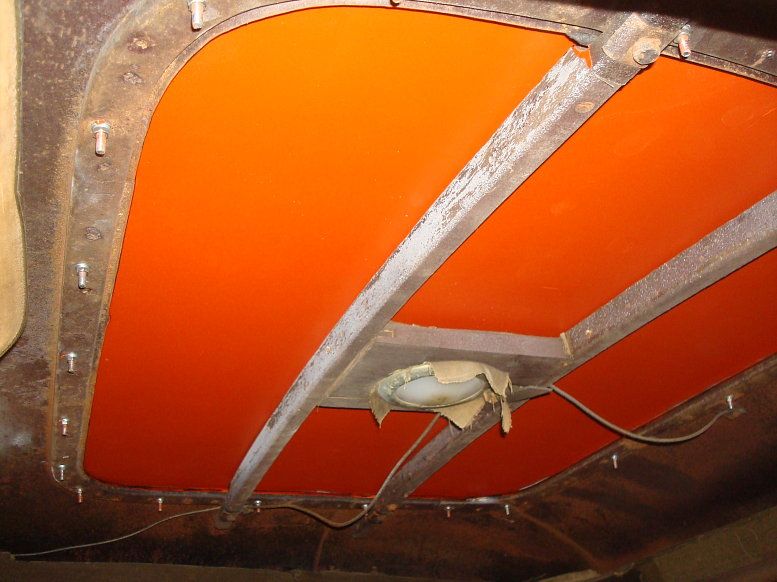 I may still trim a little off the length of the screws. I intend to just put a bit of matt black paint on the screws, because when driving, I find the bright screws in my peripheral vision distracting. Overall I'm pretty pleased with the way it turned out. Mart. |
|
|
|
|
12-12-2013, 02:45 PM
|
#106 |
|
Senior Member

Join Date: May 2010
Posts: 875
|
Sponsored Links (Register now to hide all advertisements)
|
|
|
|
|
12-12-2013, 03:07 PM
|
#107 |
|
Senior Member

Join Date: Feb 2013
Location: Eureka Calif.
Posts: 968
|
To say I'm impressed would be an understatement.Amazed is a better choice of words.I can only wish that I had your talents.Do you need an apprentice?
|
|
|
|
|
12-12-2013, 05:26 PM
|
#108 |
|
Senior Member

Join Date: Nov 2010
Location: NM
Posts: 2,438
|
Great job on all accounts, Mart!
Curious why, if you had a RHD gearbox, you didn't convert the car to RHD?
__________________
'52 F-1, EAB flathead |
|
|
|
|
12-13-2013, 11:02 AM
|
#109 |
|
Senior Member

Join Date: May 2013
Location: Coos Bay, OR
Posts: 640
|
Wow! I hadn't seen this thread before today, but very impressed with your back-yard garage skills. I'm inspired to do more to my own car, and don't throw away any part that doesn't crumble in my hand!
|
|
|
|
|
12-14-2013, 08:17 AM
|
#110 |
|
Senior Member
Join Date: Sep 2010
Location: Merrimac Mass
Posts: 161
|
That looks great! I like it better than a filled roof. No leaking canvas and no wind noises.
|
|
|
|
|
12-14-2013, 08:26 AM
|
#111 | |
|
Senior Member
Join Date: May 2010
Location: FP, NJ
Posts: 2,770
|
Quote:
__________________
Don't never get rid of nuthin! |
|
|
|
|
|
12-15-2013, 01:17 PM
|
#112 |
|
Senior Member
Join Date: May 2010
Location: FP, NJ
Posts: 2,770
|
I'm working on a '32 Tudor that needs a roof and this looks like just the ticket. I've tried bending some flat stock on edge like that and I figure that it would take either an elaborate bending set up or a lot of heat at hammering. Maybe I could cut the corners from plate and weld them to bar for the sides and ends?
__________________
Don't never get rid of nuthin! |
|
|
|
|
12-15-2013, 07:03 PM
|
#113 |
|
Junior Member

Join Date: Apr 2013
Location: California
Posts: 17
|
I have enjoyed reading this thread this weekend. The detailed descriptions and the pictures are excellent. Thanks Mart for your dedication in documenting all you are doing. Looking forward to your future posts.
|
|
|
|
|
02-19-2014, 11:17 PM
|
#114 |
|
Senior Member

Join Date: Jan 2014
Location: Atlanta, GA
Posts: 482
|
Just read this thread to the end. What? It's over? Need more posts. Great work on a great car and a driver to boot. Thanks for your effort with your documentation.
|
|
|
|
|
02-20-2014, 01:01 PM
|
#115 |
|
Senior Member

Join Date: Aug 2012
Location: Nebraska
Posts: 603
|
A friend redid his kids first car,, a 70's Buick vinyl top with rattle can bed liner.. looked pretty good and took a couple of years daily abuse.
|
|
|
|
|
02-20-2014, 01:39 PM
|
#116 | |
|
Member

Join Date: Jan 2014
Location: West of Rochester, NY
Posts: 83
|
Quote:
__________________
Josh Quick Quick Speed Shop "6.50 rubber really gives you the old dig when you need it!" |
|
|
|
|
|
02-20-2014, 02:03 PM
|
#117 |
|
Senior Member

Join Date: May 2013
Location: kent , u.k
Posts: 519
|
well done indeed mart, yours and paul,s 37 zephyr coupe threads are the most interesting for me on the barn I,v seen , like me you seem to have some serious projects on the go, i,v got a 37 zephyr coupe I tore apart 26 years ago ( very rare right hand drive) and I,m hoping to make a start on it when the truck and 39 are finished this year (I hope) some classic bikes to finish also but compared they are easy peasy, nice to see your "stuff" and like me its all done with minimum garage space,a master craftsman ...well done , cheers jim.
|
|
|
|
|
01-11-2015, 05:49 AM
|
#118 |
|
Senior Member
Join Date: Sep 2010
Location: South of I-40
Posts: 379
|
Fantastic thread!!!!!
|
|
|
|
|
01-11-2015, 09:32 AM
|
#119 |
|
Senior Member

Join Date: Sep 2013
Posts: 3,005
|
Fantastic! The man's a genius! Like watching a great artist work!
|
|
|
|
|
01-11-2015, 11:53 AM
|
#120 |
|
Member

Join Date: Sep 2012
Location: Boulder, Colorado
Posts: 96
|
Man! Slickest steering upgrade ever! And that roof insert looks really stylish compared to a smoothed over fill-in. The amount it sticks up, while still matching the roof contour perfectly, adds a lot of character. Looks like a period aftermarket accessory for bad weather areas. Incredible, as always! Thanks Mart.
|
|
|
|
|
«
Previous Thread
|
Next Thread
»
 Linear Mode

|
|

| Sponsored Links (Register now to hide all advertisements) |
|
|
All times are GMT -5. The time now is 05:25 AM.