|
|
#21 |
|
Senior Member
Join Date: May 2010
Location: Lancaster, CA
Posts: 917
|
Thanks Mikhett - the transmission I have rebuilt is indeed an original 56 Merc 3 speed with the R10 Overdrive tailhousing and attaching/actuating parts. I have all the parts (I think :>) to do the changeover from Fordomatic to 3 speed column shift - but I am planning to use a 56 steering gear/column ensemble here. What did you paint (or will you paint) your inner fenders/radiator air deflector/hood latch panel/etc? I was thinking of going with semi-gloss black Rustoleum. Painting the firewall the same color as the white exterior of the car.
__________________
Lancaster, California Visit hotrodreverend.com to view hundreds of pictures and videos of the build of the 1955 Ford Club Sedan! |
|
|

|
|
|
#22 |
|
Senior Member
Join Date: May 2010
Location: Lancaster, CA
Posts: 917
|
[QUOTE=Might check to see if your car still has the original 3.23 to one ratio?[/QUOTE]
I will check on that sometime after I get the front end all apart and remove the Fordo, etc. I do have a 3.54 STATION WAGON rear end that I know is in good shape - I just pulled the cover 3 weeks ago to inspect it.
__________________
Lancaster, California Visit hotrodreverend.com to view hundreds of pictures and videos of the build of the 1955 Ford Club Sedan! |
|
|

|
| Sponsored Links (Register now to hide all advertisements) |
|
|
|
|
#23 |
|
Senior Member
Join Date: May 2010
Location: Jackson N.J
Posts: 206
|
Southern polyurehanes black epoxy primer.A matte black it looks original and will keep rust at bay.I painted my frame on my 62 galaxie xl with it 8 yrs ago,its still holding up.
|
|
|

|
|
|
#24 |
|
Senior Member
Join Date: May 2010
Location: Granite City, Illinois
Posts: 3,008
|
The rust out at the air scoops on each of the two front wall panels is a common problem. The front wheels throw water, salt, mud and road grime up in that space and the stuff lays in there forever. It's too hard to get too when it is assembled to do a good clean out. About all you can do there is cut out the cancer and weld in new pieces of 18ga sheet metal with a mig welder.
I suggest painting the bare metal after welding with acid etch, then use a good rust inhibiting primer. As an overcoat, I used rust-Olem black. I recently had the front end all apart on my '55 Courier and discovered that the cheap rust-oleum paint had held up brilliantly through ten years of hard usage. Niether my '55 4-door sedan or my Courier had the washers on the ledge where the top of the fender sits, however, I wouldn't be opposed to using washers if needed to adjust the fender height to match the height of the mating surface of the cowl. There is supposed to be a strip of rubber between the fender and the cowl at that location. I noticed that your rubber grommet is missing where the left air cable penetrates the cown under that lip mentioned above. If you don't install that grommet, rain water will run thru that hole and flood the floor of the car. I believe it would have been much easier to remove your front bumper and splash pan first before trying to remove the front wall pieces. In addition, I noticed that you somehow removed the grille and left the park light housings in place. If you remove the 3 bolts at the back of each park light housing and then the 2 bolts at the center support, you can just lift the whole grille and park light housing out as an assembly (as long as the front bumper has been removed). |
|
|

|
|
|
#25 |
|
Senior Member
Join Date: May 2010
Location: Lancaster, CA
Posts: 917
|
Back to the grind here... my parents came up to see my wife and I - and their grandyoungin's - and we had a great time together. I didn't get to work as much on the 55 as I had planned but spending time with mom and dad was well worth it. Besides, ol' Pops carried up a small pickup truck load of parts for me and I was pretty pleased with what I saw. It was from a Craigslist deal down in Pilot Mountain, North Carolina, and dad had agreed to bring up the whole lot for me up here to Frederick County, Virginia.
I did get the entire passenger side front end sheet metal removed. This time I had to simply remove some bolts by twisting them into two pieces but there were only two. The rest came out pretty easily. This passenger side air deflector is in excellent shape compared to the driver's side. Also, the fender lip underneath the headlight bucket is very nice. There are a couple of body work places on this fender, and I am thinking that I will have to completely remove the brace that runs the vertical length at the rear of the fender to get these repairs right, and then reinstall the brace before mounting. I had one hangup that was hard to to deal with at first - the hidden stud that goes through the body (behind the kickpanel under the dash) just spun and spun when I tried to take off the nut. There was no corrosion there so I couldn't figure out what the problem was. The stud just spun with the nut. I had to insert a long screwdriver and keep pressure under the washer as I tried to back out the nut. 5 minutes later we were ready to pull the fender and serious trouble averted. I have no idea how someone would get that fender off if that nut seized up. I don't really think you could get a grinder or cut off wheel in there. Anyone ever face that problem? 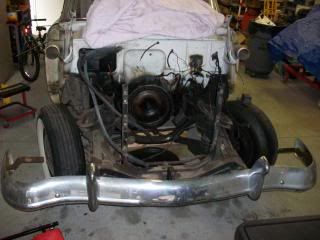 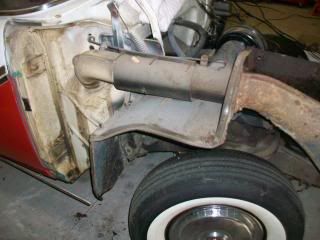 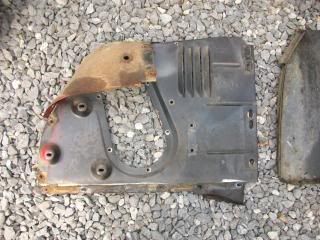 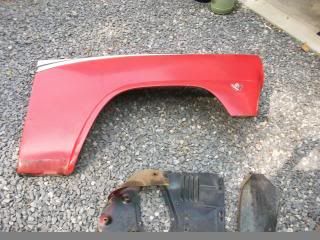 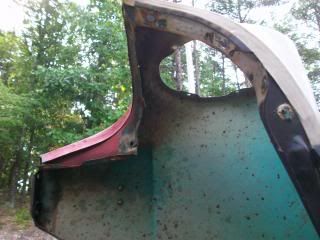 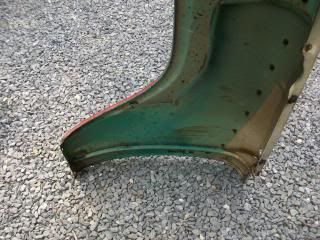 The parts were all degreased and I hit them with a pressure washer for a little while today. The splash pan is also in good condition and will clean up nicely. I will have to put some of these parts up in the rafters in the garage until I can get to things later on. The firewall and the frame is really what I want to attack first and get the car ready to place the transmission and engine back in there. There is definitely some body work to do. I am not going to be able to simply sand and paint, but I was expecting to have to work things over. It will be a learning experience for sure. I have had some questions about why I left the bumper on the front of the clip while removing everything else. It "should" be easier to remove the bumper after all the other parts are removed. I am expecting some very rough hardware on those bumper brackets and being able to get at them from the TOP with the sheet metal out of the way looks to be a good thing to do. A couple of questions: 1. What is involved in removing that brace that runs the vertical length of the fender? 2. Hardware - I have plans to degrease and blast the hardware per my ultrasonic cleaner and my glass bead cabinet. However, does anyone have some ideas on coating or finishing the hardware to keep it from rusting? I think the factory simply painted the heads of the bolts, but I am not going original here. If all of the hardware was one color that would not be a problem. This is a driver car for my father-in-law. 3. Thinking along the lines of hardware, has anyone made any updates to what Ford did to put all that sheet metal together back in 55? In other words, I am asking you guys that have disassembled and assembled front end sheet metal on 55/56 Fords with some frequency... was there any change you made to hardware use/location (fender washers, special fasteners, hidden nuts, welded hardware, etc)?
__________________
Lancaster, California Visit hotrodreverend.com to view hundreds of pictures and videos of the build of the 1955 Ford Club Sedan! |
|
|

|
|
|
#26 | |
|
Senior Member
Join Date: May 2010
Location: Lancaster, CA
Posts: 917
|
Sponsored Links (Register now to hide all advertisements)
Quote:
__________________
Lancaster, California Visit hotrodreverend.com to view hundreds of pictures and videos of the build of the 1955 Ford Club Sedan! |
|
|
|

|
|
|
#27 | |
|
Senior Member
Join Date: May 2010
Location: Lancaster, CA
Posts: 917
|
Quote:
Say, you wouldn't happen to know of a place that sells that rubber seal (between the inner fender and the outer fender) in bulk would you? It looks as if someone could purchase a roll of it and then cut/staple as needed.
__________________
Lancaster, California Visit hotrodreverend.com to view hundreds of pictures and videos of the build of the 1955 Ford Club Sedan! |
|
|
|

|
|
|
#28 |
|
Senior Member
Join Date: May 2010
Location: Granite City, Illinois
Posts: 3,008
|
At the back of the fender at the top, the fender attaches to the cowl with a 5/16" NF "flying saucer" fender bolt. There is a nut that is affixed to the underside of the lip by way of a couple of metal tabs. If there is sufficient resistance due to corroded threads in the bolt, those tabs can easily be destroyed and the nut will begin to turn freely with the bolt. You can finish the removal by getting a pair of vice-grips under there to hold the nut. Prior to re-assembly, spoit weld a new nut underneath that lip, centered in the hole.
At the bottom where the fender attaches to the underside of the rocker panel, the same type "flying saucer" fender bolt fastens to a nut that is affixed somehow inside the rocker panel. Again due to corrosion, that nut might break loose from it's mooring and just spin. I suspect many a '55 Ford enthusiast has burned off that bottom bolt with a torch to get the fender off. That nut can be attcked in a couple ways, either from the bottom or from the inner rocker panel at the front, requiring cutout and new piece of metal with the nut weled to the top of the metal and inserted into the cutout then welded in place. |
|
|

|
|
|
#29 |
|
Senior Member
Join Date: May 2010
Location: Granite City, Illinois
Posts: 3,008
|
Years ago, I was able to salvage the fender vertical brace where it was badly rusted away at the bottom by cutting out only the bad portion and duplicating it with 18ga sheet metal. It needs to be butt-welded (no overlap) and the mig welds must be ground smooth. If you don't do it that way, the fender might stick out too far at the bottom, and the bottom bolthole will not align.
|
|
|

|
|
|
#30 |
|
Senior Member
Join Date: May 2010
Location: Granite City, Illinois
Posts: 3,008
|
If you are referring to the seal that goes in between the inner fender well and the part of the fender at the top that bends down and mates with it, that is not rubber. I believe they used to call it permagum. It is sold at your local hardware store in a roll. It is made by 3M company. They don't call it permagum, though. I don't know what they call it. It is a soft, pliable material that can be bent, shaped and smashed with your fingers. Using that stuff for your seal would be as close as you can get to what the factory used.
|
|
|

|
|
|
#31 |
|
Senior Member
Join Date: May 2010
Location: Granite City, Illinois
Posts: 3,008
|
All your rubber seals for the inner fender apron are sometimes sold in a kit from places like Concours Parts, Dennis Carpenter, etc.. They include upper suspension arm rubber splash shields at the bottom, Rubber seal along bottom to frame and formed rubber strip that runs from the bottom of the tire splash shield all the way up to where the the fender apron meets the fender behind the magic-Aire duct. The seals are duplicate of original.
|
|
|

|
|
|
#32 |
|
Senior Member
Join Date: May 2010
Location: Granite City, Illinois
Posts: 3,008
|
I have tried several different ways to protect fasteners from corrosion after they have been thoroughly cleaned. Using a wire-wheel on a grinder motor is a great way to clean bolts. Sometimes a tap and die set must be employed to make sure threads are rust-free.
I tried re-plating with a zinc plating outfit. Re-plating provides the LEAST lasting protection compared to other things I have tried. I tried soaking in black oxide, heat and sealing the hardware. It's not guaranteed to last very long either. I tried spraying the hardware with a product called "Rust-Fix" (sold at most chain auto parts stores). Rust-Fix is similar to acid-etching unfortunately, you wear off some of the protection when using the fasteners. But it does seem to have some longevity. Lately, I have been using "Rust-fix" and for added protection, I have been covering the assembled fasteners with "duxseal". Duxseal is a product made to seal piping and refrigeration lines where they penetrate thru buildings. Duxseal is a moldable, pliable material like "silly Putty" except it is more dense. It does harden somewhat over time, but I have never had a problem removing a fastener that I had covered in duxseal. When my '55 Courier was finished in 2000, I had all nuts and bolts that were exposed to the weather covered in duxseal. That included all the splashpan to front wall nuts & bolts, parklight housing boltheads, grille center bracket nuts & bolts, above and below the splashpan and many other areas you'd expect contact with water, snow, salt, etc. Recently, when I had the Courier's front end all apart to perfect the alignment, every fastener that I had treated this way came out with no trouble, and 90 percent of the fasteners had no corrosion whatsoever. They looked like they did the day I installed them. The car had been driven in ever kind of weather immaginable up until 2010, so they withstood ten years of brutality. |
|
|

|
|
|
#33 |
|
Senior Member
Join Date: May 2010
Location: Granite City, Illinois
Posts: 3,008
|
At most major harware stores you can buy stainless steel hex bolts, nuts and washers of correct size and length to fit the front splashpan-to-front wall holes. You could use those also for grille and parklight housing mounting. They are the same size and thread. They don't look like the original saucer bolts and nuts though and will not be as good as the original serrated hardware for elecrical body grounding continuity, but you shouldnt need grounding continuity at the splashpan. You do need it for your parklights though unless you run a separate ground wire and fasten it with a serrated washer or a star washer.
|
|
|

|
|
|
#34 |
|
Senior Member
Join Date: May 2010
Location: Lancaster, CA
Posts: 917
|
Things went really slow this week but when I look at these photos, I say to myself, "who cares?" My boy (I have 3 kids, 2 daughters and a son) came into the garage with me last night to work on one of his projects - he was making a homemade trailer to go behind one of his small Tonka type trucks. "Hey dad, can I help?" he says. "Sure thing," I tell him, and my 11 year old son Ethan (we call him EJ) grabs the air ratchet and asks what's next...
 . I laughed a little and patted him on the back and we spent a couple of hours removing the front bumper, the hood hinges, various hoses and wiring, the sway bar, etc. It took me a whole lot longer because while he has his own hand tools he had never used an air ratchet before... I guess he has never really asked me to. Looking at the photos here I guess I should have made him wear a pair of safety goggles - will have to do that next time. He always knows to wear a pair when he is at the grinder or using a cut-off wheel or a Dremel tool. . I laughed a little and patted him on the back and we spent a couple of hours removing the front bumper, the hood hinges, various hoses and wiring, the sway bar, etc. It took me a whole lot longer because while he has his own hand tools he had never used an air ratchet before... I guess he has never really asked me to. Looking at the photos here I guess I should have made him wear a pair of safety goggles - will have to do that next time. He always knows to wear a pair when he is at the grinder or using a cut-off wheel or a Dremel tool.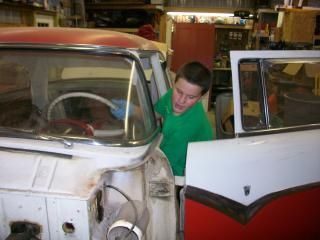 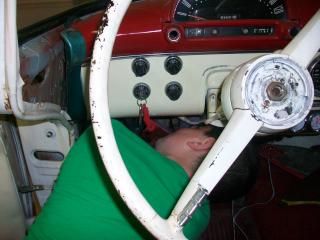 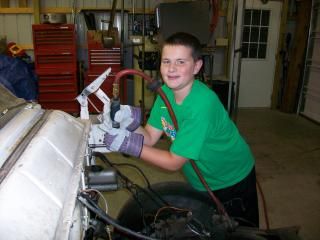 I did take some photos of the front sway bar after removal and of a sway bar that I had on the shelf here. As I recall, it was from a 56 Station Wagon... can I mount that front sway bar with the same metal brackets? It looks like the bushings are the same but the ID of the hole is probably different. It looks like I will need new a kit for the hardware also. Those rubber washer bushings are WORE OUT lol. The bolts from the wagon sway bar look like they are a little longer. I guess there is such a thing as a kit for a wagon sway bar? 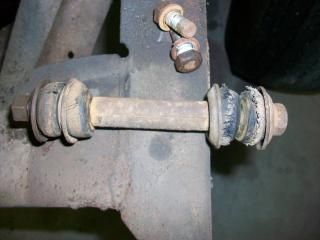 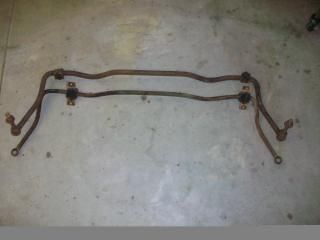 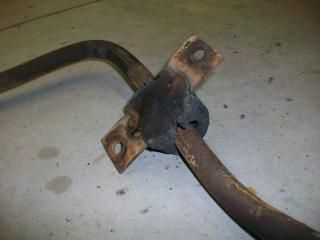 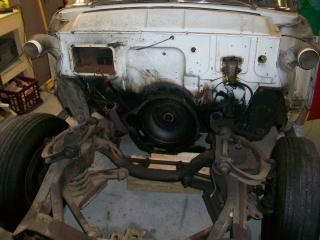 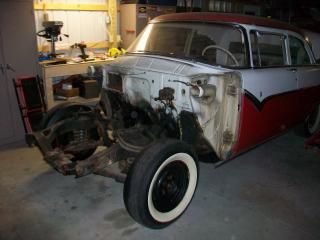 I will have to say that with my son's interest here this week things have gotten a whole lot more "fun". We'll see how long he lasts. The last thing he told me before we went in for a shower last night was whether or not he would be allowed to drive it when he got his license. I laughed and said, "You are going to have to talk to your Papa about that one!" I'm sure he will.
__________________
Lancaster, California Visit hotrodreverend.com to view hundreds of pictures and videos of the build of the 1955 Ford Club Sedan! |
|
|

|
|
|
#35 | |
|
Senior Member
Join Date: May 2010
Location: Lancaster, CA
Posts: 917
|
Quote:
I will check into the black oxide thing. I have heard pro's and cons on that one. I really don't want to have to purchase a whole new kit, but I really have not check into what that will cost.
__________________
Lancaster, California Visit hotrodreverend.com to view hundreds of pictures and videos of the build of the 1955 Ford Club Sedan! |
|
|
|

|
|
|
#36 |
|
Senior Member
Join Date: May 2010
Location: Granite City, Illinois
Posts: 3,008
|
In noticed that the front anti-sway bar on my '55 car is a smaller diameter bar than the one in my '55 Courier Sedan delivery wagon. Apparently, the station wagons all have the heavier sway bar.
Yes you can get the new rubber bushings from most Ford resto suppliers. The u-shaped brackets are same for car and wagon. To my knowledge, the bracket bolts are same length on both my car and wagon. |
|
|

|
|
|
#37 |
|
Senior Member
Join Date: May 2010
Location: Lancaster, CA
Posts: 917
|
Well I finally had a half day off today and got a chance to get in the garage for a few hours to turn some wrenches on this old Ford. Right now my life is very busy what with school starting up (I administrate or church's academy), the new volleyball season (yep - I coach girls' volleyball... don't ask me how I got talked into that but it has to do with my daughters lol), and everything else with a family of 5 I don't know how I have time. No complaints,,,, just letting you know the reason for so much time between posts.
I removed the transmission and the crossmember along with the drive shaft. It took a little more time than I anticipated - stuff was really gunked up under there. I remember years ago that a rear main seal was dumping oil everywhere for while - guess it made the floor pans last a long time! I did find one small place on the driver's floor pan that was not solid. Everything else is good. 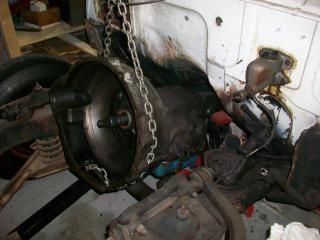 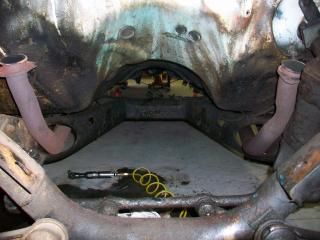 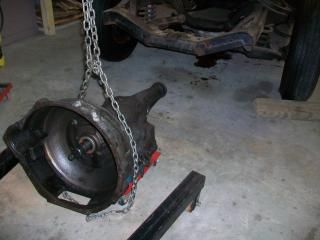 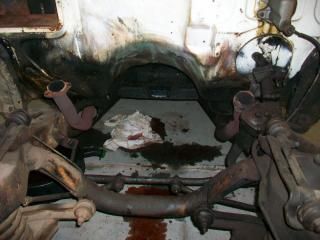 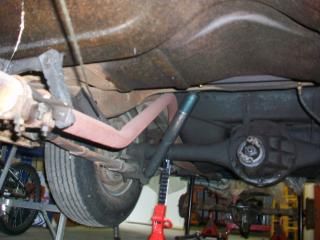 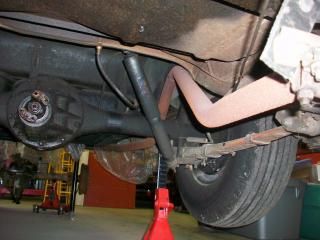 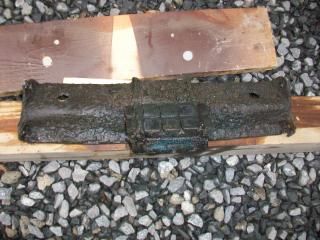 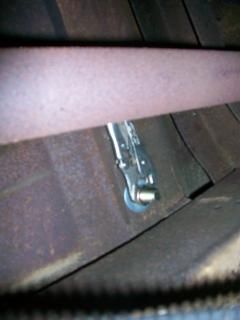 If you are wondering what is going on with the photo of the vise grips... I was looking around under there and found them clamped to a nut! I think the vise grips were left under there when the seat belts were installed. That's what I get for having teenagers help me turn wrenches! I should have counted all my tools after that project was done. I took them off... they are still good after 7 years or so and all the road time. That crossmember weighs an extra 5 lbs from all the crud, grease, and road grime collected on it. Gotta get that thing cleaned up and painted. I guess the transmission mount rubber is near perfect because of being sprayed with oil so much over the years. Hopefully I can get the firewall cleaned up soon and then start prepping the firewall for paint. I would like to do that before weather sets in here. The photos of the tail pipes are a for a member who asked for them sometime ago but I could not find his post. If you know the member or remember the post... can you direct him here? thanks
__________________
Lancaster, California Visit hotrodreverend.com to view hundreds of pictures and videos of the build of the 1955 Ford Club Sedan! |
|
|

|
|
|
#38 |
|
Senior Member
Join Date: May 2010
Location: Lancaster, CA
Posts: 917
|
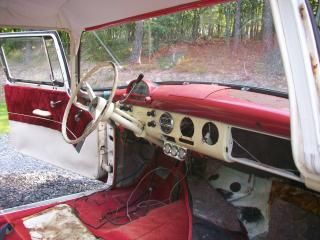
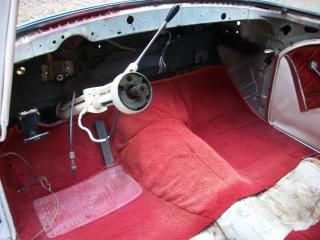
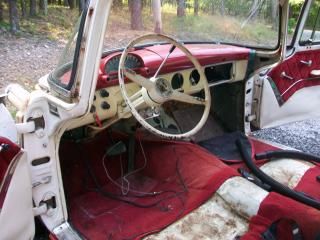
Alrighty back to work on the old Fairlane (after our first whirlwind week at school). I cleaned up the interior a bit and removed the dash and quite a bit of hardware. I already have a painted dash and painted trim pieces ready to install, just wanted to get all of this removed to make the firewall work easier. I also have plans to put in the clutch/brake pedal assembly that I have ready to go. On the list are quite a few grommets, a new wiring harness, and various pieces of anti-rattle/anti-squeak pieces. I am also going to replace the carpet.
   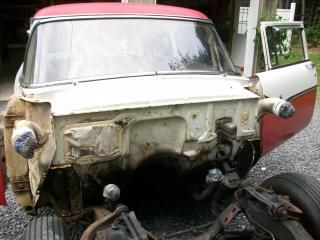 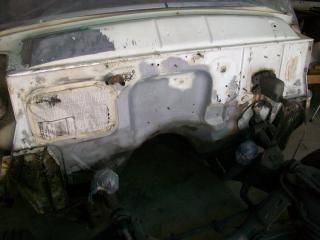 I also pressure washed the firewall and front end trying to degrease it... wasn't too successful there. I need a steam cleaner - anyone got one to loan out? :P After it dried I broke out the sandblaster but it did not work too well. The sandblaster is a decent one I got from Tractor Supply a few years back. Of course I was blasting in 90 degree weather and high humidity so that did not help, but my air getting to the tank was dry. I think the tank itself had some condensation in it working against me. I turned it over and put my flashlight through the hole to see the valve. On the interior of the tank at the bottom there were some "runs" of water leading to the valve. If you guys got any tips on sandblasting in hot weather I am all ears! I only got a little bit done on the firewall and had hoped to do a lot more today before being pulled off on another wifey project to make an antique headboard for my oldest daughter's bedroom. Maybe I will put up some photos of that project too. It is being made from a turn of the century door and vintage trim that is about 6" wide. She wants me to make "homemade" crown molding - haha, we will see how that turns out. I did order the Ford Wimbledon White for 66-69 Mustangs from Eastwood yesterday. Hopefully I can get this firewall painted (and maybe the hood hinges) before weather sets in.
__________________
Lancaster, California Visit hotrodreverend.com to view hundreds of pictures and videos of the build of the 1955 Ford Club Sedan! |
|
|

|
|
|
#39 |
|
Senior Member
Join Date: May 2010
Location: Granite City, Illinois
Posts: 3,008
|
If ya don't mind getting hands a little dirty, use a rag soaked in gasoline to wash off heavy grease from the surface and finish cleaning the entire thing with very hot water mixed with ample dose of dishwashing liquid.
|
|
|

|
|
|
#40 |
|
Member
Join Date: Dec 2011
Location: Seattle
Posts: 85
|
Do yourself a favor and put in a new upgraded swaybar. They are available in 1inch and 1 1/8 inch I think. I put a 1 inch on my 54( same chassis) and it made an amazing difference in body roll. There is a guy on here, Dave something, I think that sells a really nice kit. I'm sure he will comment.
John |
|
|

|
 |
«
Previous Thread
|
Next Thread
»
|
|
| Sponsored Links (Register now to hide all advertisements) |
|
|
All times are GMT -5. The time now is 02:55 AM.


 Linear Mode

