|
|
#261 |
|
Senior Member
Join Date: May 2010
Location: Granite City, Illinois
Posts: 3,008
|
The idea of using the copper spoon is excellent, but since I don't have one, I usually cutout a strip from the sheetmetal scrap pile. Cut to lengths to fit each side of the new metal piece and tack weld the strips to the back of the new piece such that the strips stick out a little bit. This will only work if you can slip the new piece in from behind and wedge it into place with tools and wood blocks or something. The thin strips prevent the mig welding wire from slipping in between the new and hole in the old panel and helps to prevent burn through.
|
|
|

|
|
|
#262 |
|
Senior Member
Join Date: May 2010
Location: Lancaster, CA
Posts: 916
|
The passenger side work went much, much better. You can tell from the photos - very little warpage, and the body filler went on smooth and set up well.
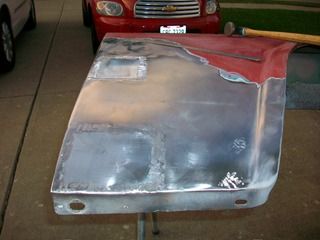 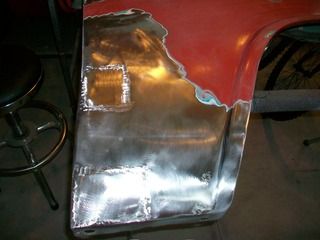 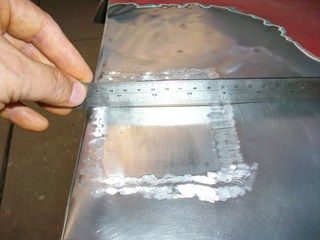 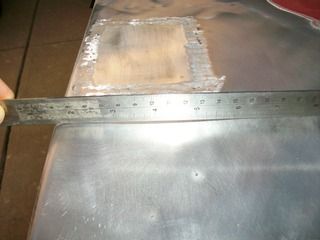 After the welding and body filler work it was time to remove the old layers underneath the white of the two-tone back on the driver's side. Whoever suggested that I take the white sections down to the bare metal was right on the money. There was various places where the metal had rusty pits and that had come up through the paint layers. At first I just used a plastic wheel to remove everything, but then after checking up on the pitting I decided to break out the sand blaster. 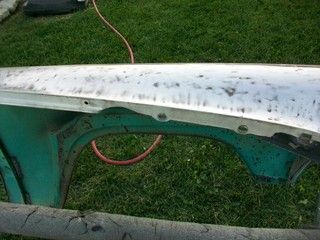 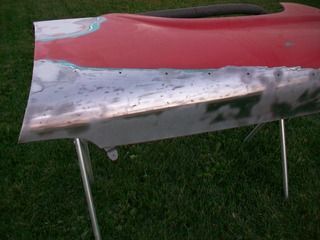 The passenger side fender was coated once in the areas where it was bare and then also in the places where the body filler was located. Upon sanding the entire exterior of the sheet metal, the whole fender was primed with two more coats of DTM primer surfacer. Time will tell on final sanding and how much goes to the floor, but I am happy with my initial look on the surface of the areas where the patches were welded in and the body filler work was done. 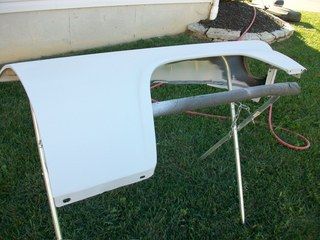 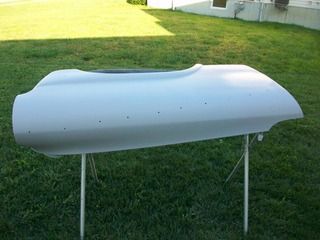 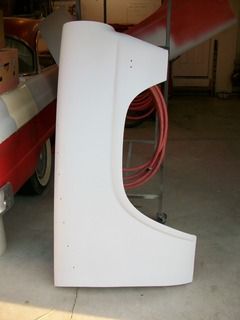 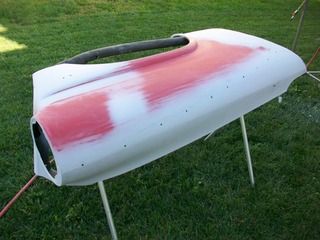 I haven't taken any pictures of the backside of the fenders, but they were cleaned up a little bit and painted with black rustoleum. I did thin the first coat pretty good to get behind the brace at the rear of each fender, and then gave it a good coat. Thankfully things are pretty stout with fenders - very little body work outside of the patches that were welded in.
__________________
Lancaster, California Visit hotrodreverend.com to view hundreds of pictures and videos of the build of the 1955 Ford Club Sedan! |
|
|

|
| Sponsored Links (Register now to hide all advertisements) |
|
|
|
|
#263 |
|
Senior Member
Join Date: May 2010
Location: westbury ny
Posts: 854
|
looks good
|
|
|

|
|
|
#264 |
|
Senior Member
Join Date: May 2010
Location: Lancaster, CA
Posts: 916
|
Are we having fun yet?
After scurrying around trying to beat a temperature drop and daylight wasting to prime the passenger side fender again and put a full coat on the driver's side look what I did... 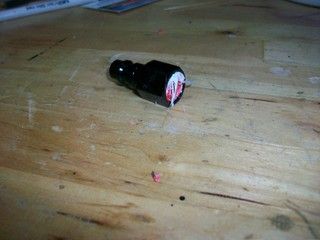 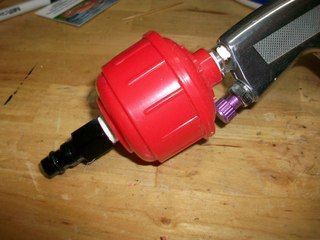 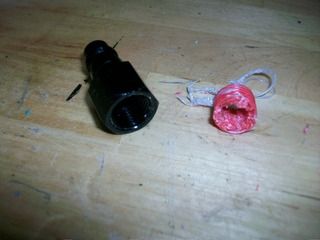 Dufus me happened to knock the paint gun out of its stand and although it did not fall far the tit on the bottom of the red bulb filter broke off in the fitting... aaaarrrrgggghhhh! Tonight was like one of those stupid reality TV shows where idiots play around like they can put a car together in a week.  Ridiculous. I did use the following glaze to prep my pinholes and what have you. This Evercoat brand is not cheap but I like its characteristics so far. It is super smooth and easy to sand. It set up quickly. However, I did not get the chance to paint until this afternoon so it did sit for quite some time. 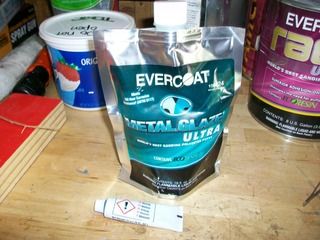 I don't know what everybody uses for a primer gun, but I do like what I am using. It is a cheap HF unit but it sprays very well and lays the primer really good. It has a 1.8 tip - the primer surfacer goes on pretty good and since this is a primer gun, not rebuildable (at least I don't think so), and it's cheap, once I get done with this project it can be tossed if need be. I have a Devilbiss Finishline gun to spray the SSU topcoats. 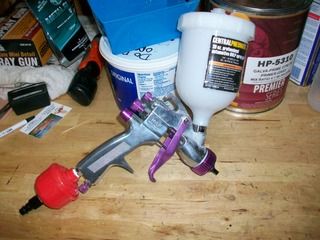 Before applying the glaze and next coat of primer surfacer I did some block sanding on the passenger side fender. Basically I sprayed the hi build primer on the low spots where I put in patches, used Rage Ultra, etc, trying to meet the red that was already on the fender. Things looked pretty good. I did wet sand as you can see. It's messy, I know, but when the water runs down the panel it is easy to see the high's and low's. Plus it keeps the sandpaper from filling up so much. 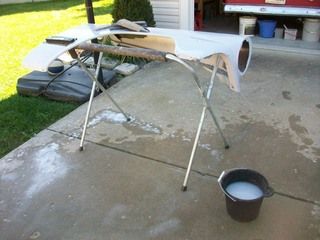 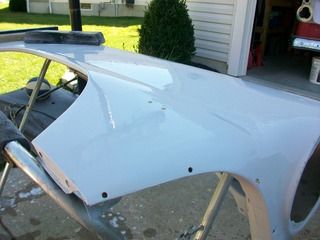 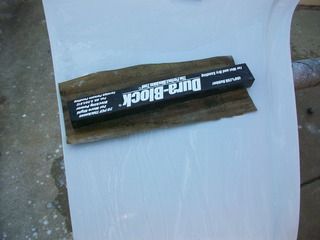 After everything was dry the next coat of primer surfacer was put on and then after a couple of days the glaze was applied. 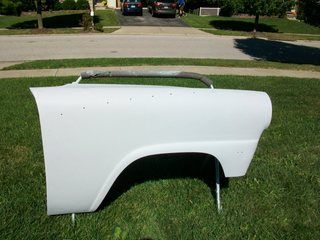 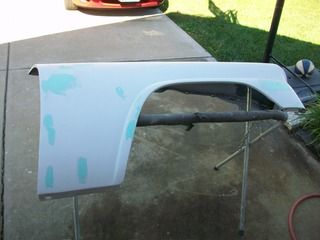  So.... to fast forward back to tonight if you are still following, the passenger side fender looks really good with the wet primer and looking down the panel as you can see. 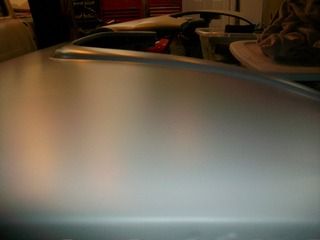 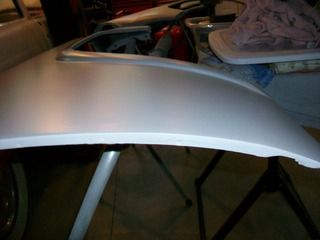 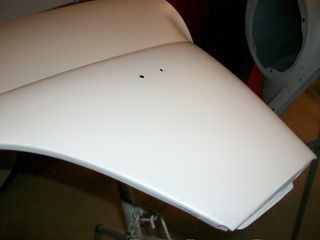 However, if you look at this photo here... 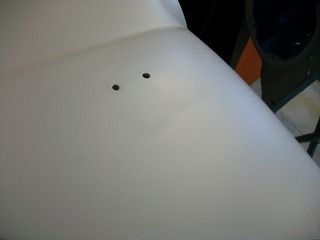 you can see that my Evercoat Metal Glaze is showing through. This is after two good coats of primer surfacer. I did reduce the surfacer a little more than normal, but not that much, so my build is not as much as the other coat of primer I put on this fender. what gives? Anyone else use this glaze? I followed the manufacturer's instructions pretty closely. Maybe I should have put less reducer in the primer surfacer? 
__________________
Lancaster, California Visit hotrodreverend.com to view hundreds of pictures and videos of the build of the 1955 Ford Club Sedan! |
|
|

|
|
|
#265 |
|
Senior Member
Join Date: May 2010
Location: Lancaster, CA
Posts: 916
|
After another several hours of block, prime, block, etc, I am reminding myself that we are saving quite a bit of money by going DIY.
The previous issue with the glaze showing through the primer was just simply too much reducer. Problem easily solved with the most recent coat of primer/surfacer. 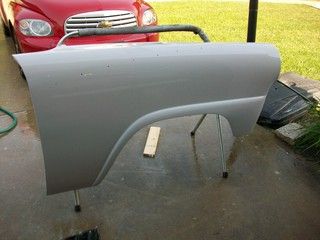 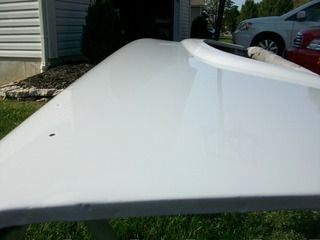 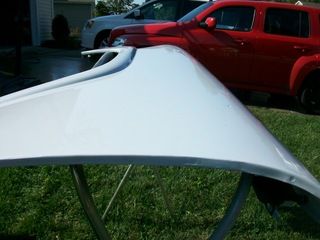 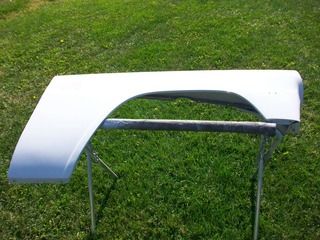 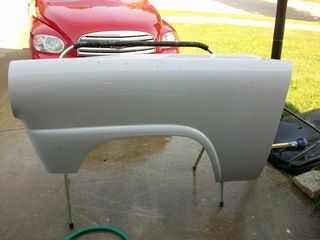 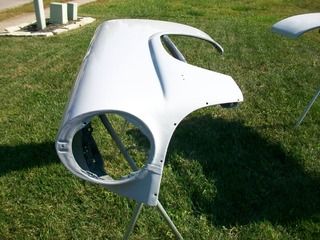 Passenger side is almost ready for a top coat, but the driver's side needs a little more attention. I did get around to mechanically stripping most of the white today. Some of the places I stripped on the door had over 1/4" of Bondo 3M Putty! I guess someone years ago had decided the best way to fill the mounting holes for mirrors on either door was to simply hammer the metal down and fill the dent they made.  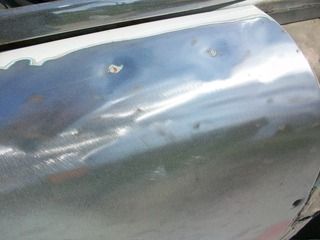 The plan next is to simply get some primer on this unprotected metal, remove all of the glass and door guts, and strip those edges without getting too much in the interior. 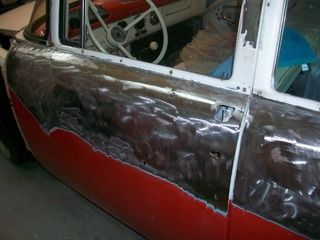 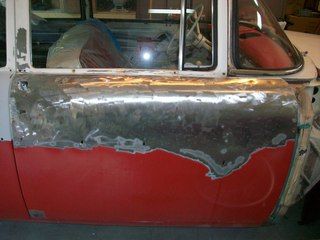 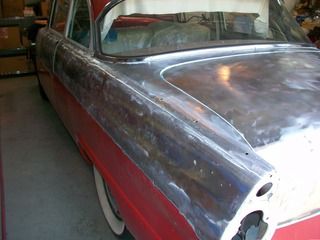 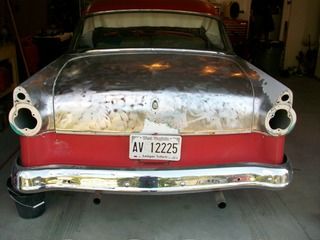 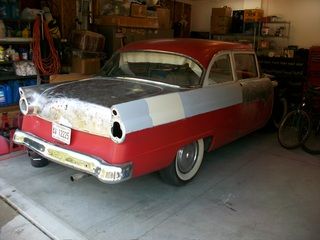 The stripping was done with a couple of these... http://www.harborfreight.com/4-12-in...eel-60571.html and a few of these 80 grit... http://www.harborfreight.com/7-in-80...-pc-69983.html inexpensive tools to strip so much paint, no warp to the panels, and no sand all over the place - although there was quite a bit of dust. Most of the layers underneath of the crow's feet white paint were just fine, but there were places where pitted rust shown up. For those places I did spot blast with sand to get it all out, but things seem very solid and pretty straight. Once we get going on these doors, it will be time to attempt an installation of 55-57 Thunderbird door handles. I read about the mild custom modification on another site somewhere and it seems pretty simple to do. (well, when I look at it anyway)  The irony in the mod is that they are actually cheaper brand new than the passenger car door handles. Go figure. The irony in the mod is that they are actually cheaper brand new than the passenger car door handles. Go figure.the only thing I am missing is the video footage of the people that drove by the house and slowed down as they watched me work on this thing half the day  . One guy with a 66 Fairlane showed up though - had a 427 cammer installed and that thing had every appearance of an original restoration car (minus the keystones and nice tires) ... of course when you heard the thing coming down the street you lost any inkling that it was stock! . One guy with a 66 Fairlane showed up though - had a 427 cammer installed and that thing had every appearance of an original restoration car (minus the keystones and nice tires) ... of course when you heard the thing coming down the street you lost any inkling that it was stock!
__________________
Lancaster, California Visit hotrodreverend.com to view hundreds of pictures and videos of the build of the 1955 Ford Club Sedan! Last edited by Hot Rod Reverend; 10-16-2016 at 12:02 PM. |
|
|

|
|
|
#266 |
|
Senior Member
Join Date: May 2010
Location: westbury ny
Posts: 854
|
Sponsored Links (Register now to hide all advertisements)
 it is a nice gun as for the thinning of the primer I like the first 3 coats un-thinned my primer calls for a 4/1 mix block then 2nd 3 coats I thin by 1 part you can also dry sand and apply a guide coat prior to sanding to find highs and lows remember the prep work shows in the finished product it is a nice gun as for the thinning of the primer I like the first 3 coats un-thinned my primer calls for a 4/1 mix block then 2nd 3 coats I thin by 1 part you can also dry sand and apply a guide coat prior to sanding to find highs and lows remember the prep work shows in the finished product
|
|
|

|
|
|
#267 |
|
Senior Member
Join Date: May 2010
Location: westbury ny
Posts: 854
|
rev if you are having trouble feathering the red /wht you can skim the edge with the rage to level it and continue on as normal as for your primer gun I also use the harbor freight "throw away" guns on sale for $10.00 along with the filter helps with water in lines I work in a trk shop on weekends and have used those guns for paint jobs they work good I also have a finishline gun that I used last weekend for the first time spraying a mack hood met blue the pattern was the widest I've ever seen came out great
 it is a nice gun as for the thinning of the primer I like the first 3 coats un-thinned my primer calls for a 4/1 mix block then 2nd 3 coats I thin by 1 part you can also dry sand and apply a guide coat prior to sanding to find highs and lows remember the prep work shows in the finished product it is a nice gun as for the thinning of the primer I like the first 3 coats un-thinned my primer calls for a 4/1 mix block then 2nd 3 coats I thin by 1 part you can also dry sand and apply a guide coat prior to sanding to find highs and lows remember the prep work shows in the finished product
|
|
|

|
|
|
#268 |
|
Senior Member
Join Date: May 2010
Location: Lancaster, CA
Posts: 916
|
Man this thread is huge! A few more photos of continued progress.
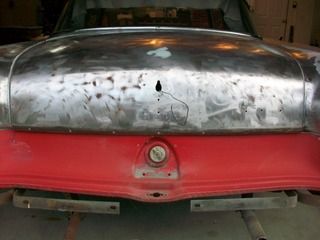 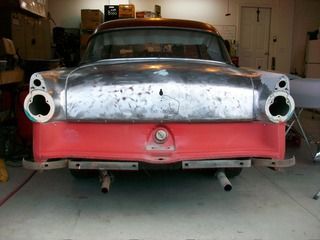 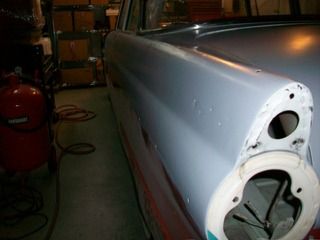 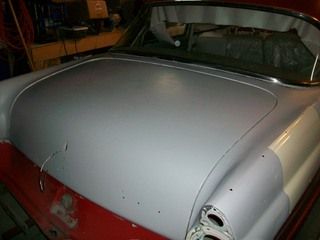 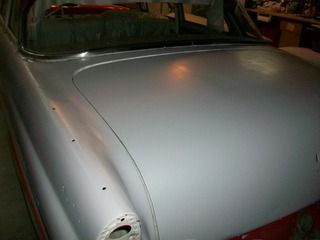 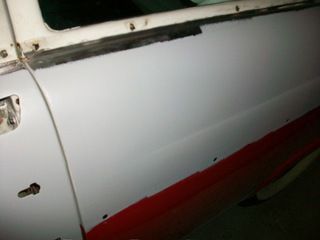 Hopefully I can get all glass out, the door guts out, and then strip the edges underneath the glass seals, etc. They have not been done since the car was new. I do have new seals, but wanted to remove all of the old stuff and then paint. That last paint job about 25 years ago was just taped up to the edges of the trim and sprayed. Surprised things have held up this long.
__________________
Lancaster, California Visit hotrodreverend.com to view hundreds of pictures and videos of the build of the 1955 Ford Club Sedan! |
|
|

|
|
|
#269 |
|
Senior Member
Join Date: Mar 2013
Location: Collinsville, OK
Posts: 171
|
HRR, before you spring for the t-bird door handles, take a look at a bird door. They have a recess in the panel for fingers to fit into. Handle will be afully close to door on a full size.
Ben |
|
|

|
|
|
#270 | |
|
Senior Member
Join Date: Aug 2012
Location: Abq, NM
Posts: 3,607
|
Quote:
Depth of recess from back of handle = 1 & 3/8 inch Depth from a 'flat' surface to back of door handle = 3/4 inch . Last edited by dmsfrr; 10-19-2016 at 10:41 AM. |
|
|
|

|
|
|
#271 | ||
|
Senior Member
Join Date: May 2010
Location: Lancaster, CA
Posts: 916
|
Quote:
Quote:
here is the link: http://www.hotrod.com/articles/1956-...r-custom-cars/
__________________
Lancaster, California Visit hotrodreverend.com to view hundreds of pictures and videos of the build of the 1955 Ford Club Sedan! |
||
|
|

|
|
|
#272 |
|
Senior Member
Join Date: May 2010
Location: Lancaster, CA
Posts: 916
|
Oh man what a night!
 My plan was to spend a few minutes removing the rear glass. I had stripped up to the edges of the stainless trim as not to scuff them up so to get the rest of the metal there and underneath of the seal (windshield and the doors/quarter windows will come next) the glass and SS trim needed to be removed. Right. A few minutes. Jessup don't kid yourself.  On with the "show" First off, I say to myself, "Jessup, you better get out the manual and read up just to check it out, there may be a hidden clip or screw or retainer that you can't see." Now mind you, I have installed and removed the windshield 4-5 times and was very familiar with that and felt pretty confident about the rear glass. I read up on the pages in the manual. 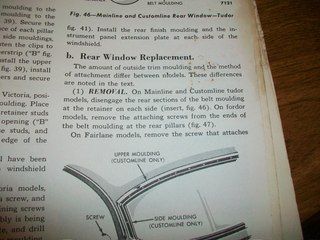 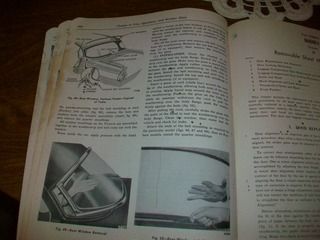 Good, got it, ready to go. Now out to the garage to remove the rear glass. 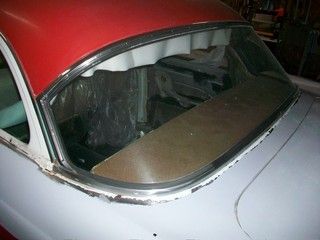 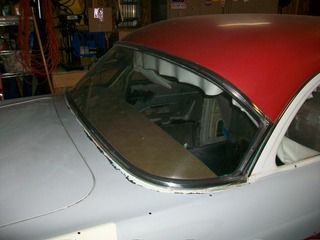 The seal was still on the soft side, but you could also see places where it had split or come apart and just needed to be replaced. 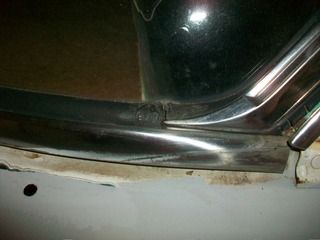 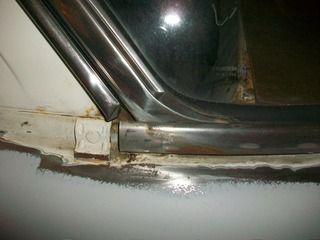 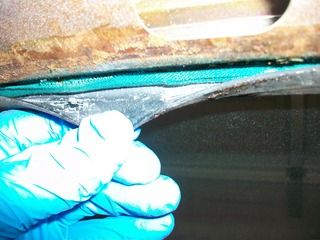 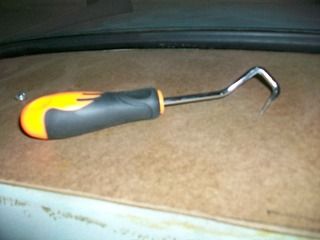 I used the tool above to pry the edge of the seal along the length of the sheet metal edges and tried to push the glass out like the manual says to do. I spent over an hour trying to nudge, push, tug, shove, cajole, tap, move, slide, pry, coax, cut, pull this 62 year old installation of rear glass from FoMoCo. I decided to cut the seal on the inside of the car. 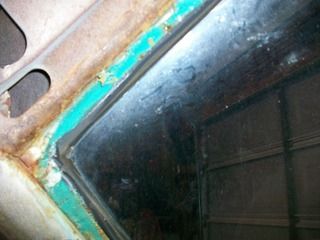 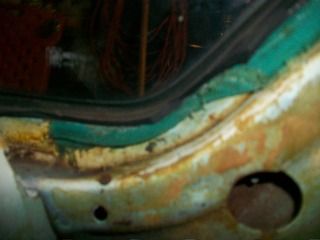 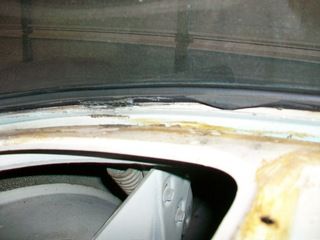 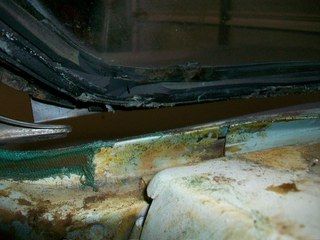 and it finally started to budge. How, I have no idea. For some reason it seemed that the passenger side was glued in heavily. 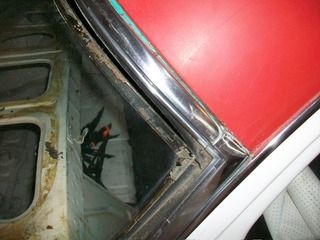 Let me just say that through all of this frustration I was glad of one thing... I did not gorilla the thing out. If I had done so, I would have surely cracked the glass. Look what was hiding under the side trim on the passenger side. 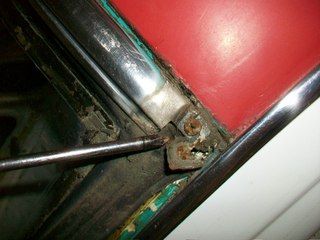 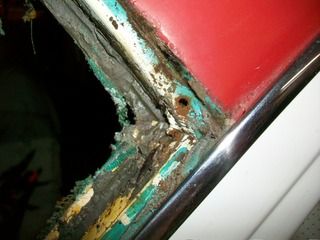 Thank you Ford, no help there lol. I thought there would be one on the driver's side but there wasn't. 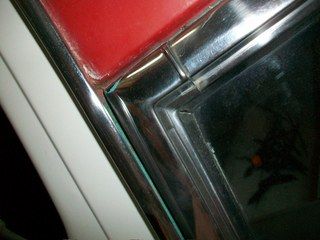 It all came out fine but I am concerned about how to get that screw back in there and then put that side trim over the screw after everything is fitted. How will that work? 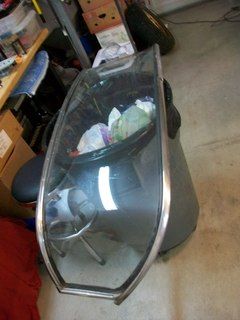
__________________
Lancaster, California Visit hotrodreverend.com to view hundreds of pictures and videos of the build of the 1955 Ford Club Sedan! Last edited by Hot Rod Reverend; 10-20-2016 at 05:01 PM. |
|
|

|
|
|
#273 |
|
Senior Member
Join Date: May 2010
Location: westbury ny
Posts: 854
|
cutting the seal is the easiest way as for the screw that's a good question can the side trim be put on after the glass is in
|
|
|

|
|
|
#274 |
|
Senior Member
Join Date: May 2010
Location: Lancaster, CA
Posts: 916
|
Been so long since my last post, the thread was sent to page 2! The last month has been very busy but hopefully it is showing signs of letting up a bit as we head into the new year soon. I did get around to start putting up a paint booth - pvc and plastic with filtering/ventilation - and have finished prepping the fenders. I am pretty happy with their look and feel after all the blocking and fine prepping. The scissor stands I have been using for the fenders are lightweight and versatile, just not a good fit for actually spraying. I was able to hit the fenders with primer alright but it took some finagling.
So... it was time to consider what to hang the fenders now that we need to spray the SSU. Enter the versatile 2x4! 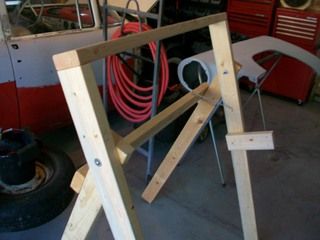 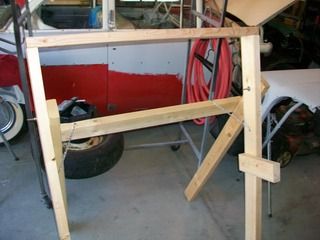 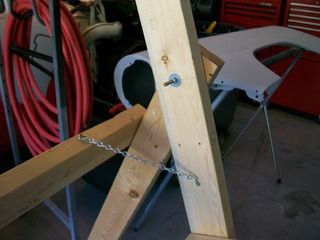 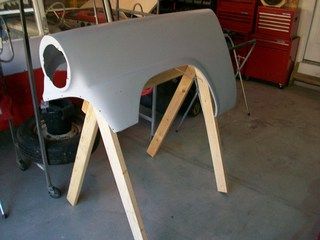 I built them on a scissor principle, but much higher. The top sits about 55" off the floor level. These were built so I could have access to both sides, tall enough to be able to shoot the bottom of the fender comfortably, and with a dog leg attached so that the bottom portion of the fender will "stick out" a bit for easier access. They are 40" wide and are obviously built for 55/56 fenders. The good thing is they fold up just about as flat as 4" give or take. 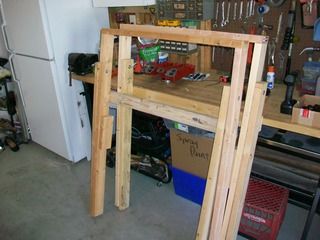 For those of you concerned about the dust... YES, I did wipe down the wood and prime the stands once they were all bolted together and functional. 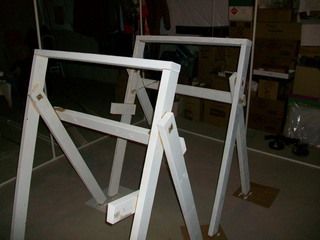 What have you guys used in the past? I have seen some good stands manufactured by different companies, but I really didn't want to spend the dough because I don't do this full time and I am not sure how many cars i will ever do in my lifetime. Any more DIY on fenders, hood, trunk lid, doors??? your pics would give us good ideas if you have some available.
__________________
Lancaster, California Visit hotrodreverend.com to view hundreds of pictures and videos of the build of the 1955 Ford Club Sedan! |
|
|

|
|
|
#275 |
|
Senior Member
Join Date: May 2010
Location: westbury ny
Posts: 854
|
looks good as for the dust if you get a little you will be able to sand and polish it out a little 1500/2000 grit and compound / and polish you'll never know as for the stands I have one I made years ago for a 62 caddy hood its 1/2 black pipe about 48 inches high but adjustable I've had a plow blade on it I would spray the underside then mask it and spray the top this way you have a glossy finish from the looks of your stands you may be able to stand the panels on end and limit the chance for dirt what kind of paint are you going to use keep up the good work
|
|
|

|
|
|
#276 | |
|
Senior Member
Join Date: May 2010
Location: Lancaster, CA
Posts: 916
|
Quote:
Wimbledon White (60s Mustang) Pinup Red (Very close to the 55 Ford Torch Red)
__________________
Lancaster, California Visit hotrodreverend.com to view hundreds of pictures and videos of the build of the 1955 Ford Club Sedan! |
|
|
|

|
|
|
#277 |
|
Senior Member
Join Date: May 2010
Location: Granite City, Illinois
Posts: 3,008
|
Actually, HRR, I recall that I have set my front fenders on regular old wooden sawhorses to paint them. You can use one sawhorse for one fender. The shape of these fenders is such that you can lay the inside top of the fender on top of the sawhorse and scoot the fender across till the headlight hole hits the end of the sawhorse and the lower back leg of the fender rests upon the opposite end sawhorse leg. It's perfect. Just cover the floor with packing paper since that lower part of the fender will be kinda close to the floor.
|
|
|

|
|
|
#278 |
|
Senior Member
Join Date: May 2010
Location: Granite City, Illinois
Posts: 3,008
|
As I recall, when removing the back window glass, the first thing that needs to happen is the removal of those little side pieces of trim on the outside which exposes those little screws that hold the top strip down. When I removed my back glass years ago, after removing those two screws on the outside, I just got in the back seat and pushed outward and it came out pretty easily. There was no glue on the flange. I see no need for that glue anyway. The inside lip of the rubber gasket is wide enough to prevent the window from coming out at the bottom and those two screws at the top prevent the top from coming loose.
|
|
|

|
|
|
#279 |
|
Senior Member
Join Date: Dec 2016
Location: Albion PA
Posts: 1,677
|
HRR,
Great thread on the work you have done on the 55. I had a red and white 55 Crown Vic Lot of the same moves your are doing. But your doing a much better more detailed job. The fenders and body work looks very good! I went and looked at a 55 custom line the other night. It needs all parts touched. The owner is asking way too much for this body style in this condition. It is a tudor. Not sure I even want to make a offer. Inside is junk. floors are rotted out. has had unknown body work done. it has a lot of primer. trunk and hood looked use able. had fender skirts. Had 272 with cross over pipe. Front gravel pan looked good. headlight uppers seemed ok. Front fenders looked pretty good, in primer. doors had been patched along the bottom in spots. Had a bunch of misc parts too, extra grill. I keep thinking about a flat black or gloss black coupe, no chrome, hood and trunk clean, blacked out grill and bumpers, with Cragar mags on the front and chrome reverse on the rear. Just dreaming!  Regards, Chris |
|
|

|
|
|
#280 | |
|
Senior Member
Join Date: May 2010
Location: Lancaster, CA
Posts: 916
|
Quote:
These projects are getting more and more difficult to find, especially in a condition where you think you can get some body work done without taking out a second mortgage! Just painted the red on the fenders and I like the results... will post later.
__________________
Lancaster, California Visit hotrodreverend.com to view hundreds of pictures and videos of the build of the 1955 Ford Club Sedan! |
|
|
|

|
 |
«
Previous Thread
|
Next Thread
»
|
|
| Sponsored Links (Register now to hide all advertisements) |
|
|
All times are GMT -5. The time now is 06:32 PM.





 Linear Mode

