|
|
#201 |
|
Senior Member
Join Date: May 2010
Location: Lancaster, CA
Posts: 917
|
__________________
Lancaster, California Visit hotrodreverend.com to view hundreds of pictures and videos of the build of the 1955 Ford Club Sedan! |
|
|

|
|
|
#202 |
|
Member
Join Date: May 2016
Location: Moorpark, CA
Posts: 72
|
Rev, Have been following your project at Y-Block and here. I have a 56 languishing in the garage that needs the same. I have picked up a bunch of tips on each sub assy as you move along. Your office clock inspire me. Somewhere in the past I came up with 1, 55/56 chrome headlamp door that I will make a clock out of. Thanks for posting
|
|
|

|
| Sponsored Links (Register now to hide all advertisements) |
|
|
|
|
#203 | |
|
Senior Member
Join Date: May 2010
Location: Lancaster, CA
Posts: 917
|
Quote:
__________________
Lancaster, California Visit hotrodreverend.com to view hundreds of pictures and videos of the build of the 1955 Ford Club Sedan! |
|
|
|

|
|
|
#204 |
|
Senior Member
Join Date: May 2010
Location: Lancaster, CA
Posts: 917
|
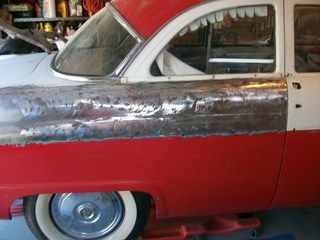
Last night I did some "testing" with two forms of paint removal on the White Tutone where the crow's feet is all showing up. The first was a simple heat gun and razor blade scraper.
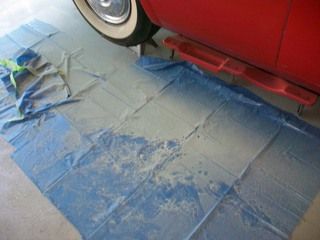
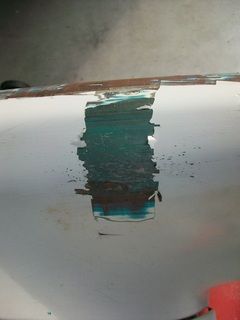 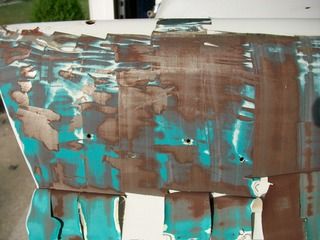 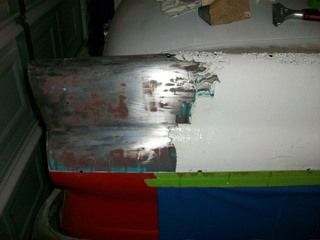 It took me over an hour to move that far along with that method, but it was a "no muss, no fuss" way - simply sweep up the chips on the floor. I was concerned over the idea of heating the paint being so close to the Red Tutone which is in excellent shape. Once I got through those layers you could see where the paint had followed this idea - FoMoCo primer, FoMoCo Sea Sprite Green, ? FoMoCo primer? and FoMoCo? White, then aftermarket primer, aftermarket White. How did Ford do their Tutones? Were all bodies painted a solid color and then if doing a Tutone car the white was painted over afterwards? All of the FoMoCo paint is really on there and really stable - no problems except for the few small places I am going to deal with where there is rust pitting. Next was brushing on "Klean Strip" - it took me an hour and a half to get only this far.  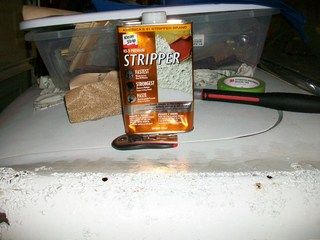 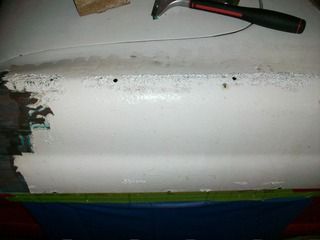 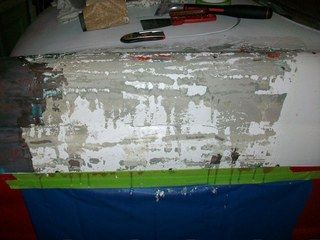 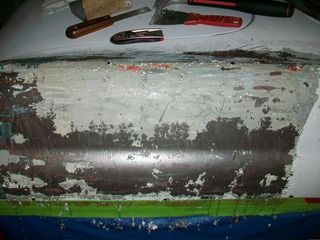 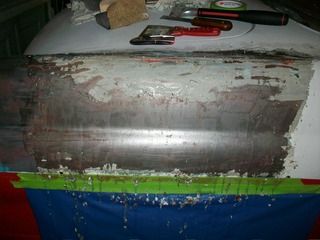 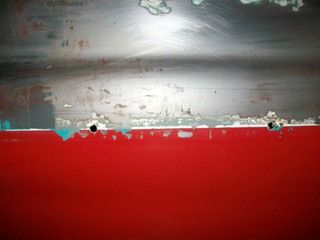 A few items of observation: 1. It took THREE applications to get the paint removed from where you see the beginning photo to the ending photo, and even at the ending photo there was some sanding with 60 grit done just to clean it up. 2. The aftermarket White Tutone with the crows feet came up as fast as you please. With all of those cracks in the surface it took no time at all. Within 5 minutes it was bubbling up and peeling. 3. The original FoMoCo paint is some tough stuff. Even after following paint stripper manufacturer's directions to the letter it still did not remove all layers after THREE applications. 4. What I had feared about the seepage of paint stripper down to the Red Tutone was true. It eventually worked its way under the paint and ate into it a tick. 5. There is an obvious mess on the floor -  Next up is get out the 7" disk electric sander and go to town. It will be interesting though to see how much dust I kick up here in my little "harry homeowner" garage that is not made for this type of work.   I also have a DA I can try, but I think that will yield the same results as the electric sander. I do know this - it might be best to remove the white Tutone from the fenders (in storage right now) by using my sandblaster. Not sure of what it would take to get that done on the entire body - I really don't have a place to do that here and the fender will be fun enough as it is. I guess the neighborhood will have to deal with the black dust cloud coming out of the Hot Rod Reverend's house!! 
__________________
Lancaster, California Visit hotrodreverend.com to view hundreds of pictures and videos of the build of the 1955 Ford Club Sedan! |
|
|

|
|
|
#205 |
|
Senior Member
Join Date: May 2010
Location: Lancaster, CA
Posts: 917
|
Ummmmm, ok after a little more "testing" I think we have a winner, winner, chicken dinner!
 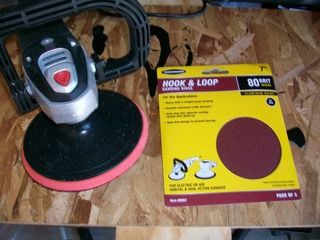 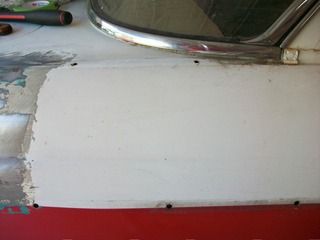 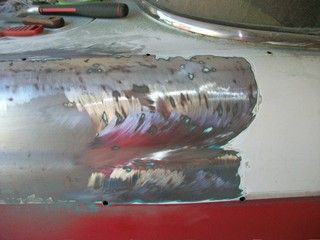 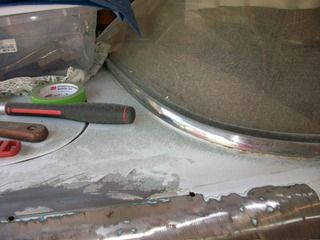 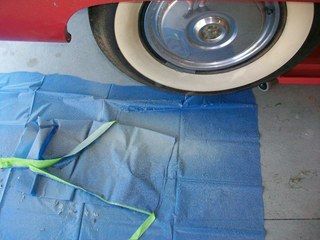 That took what.... 5 minutes if that? But check out that dust! It's everywhere. We will keep moving along here and see what we can do today. 
__________________
Lancaster, California Visit hotrodreverend.com to view hundreds of pictures and videos of the build of the 1955 Ford Club Sedan! |
|
|

|
|
|
#206 |
|
Senior Member
Join Date: May 2010
Location: Lancaster, CA
Posts: 917
|
Sponsored Links (Register now to hide all advertisements)
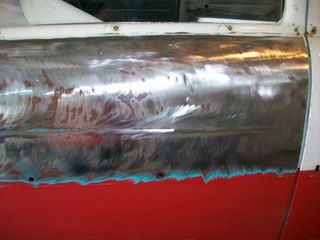 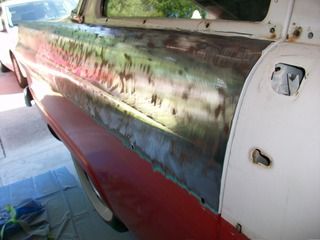   Got to put the column and steering wheel back on first!
__________________
Lancaster, California Visit hotrodreverend.com to view hundreds of pictures and videos of the build of the 1955 Ford Club Sedan! |
|
|

|
|
|
#207 |
|
Senior Member
Join Date: May 2010
Location: westbury ny
Posts: 854
|
rev the stuff you get at the home center is not the greatest see if you can find aircraft brand stripper or rock miracle brand I used these when I worked in a body shop they work best if the temp is 50-60 degrees but wear gloves as they will burn the hell out of your skin. as for your bleed through put a couple of layers of tape also when finished wipe the panel with lacquer thinner to remove any residue also where door jambs and door seems use the tape trick leaving 1/4 inch from edge as you will be sanding the panel you can remove that little area it is a lot of dirty work no matter what way you do it the only other way I would do it is find a media blaster in your area but that will be costly $500-$1000 is what it would cost in NY. area and then use duct tape to protect the red along with cardboard wait until you have to do bodywork and sand for paint then the dust starts. also you could set a fan blowing out to lighten the load in the garage keep up the good work and enjoy
|
|
|

|
|
|
#208 |
|
Senior Member
Join Date: May 2010
Location: Lancaster, CA
Posts: 917
|
The dog days of summer...
I did strip the quarter panel of the old white paint and spray primer on it to do a test of appearance, mil thickness of the paint, etc. I am very happy with what I am seeing although i did reduce the topcoat a tick too much. 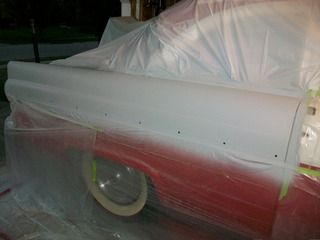 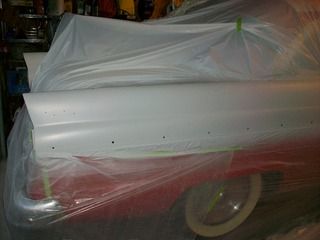 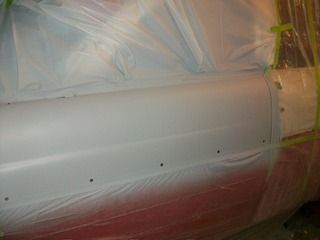 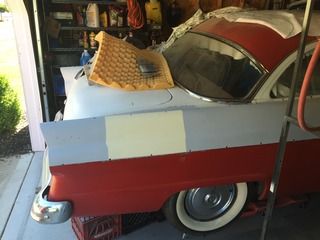 The test square of white paint looks yellow in the photo but it doesn't look that way in person. It is the Wimbledon White Ford paint code from the 60s Mustangs, kind of an off white I guess. The garage is going to be a mess for a while! And the garage is the way the entire family enters/exits the house each day. I think I am going to try to pull the car out side when I do the stripping, paint and block sand inside, etc. We will see how that works with momma!  Last night I did reinstall the steering column and dummy shaft - the shifter is on the floor but I didn't want a hole there where the old column shift was at and I didn't want to leave it on there either. 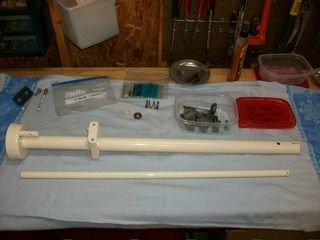 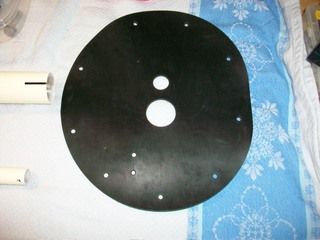 First, I laid out all of the column parts and the two seals that need to go on the column before you place it on the steering gear assembly. I used some masking tape to keep from scuffing things up on the new paint, but I wasn't perfect I can tell you that. Note the orientation of the large rubber seal - it needs to be oriented correctly. The photo is showing the FIREWALL side of the seal. Obviously I will need to cut a hole for the clutch release rod - We will wait until it all mounted up to do that but it should be pretty straightforward. 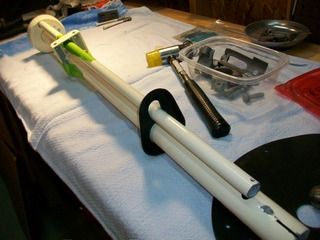 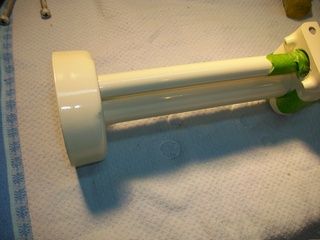 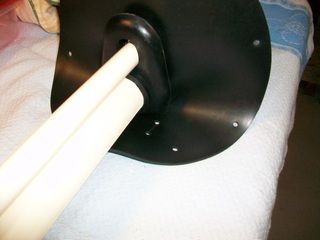 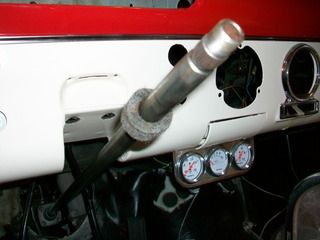 Don't forget that felt oil baffle that goes inside the steering column. Here it is pictured up top but it needs to go down to the bottom where you will tighten the tube to the steering gear. 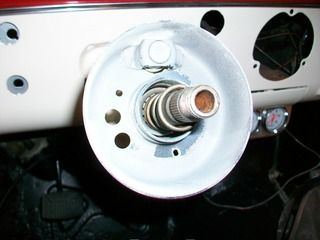 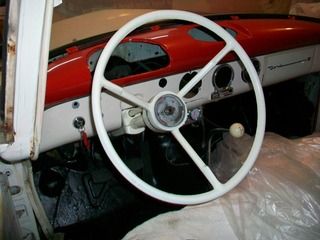 Before installing the steering wheel, make sure you place the white plastic bushing around the steering shaft - this bushing goes rests between the shaft and that bearing in the cup of the column tube. If you look closely in the photo above where the spring is shown in the cup you will find that small bushing in place. Here is the part number... 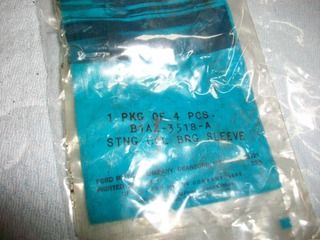 One last item to mention... After working on that steering wheel for a loooooooong time would you believe it fell off of the paint rack? TWICE! It cracked again and of course is dinged up. I hate to say it but for now since I need to move the car in and out and start getting this body work done I just gave up and installed it. It looks good in the photo - but trust me - IT AIN'T  I will locate another one and have it ready for after the car is repainted.
__________________
Lancaster, California Visit hotrodreverend.com to view hundreds of pictures and videos of the build of the 1955 Ford Club Sedan! |
|
|

|
|
|
#209 |
|
Senior Member
Join Date: May 2010
Location: westbury ny
Posts: 854
|
I feel your pain I ve had fenders fall from stands nothing like doing a job over as for your dust if you set up a fan blowing out it may help I use a little blue blower I think harbor freight sell a likeness of it keeps the air moving
|
|
|

|
|
|
#210 |
|
Senior Member
Join Date: May 2010
Location: Granite City, Illinois
Posts: 3,008
|
When I re-did my wheel, I feared it might fall over and ruin the work, so I affixed the wheel to the top of a 4ft step ladder. The arrangement consisted of; a scrap of wood 2x4 with a hole in the middle to match the thread size of a bolt long enough to poke thru the hub of the wheel while it sat on an aluminum soda or beer can with the top of the can punched out crudely to allow the cancelling tube to fit thru. I punched out the bottom of the can for the long bolt to fit thru and thread into the wood 2x4. Then I temporarily screwed the scrap of wood to the top of the stepladder. The only way it could have fallen is if the entire stepladder fell over.
|
|
|

|
|
|
#211 |
|
Senior Member
Join Date: May 2010
Location: Granite City, Illinois
Posts: 3,008
|
I cut out a strip of soft cardboard like from a cracker or serial box and coiled it around inside the small hole of the steering column bracket, then slipped the shift rod thru it and it did a good job of protecting the paint from getting scratched.
|
|
|

|
|
|
#212 |
|
Senior Member
Join Date: May 2010
Location: Lancaster, CA
Posts: 917
|
Thanks Dave - great ideas on the next time I tackle the steering wheel repaint!
__________________
Lancaster, California Visit hotrodreverend.com to view hundreds of pictures and videos of the build of the 1955 Ford Club Sedan! |
|
|

|
|
|
#213 |
|
Senior Member
Join Date: May 2010
Location: Lancaster, CA
Posts: 917
|
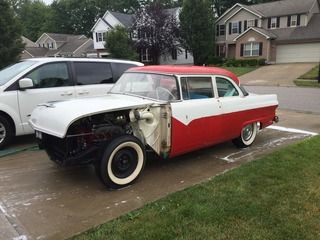
I got into the garage early this morning, cleaned it out, washed the car with dish detergent as well as I could (before tackling this body work), and took the 55 out on the street in front of the house a few hundred yards or so - it is has been a while since she moved out of the garage (not since I installed the Hurst shifter). The floor shifter works like a new one and I was reminded that the 292 with goodies has a lot of get up and go!
 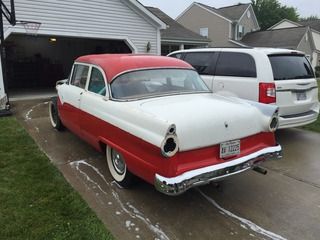 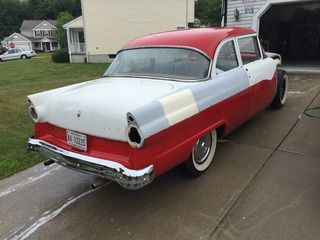 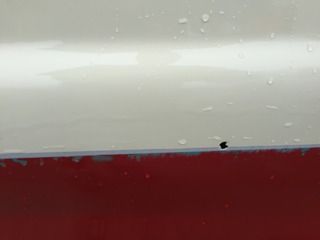 The fellas at the print shop where our church prints millions of Bibles a year gave me some leftovers of an industrial roll of high grade paper - this is excellent masking material! I mounted it above the workbench on 2x10's with conduit running through the middle to act as an axle. The weight of the roll is a little over 50 lbs. Probably more paper than I will use, but it's there and it is 36" wide. 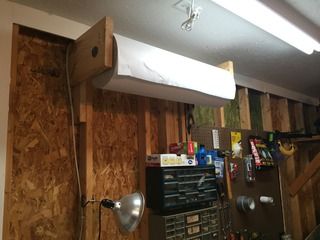 On to the grinding when I get back next week!
__________________
Lancaster, California Visit hotrodreverend.com to view hundreds of pictures and videos of the build of the 1955 Ford Club Sedan! |
|
|

|
|
|
#214 |
|
Senior Member
Join Date: May 2010
Location: westbury ny
Posts: 854
|
looks good that beats trying to unroll it you should work a tape roll into the mix so all you need to do is pull and go
|
|
|

|
|
|
#215 |
|
Junior Member
Join Date: Aug 2015
Posts: 17
|
Did you replace the starter with an aftermarket or stick with the original?
|
|
|

|
|
|
#216 | |
|
Senior Member
Join Date: May 2010
Location: Lancaster, CA
Posts: 917
|
Quote:
Yes, I have replaced these units in the car about 100 times, and NO it is not any fun. I may get around to putting an aftermarket in it later on... dunno, will have to talk to the FIL.
__________________
Lancaster, California Visit hotrodreverend.com to view hundreds of pictures and videos of the build of the 1955 Ford Club Sedan! |
|
|
|

|
|
|
#217 |
|
Senior Member
Join Date: May 2010
Location: Lancaster, CA
Posts: 917
|
Not too much to post today, but with this most recent paint job on the inner fenders AND the recent delivery of brand new front end sheet metal hardware it is just about time to start putting it all back together up front.
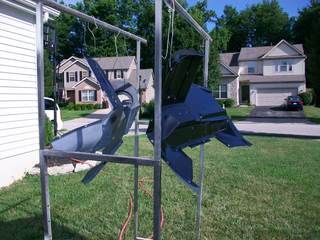 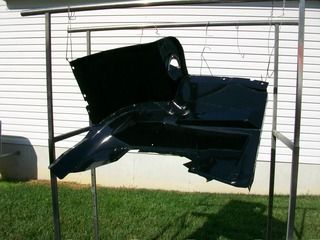 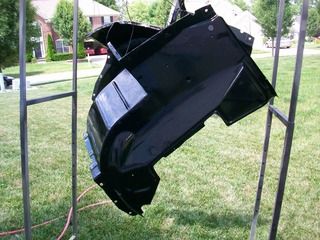 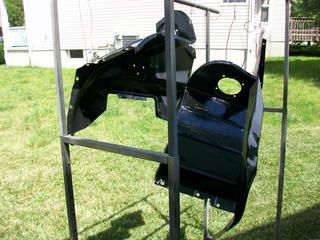 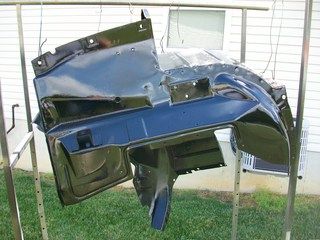 Any tips on getting this front end back together? One question I had was about the large pad underneath the "U" shaped radiator support. When do I tighten that one down? that pad is pretty thick as new, but it was as flat as a pancake when I removed it. I assume everything begins in the reverse order of how it was all removed. Begin with the radiator support, attach both air dams and then attach both fenders?
__________________
Lancaster, California Visit hotrodreverend.com to view hundreds of pictures and videos of the build of the 1955 Ford Club Sedan! Last edited by Hot Rod Reverend; 07-09-2016 at 03:47 PM. |
|
|

|
|
|
#218 |
|
Senior Member
Join Date: Jun 2010
Location: Detroit suburb, MI
Posts: 3,706
|
Hot Rod Reverend, your gonna have to re-name this blog to Restoration instead of Refresh. Lol.
Everything looks great. Great work and patience !! Sal |
|
|

|
|
|
#219 |
|
Senior Member
Join Date: May 2010
Location: Granite City, Illinois
Posts: 3,008
|
I say go ahead and install the new thick rubber pad as it is. I noticed the same thing you did when I got my new rubber pad and I cut it in half so that it would be similar in thickness as the old pad. I WAS VERY SORRY I DID THAT. I ended up taking the radiator support bracket back off and adding the other half that I had cut off.
Basically you need to watch how the bottom of the front fenders (which mate with the top of the front splash pan) fall in relationship to the front bumper. The sheet metal pieces do not have up/down adjustment here but they do have left/right adjustment to permit centering the entire doghouse. If this is adjusted properly, it allows the hood to close without having an un-even gap where the back of the hood meets the cowl. |
|
|

|
|
|
#220 |
|
Senior Member
Join Date: May 2010
Location: Granite City, Illinois
Posts: 3,008
|
Did you mean BRAND NEW fender aprons or did you mean new to you?
Your old fender aprons were probably in better condition than the ones I had to salvage on both of my '55 Fords based upon what you have shown of the rest of the car. |
|
|

|
 |
«
Previous Thread
|
Next Thread
»
|
|
| Sponsored Links (Register now to hide all advertisements) |
|
|
All times are GMT -5. The time now is 03:01 AM.




 Linear Mode

