|
|||||||


| Sponsored Links (Register now to hide all advertisements) |
|
|
 |

|
Thread Tools | Display Modes |
 03-30-2011, 09:26 AM
|
#1 |
|
Junior Member
Join Date: Jul 2010
Location: Bjursas, Sweden
Posts: 16
|
Hi all
I,m at start of my roadster top build for my 32 Ford. I have done some investigation, but need a ton of advice to pull this thru. I have never made any tops before, and did just buy an old sewing machine. ") Anyone with advices would be helpfull, and I need close up photos of standard roadster tops, the seams, details around edges and so on. I,m going to a car show next weekend, so I need to finish this during this weekend, Help 
|

|

|
|
03-30-2011, 09:39 AM
|
#2 |
|
Senior Member

Join Date: May 2010
Location: Above the gnat line in Georgia
Posts: 7,009
|
Rots of ruck. You have a job ahead of you for sure.
|
|
|
|
| Sponsored Links (Register now to hide all advertisements) |
|
|
|
03-30-2011, 11:33 AM
|
#3 |
|
Senior Member

Join Date: May 2010
Location: Sweden
Posts: 427
|
I posted this on the Hamb how i did my 33 top,
32 is not exatly the same. But i guess it could be of some use here to. ############ After driving roadsters in Sweden since 1988, im quite familiar with the Swedish summer weather. Still ive driven my 33 Roadster without a top, for the last two years! When my wife and I had been caught in rain three times during two week's. My wife refused to go out if there was a sign of a cloud on the sky. So on Evilbay i found some used roadster top parts in Australia, and since American guy's are afraid to buy from foreigner's, i got it for a really good price. OK 50% was more or less missing, since my Roadster has some patina (ive been asked if it's a Rat Rod!! ;-) ). And I know that you can buy a new set Top Iron Bows for thousands of dollar's, but im a cheap fart so I did it my way. Fortunatly i was able to borrow some Bows from a friend. The original Bows are made from Ash or oak, i could not lay my hands on that material, and to be honest this is s stopgap solution. I went over to my local lumberyard and bought some 2 by 4 Pine wood (yes timber is still measured in inches here in the metric part of the world, plumbing parts to. but that another story). The original bows are steam bent, i did not had time to figure out how to do that, so i did it my way. To cover the top i bought four old sailor bad for 15$ 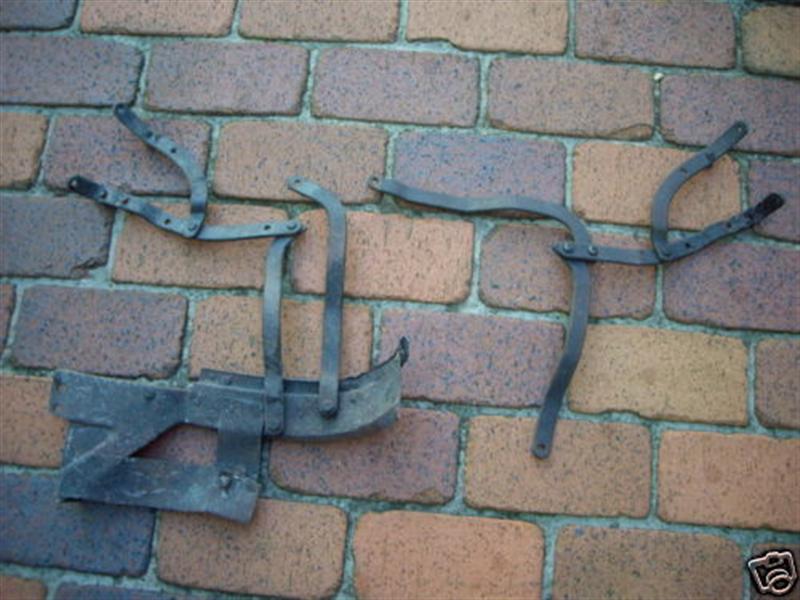 This is what came from Australia, maybe Evilbay is not so bad at all.  The Irons had been in a fire and the rust had taken its toll. 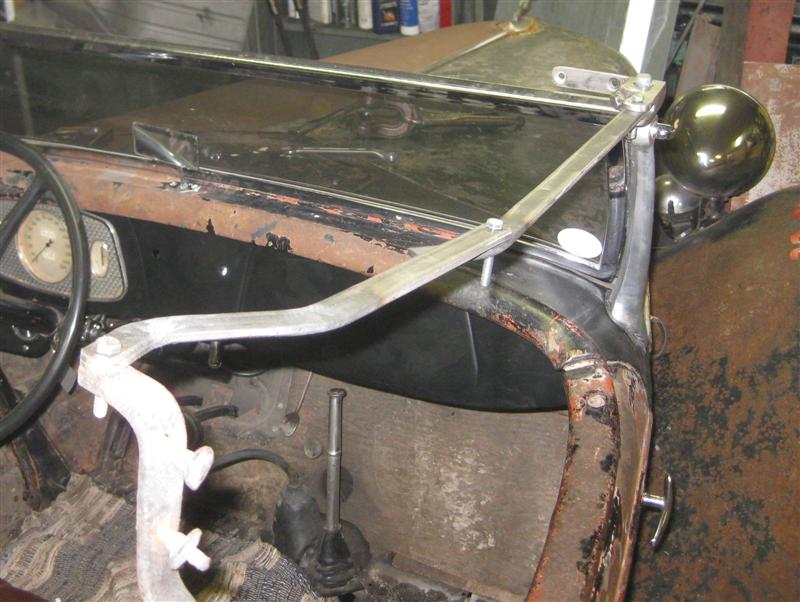 I made the other missing steel parts to.  Its important to check and see that you can fold everything, The front bow its temporary. 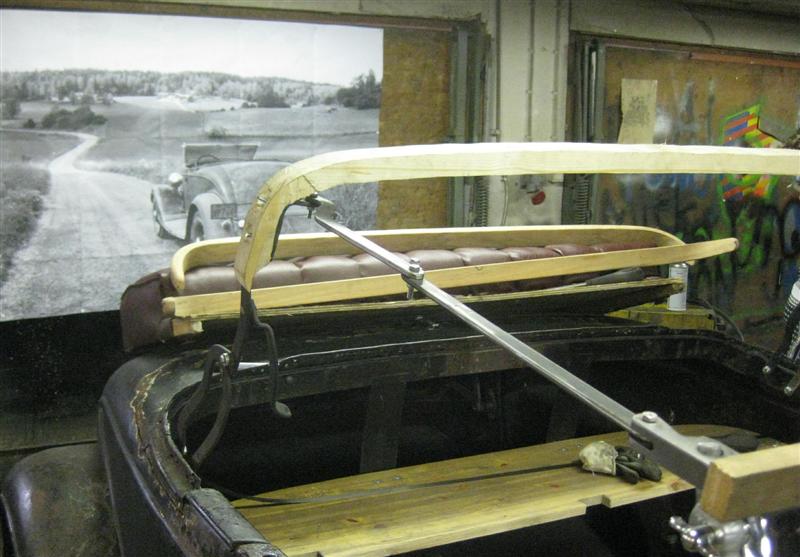 First bow ruffly shaped (carpenters look away now), The Australian iron was not exactly the same as the American, so i had to improvise a bit. 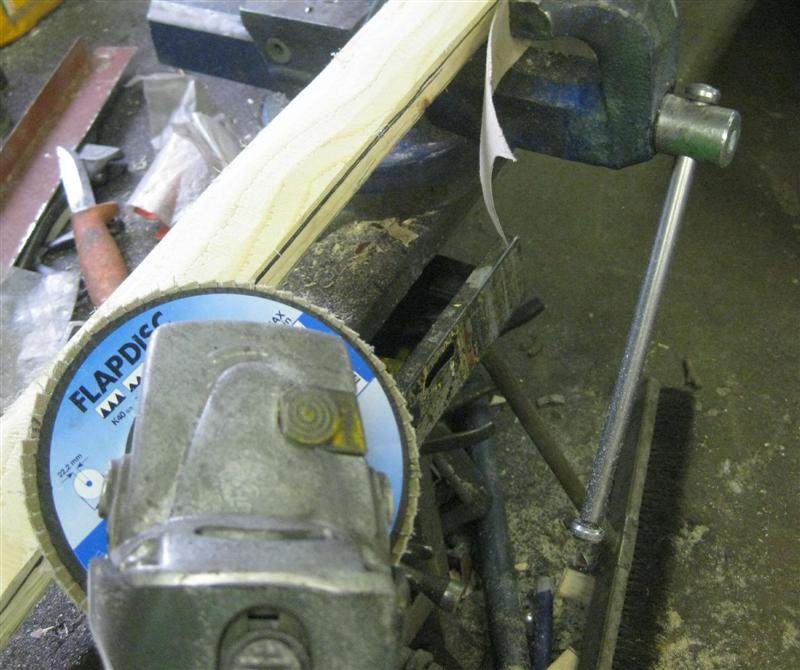 A flapdisc makes shaping easy 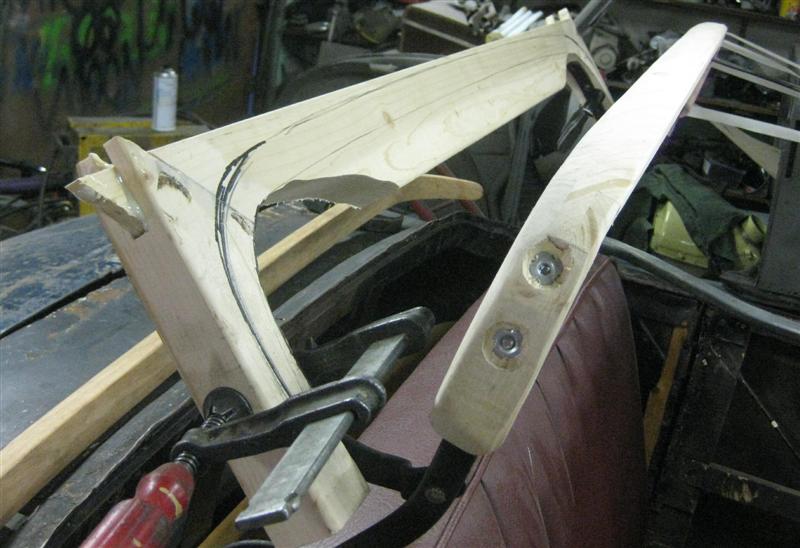 Working on bow two, it was cut ruff and shaped to fit on the iron's first, here you can see how the bend was made and glued with epoxi. 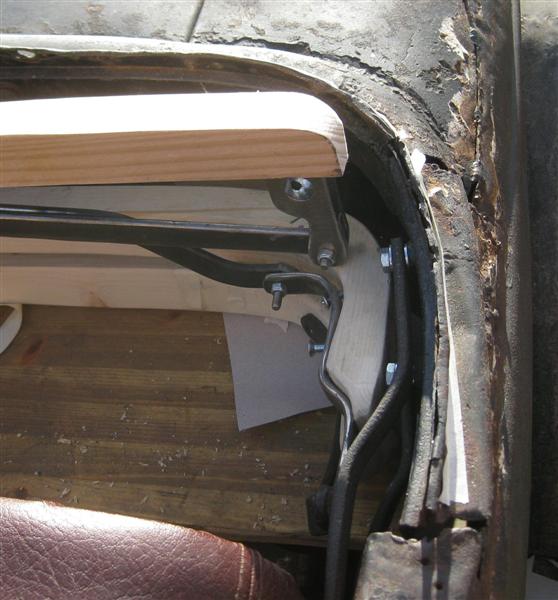 Its good to fold the top a couple of times during the progress. When they where ready i soaked the bows with mix of boiled linseed oil and turpentine, then painted them matt black.  Its nice to check so the wood does not hit wood, after this picture was taken i lowered the top another inch. 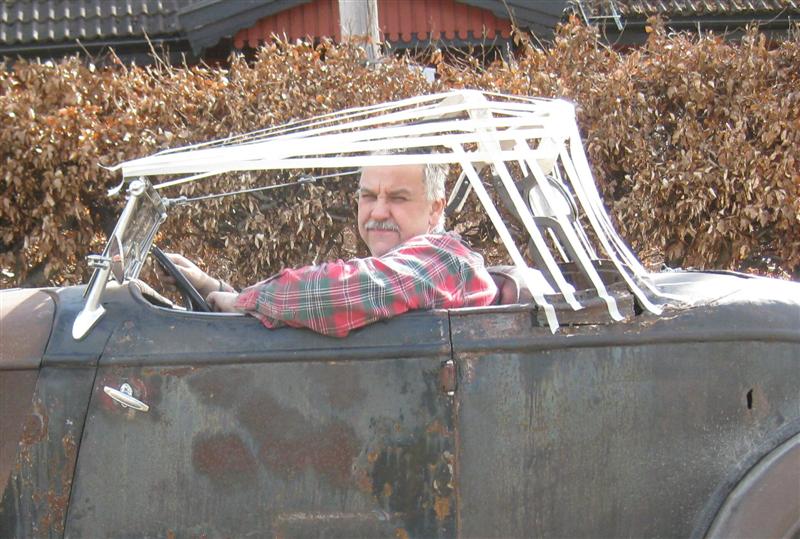 I used tape to get a feel of the endresult. 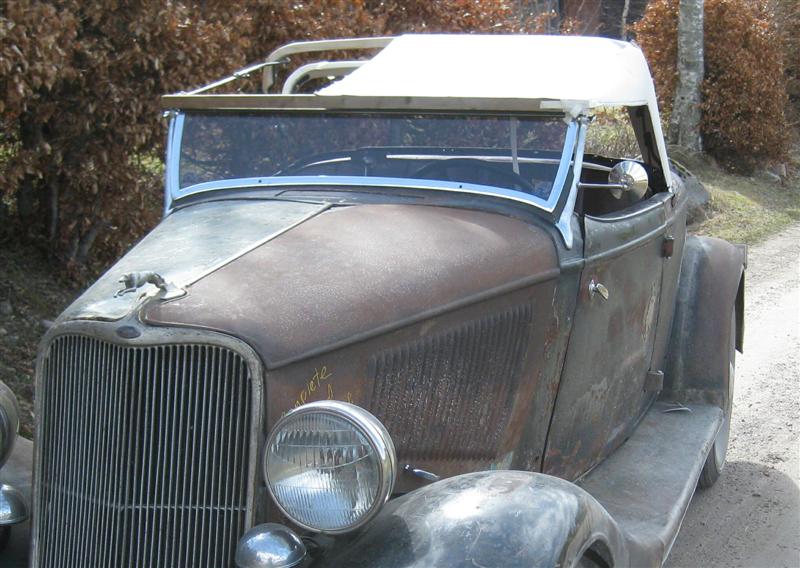 After tape, i took out out some paper, its cheaper than cloth. 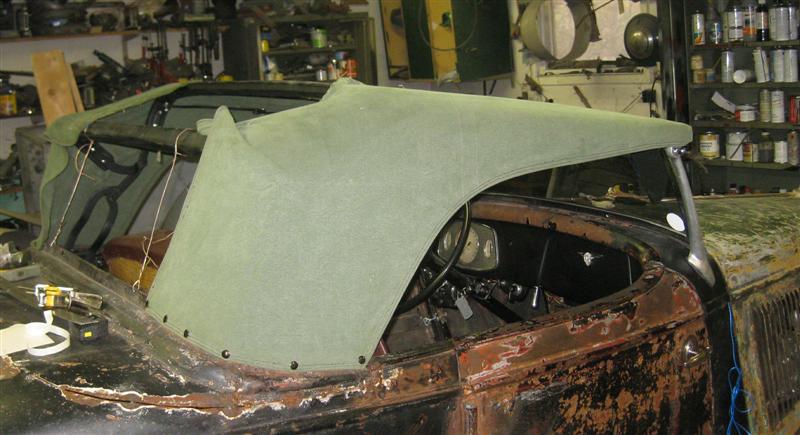 After the Iron and bows was ready i started to make the sides, of the sailor sack material. 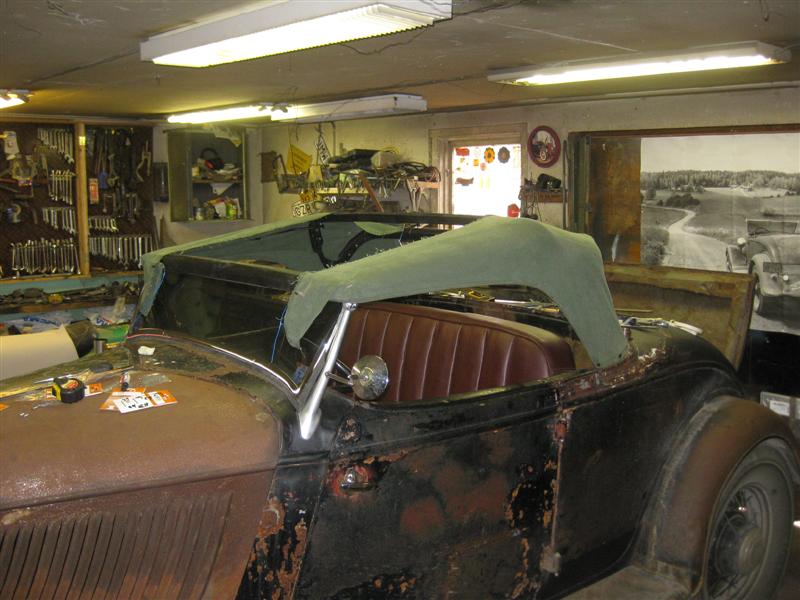 When the sides was ready i measured the distance between them, Then i guessed that the centre part would stretch almost 4", and then i stitched everything togheter. Using my wifes sewing machine. 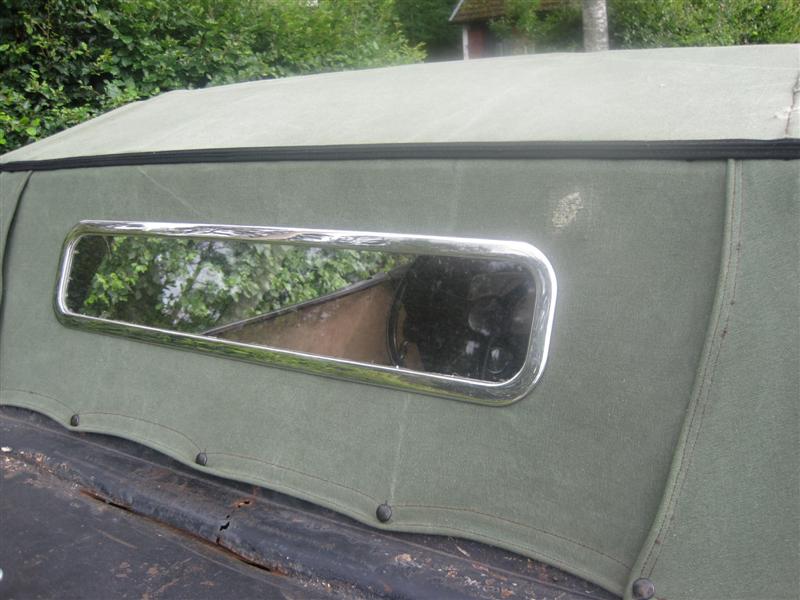 I mounted the rear window Its mounted directly on the cloth and then cut out afterwards, its good to let it rest for a day before you cut it, so the cloth can stretch. 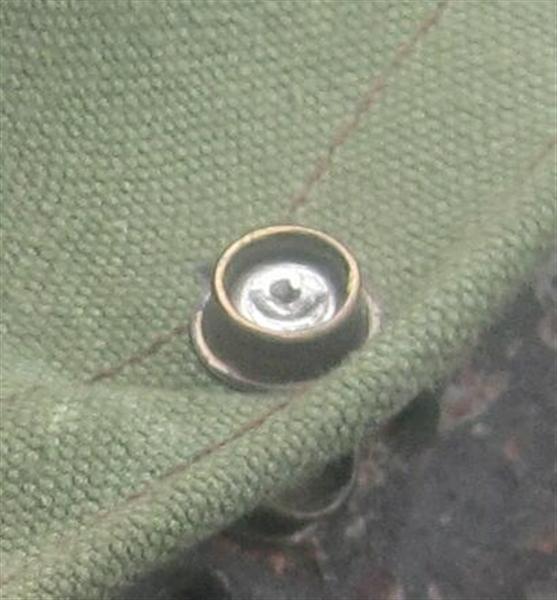 I made a special mount so i could open end close the centre part, Using a male and female and a poprivet. 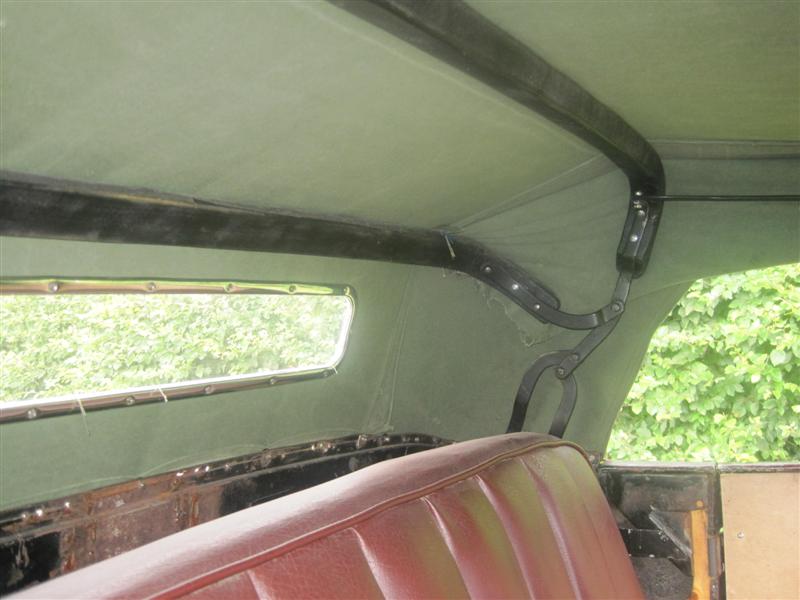 Here you can see a piece of the Pads i made to make the side's shape out nicer. 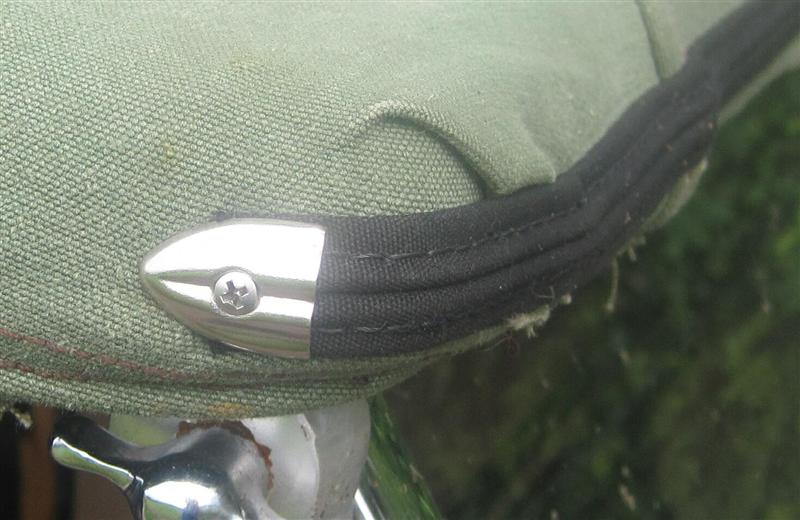 I bought some Hidem to cover the nail's used to mount the top material. 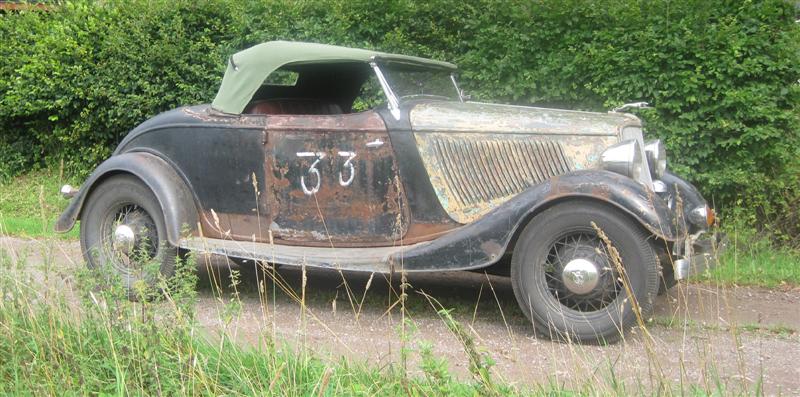 All prepaired for the Swedish Summer. 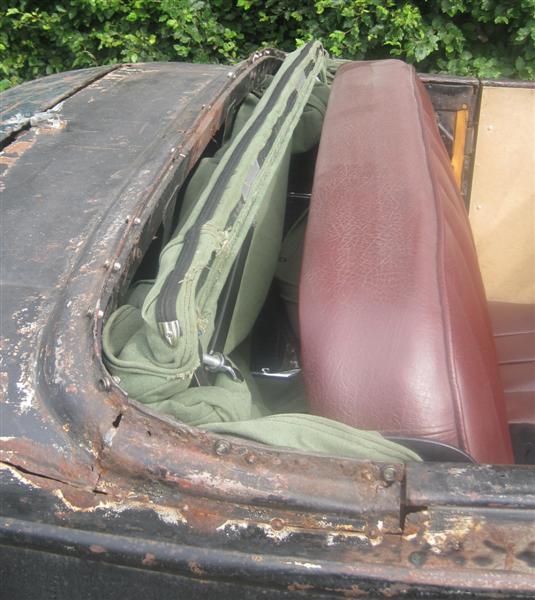 Yes its fit behind the backrest, in case the sun is shining 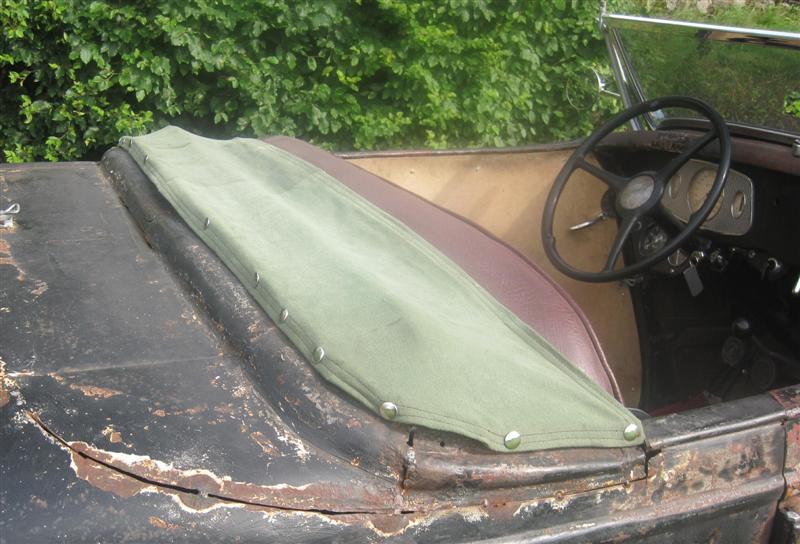 Made a small cover for the folded top. |
|
|
|
|
03-30-2011, 02:50 PM
|
#4 |
|
Junior Member
Join Date: Jul 2010
Location: Bjursas, Sweden
Posts: 16
|
Mr42
Your top and the tech is great, but I need some photos of a stock type fabrics also |
|
|
|
|
03-31-2011, 04:39 AM
|
#5 |
|
Senior Member

Join Date: May 2010
Location: Auckland
Posts: 4,705
 |
heresa hood
|
|
|
|
|
03-31-2011, 07:22 AM
|
#6 |
|
Senior Member

Join Date: May 2010
Location: At my kitchen table in Santa Rosa, Ca
Posts: 2,903
|
Sponsored Links (Register now to hide all advertisements)
__________________
If it would have been a snake it would have bit ya! i can't spell my way out of a paper bag! |
|
|
|
|
03-31-2011, 07:31 AM
|
#7 | |
|
Junior Member
Join Date: Jul 2010
Location: Bjursas, Sweden
Posts: 16
|
Quote:
|
|
|
|
|

|
04-01-2011, 02:01 PM
|
#8 |
|
Junior Member
Join Date: Jul 2010
Location: Bjursas, Sweden
Posts: 16
|
anyone got some more?
|
|
|
|
|
04-01-2011, 05:08 PM
|
#9 |
|
Senior Member
Join Date: May 2010
Location: Auckland
Posts: 4,705
|
heres some
|
|
|
|
|
04-01-2011, 05:15 PM
|
#10 |
|
Senior Member
Join Date: May 2010
Location: Auckland
Posts: 4,705
|
moreeeeeeeeee
|
|
|
|
|
04-01-2011, 05:22 PM
|
#11 |
|
Senior Member
Join Date: May 2010
Location: Auckland
Posts: 4,705
|
OKkKKKKKKKKKKKKk
|
|
|
|
|
«
Previous Thread
|
Next Thread
»
 Linear Mode

|
|

| Sponsored Links (Register now to hide all advertisements) |
|
|
All times are GMT -5. The time now is 03:52 PM.