|
|||||||


| Sponsored Links (Register now to hide all advertisements) |
|
|
 |

|
Thread Tools | Display Modes |
 03-25-2019, 06:57 AM
|
#1 |
|
Member
Join Date: Mar 2019
Location: Spring, TX
Posts: 76
|
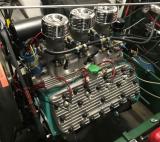
Hi Gang,
I posted this over on the HAMB, then found this place and thought there might be a little more insight over here. Picked up this old girl yesterday. Been sitting on the stand for the last 10 years and is frozen up. I'm looking forward to tearing into it! I don't know much about them but have started reading. Any tips or identification would be appreciated. |

|

|
|
03-25-2019, 07:08 AM
|
#2 |
|
Member Emeritus

Join Date: Nov 2012
Location: Wichita KS
Posts: 16,132
|
After you get it taken apart, first thing is to check the block for damage, such as cracks. If it appears ok visually, the next set is to have it pressure tested. Flatheads often have hidden cracks and you want to spend the least amount of money possible until you verify you have a good base to work with. Welcome to the Barn and the world of flathead Fords!
Disassembly can sometimes be a challenge if you are not familiar with the engine, so ask away if you have questions. |
|
|
|
| Sponsored Links (Register now to hide all advertisements) |
|
|
|
03-25-2019, 07:12 AM
|
#3 |
|
Senior Member
Join Date: Oct 2016
Location: harpursville ny
Posts: 1,040
|
it is a 49-53 engine (48 -53 truck) and looks like truck heads on it.
|
|
|
|
|
03-25-2019, 07:15 AM
|
#4 |
|
Senior Member
Join Date: May 2010
Location: NJ
Posts: 6,177
|
Going just by the heads and water pumps and crank pulley, it's a truck engine (RT-means truck), but that doesn't mean anything with this series motor. Parts get mixed and matched over the years.
First suggestion is to get a good book about these engines. One of the many examples is Tardel's & Bishop's great book. It has an excellent chapter about tear down. Since you are not familiar with these, take plenty of picts and clearly label what and where you took parts off from. My best advise is to go slow, use PLENTY of penetrating oil before turning any bolt and either purchase or borrow the proper tools to remove the valve train. Put a bunch of cardboard & newspaper down under the motor for tearing one down in a messy job. Regarding stuck pistons. I've had good luck squirting a 50/50 mix of ATF & acetone into the bores 2x or 3x's a day. Work the crank bolt back and forth each time. If that doesn't free it up, I've used a piece of wooden baseball bat blank to knock the pistons out. Once torn down, it will need to be pressure tested first. If that checks out, have it cleaned and then mag tested. After it passes these two tests, you're good to go with the rebuild. |
|
|
|
|
03-25-2019, 07:33 AM
|
#5 |
|
Senior Member

Join Date: Jun 2013
Location: Marana Arizona
Posts: 1,776
|
Welcome aboard Sharp21. You will find LOTS of info here learn to use the Search and Advanced Search on this forum because your question may have already been addressed. I would do the 50/50 soak before tearing it down and have the block pressure tested as advised. Some of those cracks can be repaired. Better to address them now than later.There are a bunch of You Tube posts on flatheads. Get you a Ford repair manual usually available online.
Below is a site to inspire you. Scroll down the pages of flathead photos and when you see a play arrow, crank up your computer and enjoy the adventure. Just remember that no question is a stupid question and it is YOUR engine. Chap http://gocatspeedshop.com/ |
|
|
|
|
03-25-2019, 07:45 AM
|
#6 |
|
Senior Member

Join Date: May 2010
Location: Chester Vt
Posts: 8,857
|
Sponsored Links (Register now to hide all advertisements)
Gramps |
|
|
|
|
03-25-2019, 07:47 AM
|
#7 |
|
Senior Member
Join Date: Oct 2016
Location: harpursville ny
Posts: 1,040
|
It may have a stuck valve or three. Pull heads and check valves. Good time to oil Pistons.
|
|
|
|
|
03-25-2019, 07:58 AM
|
#8 |
|
Senior Member
Join Date: May 2010
Location: upstate SC
Posts: 2,963
|
start soaking the pistons with a 50/50 mixture of acetone and atf, collect or borrow the necessary tools to pull this engine apart. valve bar, valve puller are the tow most important tools and post a general location-Hey there may be other flathead nuts around you that are up for a challenge and can help you. Good luck and welcome to the barn!!!
|
|
|
|
|
03-25-2019, 08:14 AM
|
#9 |
|
Senior Member

Join Date: Oct 2011
Location: Shelton, WA
Posts: 3,799
|
It looks as if the heads have already been off. I hope when you take them off there isn't something bad waiting for you. Many cracks can be repaired depending on where they are. Good advice re 50/50 acetone/atf mix, and be patient. I hope you have a usable block, as they are getting harder to find. Good luck and welcome.
|
|
|
|
|
03-25-2019, 08:28 AM
|
#10 |
|
Senior Member

Join Date: May 2010
Location: Coral Springs FL
Posts: 10,925
|
When you rebuild it don't throw anything away.
|
|
|
|
|
03-25-2019, 11:53 AM
|
#11 |
|
Senior Member
Join Date: Oct 2016
Location: harpursville ny
Posts: 1,040
|
Is that a head bolt in the temp. Sender hole? Hope it's not threaded in.
|
|
|
|
|
03-25-2019, 01:59 PM
|
#12 |
|
Senior Member
Join Date: May 2017
Location: Arkansas
Posts: 611
|
And you need a BIG rag bag. I've noticed these engines go through a lot more rags than other stuff I work on. Dam hard on your shop wardrobe, too.
|
|
|
|
|
03-25-2019, 02:05 PM
|
#13 |
|
Senior Member
Join Date: May 2017
Location: Arkansas
Posts: 611
|
My first one, the block was cracked pretty bad. I worried about this, but kept my eyes open and networked. Soon I had 4 good blocks here, been magnafluxed by the machine shop and then pressure tested by me. Point is, there are still good blocks out there even if you have to get lucky a little bit.
|
|
|
|
|
03-25-2019, 04:19 PM
|
#14 |
|
Senior Member

Join Date: Jan 2012
Location: Lyman,ME.
Posts: 2,623
|
I would have it cleaned and magnafluxed first then pressure test. Baked on crud and rust scale could seal a crack that could rear its ugly head after you re-build it. Or pressure test it twice.In my area a shop cleans and mags for a little over a hundred dollars....welcome and good luck!!!......Mark
__________________
I'm thinkin' about crankin' My ragged ol' truck up and haulin' myself into town. Billy Joe Shaver |
|
|
|
|
03-26-2019, 06:08 AM
|
#15 |
|
Senior Member
Join Date: Aug 2017
Location: ohio
Posts: 986
|
Welcome sharp21 ! What are your plans for this flatty ? These guys really know their stuff & this forum helped me A LOT. Vanpelt sale is a GR8 source for charted info, parts etc.
Hope the block is good & that you can enjoy the ride. There's just something about a Ford flathead. mike |
|
|
|
|
03-26-2019, 09:52 AM
|
#16 |
|
Member
Join Date: Mar 2019
Location: Spring, TX
Posts: 76
|
Thanks for all the replies! I definitely came to the right place!
A little bit more background - I've always loved cars. My dad started teaching me to drive at 11 years old ('65 F100, with a mean clutch). I've had a few cool cars and do most of my own work. But I've never tore down and rebuilt a motor. We recently moved and I've got my garage setup, so now is the time! Put the word out and my buddy found me this motor for a song. I think flatheads are the best looking motor going so count myself lucky. My primary goal here is to built it, learn something, and get it running on the stand. At that point I may sell/trade up into something else, or get the next piece of my future hot rod and keep building. You guys have keen eyes; the heads were pulled already. History is that it was purchased, heads and intake pulled for inspection, then they moved to a different project. It sat on the stand in the shop for the past 10 years. I'm going to start removing parts, free up the pistons, finish the teardown, and send it for the testing you guys recommend. Will make sure to label everything and promise I won't throw anything out! Appreciate the input |
|
|
|
|
03-26-2019, 11:33 AM
|
#17 |
|
Senior Member
Join Date: May 2010
Location: upstate SC
Posts: 2,963
|
after the rebuild you need to hunt up a 48/52 pick up and build that to put the motor in. my 49
|
|
|
|
|
03-26-2019, 11:34 AM
|
#18 |
|
Senior Member

Join Date: Sep 2013
Location: Dighton, Mass
Posts: 1,230
|
A box of zip lock bags mark everything on the bag as to where it come from like no.1
exhaust & intake. Mark each rod where it come from. Everything in order, All for examination whether you use them or not. You will defiantly need a cam bearing remover / installer tool, valve guide pry bar remover won't hurt either about all venders have those. Seeing your going to do most yourself, remove crank clean & clean all insert shells reassemble one by one with plastigage thats cheap enough, JUST to find out where you are at, clearance wise. You may also want to buy a cylinder ridge remover if its got any kind of ridge up top. Another tip cut a plastic barrel in half put block in barrel a step ladder with diesel with small hose on top of ladder, parts brush and go for it because if it come to machine work, they do not want greasy things coming in. These are only my suggestions. Oh don't forget to read all insert bearings, they usually are marked to tell you if anybodys been in there before. Remember there's nothing special about these to the machine shop eyes, they go by the numbers with micrometers and such......sam |
|
|
|
|
03-26-2019, 01:04 PM
|
#19 |
|
Senior Member

Join Date: Jun 2010
Location: San Antonio, Texas
Posts: 16,425
|
The L-head V8 is a simple motor. The first one I tore down was a real education. It was obvious that it was simple but it was also obvious that that simple valve train was frozen solid in the block. I lost my first home made horse shoe clip puller to a junk salvage guy that was given free range to haul off scrap when I was going to A&P school. That big 1.25" bar was 5 feet long and was tapered down to a point on one end with a slight S-curve to the tip end. I could hook into the clip holes and pry even the stiffest ones out. I miss that thing. I have All Power tools and an old KD Tool valve puller that do the job now.
Take your time with the pistons. If they aren't too rusty, you can drive them out. If they look like cauliflower with corrosion then sometimes they have to be broken out. A carefully worked hole saw can get the break out process started. It can be a lot of work for nothing if the block turns out to be bad but it is a challenge that most mechanics should experience at least once in their life. |
|
|
|
|
03-26-2019, 01:38 PM
|
#20 | |
|
Member
Join Date: Mar 2019
Location: Spring, TX
Posts: 76
|
Quote:
Great tip on the hole saw. I had an old timer give me an interesting tip the other day for breaking things free; Drill out a sparkplug and thread in a zerk fitting. Put it into the TDC piston and pump it up! Says its worked for him a few times. I've got a parts cleaner and plan on cleaning everything as soon as it comes off the block. |
|
|
|
|

|
03-26-2019, 10:34 PM
|
#21 |
|
Senior Member
Join Date: May 2010
Location: Chester Vt
Posts: 8,857
|
Be carfull about removing stuck pistons, you can crack the cylinder walls. How do I know that /??????
|
|
|
|
|
03-27-2019, 06:35 AM
|
#22 |
|
Senior Member
Join Date: Aug 2017
Location: ohio
Posts: 986
|
Ron, you crack me up...LOL...pun intended. Read all of your posts. mike
|
|
|
|
| Sponsored Links (Register now to hide all advertisements) |
|
|
|
03-27-2019, 07:02 AM
|
#23 |
|
Senior Member
Join Date: May 2012
Location: Grove City, Oh
Posts: 255
|
I was gonna say something similar to big job yesterday but then I assumed you'd done this before.
Keep everything in order and organized, oriented the way it came out of the engine, for balance sake. If you have enough room in your garage/shop put down a piece of cardboard on a bench and label everything. You can even punch screws/bolts through so they don't move if it gets bumped. Label your crank caps. Label/number your pistons and keep their caps attached with the same bolts. Put an arrow on top of them to know which way the front of the engine is. Baggie and sharpie label everything else. Last edited by Terranova; 03-27-2019 at 07:14 AM. |
|
|
|
|
03-27-2019, 08:16 AM
|
#24 |
|
Senior Member
Join Date: May 2010
Location: Coral Springs FL
Posts: 10,925
|
Do not dip your block in a solution that
will dissolve the front and rear main seal retainers. I think they are made of zinc alloy,not steel. Also, be sure to number all your main bearing caps BEFORE you remove them. Same with rod caps. |
|
|
|
|
03-28-2019, 05:17 PM
|
#25 | |
|
Senior Member
Join Date: May 2010
Location: NJ
Posts: 6,177
|
Quote:
|
|
|
|
|
|
03-28-2019, 08:50 PM
|
#26 |
|
Senior Member
Join Date: May 2012
Location: Grove City, Oh
Posts: 255
|
Sponsored Links (Register now to hide all advertisements)
|
|
|
|
|
03-29-2019, 08:52 AM
|
#27 | |
|
Member
Join Date: Mar 2019
Location: Spring, TX
Posts: 76
|
Quote:
Here are a few of unloading and getting bolted to the stand. It's still on the ground but I'm planning for liftoff today! |
|
|
|
|
|
04-01-2019, 11:58 AM
|
#28 |
|
Member
Join Date: Mar 2019
Location: Spring, TX
Posts: 76
|
Finally got it up on the stand and opened up. The heads and intake were only held on by a few finger tight bolts.
Yup, looks like a project! |
|
|
|
|
04-01-2019, 11:59 AM
|
#29 |
|
Member
Join Date: Mar 2019
Location: Spring, TX
Posts: 76
|
And a shot of the shop for good measure
|
|
|
|
|
04-01-2019, 12:15 PM
|
#30 |
|
Senior Member

Join Date: Dec 2013
Location: Minnesota, Florida Keys
Posts: 10,304
|
I'm sure you noticed it has adjustable lifters. It may also have an aftermarket cam.It looks pretty clean, so maybe they can be reused. Looks like a good score to me. Just try to keep the lifters with their original lobes until you're sure what you have.
|
|
|
|
|
04-01-2019, 12:19 PM
|
#31 |
|
Senior Member
Join Date: May 2017
Location: Arkansas
Posts: 611
|
You get one of those valve gear bars yet? Looks like there wasn't anybody living in the valley there.
|
|
|
|
|
04-05-2019, 04:54 PM
|
#32 | |
|
Member
Join Date: Mar 2019
Location: Spring, TX
Posts: 76
|
Quote:
Not yet. After those pics were taken Ive been spent all my time offshore in Mexico. I travel a lot so it wont be a fast project. I did see the adjustable lifters. Will make sure everything is kept in order when tearing er down Sent from my iPhone using Tapatalk |
|
|
|
|
|
04-16-2019, 06:09 PM
|
#33 |
|
Member
Join Date: Mar 2019
Location: Spring, TX
Posts: 76
|
A little progress.
First, I had to reorganize my wrenches so they werent all tucked in a dusty old toolbox!  Then today I pulled the pan.    The sludge is nice and thick! Rods look straight though. Sent from my iPhone using Tapatalk |
|
|
|
|
04-16-2019, 07:30 PM
|
#34 |
|
Senior Member
Join Date: Feb 2013
Posts: 511
|
I'm going to be doing something similar. One bank had water enter from a leaky roof via heads without spark plugs. I've been soaking in ATF and acetone. So far no movement. I thought I might flip it over, remove the pan, oil pump, and then the crank. I should be able to tap on the con rods to get some movement. Yes? Don't want to hijack but thought it might pertinent.
|
|
|
|
|
04-16-2019, 08:46 PM
|
#35 |
|
Senior Member

Join Date: Nov 2015
Location: North Pole, Alaska
Posts: 2,651
|
That shop is waay too neat, you’ll have to get that disheveled look or people won’t believe your working on a flathead!

|

|
|
|
04-17-2019, 06:39 AM
|
#36 | |
|
Member
Join Date: Mar 2019
Location: Spring, TX
Posts: 76
|
Quote:
My wife parks there when Im out of town working. The cleaner I keep it the less I have to hear about it! Sent from my iPhone using Tapatalk |
|
|
|
|
|
04-17-2019, 06:42 AM
|
#37 | |
|
Member
Join Date: Mar 2019
Location: Spring, TX
Posts: 76
|
Quote:
This is what the book Im working from offers:  Im definitely not reusing the pistons but will reuse the rods if I can. I may soak it first then try to punch them out. Sent from my iPhone using Tapatalk |
|
|
|
|
|
04-17-2019, 09:09 AM
|
#38 |
|
Senior Member
Join Date: Jun 2010
Location: San Antonio, Texas
Posts: 16,425
|
It will be a big clean up chore after you disassemble that thing but it is nice to start a day working in a clean environment. It's definitely easier to find the tools anyway.
I can clean the shop one day and a customer comes in on the next with his helicopter and blows all the crap from the outside into the shop. Its a never ending battle. |
|
|
|
|
04-17-2019, 07:07 PM
|
#39 |
|
Senior Member
Join Date: Feb 2013
Posts: 511
|
Does the book have a title or did I miss that?
|
|
|
|
|
04-17-2019, 09:53 PM
|
#40 |
|
Senior Member
Join Date: May 2010
Location: NJ
Posts: 6,177
|
Let me put it this way, get them out by any means necessary. You can get brand new 8BA rods from Tardel and SF Flatheads for $225. You'd be hard pressed to get current rods reconditioned for that price.
Don't waste your efforts if they are giving you are hard time. Use the red wrench and cut them out. Same with valves. Believe me, I try to save what ever I can, but then it comes down to time and effort. I've found a baseball bat blank (can be found online for under $30) is the perfect sized dowel for knocking pistons out of the bore. In the past six months I've torn down five motors. One came apart like it was made yesterday. One had to have everything torched out. No rhyme or reason for it. I have all the proper tools to boot. Get them out and move on. |
|
|
|
|
04-18-2019, 09:50 AM
|
#41 |
|
Senior Member
Join Date: May 2010
Location: Chester Vt
Posts: 8,857
|
After pressure testing, have the block bake cleaned. This would be an ideal time to have the block decked and bored, valve job. Then all you have to do is put it together, keeping your wife very happy.A happy wife is almost as important as a well running Flathead.
|
|
|
|
|
04-19-2019, 07:43 AM
|
#42 | |
|
Member
Join Date: Mar 2019
Location: Spring, TX
Posts: 76
|
Quote:
 There ya go Sent from my iPhone using Tapatalk |
|
|
|
|
| Sponsored Links (Register now to hide all advertisements) |
|
|
|
04-19-2019, 07:47 AM
|
#43 | |
|
Member
Join Date: Mar 2019
Location: Spring, TX
Posts: 76
|
Quote:
Aint that the truth! Question about pressure testing; my book shows a kit from speedway to do the test. Is that something you guys have, and normally run the test yourself? I dont mind buying it as Im enjoying myself and think Ill build another after this, but dont want to waste the coin if this can also be done at the shop Sent from my iPhone using Tapatalk |
|
|
|
|
|
04-19-2019, 07:51 AM
|
#44 | |
|
Member
Join Date: Mar 2019
Location: Spring, TX
Posts: 76
|
Quote:
Great tip, thanks. I was looking for a brass drift but will check out the bat blanks. This is my first ever engine build so Im taking my time to really get to know the internals. But if they refuse to come out I wont hesitate to chop em up! Sent from my iPhone using Tapatalk |
|
|
|
|
|
04-19-2019, 07:55 AM
|
#45 |
|
Member Emeritus
Join Date: Nov 2012
Location: Wichita KS
Posts: 16,132
|
"Question about pressure testing; my book shows a kit from speedway to do the test. Is that something you guys have, and normally run the test yourself?"
I have the Speedway kit. In my case I felt it took some modification to work the way I wanted. A shop that is familiar with and works on flatheads should have the proper equipment. Check with them. Last edited by JSeery; 04-19-2019 at 05:57 PM. |
|
|
|
|
04-19-2019, 08:39 AM
|
#46 |
|
Member
Join Date: Mar 2019
Location: Spring, TX
Posts: 76
|
Sponsored Links (Register now to hide all advertisements)
 Another quick question; what should I be using to clean the oil like this in my washing bin? A degreaser? Varsol? Sent from my iPhone using Tapatalk |
|
|
|
|
04-19-2019, 05:41 PM
|
#47 |
|
Senior Member
Join Date: Feb 2013
Posts: 511
|
[QUOTE=sharp21;1748497]
There ya go. Thanks. |
|
|
|
|
04-20-2019, 10:52 AM
|
#48 |
|
Member
Join Date: Mar 2019
Location: Spring, TX
Posts: 76
|
I assume the crank isnt supposed to be missing a chunk?
 Sent from my iPhone using Tapatalk |
|
|
|
|
04-20-2019, 11:30 AM
|
#49 |
|
Senior Member
Join Date: Dec 2013
Location: Minnesota, Florida Keys
Posts: 10,304
|
They are all like that. As I understand it, they were cast in groups of four and then broken apart.
|
|
|
|
|
04-20-2019, 11:56 AM
|
#50 | |
|
Member
Join Date: Mar 2019
Location: Spring, TX
Posts: 76
|
Quote:
Great, thanks! I had the fellas over last night and they were sure it was shot, but I didnt think so. Sent from my iPhone using Tapatalk |
|
|
|
|
|
04-20-2019, 11:58 AM
|
#51 |
|
Member
Join Date: Mar 2019
Location: Spring, TX
Posts: 76
|
Got the oil pump, exhaust manifolds, and bearing caps pulled today.
    Sent from my iPhone using Tapatalk |
|
|
|
|
04-20-2019, 03:10 PM
|
#52 |
|
Member
Join Date: Mar 2019
Location: Spring, TX
Posts: 76
|
And went a little further... first piston out! What a mess...
 Sent from my iPhone using Tapatalk |
|
|
|
|
04-20-2019, 04:42 PM
|
#53 |
|
Senior Member
Join Date: Dec 2013
Location: Minnesota, Florida Keys
Posts: 10,304
|
Fun, ain't it!

|
|
|
|
|
04-21-2019, 07:57 AM
|
#54 |
|
Member
Join Date: Mar 2019
Location: Spring, TX
Posts: 76
|
Last night turned into a neighbors over, bottle of tequila, engine working kind of night.
 Hammered out 4 of the pistons and have the rest soaking.  And I managed to take in a car show as well! Pretty good day. This car is along the lines of what Id like to build. I guess its an A roadster on a 32 style frame?  Sent from my iPhone using Tapatalk |
|
|
|
|
04-21-2019, 11:14 AM
|
#55 |
|
Senior Member
Join Date: Nov 2015
Location: North Pole, Alaska
Posts: 2,651
|
Great progress! And great choice of motor for your future project. Everyone loves a flathead powered Hot Rod!
|
|
|
|
|
04-21-2019, 11:43 AM
|
#56 |
|
Senior Member

Join Date: May 2010
Location: Waddell, AZ
Posts: 2,540
|
Looks like you’re having fun. Floor is getting dirty and oily. And you offer tequila? Keep on havin fun. Good progress. Mike
|
|
|
|
|
04-21-2019, 06:27 PM
|
#57 |
|
Senior Member
Join Date: May 2012
Location: Grove City, Oh
Posts: 255
|
Man! What's all the crud in the exhaust ports? One looks like leaves and the other is oddly uniform all the way around the port. ???
|
|
|
|
|
04-23-2019, 08:09 AM
|
#58 | |
|
Member
Join Date: Mar 2019
Location: Spring, TX
Posts: 76
|
Quote:
The ones on the end are carbon. The one in the middle is rust that came off the manifold. Sent from my iPhone using Tapatalk |
|
|
|
|
|
04-23-2019, 09:34 AM
|
#59 |
|
Senior Member
Join Date: May 2010
Location: Chester Vt
Posts: 8,857
|
So far, so good. All Flathead cranks have a chunk out of them. Except some 53 cranks that used a different method. Why the rod in the trash??
|
|
|
|
|
04-24-2019, 06:43 PM
|
#60 | |
|
Member
Join Date: Mar 2019
Location: Spring, TX
Posts: 76
|
Quote:
Thats just where it fell into the oil pan, along with a shower of rusty debris! Sent from my iPhone using Tapatalk |
|
|
|
|
|
04-24-2019, 08:05 PM
|
#61 |
|
Senior Member
Join Date: Dec 2013
Location: Minnesota, Florida Keys
Posts: 10,304
|
Junior Member
|
|
|
|
|
04-25-2019, 09:02 AM
|
#62 |
|
Senior Member
Join Date: May 2010
Location: Chester Vt
Posts: 8,857
|
A word of caution, have the rods cleaned and the wrist pin bushing checked for ware. If over .0015" have them replaced. Now this can be a problem because some shops don't have the proper tools to do this because the bushing have to be waged into the rods. before honing. Fortunately most of the time they don't have to be replaced. Some people just do it because they think it a good idea.
|
|
|
|
| Sponsored Links (Register now to hide all advertisements) |
|
|
|
04-25-2019, 02:37 PM
|
#63 |
|
Member

Join Date: Jan 2013
Location: Kansas City, MO
Posts: 41
|
If you were able to get that oil pump out without much effort, consider yourself lucky! The real fun comes when you start taking the valves out, but yours may be easy. I had to rent a special tool to remove the cam bearings but that wasn't difficult. Highly recommend thermal cleaning the bare block once you get it all torn down. Good Luck!
|
|
|
|
|
04-25-2019, 03:13 PM
|
#64 | |
|
Member
Join Date: Mar 2019
Location: Spring, TX
Posts: 76
|
Quote:
Great to know. The pump came out very easily. Unbolted it, a little persuasion with the rubber mallet, and it wiggles right out. Sent from my iPhone using Tapatalk |
|
|
|
|
|
04-25-2019, 03:13 PM
|
#65 | |
|
Member
Join Date: Mar 2019
Location: Spring, TX
Posts: 76
|
Quote:
Roger that, thanks. Im on a job in Cali right now but hope to get home for the weekend and keep wrenching Sent from my iPhone using Tapatalk |
|
|
|
|
|
04-26-2019, 02:54 PM
|
#66 | |
|
Senior Member
Join Date: May 2010
Location: NJ
Posts: 6,177
|
Sponsored Links (Register now to hide all advertisements)
Quote:
They were selling NOS french rods for real reasonable money. They are cheaper than getting them reconditioned. Even if you don't use them, they are good to have. I believe I bought them many years ago when they were selling them for $125 a set. I'm sure the price has gone up since. |
|
|
|
|
|
04-26-2019, 03:33 PM
|
#67 |
|
Member
Join Date: Mar 2019
Location: Spring, TX
Posts: 76
|
What exactly is involved in reconditioning rods? Blasting and balancing?
Sent from my iPhone using Tapatalk |
|
|
|
|
04-26-2019, 05:32 PM
|
#68 | |
|
Member Emeritus
Join Date: Nov 2012
Location: Wichita KS
Posts: 16,132
|
Quote:
|
|
|
|
|
|
04-27-2019, 09:36 AM
|
#69 |
|
Senior Member
Join Date: May 2010
Location: Chester Vt
Posts: 8,857
|
The good news is: You very rarely find a bad one. When disassembling an engine i keep the rod sets together along with the crank. This way there is no need to have the assembly re balanced for just a piston replacement. Also if you change cranks the rebalancing is much cheaper. The rods come in balanced sets.
|
|
|
|
|
04-27-2019, 12:44 PM
|
#70 | |
|
Member
Join Date: Mar 2019
Location: Spring, TX
Posts: 76
|
Quote:
Ive been keeping track of which cylinder they each cane from so Ill make sure not to mix them up! Sent from my iPhone using Tapatalk |
|
|
|
|
|
04-27-2019, 02:25 PM
|
#71 |
|
Member
Join Date: Mar 2019
Location: Spring, TX
Posts: 76
|
Victory!
 Sent from my iPhone using Tapatalk |
|
|
|
|
04-28-2019, 12:14 PM
|
#72 |
|
Member
Join Date: Mar 2019
Location: Spring, TX
Posts: 76
|
Got the drivetrain freed up! Crank is spinning easily by hand and some of the valves are moving. The other appear to be stuck open.
Question. Im not gonna reuse those valves am I? Any problem with given the open ones a tap with the hammer to free them up? Sent from my iPhone using Tapatalk |
|
|
|
|
04-28-2019, 12:15 PM
|
#73 |
|
Member
Join Date: Mar 2019
Location: Spring, TX
Posts: 76
|
Also, I posted a video on my instagram (@crushedcangarage) but am not sure how to post one here. Any ideas?
Sent from my iPhone using Tapatalk |
|
|
|
|
04-28-2019, 01:36 PM
|
#74 |
|
Member Emeritus
Join Date: Nov 2012
Location: Wichita KS
Posts: 16,132
|
I almost always cut the valves out of hard to disassemble engines. Makes the whole process easier IMO.
|
|
|
|
|
04-28-2019, 10:31 PM
|
#75 |
|
Member
Join Date: Jan 2013
Location: Kansas City, MO
Posts: 41
|
There's several ways to get the old valves out and there's lots of threads to search on this forum regarding valve removal. Spray the stuck valves with e 50/50 mix of acetone & transmissions fluid and they might free up. I think most of the time folks end up replacing the valve assemblies (Egge is a good source for these).
Last edited by kegmon; 04-28-2019 at 10:49 PM. |
|
|
|
|
04-28-2019, 11:26 PM
|
#76 |
|
Senior Member
Join Date: Dec 2013
Location: Minnesota, Florida Keys
Posts: 10,304
|
To post videos here, I have a free account on "YouTube". I post the video there (it is quite easy), and then cut and paste the "YouTube" link into the post I make on here. There are probably other, better ways to do it, but this works for me.
|
|
|
|
|
04-29-2019, 08:43 AM
|
#77 |
|
Member
Join Date: Mar 2019
Location: Spring, TX
Posts: 76
|
|
|
|
|
|
04-29-2019, 09:37 AM
|
#78 |
|
Senior Member
Join Date: Dec 2013
Location: Minnesota, Florida Keys
Posts: 10,304
|
Glad that worked. It looks like you've got a better place to start than most. Now, hope for no cracks.
|
|
|
|
|
04-29-2019, 11:02 AM
|
#79 |
|
Senior Member

Join Date: May 2010
Location: Long Island, NY
Posts: 1,052
|
Hi "sharp", try to find a shop who will use a block-plate to finish-hone the bores, it's fairly important on these Flathead castings!
Also, make certain you have it pressure-tested, do not rely on "magging" only! Thanks, Gary in N.Y. P.S. Would also strongly recommend some stainless valves and some bronze-lined guides so there will be no valves "hanging" down the road.
__________________
http://www.stromberg-bulletin.com/me...berg-equipped/ |
|
|
|
|
04-29-2019, 01:20 PM
|
#80 | |
|
Member
Join Date: Mar 2019
Location: Spring, TX
Posts: 76
|
Quote:
Copy that Gary, thanks. Its gonna be a mild build with a focus on longevity, so its tips like that Im looking for. Sean Sent from my iPhone using Tapatalk |
|
|
|
|
|
04-29-2019, 01:21 PM
|
#81 | |
|
Member
Join Date: Mar 2019
Location: Spring, TX
Posts: 76
|
Quote:
Knock on wood but Im feeling real good about it so far! I havent been able to find any cracks yet. Not bad for $200! Sent from my iPhone using Tapatalk |
|
|
|
|
|
04-29-2019, 08:55 PM
|
#82 |
|
Senior Member
Join Date: Nov 2015
Location: North Pole, Alaska
Posts: 2,651
|
Use a good penetrating oil and then give those stuck valves a tap with a wood block, or brass drift. Should free them up.
|
|
|
|
| Sponsored Links (Register now to hide all advertisements) |
|
|
|
04-30-2019, 05:27 AM
|
#83 | |
|
Senior Member
Join Date: Aug 2018
Location: Ottawa, ON
Posts: 850
|
Quote:
|
|
|
|
|
|
04-30-2019, 05:39 AM
|
#84 | |
|
Senior Member
Join Date: May 2010
Location: NJ
Posts: 6,177
|
Quote:
I've had more bad and expensive machine work done in the past than I care to admit. Please listen to others here, find another shop. If he doesn't think a torque plate is necessary, what other short cuts is he taking? |
|
|
|
|
|
04-30-2019, 05:55 AM
|
#85 |
|
Senior Member
Join Date: Aug 2018
Location: Ottawa, ON
Posts: 850
|
I'm no expert, and I'm sure having one honed with a toque plate gives piece of mind, but he simply doesn't have one. I trust him based on feedback from those that have used him in the past and I'm comfortable with any potential risk. I found this post here on HAMB, but I'm sure there are others that say the opposite.
https://www.jalopyjournal.com/forum/...gines.1055001/ |
|
|
|
|
04-30-2019, 06:54 AM
|
#86 | |
|
Senior Member
Join Date: May 2010
Location: NJ
Posts: 6,177
|
Sponsored Links (Register now to hide all advertisements)
Quote:
I pulled a quote from the the thread you copied. I feel a flathead block falls into the same category as a Ford 302 block in terms of this. Think about it. There is a reason why Ford added 3 more studs to the block when it went to 239 c.i. A cast iron head clamping down on that deck with one big hole and many smaller holes on a thin casting is going to move. from what I have seen the lighter the block the more it needs a plate. A 302 ford will move enough to mesure but a big block 460 its hard to see. The ones I did we bored without the plate on a rotler bar then put the plate on the 302 pulls around the head bolts about .0015ish big blocks you could berly get .0002 |
|
|
|
|
|
05-11-2019, 01:28 PM
|
#87 |
|
Member
Join Date: Mar 2019
Location: Spring, TX
Posts: 76
|
No progress as such, but just got this in the mail so Im ready to continue
 Sent from my iPhone using Tapatalk |
|
|
|
|
05-11-2019, 02:09 PM
|
#88 |
|
Senior Member
Join Date: Nov 2015
Location: North Pole, Alaska
Posts: 2,651
|
One of these pry bars will come in awful handy when pulling the horseshoe clips as well.
Once the clip is out you can sometimes pry up on valve from bottom, tap down and repeat, using lots of PB blaster. Or you can get the other tool here and make the job even easier. |
|
|
|
|
05-12-2019, 06:50 AM
|
#89 |
|
Member
Join Date: Mar 2019
Location: Spring, TX
Posts: 76
|
Im always happy to buy more tools!
Sent from my iPhone using Tapatalk |
|
|
|
|
05-13-2019, 07:22 AM
|
#90 |
|
Senior Member
Join Date: Jan 2012
Location: Lyman,ME.
Posts: 2,623
|
If you get another motor......keep them separated......they breed like rabbits!!!!!....Mark
__________________
I'm thinkin' about crankin' My ragged ol' truck up and haulin' myself into town. Billy Joe Shaver |
|
|
|
|
05-13-2019, 08:44 AM
|
#91 | |
|
Senior Member
Join Date: May 2010
Location: NJ
Posts: 6,177
|
Quote:
|
|
|
|
|
|
05-14-2019, 06:24 AM
|
#92 |
|
Member
Join Date: Mar 2019
Location: Spring, TX
Posts: 76
|
Oil pump drive cover off. Now how to get the idler gear out while the block is on the stand...?
 Sent from my iPhone using Tapatalk |
|
|
|
|
05-14-2019, 07:04 AM
|
#93 | |
|
Senior Member
Join Date: May 2010
Location: NJ
Posts: 6,177
|
Quote:
It may be stuck on from years of oil goop and muck. |
|
|
|
|
|
05-14-2019, 09:25 AM
|
#94 |
|
Senior Member
Join Date: Dec 2013
Location: Minnesota, Florida Keys
Posts: 10,304
|
"Sharp" - Just a question about an obscure item. Is the oil pump drive cover stamped steel or cast iron? Every Ford car 8BA I've seen had a stamped cover, while the Merc's (admittedly only two) had cast covers. Your's looks cast (maybe because it's a truck engine 8RT)?
|
|
|
|
|
05-14-2019, 11:03 AM
|
#95 |
|
Member
Join Date: Jan 2013
Location: Kansas City, MO
Posts: 41
|
I remember making a 'slide hammer' out of a short piece of all thread (or a long bolt) and some nuts and washers. It just needed to be the same size thread as the idler gear center. It came out pretty easily once I got that rigged up.
|
|
|
|
|
05-14-2019, 11:04 AM
|
#96 |
|
Senior Member
Join Date: Nov 2015
Location: North Pole, Alaska
Posts: 2,651
|
If you don’t want to damage the idler then get a puller. Screw bolt into threaded hole then pull slowly.
P.S. Tubman, I just looked at an 8 RT motor I have torn down, cover plate is stamped. Last edited by RalphM; 05-14-2019 at 11:28 AM. |
|
|
|
|
05-15-2019, 06:21 AM
|
#97 |
|
Member
Join Date: Mar 2019
Location: Spring, TX
Posts: 76
|
Valves! No progress. Cant get the horseshoe retainers off and cant get anything going.
I wont need to reuse any of these will I? Can I just cut the spring then cut the valve stem down low? Sent from my iPhone using Tapatalk |
|
|
|
|
05-15-2019, 06:55 AM
|
#98 |
|
Member Emeritus
Join Date: Nov 2012
Location: Wichita KS
Posts: 16,132
|
I just cut the valves to get them out.
|
|
|
|
|
05-15-2019, 06:56 AM
|
#99 |
|
Senior Member
Join Date: May 2015
Location: Frelighsburg, QC
Posts: 166
|
I had the same problems with my teardown. Ended up getting out the plasma torch to cut the springs & valve stems, then pulled the valves out from above (some with the help of a slide hammer) and drove the guides down into the valley. Only way to do it in some cases!
Sent from my iPhone using Tapatalk |
|
|
|
|
05-15-2019, 12:34 PM
|
#100 |
|
Member
Join Date: Jan 2013
Location: Kansas City, MO
Posts: 41
|
This probably isn't the best way but it worked for me. Pry up the spring from the bottom and see if you can't get the 2 little keepers on the valve stem bottom off. If you can, then the valve should just pull out from the top. A little of the aforementioned acetone/trans fluid on the valve guides will help. I was then able to pop the springs out (wear eye protection). After that I tapped the valve guides down and out from the top using the right sized socket and extension.
|
|
|
|
|
05-15-2019, 12:53 PM
|
#101 | |
|
Senior Member
Join Date: Oct 2016
Location: harpursville ny
Posts: 1,040
|
Quote:
|
|
|
|
|
|
05-22-2019, 06:02 AM
|
#102 |
|
Member
Join Date: Mar 2019
Location: Spring, TX
Posts: 76
|
These are mushroom valves. Im still struggling with this. Am going to break down and buy the clip removal tool today. Will prolly be two weeks before it arrives...
 Sent from my iPhone using Tapatalk |
|
|
|
| Sponsored Links (Register now to hide all advertisements) |
|
|
|
05-22-2019, 10:47 AM
|
#103 |
|
Senior Member
Join Date: Nov 2015
Location: North Pole, Alaska
Posts: 2,651
|
That cone shaped piece is not part of the valve, raise it up and the split keeper will fall out of place( may need a little help).
|
|
|
|
|
05-22-2019, 10:55 AM
|
#104 |
|
Member Emeritus
Join Date: Nov 2012
Location: Wichita KS
Posts: 16,132
|
"These are mushroom valves."
Those are not mushroom valves, the cup part (6534) is just part of the rotator. |
|
|
|
|
05-22-2019, 09:56 PM
|
#105 |
|
Member
Join Date: Mar 2019
Location: Spring, TX
Posts: 76
|
So I need to slide that cup upwards? Ill give that a try tomorrow
Sent from my iPhone using Tapatalk |
|
|
|
|
05-23-2019, 06:17 AM
|
#106 |
|
Member
Join Date: Mar 2019
Location: Spring, TX
Posts: 76
|
Sponsored Links (Register now to hide all advertisements)
 Got the first one out. I leveled up on the fork and gave it a smack with the hammer. That got the keeper to move and the retainers just fell off. From there I levered out the spring aaaaand.... stuck again!  Thats the valve guide from the top. I tried getting on it with the hammer and an extension but no dice.  Thats it in the inside. I can easily get the fork on it now but as it fully engages there is nothing to lever against. Cant get it to budge. Ive soaked it with 50/50 and am off to work. Will try again tonight Sent from my iPhone using Tapatalk |
|
|
|
|
05-23-2019, 07:22 AM
|
#107 |
|
Member Emeritus
Join Date: Nov 2012
Location: Wichita KS
Posts: 16,132
|
Your getting a lesson on how easy some flatheads can be to disassemble!!!!!
A large diameter brass or aluminum rod makes a good drive to get the guides out. |
|
|
|
|
05-23-2019, 07:23 AM
|
#108 |
|
Senior Member
Join Date: Oct 2016
Location: harpursville ny
Posts: 1,040
|
you can now use a crowbar with a block of wood to pry valve out. if you are lucky you wont bend it but i would figure on using new valves anyway.
|
|
|
|
|
05-23-2019, 08:42 AM
|
#109 |
|
Senior Member
Join Date: May 2010
Location: Long Island, NY
Posts: 1,052
|
Just get a "conventional" valve spring compressor, those rotators and locks will come right out.
This is how we install all the valves during the reassembly, with a spring compressor. Ours is air-operated but a hand one will get it done also! Thanks, Gary in N.Y. P.S. Here's a shot (again) of the compressor at work, makes life easy.
__________________
http://www.stromberg-bulletin.com/me...berg-equipped/ |
|
|
|
|
05-23-2019, 09:02 AM
|
#110 |
|
Senior Member
Join Date: May 2010
Location: Coral Springs FL
Posts: 10,925
|
After you remove the lifters, drill 1/8 inch holes in the lifter bores to make adjustment easy.
Would be nice if those are original Johnson adjustable lifters. Don't throw them away. |
|
|
|
|
05-23-2019, 10:35 AM
|
#111 |
|
Senior Member
Join Date: Nov 2015
Location: North Pole, Alaska
Posts: 2,651
|
And be sure to drill the holes as low as possible so a punch, or drill rod will center in the slot on lifter when adjusting your valves. You’ll see when you finally get one of the lifters out.
|
|
|
|
|
05-27-2019, 06:52 AM
|
#112 | |
|
Member
Join Date: Mar 2019
Location: Spring, TX
Posts: 76
|
Quote:
Im going to circle back with you guys when I get to this stage. Im having trouble getting the guides out still... Ive got them soaking and give em a whack with a socket from the top every time I go by, but no joy yet Sent from my iPhone using Tapatalk |
|
|
|
|
|
05-27-2019, 08:22 AM
|
#113 |
|
Member Emeritus
Join Date: Nov 2012
Location: Wichita KS
Posts: 16,132
|
I think a brass or aluminum rod would be a better driver than a socket.
|
|
|
|
|
05-27-2019, 04:28 PM
|
#114 | |
|
Member
Join Date: Mar 2019
Location: Spring, TX
Posts: 76
|
Quote:
Trouble is finding one. Ive looked at my usual stops and they dont carry them. Ive got a long socket that I plan on beating to death. Good news is that things are starting to move! Sent from my iPhone using Tapatalk |
|
|
|
|
|
05-27-2019, 05:32 PM
|
#115 |
|
Member Emeritus
Join Date: Nov 2012
Location: Wichita KS
Posts: 16,132
|
LOL. I collect up different size and length rods to use. We have a surplus store that handles stock metal that is a good source.
|
|
|
|
|
05-28-2019, 05:59 AM
|
#116 |
|
Senior Member
Join Date: Dec 2013
Location: Minnesota, Florida Keys
Posts: 10,304
|
For stuff like this, I use a place called "ONLINEMETALS.COM". They have "samples" of just about anything you might want in the $3-$10 range. Be careful to keep your orders small enough so you can specify USPS shipping, or the freight charges will kill you.
|
|
|
|
|
05-28-2019, 12:33 PM
|
#117 | |
|
Member
Join Date: Mar 2019
Location: Spring, TX
Posts: 76
|
Quote:
Great tip! Sent from my iPhone using Tapatalk |
|
|
|
|
|
05-28-2019, 12:59 PM
|
#118 |
|
Senior Member
Join Date: Jun 2010
Location: San Antonio, Texas
Posts: 16,425
|
I use the same guide driver as I use on my Harley 45 flathead guides. It uses 11/32" ID guides too. This is a link to the KD 812 set that has an 11/32" driver size. https://www.ebay.com/itm/K-D-Tools-N...UAAOSws7xc0kQi
The KD 918 valve puller would likely work as well but I use it to pull the complete assemblies after I yank the horse shoe clips out.https://www.ebay.com/itm/VINTAGE-FOR...EAAOSwL9hc5ciz |
|
|
|
|
06-02-2019, 08:40 AM
|
#119 | |
|
Member
Join Date: Mar 2019
Location: Spring, TX
Posts: 76
|
Quote:
I see what you mean now. I had one complete assembly that pulled out from the top. Next time Ill get the clip removal tool and do it that way. Sent from my iPhone using Tapatalk |
|
|
|
|
|
06-02-2019, 08:42 AM
|
#120 | |
|
Member
Join Date: Mar 2019
Location: Spring, TX
Posts: 76
|
Quote:
Circling back! Finished the valves yesterday.  And the lifters this morning  Now where am I supposed to drill these holes?  Dont forget to clean up your tools when finished for the day!  Sent from my iPhone using Tapatalk |
|
|
|
|
|
06-02-2019, 08:47 AM
|
#121 |
|
Member Emeritus
Join Date: Nov 2012
Location: Wichita KS
Posts: 16,132
|
"Now where am I supposed to drill these holes?"
The holes are drilled into the lifter bores in the block, not the lifters themselves. The holes need to line up with in recesses in the lifters. |
|
|
|
|
06-02-2019, 09:21 AM
|
#122 | |
|
Member
Join Date: Mar 2019
Location: Spring, TX
Posts: 76
|
Quote:
Gotcha. I take it that is so you can put a pin in there when adjusting so that the lifters dont just spin in the bore? Makes sense Sent from my iPhone using Tapatalk |
|
|
|
|
| Sponsored Links (Register now to hide all advertisements) |
|
|
|
06-02-2019, 10:05 AM
|
#123 |
|
Senior Member
Join Date: May 2010
Location: Long Island, NY
Posts: 1,052
|
Here's a couple shots of the lifter pinning holes!
Thanks, Gary in N.Y. P.S. Mentioned above, drill them as low as possible without breaking through on the edge of the casting. We drill them with a 12" 3/16" bit, all by hand.
__________________
http://www.stromberg-bulletin.com/me...berg-equipped/ |
|
|
|
|
06-02-2019, 01:32 PM
|
#124 |
|
Senior Member
Join Date: Nov 2015
Location: North Pole, Alaska
Posts: 2,651
|
Like this, but I can tell you those solid lifters are real hard to hold and adjust. I put a set my 8BA and it really is a chore to adjust them. if I had it to do again I would go with the hollow ones.
|
|
|
|
|
06-17-2019, 10:07 AM
|
#125 |
|
Member
Join Date: Mar 2019
Location: Spring, TX
Posts: 76
|
A little progress, got the bumpstick out.
 Just about ready to send to the machine shop. I found a place 20min from the house that has flathead experience. My next question; I dont have a parts washer or blast cabinet. What do yall suggest for parts prep? Paint stripper and varsol? Id like to reuse as much as possible and also get to know each part well as this is my first rebuild. Sent from my iPhone using Tapatalk |
|
|
|
|
06-17-2019, 11:55 AM
|
#126 |
|
Senior Member
Join Date: Nov 2015
Location: North Pole, Alaska
Posts: 2,651
|
Sponsored Links (Register now to hide all advertisements)
I once cleaned an entire truck frame with a wire wheel on a drill and a scraper. Ruined the drill motor, but I got it done. |
|
|
|
|
06-17-2019, 03:04 PM
|
#127 |
|
Senior Member
Join Date: May 2010
Location: NJ
Posts: 6,177
|
That cam looks pretty good considering. I'd hit that gunk with a can of cheap brake cleaner over some newspaper.
|
|
|
|
|
06-17-2019, 03:19 PM
|
#128 |
|
Member
Join Date: Mar 2019
Location: Spring, TX
Posts: 76
|
I got the engine turning over before tearing it down so feel I started from an easier place than some other projects I looked at.
Sent from my iPhone using Tapatalk |
|
|
|
|
06-17-2019, 07:11 PM
|
#129 |
|
Senior Member
Join Date: Aug 2018
Location: Ottawa, ON
Posts: 850
|
I had picked up a cheap parts washer about 10 yrs ago on sale and never used it until a few months back. I purchased two 5 gal parts cleaner fluid and couldn't be happier. No mess, cleaned the parts much better than I could have imagined including all brake related stuff. Will use on my banjo rear diff when I tear it down.
This is what I got from Princess Auto here in the great North = Harbor Freight. https://www.princessauto.com/en/deta...mp/A-p8022392e https://www.princessauto.com/en/deta...nt/A-p8047490e |
|
|
|
|
06-18-2019, 03:27 AM
|
#130 |
|
Member
Join Date: Mar 2019
Location: Spring, TX
Posts: 76
|
The HF washer can be had for $75 with coupon so Ill probably do that. Dont know where Im gonna set it up though... now that Ive added an engine stand, hoist, and welding machine space in the shop is getting tight!
Sent from my iPhone using Tapatalk |
|
|
|
|
06-18-2019, 09:32 AM
|
#131 |
|
Senior Member
Join Date: Nov 2015
Location: North Pole, Alaska
Posts: 2,651
|
One word “shelving” heavy duty enough for engine blocks!
No matter how big your shop is, space is always an issue, mine is 40’x50’, but with three cars, and all the equipment, it’s still tight. |
|
|
|
|
06-26-2019, 09:57 AM
|
#132 |
|
Member
Join Date: Mar 2019
Location: Spring, TX
Posts: 76
|
A little off topic, but can somebody help me identify this build?
 Its pretty much exact the direction if like to go. I feel like its a 27t, but is it on a custom frame? There is a metal 23 with turtle deck for sale locally. But are those much smaller than a 27? Sent from my iPhone using Tapatalk |
|
|
|
|
06-26-2019, 10:03 AM
|
#133 |
|
Senior Member

Join Date: May 2010
Location: Star, MS
Posts: 4,024
|
That is a '26-'27 on a '32 frame.
|
|
|
|
|
06-26-2019, 02:27 PM
|
#134 | |
|
Member
Join Date: Mar 2019
Location: Spring, TX
Posts: 76
|
Quote:
Thanks, I love the look and stance. I wasnt sure of the frame as the grill is out in front of the axle... Sent from my iPhone using Tapatalk |
|
|
|
|
|
06-26-2019, 04:17 PM
|
#135 |
|
Senior Member
Join Date: Dec 2013
Location: Minnesota, Florida Keys
Posts: 10,304
|
In my opinion, a '23 and a '27 are two different styles. The '27 you show is a good example of a regular hot rod but a '23 can only be used as a "T" bucket; I have never seen one "stretched" like the '27 you show. However, if it's in any kind of shape at all, I'd buy it in a heartbeat. They ain't makin' them anymore. "Trade meat" if nothing more.
Members, please feel free to correct me about a '23 bodied "hot rod"; pictures appreciated. |
|
|
|
|
07-10-2019, 05:56 AM
|
#136 |
|
Member
Join Date: Mar 2019
Location: Spring, TX
Posts: 76
|
I spoke to the machine shop Im going to use and the prices seem really good! Im going to put the push on and try to get it dropped off this weekend. Just a few more bits to remove.
With that said, what is this?  Stubborn little bugger. Also, anyone know the thread size to get this idler gear out?  I think those are the last two pieces to come off. There is a sheared bolt also. Not sure if that needs to be removed or if I can get the ship to do it. Theyll probably get it faster than I will Sent from my iPhone using Tapatalk |
|
|
|
|
07-10-2019, 06:03 AM
|
#137 |
|
Member
Join Date: Mar 2019
Location: Spring, TX
Posts: 76
|
Oh, and should I drill the holes in the lifter note before machining or can it wait til after?
Sent from my iPhone using Tapatalk |
|
|
|
|
07-10-2019, 07:01 AM
|
#138 |
|
Junior Member
Join Date: Jun 2019
Location: New Hampton IA
Posts: 16
|
I really enjoy watching your progress! I am waiting on my block to come back from the machine shop then I will be doing my rebuild. I’m looking for some adjustable lifters and vintage speed parts
|
|
|
|
|
07-10-2019, 07:23 AM
|
#139 | |
|
Member Emeritus
Join Date: Nov 2012
Location: Wichita KS
Posts: 16,132
|
Quote:
|
|
|
|
|
|
07-10-2019, 08:09 AM
|
#140 |
|
Senior Member
Join Date: Dec 2013
Location: Minnesota, Florida Keys
Posts: 10,304
|
The round object in your first picture is the sending unit for the King-Seeley electric oil pressure gauge.
|
|
|
|
|
07-10-2019, 03:40 PM
|
#141 | |
|
Member
Join Date: Mar 2019
Location: Spring, TX
Posts: 76
|
Quote:
I was thinking pressure gauge. Sure doesnt want to come off! Sent from my iPhone using Tapatalk |
|
|
|
|
|
07-10-2019, 06:07 PM
|
#142 |
|
Member
Join Date: Mar 2019
Location: Spring, TX
Posts: 76
|
A little progress. Got the mushroom off
 Then got the two sheared bolts drilled out. Damned if I can find my extractor set though...  Next problem. I dont have a socket that can get onto these cam gear bolts! The small gear is interfering...  And finally, it just occurred to me that I have no idea where to hook the engine lift to, now that it is stripped down! Sent from my iPhone using Tapatalk |
|
|
|
| Sponsored Links (Register now to hide all advertisements) |
|
|
|
07-10-2019, 08:13 PM
|
#143 |
|
Member Emeritus
Join Date: Nov 2012
Location: Wichita KS
Posts: 16,132
|
Extractor is not the way to go on a head bolt. Not finding it is most likely a blessing! You break off an extractor and you just complicate the problem and it is highly unlikely it would work anyway. Best method is to weld a nut to it and turn it out that way. The cast iron in the block will not be bothered by the weld and the heat will break the rust bond.
|
|
|
|
|
07-10-2019, 09:06 PM
|
#144 |
|
Senior Member

Join Date: May 2010
Location: Oshkosh, Wi
Posts: 4,526
|
There is a lock plate with tabs that bend up to the flats on those bolts. Must tap those down flat. I use a 1/2" 1/4 drive socket to remove those bolts.
|
|
|
|
|
07-10-2019, 10:00 PM
|
#145 |
|
Senior Member
Join Date: May 2017
Location: Arkansas
Posts: 611
|
I'm no expert, but get along real well. Try different sockets, you'll find one that gets in there on those bolts. And if you don't have a little MIG welder, well you need one and that broken bolt is your justification.
|
|
|
|
|
07-11-2019, 11:23 AM
|
#146 | |
|
Member
Join Date: Mar 2019
Location: Spring, TX
Posts: 76
|
Sponsored Links (Register now to hide all advertisements)
Quote:
That is great thanks. I dont have a mig so maybe time to get a little unit... Ive got a big stick welder but the new garage isnt wired for it yet. Sent from my iPhone using Tapatalk |
|
|
|
|
|
07-11-2019, 12:11 PM
|
#147 |
|
Senior Member
Join Date: Dec 2013
Location: Minnesota, Florida Keys
Posts: 10,304
|
About welders; I had a 250 AMP Miller "buzzbox" for years and used it a lot. It was great for building frames, etc., but there was a lot it couldn't do. I eventually ended up buying 220 volt Hobart MIG. I was never particularly enamored with it, but it got me through. A couple of years ago, I became intrigued with the newer, smaller stick welders using Inverter technology, rather than transformer. I ended up buying an Everlast unit from Amazon, so I could have regular arc capabilities, as well as being able to upgrade it to a TIG. What I found was that "regular" arc welders have a lot more capability these days than the old "buzzboxes" did. The main thing is you are able to use both straight and reverse polarity on DC and regular AC. That, and a thorough knowledge of the welding rods available and their properties and intended purposes opened up a whole new world for me. Do you know you can "stickweld" aluminum? You can with the proper welder and rod. The welder, though made in China, is of high quality and quite reasonably priced. I am going to update it to a TIG someday, but the tank, etc. will cost almost as much as the welder did. I hardly use my Hobart at all lately.
|
|
|
|
|
07-12-2019, 04:17 AM
|
#148 |
|
Senior Member

Join Date: May 2010
Location: Solihull, England.
Posts: 8,745
|
You should be able to get to the cam bolts with a small offset ring spanner. Don't know what it would be called there in the usa. Like said above, make sure you've knocked the tabs back first.
I've lifted a bare block before now by bolting an open end spanner (wrench) between the most central inlet manifold bolt holes. big washers under the bolt heads, just bolt the spanner down and lift on the central part of the spanner. Mart. |
|
|
|
|
07-12-2019, 07:16 PM
|
#149 | |
|
Member
Join Date: Mar 2019
Location: Spring, TX
Posts: 76
|
Quote:
Great tip, thanks! Ill probably do just that. For the record Im from the colonies so am well aware of spammers, shifters, and the like Sent from my iPhone using Tapatalk |
|
|
|
|
|
07-13-2019, 08:36 AM
|
#150 |
|
Member
Join Date: Mar 2019
Location: Spring, TX
Posts: 76
|
Progress!
Did someone recommend a 12 x 3/16 drill bit? Because that made short work of drilling out the lifter bores!   I also got the cam gear off (using the box spanner).  Next up Im going to strip the heads. Its interesting to note the differences between the two sides.  Sent from my iPhone using Tapatalk |
|
|
|
|
07-13-2019, 10:04 AM
|
#151 |
|
Member
Join Date: Mar 2019
Location: Spring, TX
Posts: 76
|
Oh and trying to extract the sheared bolts definitely didnt work. Broke my extractor in two.
 This is the kick in the pants I need to get a 220 outlet installed for my welder. Sent from my iPhone using Tapatalk |
|
|
|
|
07-13-2019, 10:49 AM
|
#152 |
|
Member
Join Date: Mar 2019
Location: Spring, TX
Posts: 76
|
Question; the machine shop Im going to use does a back/shot blast process. Im going to have them do the block, heads, etc. Should I break down the water pumps and have them do those too?
Sent from my iPhone using Tapatalk |
|
|
|
|
07-13-2019, 11:09 AM
|
#153 |
|
Senior Member
Join Date: May 2010
Location: Solihull, England.
Posts: 8,745
|
What did we say? Don't use an extractor!
Now the machine shop will have to get the stud and half an extractor out. Unless you got lucky and it came out. Good luck with the rest of it. Mart. |
|
|
|
|
07-13-2019, 12:16 PM
|
#154 |
|
Senior Member
Join Date: Nov 2015
Location: North Pole, Alaska
Posts: 2,651
|
Water pumps will have to be rebuilt so no reason to blast those. If you send them to a rebuilder they will take care of all that.
Heads are built differently because the distributor bolts to the right head front and the oil filter bolts on to the left head on rear. Do a search there are several Rebuilders of water pumps on the Ford Barn. |
|
|
|
|
07-13-2019, 02:22 PM
|
#155 |
|
Member
Join Date: Mar 2019
Location: Spring, TX
Posts: 76
|
What is this thing and why is it only in one head? One way valve?
 Sent from my iPhone using Tapatalk |
|
|
|
|
07-13-2019, 02:22 PM
|
#156 | |
|
Member
Join Date: Mar 2019
Location: Spring, TX
Posts: 76
|
Quote:
I know I know.... Id already drilled the hole so thought Id give it a try Sent from my iPhone using Tapatalk |
|
|
|
|
|
07-13-2019, 02:38 PM
|
#157 | |
|
Member Emeritus
Join Date: Nov 2012
Location: Wichita KS
Posts: 16,132
|
Quote:
you didn't lesson did you.
|
|
|
|
|
|
07-13-2019, 02:41 PM
|
#158 |
|
Senior Member
Join Date: May 2010
Location: Solihull, England.
Posts: 8,745
|
It's a thermostat and there should be on on both sides.
|
|
|
|
|
07-23-2019, 06:11 PM
|
#159 |
|
Member
Join Date: Mar 2019
Location: Spring, TX
Posts: 76
|
Finally got this bolt that was in the head to break loose. Turns out all it needed was a gallon of 50/50 and 200 hammer strikes.
 And with that the only thing left to remove is the oil pump idler gear in the back of the block. I dont have a slide hammer so am gonna see if the shop will do that for me. And now for my next problem: what do I hook my hoist to in order to lift the block? Sent from my iPhone using Tapatalk |
|
|
|
|
07-23-2019, 06:34 PM
|
#160 |
|
Member Emeritus
Join Date: Nov 2012
Location: Wichita KS
Posts: 16,132
|
Intake manifold bolts (more than one), bolt holes on the front of the block, etc. Depends on the orientation you want the block in. There are two sets of holes on either side of the timing cover that are not used for anything that can be used if you are wanting to pick it up from the front end. Bellhousing bolt holes in the back if you want to pick it up from than end. So, just depends on how you want it to end up.
Last edited by JSeery; 07-23-2019 at 06:41 PM. |
|
|
|
|
07-23-2019, 07:44 PM
|
#161 |
|
Member
Join Date: Mar 2019
Location: Spring, TX
Posts: 76
|
I might just run a strap through the bores and call it a day
Sent from my iPhone using Tapatalk |
|
|
|
|
07-23-2019, 08:41 PM
|
#162 |
|
Senior Member

Join Date: Dec 2010
Location: North of sandy ago, CA.
Posts: 2,064
|
I heard men in Texas pick up flathead blocks like a six pack. Joking
Bruce
__________________
Works good Lasts long time |
|
|
|
| Sponsored Links (Register now to hide all advertisements) |
|
|
|
07-24-2019, 12:55 AM
|
#163 |
|
Senior Member
Join Date: Nov 2015
Location: North Pole, Alaska
Posts: 2,651
|
Men in Alaska just pick them up off the floor and throw them in the back of the truck!
Yes, I’ve done it before.
|
|
|
|
|
07-24-2019, 01:28 PM
|
#164 |
|
Member Emeritus
Join Date: Nov 2012
Location: Wichita KS
Posts: 16,132
|
I did in my younger days, but that's long gone!
|
|
|
|
|
07-24-2019, 05:28 PM
|
#165 |
|
Senior Member

Join Date: Apr 2019
Location: Kansas
Posts: 921
|
Block upside down. Run a fan belt (cushion it with a rag) through the center main cap and hook it to your hoist hook.
Terry |
|
|
|
|
07-27-2019, 08:28 PM
|
#166 |
|
Member
Join Date: Mar 2019
Location: Spring, TX
Posts: 76
|
Sponsored Links (Register now to hide all advertisements)
Question: should I do an s10 rear for ease of use? Or should I pick up the banjo rear that is available right now locally for $150? Im worried that the banjo Rebuild will be more than I want to spend. Input appreciated Sent from my iPhone using Tapatalk |
|
|
|
|
07-27-2019, 09:13 PM
|
#167 |
|
Member Emeritus
Join Date: Nov 2012
Location: Wichita KS
Posts: 16,132
|
An open later model rear end takes some work just to install. Have to have spring mounts and everything (there are bolt in kits). Or you can convert the banjo to open drive, but that requires addition of radius rods. Or you can modify the T5 to bolt up to the torque tube on a banjo. Any way you go requires some work and modification.
|
|
|
|
|
07-27-2019, 10:23 PM
|
#168 |
|
Member
Join Date: Mar 2019
Location: Spring, TX
Posts: 76
|
Im kind of leaning towards an early s10 tranny, driveshaft and rear. Keep it as simple as possible.
Sent from my iPhone using Tapatalk |
|
|
|
|
07-29-2019, 06:24 AM
|
#169 |
|
Member
Join Date: Mar 2019
Location: Spring, TX
Posts: 76
|
What exactly is this but on the intake for? Im having a hell of a time getting it off.
 Im aiming to drop everything off at the machine shop on Friday. Going to get a 3/8 threaded rod with some nuts and washers after work today. Then get the block off the stand and remove the idler gear. Thats the final piece before its game time. Sent from my iPhone using Tapatalk |
|
|
|
|
07-29-2019, 10:15 AM
|
#170 |
|
Senior Member
Join Date: May 2010
Location: Solihull, England.
Posts: 8,745
|
That stud at the front is where the generator bolts on. There's not normally any reason to remove it. The nut should come off, though, of course.
Mart. |
|
|
|
|
07-29-2019, 04:07 PM
|
#171 |
|
Member Emeritus
Join Date: Nov 2012
Location: Wichita KS
Posts: 16,132
|
Generator and fan bracket, it is kinda a sandwich affair.
|
|
|
|
|
07-29-2019, 05:57 PM
|
#172 |
|
Member
Join Date: Mar 2019
Location: Spring, TX
Posts: 76
|
Ill keep working on that nut.
In the meantime, time for liftoff!  Got it on a temporary bench  And put together a makeshift slide hammer  That didnt work, so tried to turn it out using a little bucket  Lets just say that the bucket list this round. Back to the drawing board  Sent from my iPhone using Tapatalk |
|
|
|
|
07-29-2019, 08:39 PM
|
#173 |
|
Senior Member

Join Date: Dec 2014
Location: Columbus, IN
Posts: 1,406
|
The oil pump idler pulley setup is different on the 8BA from the earlier 32-48 engines. Frank Oddo in, "Ford Flathead V-8 Builder's Handbook 1932-1953," recommends using a drift punch to drive the shaft out from inside the block. George McNicholl in, "How to Build Ford Flathead V-8 Horsepower," recommends using a 3/8 UNC bolt 1 1/2" long and a thick flat washer to pull against using a slide hammer with jaws to pull against the flat washer. Good luck with your project.
|
|
|
|
|
07-30-2019, 09:23 AM
|
#174 | |
|
Member
Join Date: Mar 2019
Location: Spring, TX
Posts: 76
|
Quote:
Im worried about punching it out as Id hate to damage it. Is this a part that should be replaced every time? Im planning next to make a puller out of a piece of strapping with a few bolts, thread the bolt I have up the middle, and screw it out. If that doesnt work Ill get drastic. Sent from my iPhone using Tapatalk |
|
|
|
|
|
07-30-2019, 11:03 AM
|
#175 |
|
Senior Member
Join Date: May 2010
Location: Oshkosh, Wi
Posts: 4,526
|
Do yourself a favor and buy a slide hammer. You'd be done by now if you had one.
|
|
|
|
|
07-30-2019, 11:58 AM
|
#176 |
|
Senior Member
Join Date: May 2010
Location: Solihull, England.
Posts: 8,745
|
I don't think you necessarily need to remove it. If it rotates freely with no discernable wobble, and the teeth are in good condition you could leave it in place.
Just my take on it. Mart. |
|
|
|
|
07-31-2019, 06:10 AM
|
#177 | |
|
Member
Join Date: Mar 2019
Location: Spring, TX
Posts: 76
|
Quote:
The machine shop is going to bake the block so Im not sure that leaving it in is ideal. Sent from my iPhone using Tapatalk |
|
|
|
|
|
07-31-2019, 06:10 AM
|
#178 | |
|
Member
Join Date: Mar 2019
Location: Spring, TX
Posts: 76
|
Quote:
The voice of reason... Sent from my iPhone using Tapatalk |
|
|
|
|
|
08-02-2019, 03:56 PM
|
#179 |
|
Member
Join Date: Mar 2019
Location: Spring, TX
Posts: 76
|
Big day! Got the works dropped off at the shop. Ill know next week what the actual condition is.
Billy (the son) owns it now, but Ted is still there and he cut his teeth on flatheads. Very happy having them so close to the house Stay tuned!   Sent from my iPhone using Tapatalk |
|
|
|
|
08-02-2019, 06:19 PM
|
#180 |
|
Senior Member
Join Date: Dec 2013
Location: Minnesota, Florida Keys
Posts: 10,304
|
Good luck man! Hopefully, no (or repairable) cracks.
|
|
|
|
|
08-05-2019, 08:07 PM
|
#181 |
|
Member
Join Date: Mar 2019
Location: Spring, TX
Posts: 76
|
Moving on!
Getting the pistons separated from the rods. Looks good so far.  Question; reuse the rods or get new? Sent from my iPhone using Tapatalk |
|
|
|
|
08-05-2019, 08:49 PM
|
#182 |
|
Member Emeritus
Join Date: Nov 2012
Location: Wichita KS
Posts: 16,132
|
Depends on the condition of the rods. Need to have them checked by the machine shop.
|
|
|
|
| Sponsored Links (Register now to hide all advertisements) |
|
|
|
08-06-2019, 06:12 PM
|
#183 | |
|
Member
Join Date: Mar 2019
Location: Spring, TX
Posts: 76
|
Quote:
Ready to get checked out  Sent from my iPhone using Tapatalk |
|
|
|
|
|
08-07-2019, 03:09 AM
|
#184 |
|
Senior Member
Join Date: May 2010
Location: Solihull, England.
Posts: 8,745
|
I'd say some of those pistons might be a bit low on compression.
|
|
|
|
|
08-09-2019, 01:48 PM
|
#185 |
|
Member
Join Date: Mar 2019
Location: Spring, TX
Posts: 76
|
Bad news. Machine shop called and says the block is unusable. Lots of cracks with some going into the bores...
Pretty disappointed Sent from my iPhone using Tapatalk |
|
|
|
|
08-09-2019, 01:55 PM
|
#186 |
|
Senior Member
Join Date: May 2012
Location: Grove City, Oh
Posts: 255
|
Sponsored Links (Register now to hide all advertisements)
That sucks. |
|
|
|
|
08-09-2019, 02:04 PM
|
#187 | |
|
Member Emeritus
Join Date: Nov 2012
Location: Wichita KS
Posts: 16,132
|
Quote:
|
|
|
|
|
|
08-09-2019, 02:21 PM
|
#188 |
|
Senior Member
Join Date: May 2017
Location: Arkansas
Posts: 611
|
Sharp: That's just what happened to me, I suspect it must be the usual run of things from what I've read. But there are good blocks out there, I know because I found 4 of em. Start asking car guys wherever you see them.
|
|
|
|
|
08-10-2019, 09:11 AM
|
#189 | |
|
Member
Join Date: Mar 2019
Location: Spring, TX
Posts: 76
|
Quote:
I did. Got some new tools, learned a thing or two. I really felt I was making progress towards the hot rod Ive always wanted, but will just need to find something else. I think Ill clean up / refurb the parts as best I can then sell them off, then track down another project Sent from my iPhone using Tapatalk |
|
|
|
|
|
08-23-2019, 01:15 PM
|
#190 |
|
Member
Join Date: Mar 2019
Location: Spring, TX
Posts: 76
|
Got everything back
 Definitely some bad cracks  But they cleaned everything else up real nice which is great. Will probably part it all out and sell it to fund the next project.   Thanks all for your help. I had a good time. Sent from my iPhone using Tapatalk |
|
|
|
|
08-23-2019, 03:58 PM
|
#191 |
|
Member Emeritus
Join Date: Nov 2012
Location: Wichita KS
Posts: 16,132
|
The block will make a good mockup tool while you look for a usable one.
|
|
|
|
|
08-23-2019, 09:25 PM
|
#192 |
|
Senior Member

Join Date: Jun 2010
Location: Marana, AZ
Posts: 1,194
|
Sharp, how did your machine shop locate the cracks? From your pictures, it's a little hard to see. Since they didn't hot tank or shake and bake it.....might not have worth the expense.....I'm curious how they were able to tell if the cracks were unrepairable.
Probably a stupid question, but consider the source!! |
|
|
|
|
08-23-2019, 09:36 PM
|
#193 | |
|
Senior Member
Join Date: Dec 2013
Location: Minnesota, Florida Keys
Posts: 10,304
|
Quote:
|
|
|
|
|
|
08-23-2019, 09:51 PM
|
#194 |
|
Senior Member
Join Date: May 2010
Location: Chester Vt
Posts: 8,857
|
I;d want a second opinion on the cracks. There are some new stop leaks, like Morso's ceramic. I heard of some ne stuff, can't remember the name you can leave in the coolant,
|
|
|
|
|
08-24-2019, 06:16 AM
|
#195 |
|
Member
Join Date: Mar 2019
Location: Spring, TX
Posts: 76
|
They didnt photograph well but there was one in a port that was unrepairable and another that went from a port straight into the adjacent bore. And a bunch more besides
It was done by mag particle. Sent from my iPhone using Tapatalk |
|
|
|
|
03-12-2020, 01:01 AM
|
#196 |
|
Senior Member
Join Date: Feb 2013
Posts: 511
|
I know this is an oldish thread but you can sleeve the bore and pin the crack.
|
|
|
|
|
03-16-2020, 02:38 PM
|
#197 | |
|
Senior Member

Join Date: May 2010
Location: South California
Posts: 6,188
|
Quote:
The old guys often knew what was and wasn't worth their time/money, eh.... |
|
|
|
|
|
03-16-2020, 03:36 PM
|
#198 |
|
Senior Member
Join Date: Nov 2015
Location: North Pole, Alaska
Posts: 2,651
|
Save all the pieces off the block, plugs,caps, breather tube,etc.
Too bad i’m so far away or I’d let you come pick one of mine out. Well if anybody’s making around trip to Alaska let me know. |
|
|
|
|
«
Previous Thread
|
Next Thread
»
 Linear Mode

|
|

| Sponsored Links (Register now to hide all advertisements) |
|
|
All times are GMT -5. The time now is 11:34 PM.