Go Back   The Ford Barn > General Discussion > Early V8 (1932-53)

Sponsored Links (Register now to hide all advertisements)

Reply
 
Thread Tools Display Modes
Old 11-22-2019, 07:07 AM   #41
Ian1932
Senior Member
 
Ian1932's Avatar
 
Join Date: Nov 2017
Location: Knoxville, TN
Posts: 317
Default Re: Installing a 32' Roadster Body

So the exhaust is done. I just took it back down to paint it. The bracket kit i ordered made this super easy. There were few clamps with brackets which was good as i had a few to choose to modify.

Brake lines are done, almost. Need to mount a mater cylinder...Not really sure how to do this...Or where it should go. I guess i first need the pedals in place? Them i can plumb the rest of the brakes which should only take a few minutes...Does anyone have a few pictures of their master cylinder mounted & connected the the brake pedal and lines. Also need some mounting info...Pictures would really help me with this!

The fuel line, Not really sure what material this is or where it goes. Im guessing this is something i would run a metal line of some sort and then cut it to length after i get the engine and take installed? Can anyone direct me with this or share some pictures?

The tail-lamp wiring, should i do this first only so i wont have to crawl around on the floor? If this is the case im going to do that later.

Once again, thanks for your help!!!!!!!!!!!
Ian1932 is offline   Reply With Quote
Old 11-22-2019, 09:30 AM   #42
glennpm
Senior Member
 
glennpm's Avatar
 
Join Date: Sep 2014
Location: Wiscasset, Maine
Posts: 1,981
Default Re: Installing a 32' Roadster Body

Hi Ian ... err Nick ;-)


Richard Lacy and son sell a conversion kit so this may be worth looking into.


http://www.earlyv8garage.net/Convers...geles__CA.html


I can post my home made setup if you're interested. It is quite a bit of work though to make. It does work very well for me.


Glenn
glennpm is offline   Reply With Quote
Sponsored Links (Register now to hide all advertisements)
Old 11-22-2019, 09:41 AM   #43
Ian1932
Senior Member
 
Ian1932's Avatar
 
Join Date: Nov 2017
Location: Knoxville, TN
Posts: 317
Default Re: Installing a 32' Roadster Body

Quote:
Originally Posted by glennpm View Post
Hi Ian ... err Nick ;-)


Richard Lacy and son sell a conversion kit so this may be worth looking into.


http://www.earlyv8garage.net/Convers...geles__CA.html


I can post my home made setup if you're interested. It is quite a bit of work though to make. It does work very well for me.


Glenn
I would like to see you homemade setup if you have time to take pics! I have a few of these master cylinders shown here. I wonder how this is set up? This is the only picture i could find...
Attached Images
File Type: jpg Capture.jpg (53.6 KB, 56 views)
Ian1932 is offline   Reply With Quote
Old 11-22-2019, 01:00 PM   #44
DavidG
Senior Member
 
DavidG's Avatar
 
Join Date: May 2010
Location: southeastern Michigan
Posts: 10,095
Default Re: Installing a 32' Roadster Body

Originally, a product called Bundy tubing was used by Ford for fuel lines. It is composed of s copper-plated steel steel strip formed (wrapped) into double wall thickness tubing and fused together. Through the 1935 model year, the fuel gauges Ford used were so-called nydrostatic gauges which operated based on the amount of air pressure built up in the in-tank sending unit. The air traveled through a very small air line also made of Bundy tubing which was fused to the fuel line except at the very rear and at the firewall. The routing of these lines is shown on page A-14-5 and in the photos below.

While I have installed fuel/air lines on '32s with the body already in place, the better way is to install it before the body is installed.

The tail lamp wiring is not difficult to install after the body is in place, but again, it is a lot easier to do so before the body drop.
Attached Images
File Type: jpg 712.JPG (60.0 KB, 55 views)
File Type: jpg 713.JPG (60.2 KB, 50 views)
File Type: jpg 714.JPG (53.0 KB, 55 views)
File Type: jpg Image Expert Photos 500.jpg (72.0 KB, 56 views)
File Type: jpg Image Expert Photos 501.jpg (61.4 KB, 48 views)
DavidG is offline   Reply With Quote
Old 11-22-2019, 01:18 PM   #45
glennpm
Senior Member
 
glennpm's Avatar
 
Join Date: Sep 2014
Location: Wiscasset, Maine
Posts: 1,981
Default Re: Installing a 32' Roadster Body

This is my personal design for my 32.

I first determined what I could have for brake pedal lever ratios to work with my planed master cylinder in back of and just below the frame center-section. I had a stock 1940 pedal assembly with bracket so measured the lever distances from the centerline of the brake shaft to the pedal and then for the welded on brake arm I made.

I drilled two holes in the arm, the longer is what I used and the shorter, a contingent, which would require a drill hole through the frame for the push rod. The 40 has a 1 to 6 ratio and my 32 with the long lever, furthest out hole from shaft centerline, is 1 to 4-1/3.

I made the MC mount from 2”-4”-1/8” wall tube steel. I have a thick plate on the back where my bracket bolts to the center section on. It is slightly thicker than the indent at the back on the 32 center-section. It is attached with grade 8 bolts that hold the pedal bracket to the frame. The MC mount is ¼” thick. I added a plate and welded on side in a few blind weld holes from the other side.

In one my attached pictures you can see the back of the bracket. The three symmetrically located holes are for the MC. The one off to the left is to accept the engine steady rod rear retaining nut to the shaft.
The brake action is great for me. It is easy to modulate the action and not too stiff but more so than a 40 for example.

Glenn
Attached Images
File Type: jpg Lever arm dimensions.jpg (32.9 KB, 67 views)
File Type: jpg DSCN1159.jpg (44.9 KB, 67 views)
File Type: jpg DSCN1162.jpg (61.3 KB, 64 views)
File Type: jpg DSCN1164.jpg (65.4 KB, 68 views)
File Type: jpg DSCN1166.jpg (65.9 KB, 62 views)
File Type: jpg DSCN3537.jpg (30.8 KB, 61 views)

Last edited by glennpm; 11-22-2019 at 01:37 PM. Reason: correction and added pictures
glennpm is offline   Reply With Quote
Old 11-22-2019, 05:43 PM   #46
Ian1932
Senior Member
 
Ian1932's Avatar
 
Join Date: Nov 2017
Location: Knoxville, TN
Posts: 317
Default Re: Installing a 32' Roadster Body

Sponsored Links (Register now to hide all advertisements)
Quote:
Originally Posted by DavidG View Post
Originally, a product called Bundy tubing was used by Ford for fuel lines. It is composed of s copper-plated steel steel strip formed (wrapped) into double wall thickness tubing and fused together. Through the 1935 model year, the fuel gauges Ford used were so-called nydrostatic gauges which operated based on the amount of air pressure built up in the in-tank sending unit. The air traveled through a very small air line also made of Bundy tubing which was fused to the fuel line except at the very rear and at the firewall. The routing of these lines is shown on page A-14-5 and in the photos below.

While I have installed fuel/air lines on '32s with the body already in place, the better way is to install it before the body is installed.

The tail lamp wiring is not difficult to install after the body is in place, but again, it is a lot easier to do so before the body drop.
Thanks David! So can i use 1/4" brake line tubing for these? Or maybe just a roll of copper from home depot? Are the ends going to be just a flare like the brake lines? I have done zero research on this yet so i know nothing other than what you told me so far...Thanks!

Also, it seems you have little clips to hold the lines in place? Is that a modern clip of some type?
Ian1932 is offline   Reply With Quote
Old 11-22-2019, 05:48 PM   #47
Ian1932
Senior Member
 
Ian1932's Avatar
 
Join Date: Nov 2017
Location: Knoxville, TN
Posts: 317
Default Re: Installing a 32' Roadster Body

Quote:
Originally Posted by glennpm View Post
This is my personal design for my 32.

I first determined what I could have for brake pedal lever ratios to work with my planed master cylinder in back of and just below the frame center-section. I had a stock 1940 pedal assembly with bracket so measured the lever distances from the centerline of the brake shaft to the pedal and then for the welded on brake arm I made.

I drilled two holes in the arm, the longer is what I used and the shorter, a contingent, which would require a drill hole through the frame for the push rod. The 40 has a 1 to 6 ratio and my 32 with the long lever, furthest out hole from shaft centerline, is 1 to 4-1/3.

I made the MC mount from 2”-4”-1/8” wall tube steel. I have a thick plate on the back where my bracket bolts to the center section on. It is slightly thicker than the indent at the back on the 32 center-section. It is attached with grade 8 bolts that hold the pedal bracket to the frame. The MC mount is ¼” thick. I added a plate and welded on side in a few blind weld holes from the other side.

In one my attached pictures you can see the back of the bracket. The three symmetrically located holes are for the MC. The one off to the left is to accept the engine steady rod rear retaining nut to the shaft.
The brake action is great for me. It is easy to modulate the action and not too stiff but more so than a 40 for example.

Glenn
Glenn! Nice work! I see what you did there. That should help me get rolling. Going to get pedals on tonight maybe? Im might do just what you've done! Thanks for taking the time to take pics and all...Thanks you!
Ian1932 is offline   Reply With Quote
Old 11-22-2019, 05:49 PM   #48
glennpm
Senior Member
 
glennpm's Avatar
 
Join Date: Sep 2014
Location: Wiscasset, Maine
Posts: 1,981
Default Re: Installing a 32' Roadster Body

You’re very welcome.

Glenn
glennpm is offline   Reply With Quote
Old 11-22-2019, 06:09 PM   #49
V8COOPMAN
Senior Member
 
V8COOPMAN's Avatar
 
Join Date: May 2010
Location: East Shore of LAKE HOUSTON
Posts: 11,106
Default Re: Installing a 32' Roadster Body

Quote:
Originally Posted by Ian1932 View Post
Thanks David! So can i use 1/4" brake line tubing for these? Or maybe just a roll of copper from home depot? Are the ends going to be just a flare like the brake lines? I have done zero research on this yet so i know nothing other than what you told me so far...Thanks!

Also, it seems you have little clips to hold the lines in place? Is that a modern clip of some type?

Ian...DON'T use copper line for brakes. It doesn't meet the pressure requirements. 1/4" line was what Henry used originally, and the vintage hydraulic brakes all use fittings sized for 1/4" tubing. Don't forget to DOUBLE FLARE brake flares. Get this "made for brakes" tubing at your local auto parts house. Click the link below! DD


https://shop.advanceautoparts.com/p/...008%7CL3*15690


__________________
Click Links Below __


'35-'36 W/8BA & MECHANICAL FAN


T5 W/TORQUE TUBE
V8COOPMAN is offline   Reply With Quote
Old 
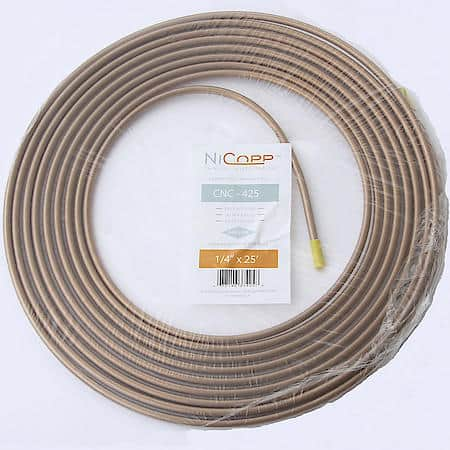
11-22-2019, 06:44 PM   #50
DavidG
Senior Member
 
DavidG's Avatar
 
Join Date: May 2010
Location: southeastern Michigan
Posts: 10,095
Default Re: Installing a 32' Roadster Body

And don't use plain copper for the fuel line either. There's good reason it was steel originally. Some will chime in and write that they've used copper fuel lines for years without a problem. Those that did encounter problems likely can't write from where they are now.
DavidG is offline   Reply With Quote
Old 11-22-2019, 06:55 PM   #51
Ian1932
Senior Member
 
Ian1932's Avatar
 
Join Date: Nov 2017
Location: Knoxville, TN
Posts: 317
Default Re: Installing a 32' Roadster Body

Quote:
Originally Posted by V8COOPMAN View Post
Ian...DON'T use copper line for brakes. It doesn't meet the pressure requirements. 1/4" line was what Henry used originally, and the vintage hydraulic brakes all use fittings sized for 1/4" tubing. Don't forget to DOUBLE FLARE brake flares. Get this "made for brakes" tubing at your local auto parts house. Click the link below! DD


https://shop.advanceautoparts.com/p/...008%7CL3*15690


See post #46
Oh no, i didnt use copper for brake lines. I used nicop! I was asking if you can use brake line for fuel line or copper for fuel line...I did double flare everything as well...Thanks for looking out

Last edited by Ian1932; 11-22-2019 at 07:00 PM.
Ian1932 is offline   Reply With Quote
Old 11-22-2019, 06:57 PM   #52
Ian1932
Senior Member
 
Ian1932's Avatar
 
Join Date: Nov 2017
Location: Knoxville, TN
Posts: 317
Default Re: Installing a 32' Roadster Body

Quote:
Originally Posted by DavidG View Post
And don't use plain copper for the fuel line either. There's good reason it was steel originally. Some will chime in and write that they've used copper fuel lines for years without a problem. Those that did encounter problems likely can't write from where they are now.
Can i use brake line for fuel line? What are the fittings at the ends of the fuel line? It looks like a double flare just like a brake line? Also what are the little clips you used to hold the fuel line in place in your photos? Thanks!
Ian1932 is offline   Reply With Quote
Old 11-22-2019, 07:07 PM   #53
35fordtn
Senior Member
 
35fordtn's Avatar
 
Join Date: Aug 2010
Location: McMinnville, TN
Posts: 2,327
Default Re: Installing a 32' Roadster Body

Quote:
Originally Posted by Ian1932 View Post
Can i use brake line for fuel line? What are the fittings at the ends of the fuel line? It looks like a double flare just like a brake line? Also what are the little clips you used to hold the fuel line in place in your photos? Thanks!
Ian,
The fittings for the Ford fuel lines are quite special. When you get to that point, let me know as we make them.
35fordtn is offline   Reply With Quote
Old 11-22-2019, 07:11 PM   #54
Ian1932
Senior Member
 
Ian1932's Avatar
 
Join Date: Nov 2017
Location: Knoxville, TN
Posts: 317
Default Re: Installing a 32' Roadster Body

Quote:
Originally Posted by 35fordtn View Post
Ian,
The fittings for the Ford fuel lines are quite special. When you get to that point, let me know as we make them.

I think im at that point...What is the line i should use? Thanks
Ian1932 is offline   Reply With Quote
Old 11-22-2019, 07:14 PM   #55
35fordtn
Senior Member
 
35fordtn's Avatar
 
Join Date: Aug 2010
Location: McMinnville, TN
Posts: 2,327
Default Re: Installing a 32' Roadster Body

As mentioned, copper plated steel. Given you are doing a not 100% stock car I wouldn't bother with the original Siamese line used in 1932-35..

If you have trouble sourcing any of this, we stock it all.
35fordtn is offline   Reply With Quote
Old 11-23-2019, 01:19 PM   #56
Ian1932
Senior Member
 
Ian1932's Avatar
 
Join Date: Nov 2017
Location: Knoxville, TN
Posts: 317
Default Re: Installing a 32' Roadster Body

Quote:
Originally Posted by 35fordtn View Post
As mentioned, copper plated steel. Given you are doing a not 100% stock car I wouldn't bother with the original Siamese line used in 1932-35..

If you have trouble sourcing any of this, we stock it all.
35fordtn, im taking it you own some type of business? Can you PM me some more info on what i need to buy or post some links for me? Thanks for your time...!

Last edited by Ian1932; 11-23-2019 at 05:19 PM.
Ian1932 is offline   Reply With Quote
Old 11-23-2019, 01:59 PM   #57
JSeery
Member Emeritus
 
JSeery's Avatar
 
Join Date: Nov 2012
Location: Wichita KS
Posts: 16,132
Default Re: Installing a 32' Roadster Body

Third Generation
https://www.facebook.com/Third-Gen-A...1476857296508/
JSeery is offline   Reply With Quote
Old 11-23-2019, 01:59 PM   #58
JSeery
Member Emeritus
 
JSeery's Avatar
 
Join Date: Nov 2012
Location: Wichita KS
Posts: 16,132
Default Re: Installing a 32' Roadster Body

Third Generation Automotive

http://listings.homestead.com/info-t...e-nashville-tn

https://www.facebook.com/Third-Gen-A...1476857296508/

https://www.ebay.com/str/thirdgenautomotive
JSeery is offline   Reply With Quote
Old 02-16-2020, 09:49 AM   #59
deuce5wndw
Senior Member
 
deuce5wndw's Avatar
 
Join Date: May 2010
Location: Liberty, KY
Posts: 900
Default Re: Installing a 32' Roadster Body

Any updates?
deuce5wndw is offline   Reply With Quote
Old 02-16-2020, 08:15 PM   #60
tomcarman
Senior Member
 
tomcarman's Avatar
 
Join Date: Feb 2017
Location: Rochester Wa
Posts: 574
Default Re: Installing a 32' Roadster Body

I too had been following this thread with interest. Ian32, where are you? Hope all is well.
tomcarman is offline   Reply With Quote
Reply


Posting Rules
You may not post new threads
You may not post replies
You may not post attachments
You may not edit your posts

BB code is On
Smilies are On
[IMG] code is On
HTML code is Off

Forum Jump

Sponsored Links (Register now to hide all advertisements)


All times are GMT -5. The time now is 07:44 PM.